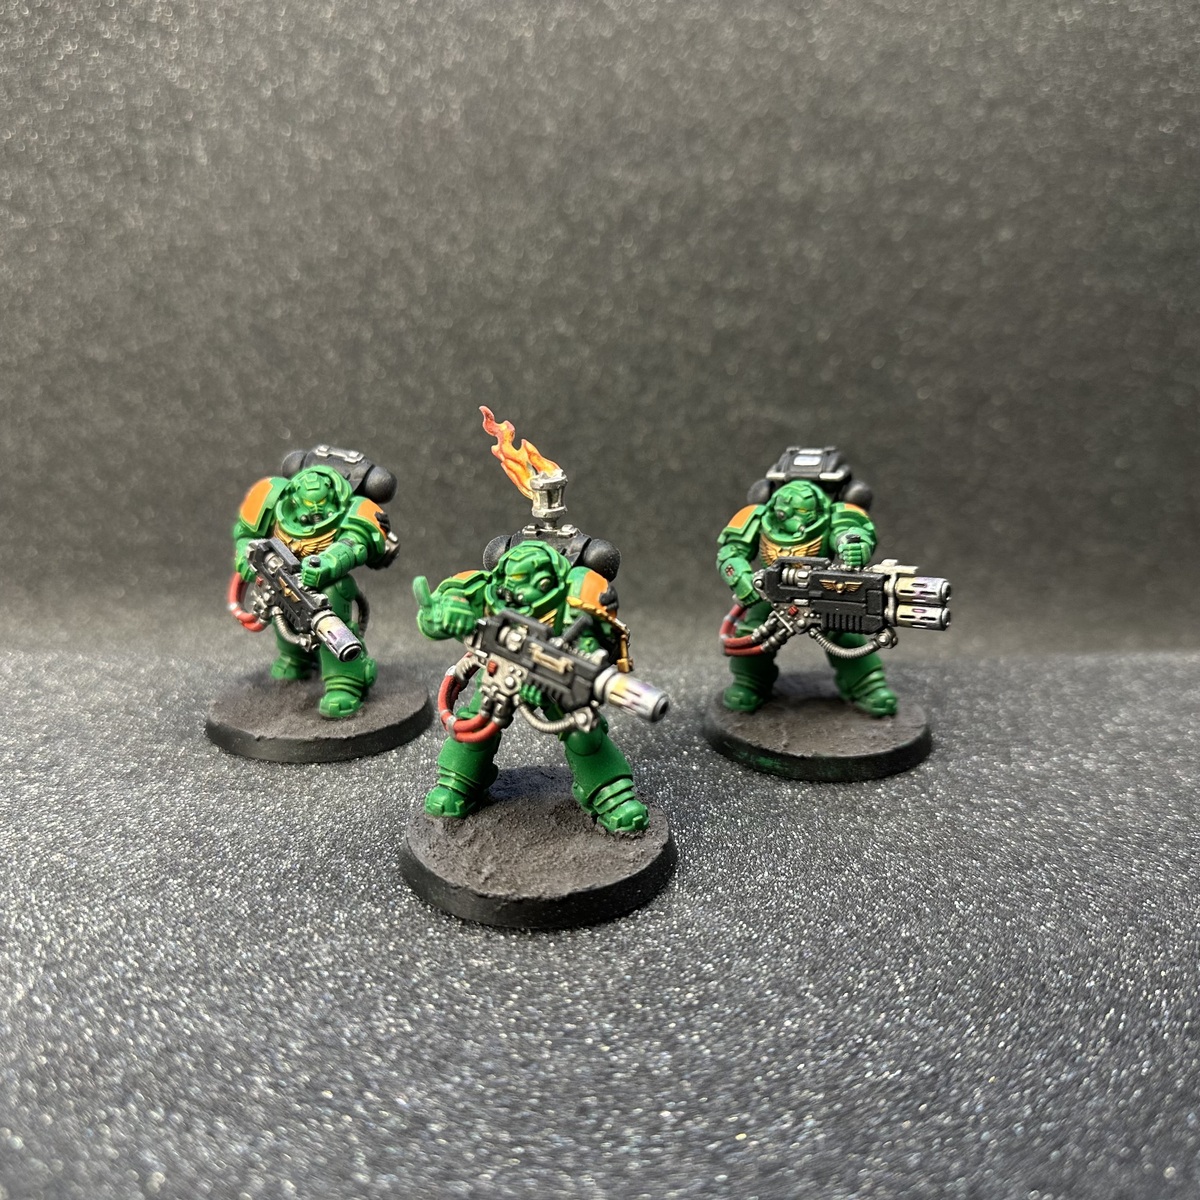
Pete The Wargamer Raptors
- Prime with WWI German Red Brown
- Basecoat with Olive Green focusing on upper parts of the model, allowing the WWI German Red Brown to still show through
- Focus Golden Olive across the top of the model as a highlight in bright spots
- Acrylic Gloss Varnish areas where decals will be placed (Shoulders, knees, backpack middle etc.)
- Apply decals with Microsol & Microset
- Once dry, fix transfers in place with Matt Polyurethane Varnish
- Very lightly drybrush Olive Green using circular motions and light stippling on the decals to weather
- Using small piece of torn foam, lightly stipple Cuirass Leather across edges of armor to give battle worn effect
- Using small piece of torn foam, lightly stipple a mixture of Golden Olive & Pastel Yellow across edges of armor to represent light chipping- focus on hands, boots and shoulderpads.
- Recess shade (Shoulders, feet, backpack) with mix of Airbrush Thinner & Cygor Brown
- Paint anything that isn't armor, skin or lenses with Death Reaper (Metal areas and leather details)
- Apply Oblivion Black Wash over Death Reaper areas just painted
- Edge highlight any non-metal Death Reaper areas with a mixture of Death Reaper and Pastel Yellow
- Edge highlight any metal Death Reaper areas with Sir Coates Silver
- Base glowy parts (Mainly lenses) in Pastel Yellow
- Coat glowy parts in thinned down (Glaze) of Magmadroth Flame
Basing
- Apply Vallejo 26.811 Thick Brown Mud. Slop it on and press the boots in.
The "Weight" Trick: While the mud is still wet, place your miniature onto the base and press down slightly. Use a toothpick to push a little bit of mud over the edges of the "soles" of the boots. This makes the heavy power armor look like it’s actually sinking into the soft forest floor.
DRY COMPLETELY: This is the hardest part. Texture paint can take 2–4 hours to dry depending on thickness. Do not move to the next step until it’s rock hard.
- Wash: Cover the mud in Agrax Earthshade (or a similar dark brown wash). This creates shadows in the cracks.
- Drybrush 1: Once the wash is dry, very lightly brush Boar Hide . Use a heavy-ish pass to bring back the rich brown color.
- DRYBRUSH 2: Skeleton Legion ,Use a very light pass to catch the sharp peaks of the mud.
- Vegetation (The Tufts) Pick 1 or 2 autumn tufts. Use tweezers to peel them off the sheet, Put a tiny drop of superglue (or strong PVA) where you want the tuft.
Pro-Tip: Don't put them right under the feet. Place them off to the side or behind the model to create a "frame" for your Forest Knight.
- For the autumn Leaves (Red, Orange, Yellow, pale green), Glue Map: Take some watered-down PVA glue (white wood glue) and dab it in 2 or 3 small patches on the mud.
Logic: In a real forest, leaves don't spread out perfectly; they gather in piles against rocks, tufts of grass, or in footprints.
- Once everything is dry, paint the side (rim) of the base with Death Reaper
AK Interactive 3rd Generation Acrylics 3
Standard 2
- AK11139 Golden Olive
- AK11147 Olive Green
Pastel 1
- AK11037 Pastel Yellow
AK Interactive Acrylics
Air 1
- AK2275 WWI German Red Brown
Two Thin Coats 6
Shade 2
- Cuirass Leather
- Sir Coates Silver
Midtone 3
- Boar Hide
- Death Reaper
- Skeleton Legion
Wash 1
- Oblivion Black Wash
Vallejo Auxiliaries
Base 3
- 28.530 Acrylic Gloss Varnish
- 71.261 Airbrush Thinner
- 72.651 Matt Polyurethane Varnish