
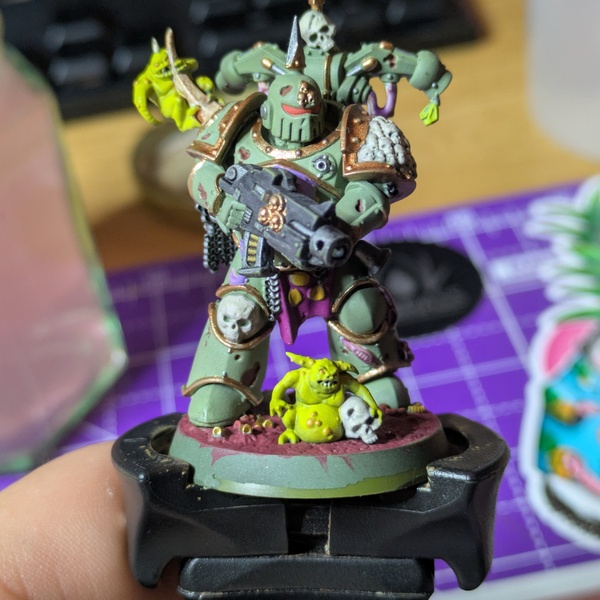
My first attempt at recording and refining my method for a model type. This was my test model for the 2024 Kill Team starter set Plague Marines, and I was happy with the results. I'm still quite a new painter, and I got a result I was happy with, so I thought this might be quite a beginner-friendly tutorial. With any luck, there'll also be a gain in quality between this lad and whenever I finish off the box.
- Prime the model In AK Russian Green Primer, then apply an all-over base coat of Olive Drab
 Base Coat Your Sections Gunmetal for anything you want to be silver, such as chainmail, swords, parts of the gun, etc.
Cloth parts get their base coat of Warlord Purple
Apply Bright Bronze to the trim and any small accents that will be bronze, and Brass to things like bolter casings.
For the exposed fleshy parts (not the tentacles), give a base coat of Pastel Violet .
Tentacles are based in Forbidden Fruit .
For the skin of the Nurglings, apply a layer of Interior Yellow Green as a base.
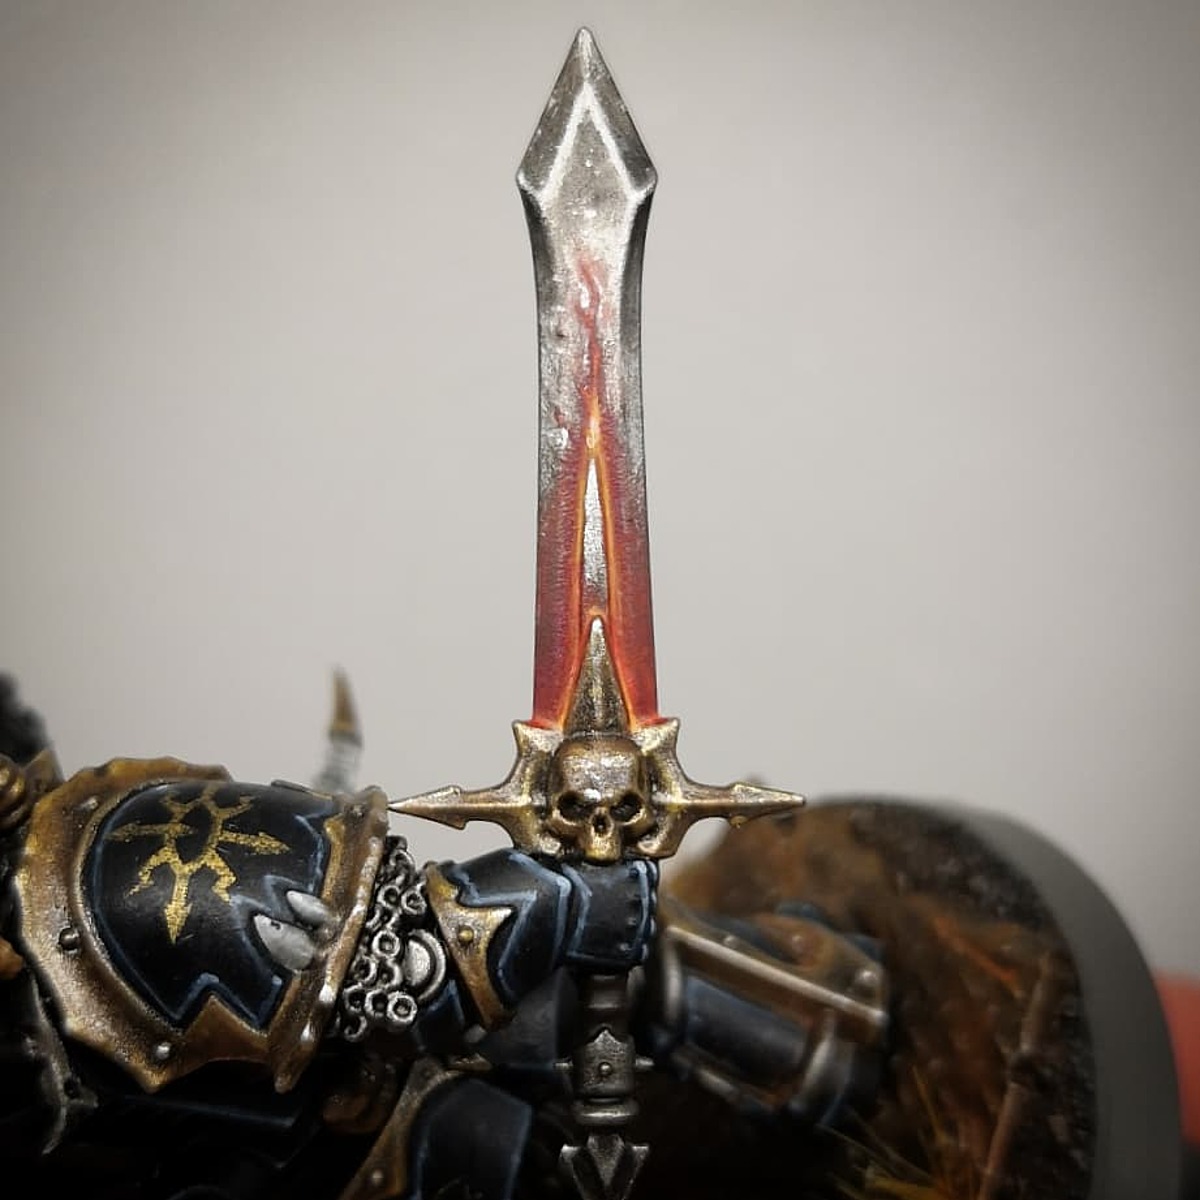
For the helmet lenses, and the eyes of the nurglings, add a base layer of Angelic Red .
Bone & Horn get a base coat of Ancient Stone .
Any leather wraps or handles for weapons get a base coat of AK's Dragonblood , a rich dark purple that should pair nicely with green.
Buboes, boils & the worms on the base get a base coat of Averland Sunset . This should hopefully make them stand out on the base without drawing too much attention.
The surface of the base gets a Deep Red layer that should make it contrast nicely with the armour and complement the red tones in the armour trim.- Shades & Washes
Make a wash of Blue Violet and apply it to your tentacles.
Where the armour has pits and gouges, carefully add Dark Rust into the space.
Apply a black wash to your silver metallics. I used Pro Acryl’s Black Wash , but any black wash like Nuln Oil should work fine.
For your fleshy bits, apply a coat of Reikland Fleshshade , ensuring that the deepest spots are especially darkened, then once it dries, apply a layer of Druchii Violet over the top. The result should be quite an infected looking purple.
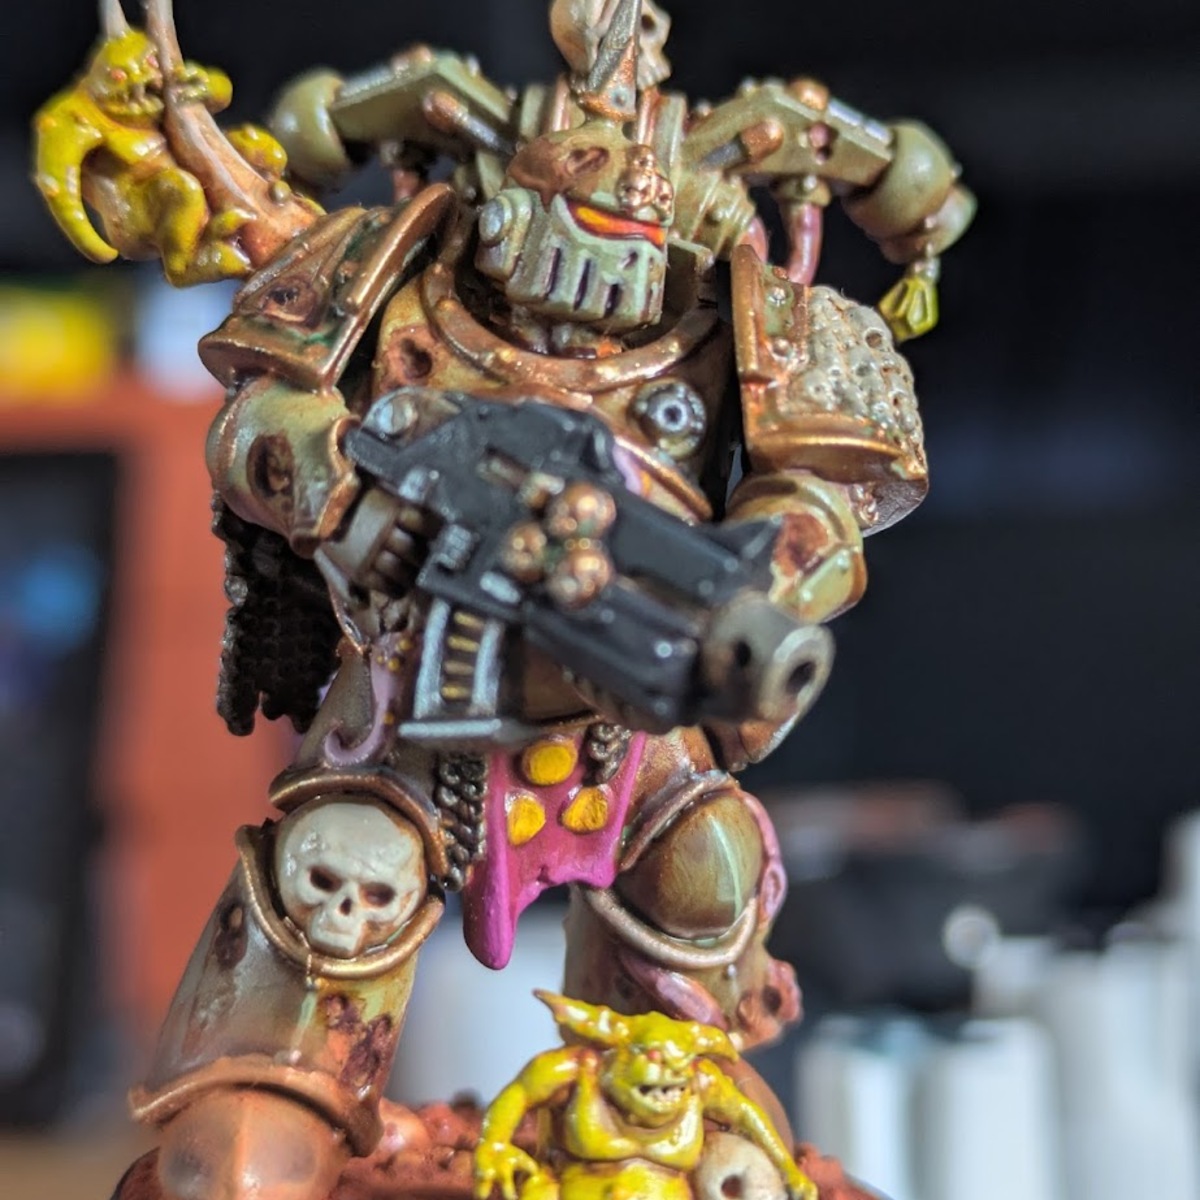
Next up, I Gloss Varnished the entire model in preparation for an oil wash. This is when your model should go from being a nicely painted marine with a few rusty spots to a grotty, disgusting plague marine. You don’t HAVE to gloss varnish first, but doing so will help your wash find its way off the flat surfaces and stick to the cracks and recesses. As a bonus, it will protect your previous paint job and give you something of a “save point”.
Mix up an oil wash with a brown oil paint. I went for a Burnt Sienna, since it has quite a lot of orangey-red tones, which is a complementary colour for all of the green armour. Slap the oil wash on liberally if you want your marine and nurglings to look really gross, then after a short wait (I gave it 15 minutes), use a soft makeup sponge or gently use a cotton-bud to remove the excess wash that may have collected on your flat spots. Use your own judgement of how gross a plague marine ought to be here.
Create a shading wash from Lahmian Medium (3parts), Reikland Fleshshade (3parts), and Druchii Violet (5parts). Apply this wash into the recesses of your model, paying special attention to the lower part of the body. - Highlights
The green armour gets edge highlights in pure Olive Drab . Despite being the original base coat, this should still be a bit brighter if the oil wash has successfully dulled down the armour. Just keep your highlights nice and skinny, if you can.
The Nurglings get a highlight on their raised areas in Pistachio , which should really make them pop, despite being in the same yellow-green colour banding as the marine.
From your Angelic Red base in your helmet lenses, add a layer of Scarlet that starts at the outer part of the lens and works about 2/3 in. When that dries, start at the same point and add Orange Fire , only moving about 1/3 of the way in. You should have some pretty cool, angry-looking lenses. Inevitably, shaky hands can make this messy, but you can tidy up by adding a small amount of your mixed shading wash to darken around the lens and make the colours pop more cleanly.
Sharpen up your silvers by adding Gunmetal as an edge highlight to the parts you previously gave a black wash. Do the same for your Brass parts.
Highlight your tentacles with pure Forbidden Fruit
Highlight the raised parts and edges of your cloth with a mixture of Warlord Purple (75%) and Forbidden Fruit (25%).
For your buboes and pustules, add a dot highlight of TT Combat's Spotlight Yellow, and you can even add a dot of it in the eye lenses if you want to really exaggerate the highlight. I also used this shade to colour in the icons of Nurgle that were on my marine’s tabard.
Highlight bone and skulls with Skeleton Bone . Molten Lava can be applied to the little fleshy parts of the base to give it a little extra contrast without being overpowering.
Sparingly, edge highlight around the raised parts of the helmet with Necrotic Flesh . A little goes a long way, here.
Highlight your weapon casing in Anthracite Grey . - Special Effect - Rust
Mix your Dirty Down Rust like crazy, shaking it longer than you think you need to, long after you can hear the ball bearing rattling around inside it. You can even stir it with something. Then place it on and around your gouges and holes in your armour. Be careful not to let it run too much, though. It can be messy, and it reactivates with water.
You can also add it to any silver elements you like, but I recommend using it sparingly. A little goes a long way. I think its best effect was on my marine’s chain mail, which looked wonderfully corroded. Once it’s dried, apply a drybrush of your Gunmetal to the chainmail to highlight the raised areas, leaving the rusty bits in the recesses. - Special Effect - Verdigris
This was my first time using any verdigris effects, and I still need to refine it, but I applied Nihilakh Oxide technical paint to parts of the bronze armour trim that I thought would suit it. I think I used too much however, as it was far too bright blue and looked like I’d accidentally painted the wrong colour. Learn from my lesson and be sparing with your application. To dull it down a little, I waited for it to dry before adding a layer of Seraphim Sepia on top of it. I then added a further edge highlight of 50/50 Bright Bronze and Brass to make the edges shine and exaggerate the tarnished, dirty look of the recesses. - Special Effect - Pigment
I used Vallejo’s Dark Red Ochre pigment powder to give my base a good texture that would blend my marine and nurgling’s feet into the base. I did this by applying it with a dry brush to the base, then applying a light coat to my marine’s feet and lower legs. The already dirty look of the marine works nicely with the effect.
Be aware that when I varnished in the next stage, I did fix the pigment to the base, but it lost its nice powdery texture, which meant I needed to apply a little bit more as a finishing touch. Don’t worry. It sticks to the model quite nicely, even without fixing it down. Just try not to get any on your Black base rim.  Varnish
I used a mix of Matt Varnish (75%) and Gloss Varnish (25%) to dial back the shine, but give your model a bit of protection from all the picking it up you’ll be doing when you play (or when your friends just HAVE to get a closer look at it.

AK Interactive 3rd Generation Acrylics 8
Standard 6
- AK11070 Blue Violet
- AK11107 Dark Rust
- AK11130 Pistachio
- AK11138 Interior Yellow Green
- AK11159 Russian Green
- AK11167 Anthracite Grey
Pastel 1
- AK11069 Pastel Violet
Metallic 1
- AK11194 Brass
Citadel Painting System 7
Base 1
- Averland Sunset
Shade 4
- Druchii Violet
- Nuln Oil
- Reikland Fleshshade
- Seraphim Sepia
Technical 2
- Lahmian Medium
- Nihilakh Oxide
Monument Hobbies Pro Acryl
Wash 1
- 200 Black Wash
Scale75 Scalecolor
Scalecolor 1
- SC-35 Deep Red
The Army Painter Warpaints Fanatic
Acrylic 7
- Ancient Stone
- Angelic Red
- Forbidden Fruit
- Molten Lava
- Necrotic Flesh
- Olive Drab
- Skeleton Bone
Vallejo Game Color 4
Base 2
- 72.008 Orange Fire
- 72.014 Warlord Purple
Metallic 2
- 72.054 Gunmetal
- 72.057 Bright Bronze
Vallejo Model Color
Base 2
- 70.817 Scarlet
- 70.950 Black