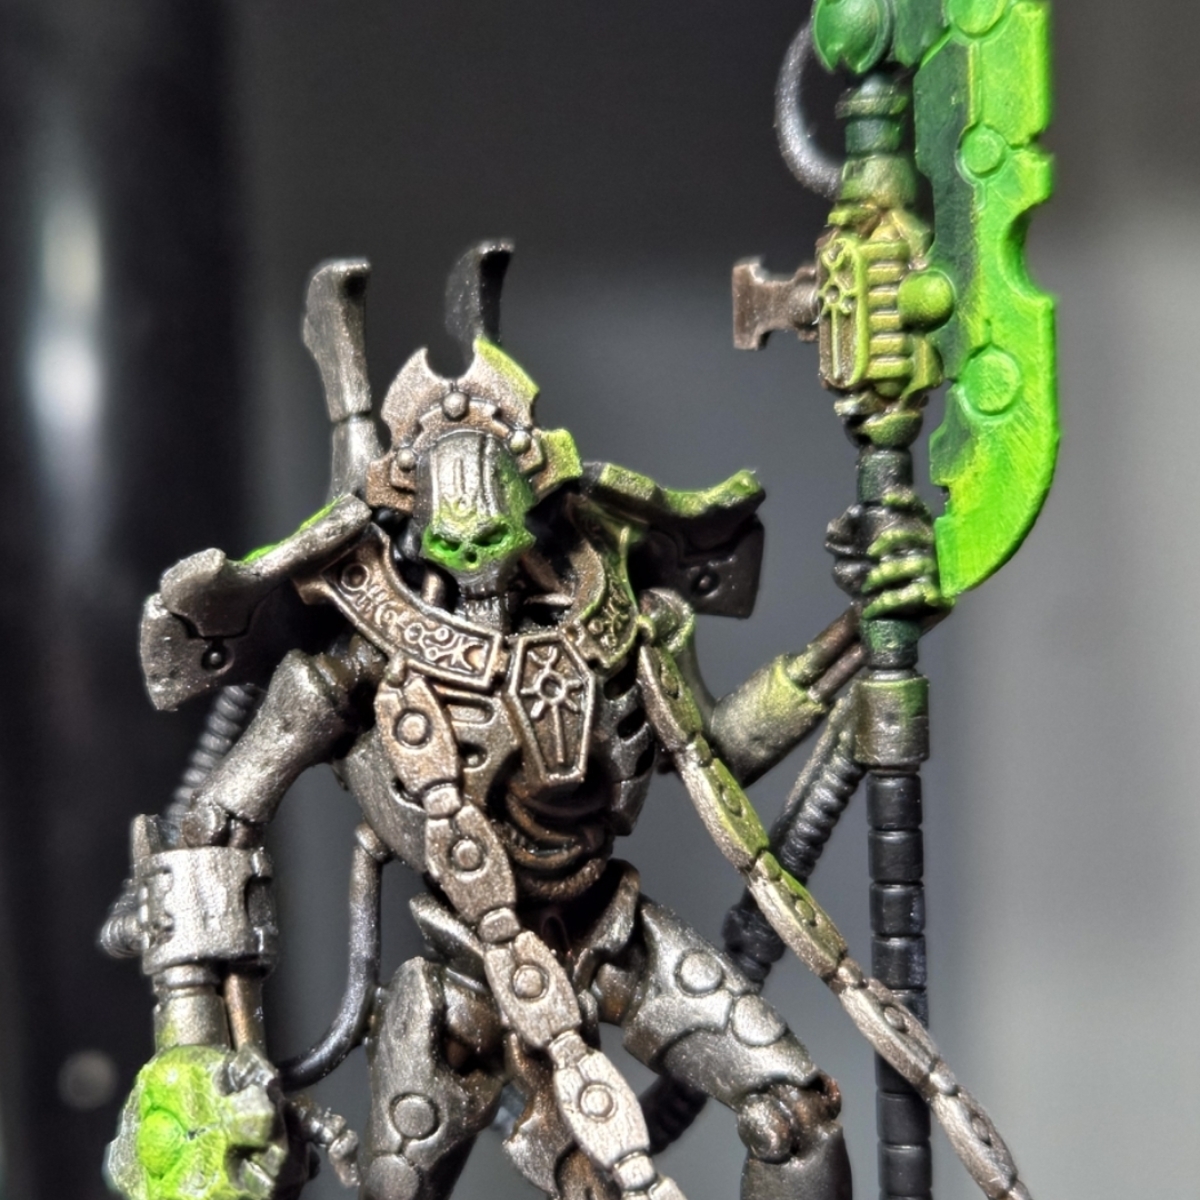
How to paint Sautekh dynasty Necrons that look like ancient and menacing fallen royalty.
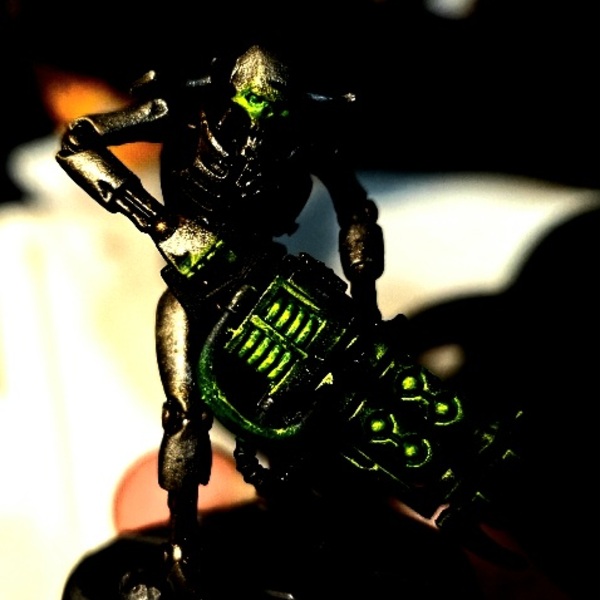 OPTIONAL: Establish a light profile. This is where you choose parts of the model to give artificial lighting and make a bit brighter than the rest of the model. Put your model under a lamp at whatever angle you think looks best and see where most of the light hits. When you paint, take some extra care to drybrush the brighter metallics a bit more intensely in these areas, and don't let wash pool up at all here. In the example picture, I turned the contrast way up, and you can see that most of the light falls on the right side of the face + right hand/forearm + right side of the leg as well as a little less intensely on the upper right torso + the inner left arm. You can also apply this same method for OSL by painting brighter layers on the surfaces close to glowing objects.
- Prime black.
- Basecoat with Iron Warriors .
- Apply Warplock Bronze to the joints and inner skeletal parts. I prefer to thin this down quite a bit and let it "stain" the joints rather than fully coat them.
- Dab patches of Typhus Corrosion into the joints. For more buildup you can let it dry and then apply more. Then lightly drybrush Ryza Rust over those same areas.
- Apply Sycorax Bronze to the regal elements, sigil, etc.
- Hit the entire model with a focused wash of Agrax Earthshade thinned about 50/50. Put it in the joints and drag it out onto the armor plating. Some staining is ok. Try to apply the wash more heavily to the areas of the armor plating that are closest to the joints. You may want to apply once, let it dry, then do one more wash just in these areas to get the desired effect.
- Using Leadbelcher , lightly drybrush the armor plating across the model. Stipple out some of the pooling, but make sure there's still some discoloration from the agrax showing.
- Using Canoptek Alloy , lightly drybrush the high/bright/focused parts of the model.
- All over Nuln Oil wash.
- Edge highlight the armor with Stormhost Silver , the joints with Warplock Bronze , the regal elements with Canoptek Alloy , and the gun/black parts with Eshin Grey .
- Paint the weapons and cables with Abaddon Black .
- Glaze Caliban Green over the cables.
- Glaze Warpstone Glow over the cables, aiming to create a gradient that is brightest towards the center of the cable and dark towards the ends.
- For any glowing objects, start by basing in white. Be prepared to water this down pretty heavily and paint several layers over the object.
- Cover the white in Warp Lightning .
- Drybrush the object with white, and catch the nearest surfaces and edges too.
- Do another pass around the white with an even lighter drybrush of white or offwhite.
- Coat the object with Tesseract Glow .
- On the further away white/offwhite, take most of the tesseract glow off your brush and build the glow up slowly.
- Add white as a highlight. For orbs, it should be a dot. For blades, it should be an edge highlight. For longer objects (i.e the deathmark's weapon), it should be a line.
- For objects that are further away that may still reflect some of the glow, just glaze tesseract over it.
- Don't go overboard! Most of the time the glow should be subtle and the white shouldn't be drybrushed heavily enough to fully cover the surface. Save the intense glows for large objects like the overlord's blade.
Citadel Painting System 16
Base 5
- Abaddon Black
- Caliban Green
- Iron Warriors
- Leadbelcher
- Warplock Bronze
Shade 2
- Agrax Earthshade
- Nuln Oil
Layer 5
- Canoptek Alloy
- Eshin Grey
- Stormhost Silver
- Sycorax Bronze
- Warpstone Glow
Dry 1
- Ryza Rust
Technical 2
- Tesseract Glow
- Typhus Corrosion
Contrast 1
- Warp Lightning