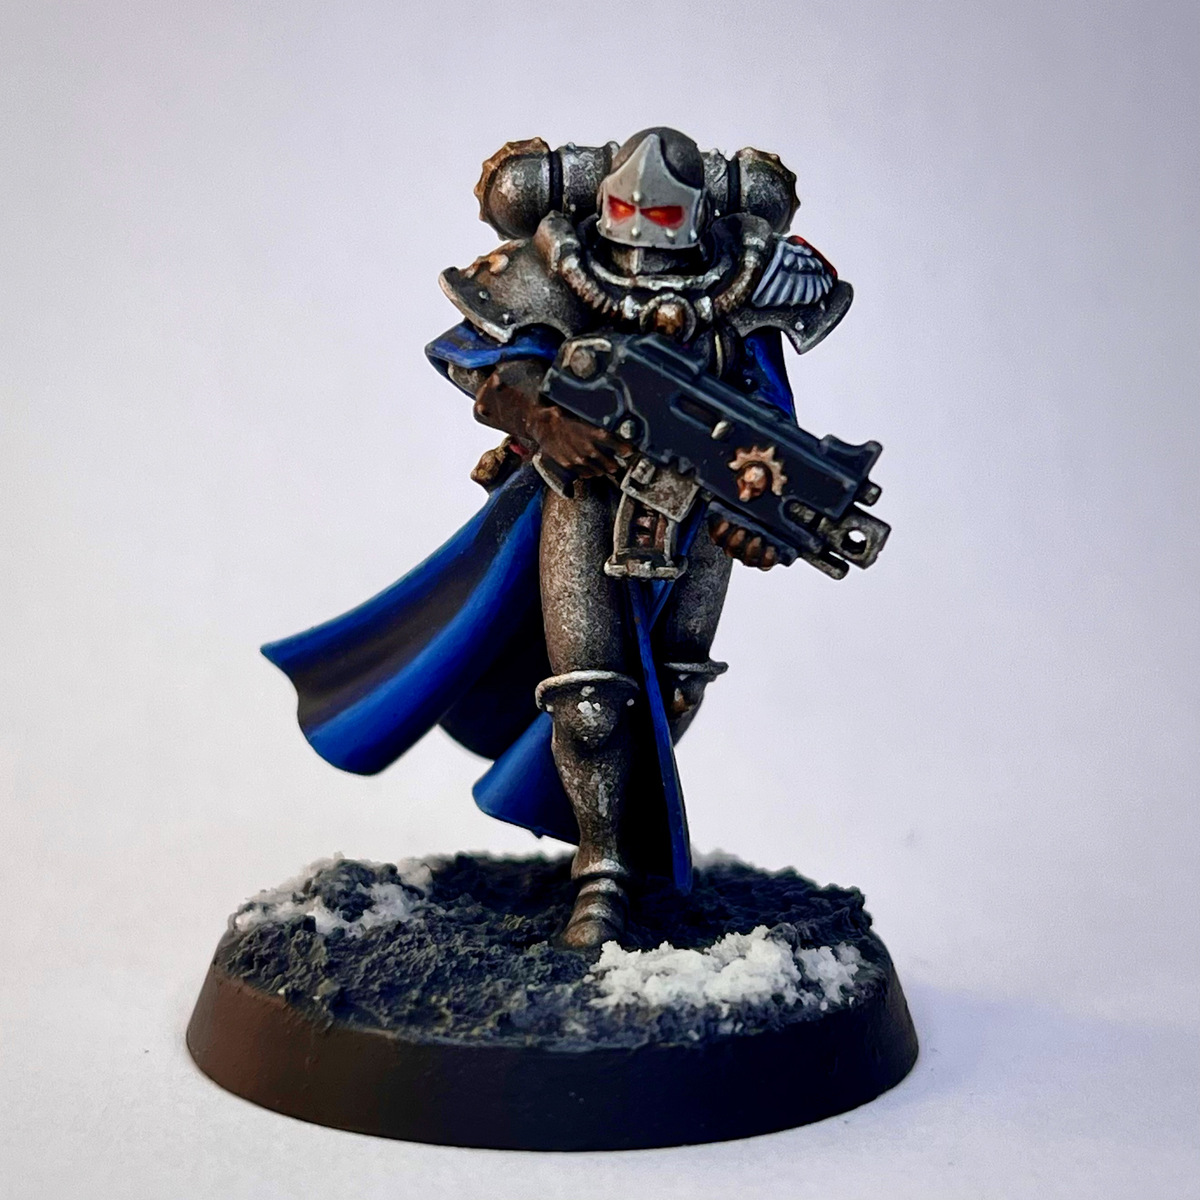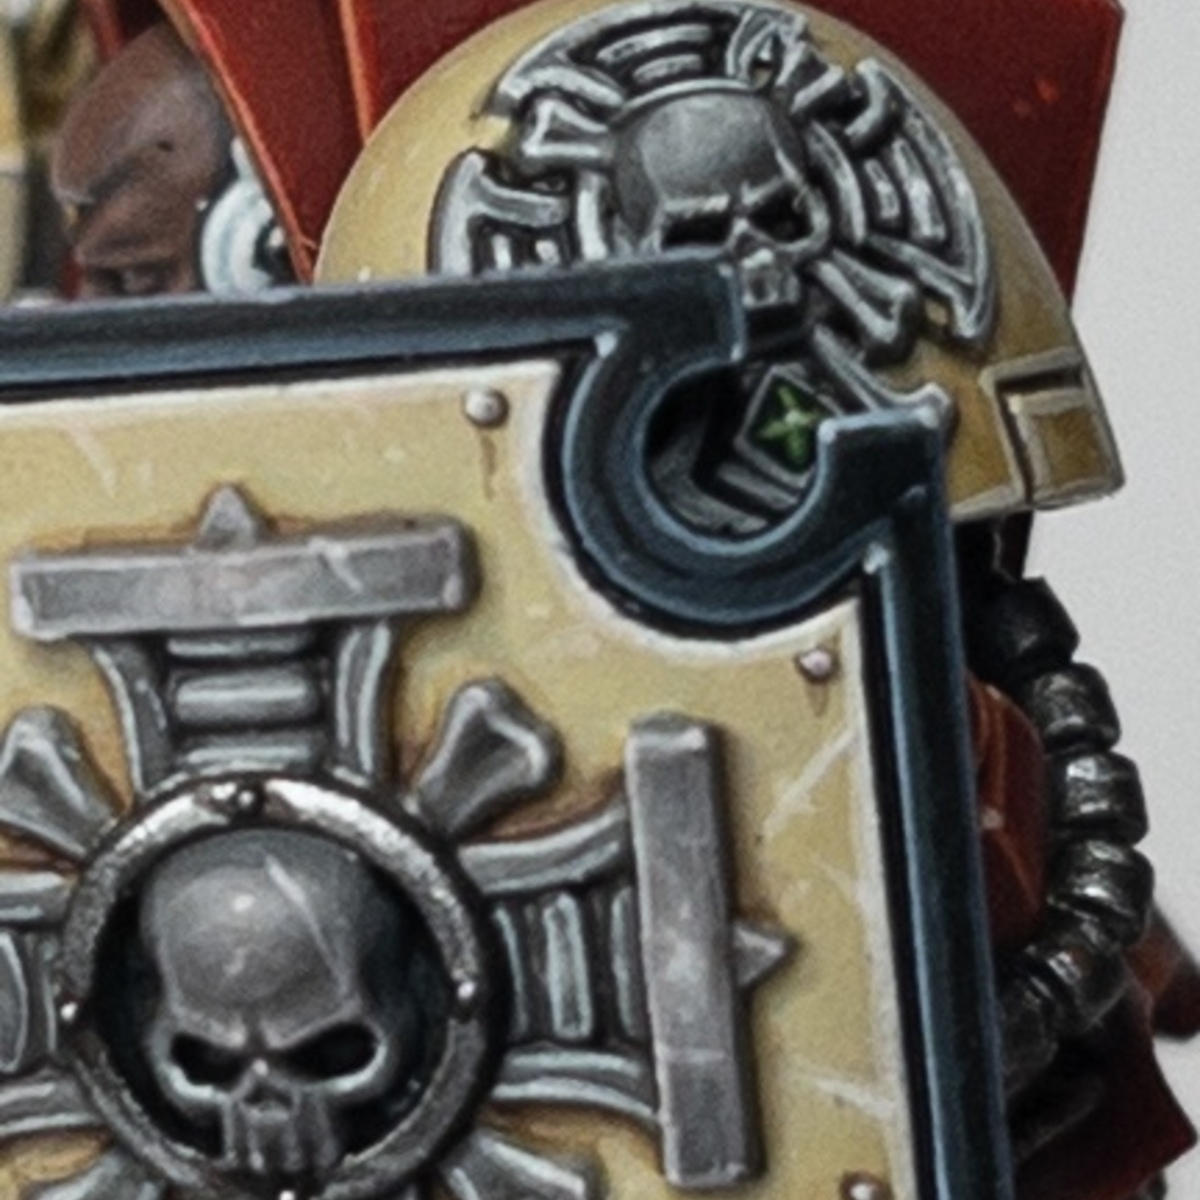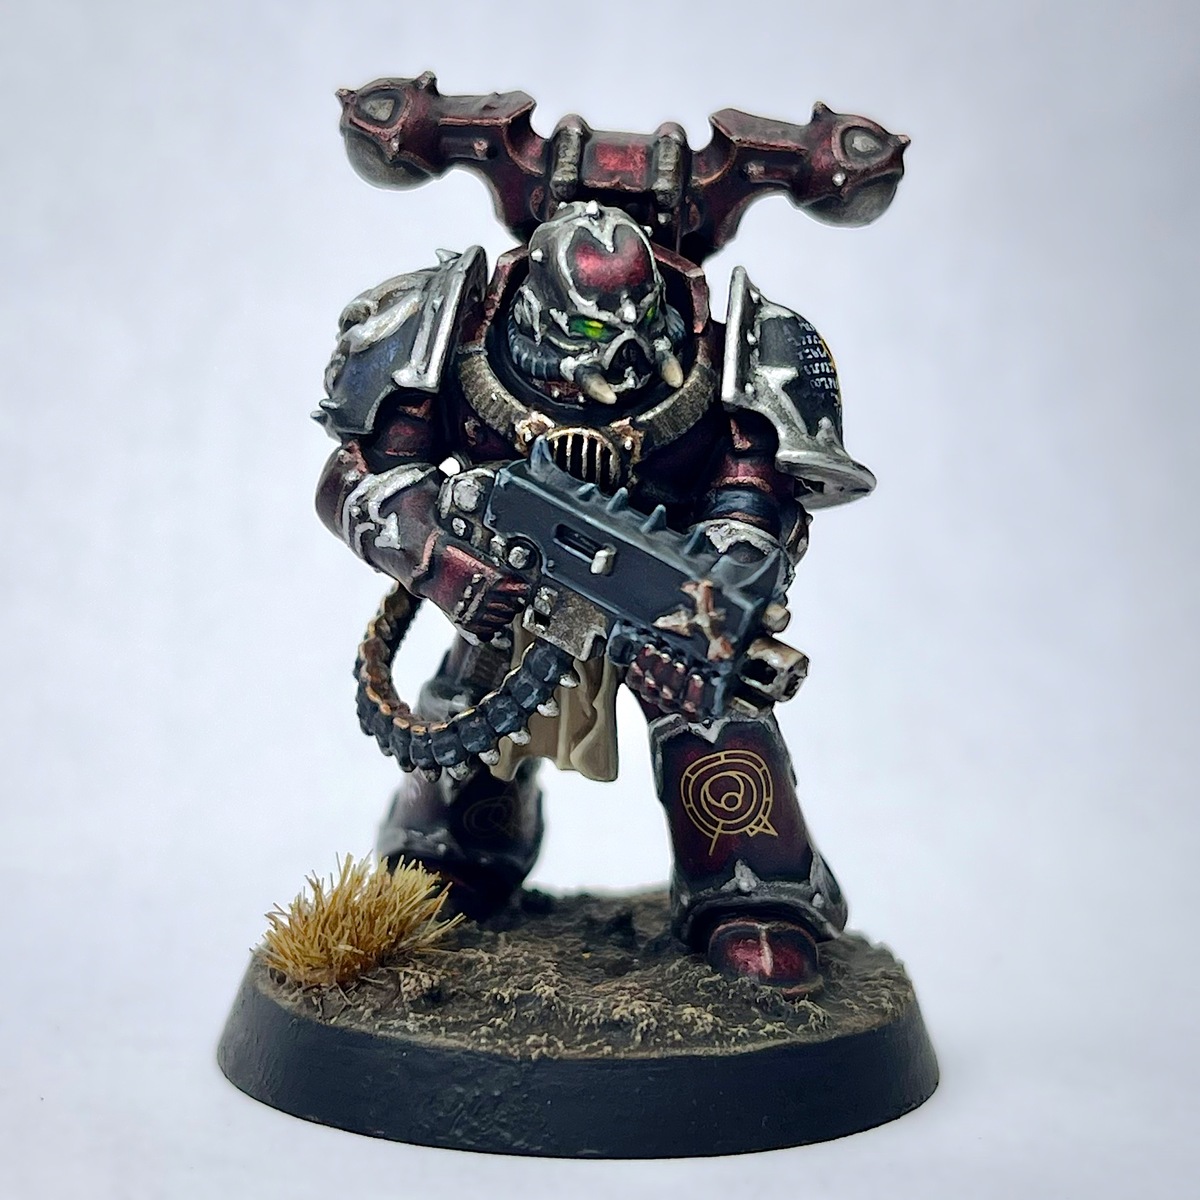

This is my take on the original traitors and my personal favorite Traitor Legion, the Word Bearers.
I'll admit that the original idea for the metallic red comes from Darcy Bono Creations. While I've changed a few things and tweaked their methods and some of the paints to my tastes, a lot of the technique is still the same. Strongly recommend checking them out: https://youtu.be/Xq5TFp8WShA?si=nyBIA0YmbTGtHXvL
Silver Trim
- Prime with Chaos Black
- Base coat all of the armor and trim using Leadbelcher
- Apply a wash of 1:1 of Gravelord Grey and Lahmian Medium over all of the armor and trim
- Pick out any rivets and shade them using Black Templar
- Edge highlight the trim and pick out any rivets using Leadbelcher and then Runefang Steel
- Apply a selective edge highlight, picking out the sharpest corners, using Aluminum
 Black Pauldrons
- Apply a mix of 1:1:1 Black Templar , Leviadon Blue , and Lahmian Medium to the areas you want to be black. Feel free to adjust and play around with the ratios to taste.
- Once the contrast paint has dried completely, using a small dry brush, stipple some Aluminum onto the raised areas/rounded surface of the pauldron, where it would naturally catch the light.
- Apply another contrast mix (this time doubling the medium) of 1:1:2 Black Templar , Leviadon Blue , and Lahmian Medium
- Shade the recesses using pure Black Templar
- Highlight any edges using Leadbelcher
Red Armor
- Coat all of the red armor panels using a mix of 2:2:1.5 Flesh Tearers Red , Lahmian Medium , and Leviathan Purple
- Once the contract paint has dried completely, using a small dry brush, stipple some Screaming Bell into the center of the panels or onto the raised surfaces
- Repeat step 1 again, coating the panels with the contrast mixture
- Shade the recesses using pure Black Templar
- Edge highlight as needed using Screaming Bell
- Perform a more selective edge highlight using Hashut Copper
- Finally, pick out the most extreme corners using Runefang Steel
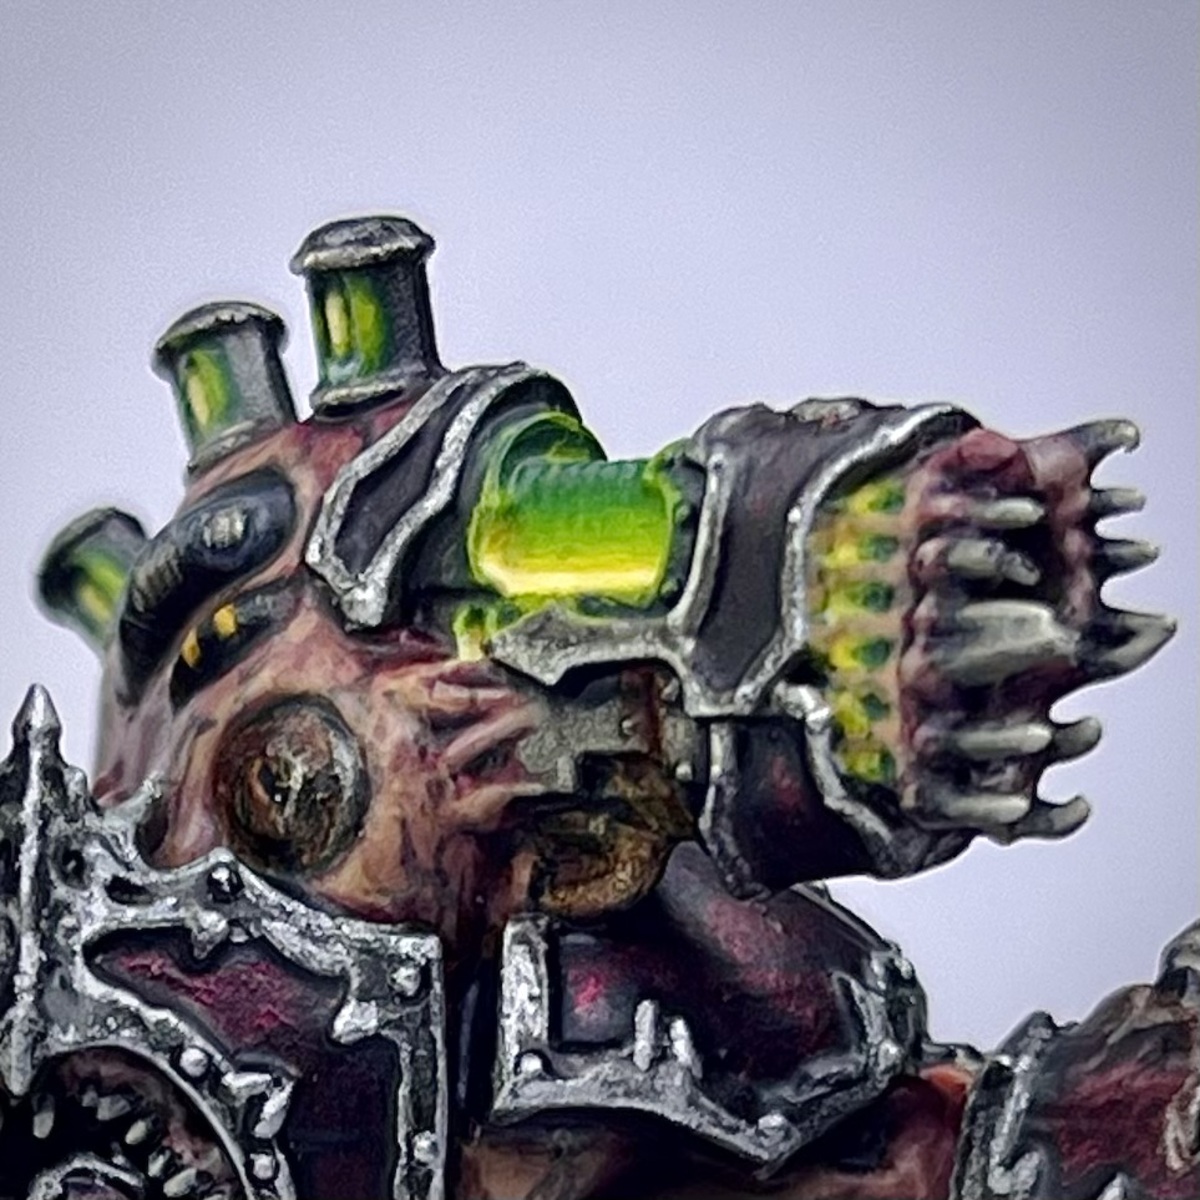
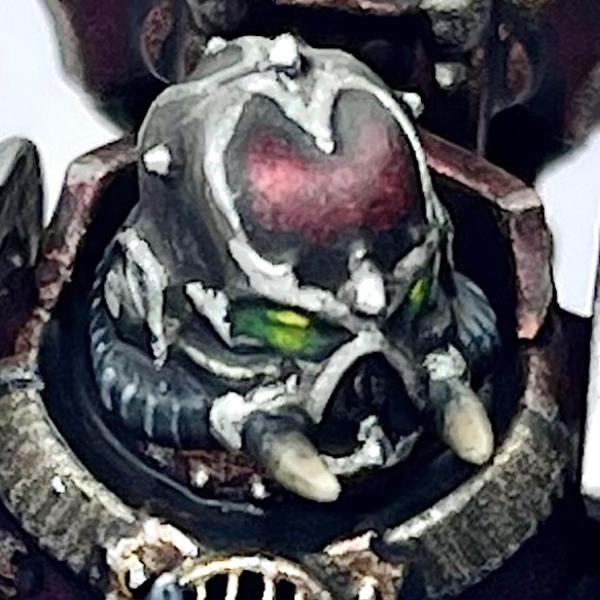 Green Lenses
- Base coat the eyes using Wyvern Green , allowing it to flow into the recesses and spill over the bottom of the eye/lens just barely
- Focusing more towards the center, apply a coat of Warpstone Glow , doing the same right below the lens, again focusing more towards the center
- Now focusing towards the very center of the lens, apply a coat of Moot Green , doing the same right below the lens, again focusing towards the very center
- Add just a touch of Flash Gitz Yellow to the very center of the lens, doing the same right below the lens, again in the very center
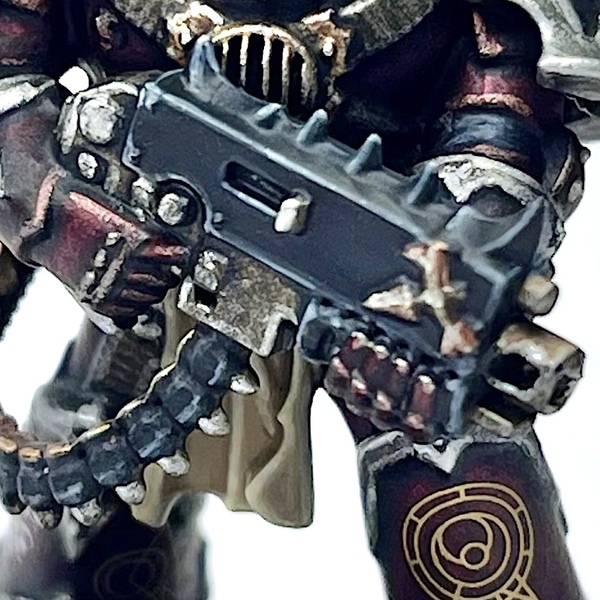 Bolter Casing and Ammo Belt
This method can also be used on the armor joints as well as the tubing on the helmet. Just swap Doom Death Black for Death Reaper .
- Base coat using Doom Death Black
- Edge highlight using Incubi Darkness followed by Dark Reaper and then Dawnstone
- Apply a more selective edge highlight using Administratum Grey
- Highlight the most extreme edges and details using Celestra Grey
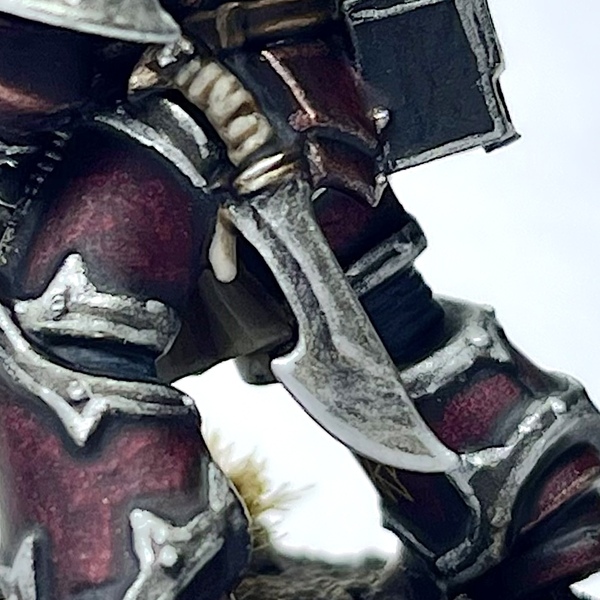 Silver Metallics
This method can be applied to all silver metal bits including the bolter, straps, knife, etc. Pretty much anything silver aside from the armor trim.
- Apply a base coat of Iron Warriors
- Apply a wash using Agrax Earthshade
- Shade the recesses using Black Templar
- Highlight any edges and raised areas using Leadbelcher
- Perform a much more selective edge highlight using Runefang Steel
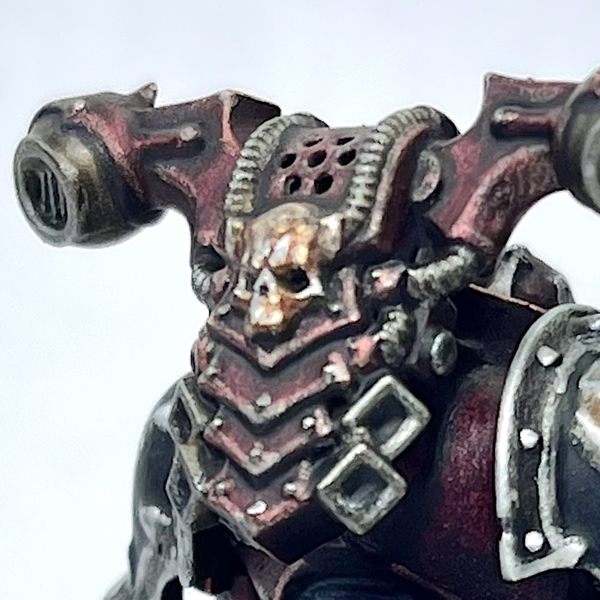 Gold/Brass Metallics
This method can be applied to any bits you wish to be gold or brass, including the bolt shell casings and any ornamental skulls.
- Base coat using Balthasar Gold
- Wash the gold using a 1:1 mix of Agrax Earthshade and Reikland Fleshshade
- Shade any recesses using Black Templar
- Highlight any edges or raised areas using Liberator Gold
- Perform a much more selective highlight using Runefang Steel
- Highlight the most extreme points or edges using Aluminum
Loincloth
- Base coat using Karak Stone
- Shade the recesses of the loincloth using a 1:1 mix of Karak Stone and Zandri Dust
- Repeat the previous step, this time focusing more towards the very recesses, using pure Zandri Dust
- Apply a layer of 1:1 Karak Stone and Ushabti Bone to the raised areas
- Repeat the previous step, this time focusing on towards the center of the raised areas, using pure Ushabti Bone
- Apply a final highlight over the raised areas using a 1:1 mix of Ushabti Bone and Screaming Skull
- Apply an edge highlight using Ushabti Bone
- Perform a more selective edge highlight using Screaming Skull
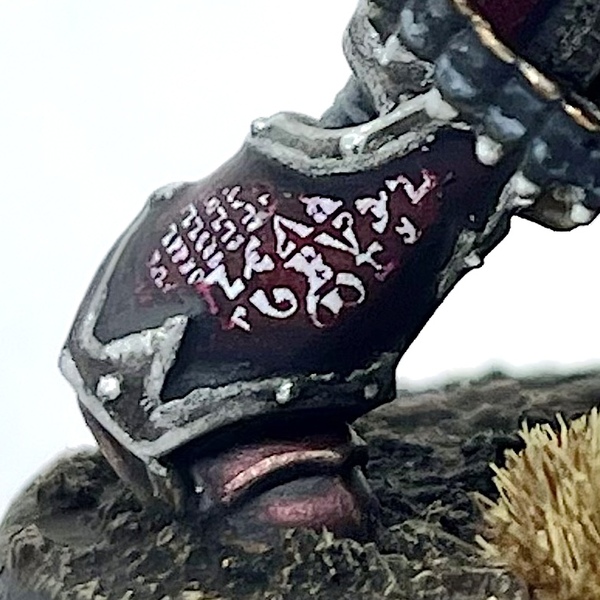 Transfers
Transfers should be the last step before basing or varnishing your model. All of your painting should be more or less complete. In the case of this model, however, it can help to go back and ease the transition of your transfers/decals using the base color.
- Apply one to two coats of Ardcoat to the area you wish to apply the transfer to
- Once completely dry, apply your transfer like normal
- Let the transfer dry and adhere completely and apply another one to two coats of Ardcoat to seal it
- Apply a matte varnish to smooth things out once the gloss varnish is dry
- Using your base color (i.e. the contrast mix from either the red armor or the black pauldrons, as appropriate), apply a thin layer around the edges of the transfer and let it dry. Keep playing with it until you're happy.
- Be sure to touch up recess shading using Black Templar as needed
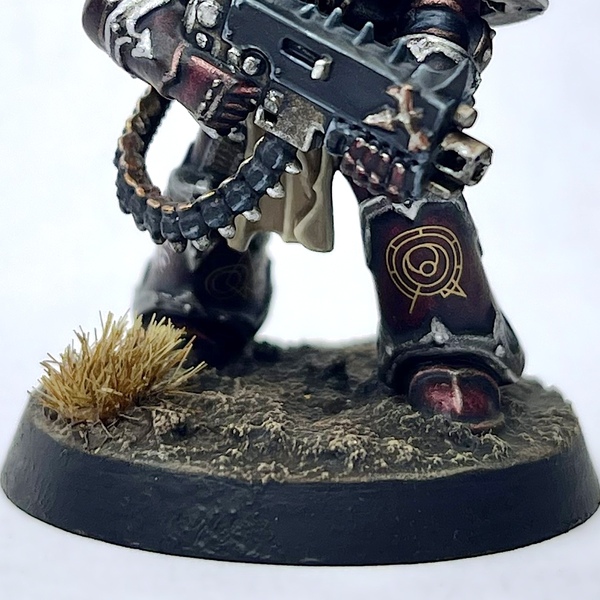 Base/Terrain
This is a fairly simple basing scheme that I use on my Word Bearers that I like to refer to as "blighted earth." It's very easy and good for basing a large number of troops with. Feel free to add skulls, tufts of grass, or whatever else to mix things up a bit.
- Apply a coat of Stirland Mud along with small amounts of Stirland Battlemire throughout for texture
- Once the texture paint has fully cured (I give it 12+ hours), apply a wash of Agrax Earthshade
- Using a dry brush, highlight the terrain using Dryad Bark
- Using a dry brush, highlight the terrain using Karak Stone
- Apply a wash of Seraphim Sepia
- Again, using a dry brush, apply a very light highlight using Screaming Skull
- Paint the rim using a pure black like Doom Death Black
Sabrina Fay
FayDayParade
I paint little plastic dudes.
Citadel Painting System 32
Base 8
- Balthasar Gold
- Celestra Grey
- Dryad Bark
- Incubi Darkness
- Iron Warriors
- Leadbelcher
- Screaming Bell
- Zandri Dust
Shade 3
- Agrax Earthshade
- Reikland Fleshshade
- Seraphim Sepia
Layer 12
- Administratum Grey
- Dark Reaper
- Dawnstone
- Flash Gitz Yellow
- Hashut Copper
- Karak Stone
- Liberator Gold
- Moot Green
- Runefang Steel
- Screaming Skull
- Ushabti Bone
- Warpstone Glow
Technical 2
- Ardcoat
- Lahmian Medium
Texture 2
- Stirland Battlemire
- Stirland Mud
Spray 1
- Chaos Black
Contrast 4
- Black Templar
- Flesh Tearers Red
- Leviadon Blue
- Leviathan Purple
The Army Painter Speedpaint 2.0
Speedpaint 1
- Gravelord Grey
Vallejo Metal Color
Base 1
- 77.701 Aluminum