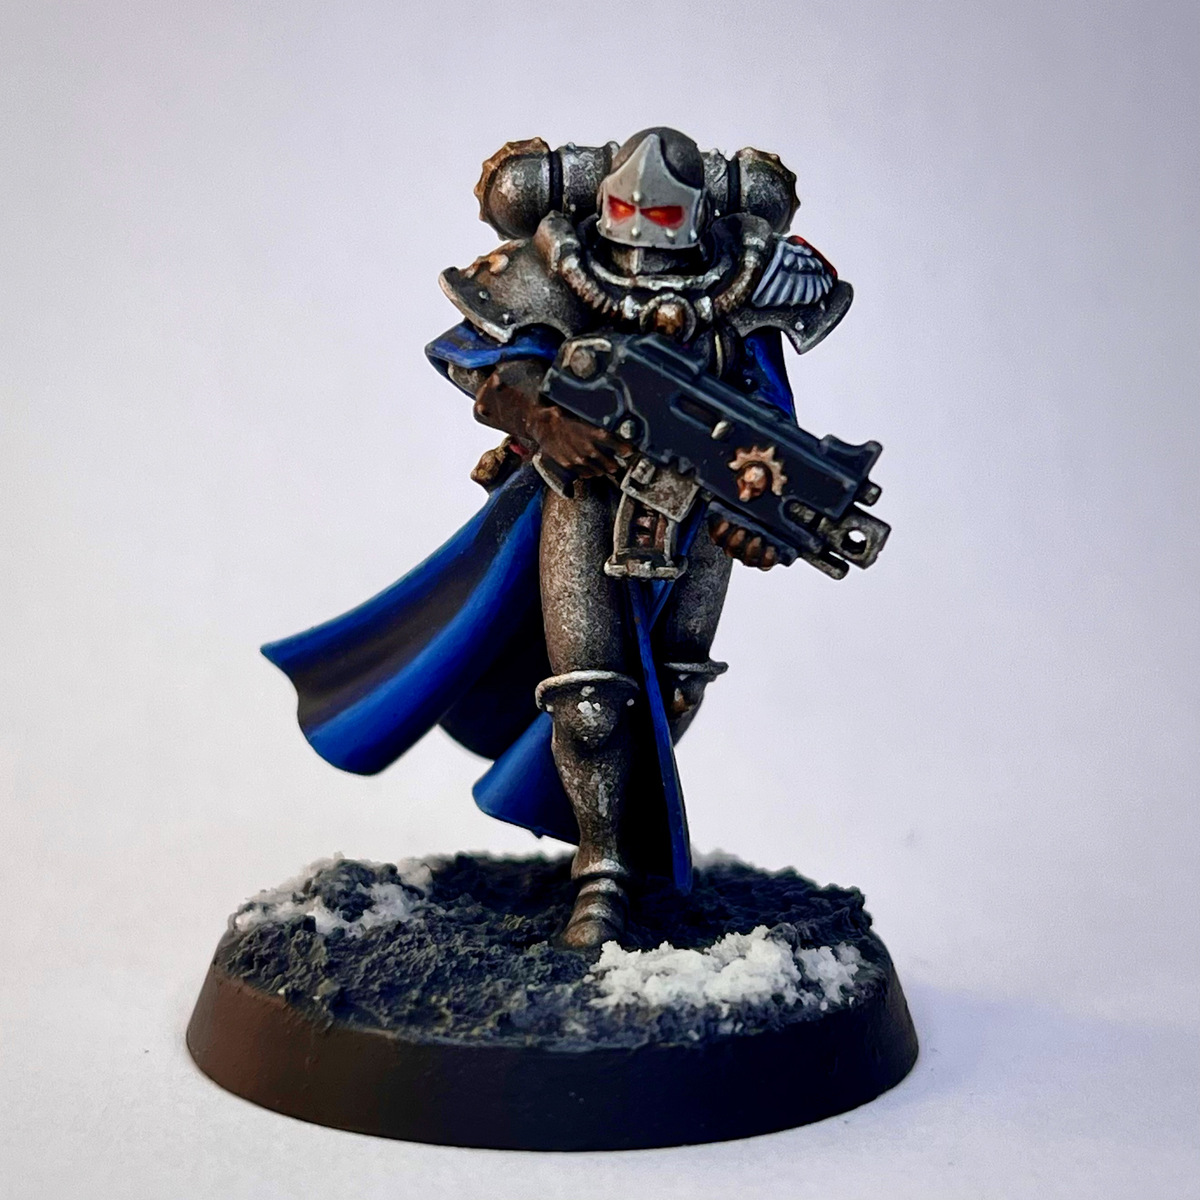

This paint scheme is for my custom Minor Order Militant of the Adepta Sororitas - The Order of Our Aegis Resplendent.
The recipes here can apply to any silver armor or flowing capes.
Silver Power Armor
- Prime Chaos Black
- Cover the armor with two thin coats of Doom Death Black for consistency.
- Heavy dry brush Mournfang Brown
- Use a dry brush or an old brush with stiff bristles to stipple on Iron Warriors
- Shade the recesses of the armor using Black Templar
- Using a dry brush or sponge (I like using the green part of dish sponges), stipple Leadbelcher on areas that would naturally catch the light.
- Repeat the previous step, being more selective, using Runefang Steel
- Repeat the previous step one last time, being very selective, using Aluminum
- Edge highlight with Runefang Steel
- Highlight the sharpest corners and edges using Aluminum
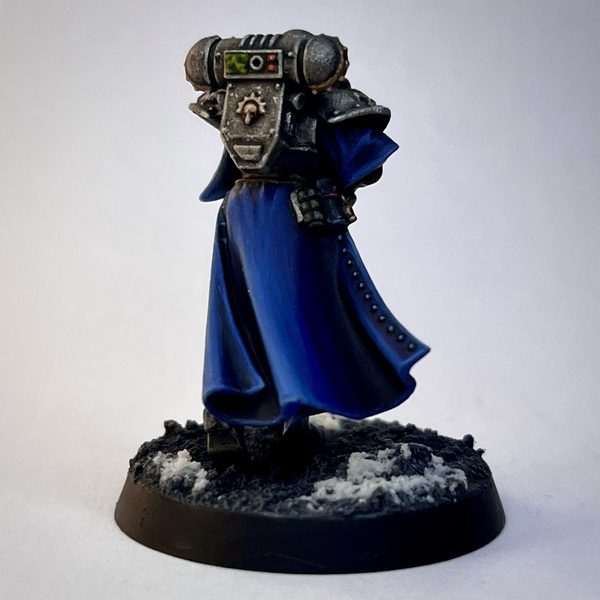
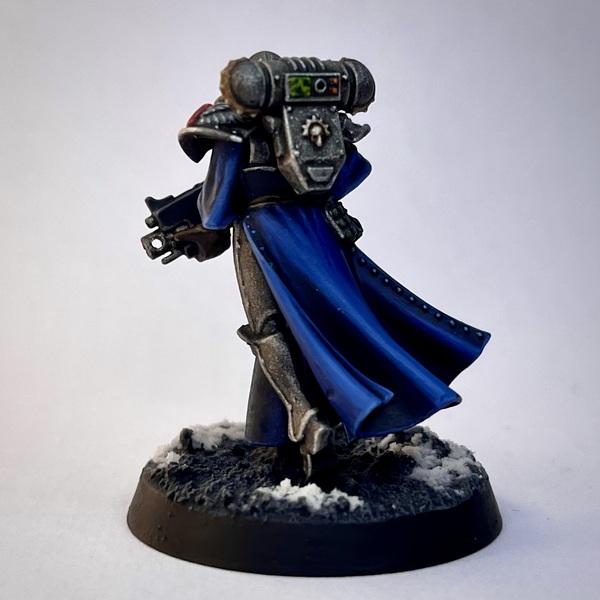 Blue Robes
 (Additional angle)
- Base coat using Kantor Blue
- Shade the recesses with a heavily thinned down mix of 1:1 Doom Death Black and Kantor Blue
- Being more selective, continue shading the recesses with a heavily thinned down mix of 2:1 Doom Death Black and Kantor Blue
- Shade only the very deepest recesses with a heavily thinned down mix of 3:1 Doom Death Black and Kantor Blue
- Begin highlighting the raised areas with a mix of 1:1 Alaitoc Blue and Kantor Blue
- Being more selective, highlight the raised areas with some heavily thinned down Alaitoc Blue
- Continue with increasingly narrow highlights using a mix of 1:1 Alaitoc Blue and Baharroth Blue
- Highlight the most extreme raised points using some heavily thinned down Baharroth Blue
- Edge highlight all over using Alaitoc Blue and selective highlights of the 1:1 Alaitoc Blue and Baharroth Blue mix
- At this point, go back and check for any transitions that aren't quite smooth or areas where the midtone might be too weak compared to the highlights and shading. Heavily thin down some Kantor Blue using Lahmian Medium and glaze over the transitions until you're happy with them.
- This step is optional, but I used an all over glaze of 1:1 Talassar Blue and Lahmian Medium
Bolter Casing
- Begin with a base coat of Doom Death Black
- Edge highlight using Incubi Darkness
- Second edge highlight using Dungeon Stone Grey
- Being more selective, highlight using Wizard Grey
- Finally, pick out the sharpest corners using Carcharodon Grey
Brown Leather
- Begin with a base coat of Rhinox Hide
- Wash the leather using Reikland Fleshshade
- Shade the deepest recesses of the leather or anywhere the leather meets the armor or another component using Black Templar
- Edge highlight and pick out raised areas using Mournfang Brown . You can also add some scratches at this stage to make it look more worn.
- Being more selective, continue highlighting using Skrag Brown
- Finally, pick out the most extreme edges and highest points using Cadian Fleshtone
Corset
- Base coat using Death Reaper
- Shade the recesses using Black Templar
- Highlight edges and raised areas using Incubi Darkness followed by Dungeon Stone Grey
- Highlight the sharpest corners using Wizard Grey
Gold Accents
- Base coat with Balthasar Gold
- Wash the gold using a 1:1 mix of Reikland Fleshshade and Agrax Earthshade
- Shade any recesses using Black Templar
- Highlight any raised areas using a few very thin coats of Liberator Gold
- Being very selective, spot highlight the sharpest points using Runefang Steel
Inquisitorial Symbol Pauldron
- For the red I, base coat using Khorne Red followed by a thin layer of Mephiston Red
- Edge highlight using Evil Sunz Scarlet
- Highlight the sharpest corners using Fire Dragon Bright
- For the wings, start with a base coat of Carcharodon Grey
- Wash the wings using a 2:1 mix of Drakenhof Nightshade and Nuln Oil
- Shade the deepest recesses using Black Templar
- Add 1 to 2 thin coats of Carcharodon Grey to the wings, careful to avoid the recesses. This will just tone down the blue shade a little.
- Using a heavily thinned down 1:1 mix of Carcharodon Grey and Trooper White , add 1 to 2 layers to the wings, careful to avoid recesses.
- Edge highlight using Trooper White
- Finally, highlight the sharpest corners using Bold Titanium White
Helmet Visor
- Base coat the visor using Carcharodon Grey
- Shade any recesses using Black Templar
- Edge highlight using Trooper White
- Highlight the most extreme corners using Bold Titanium White
- For the lenses, start with a base coat of Gal Vorbak Red followed by a layer of Khorne Red
- Focusing on the center of the lens, add a layer of Evil Sunz Scarlet
- Finally, right in the very center of the lenses, apply a thin layer of Fire Dragon Bright followed by a very small amount of Flash Gitz Yellow
For a soft glow effect on the lenses, ensure your paint is very thin and apply each step of the lenses again, up to Evil Sunz Scarlet , onto the visor directly below the lenses, covering a smaller area with each pass.
Base
I was going for a sort of winter urban base with this. I tried to keep it minimalistic while still giving the feeling of snow on concrete/rubble.
- Coat the base using Astrogranite
- Apply some Astrogranite Debris on top in random places throughout the base for additional texture.
- Once the texture paint is dry, apply Drakenhof Nightshade all over.
- Give the base a heavy dry brush of Dungeon Stone Grey
- Apply another dry brush using Wizard Grey
- Apply a very light dry brush of Screaming Skull to the sharpest points.
- Apply Valhallan Blizzard in random patches across the base.
- Paint the rim using Doom Death Black
Sabrina Fay
FayDayParade
I paint little plastic dudes.
Citadel Painting System 31
Base 9
- Gal Vorbak Red
- Incubi Darkness
- Iron Warriors
- Kantor Blue
- Khorne Red
- Leadbelcher
- Mephiston Red
- Mournfang Brown
- Rhinox Hide
Shade 4
- Agrax Earthshade
- Drakenhof Nightshade
- Nuln Oil
- Reikland Fleshshade
Layer 10
- Alaitoc Blue
- Baharroth Blue
- Cadian Fleshtone
- Evil Sunz Scarlet
- Fire Dragon Bright
- Flash Gitz Yellow
- Liberator Gold
- Runefang Steel
- Screaming Skull
- Skrag Brown
Technical 1
- Lahmian Medium
Texture 3
- Astrogranite
- Astrogranite Debris
- Valhallan Blizzard
Air 1
- Balthasar Gold
Spray 1
- Chaos Black
Contrast 2
- Black Templar
- Talassar Blue
Monument Hobbies Pro Acryl
Base 1
- 001 Bold Titanium White
Two Thin Coats 6
Shade 2
- Doom Death Black
- Wizard Grey
Midtone 2
- Carcharodon Grey
- Death Reaper
Highlight 2
- Dungeon Stone Grey
- Trooper White
Vallejo Metal Color
Base 1
- 77.701 Aluminum