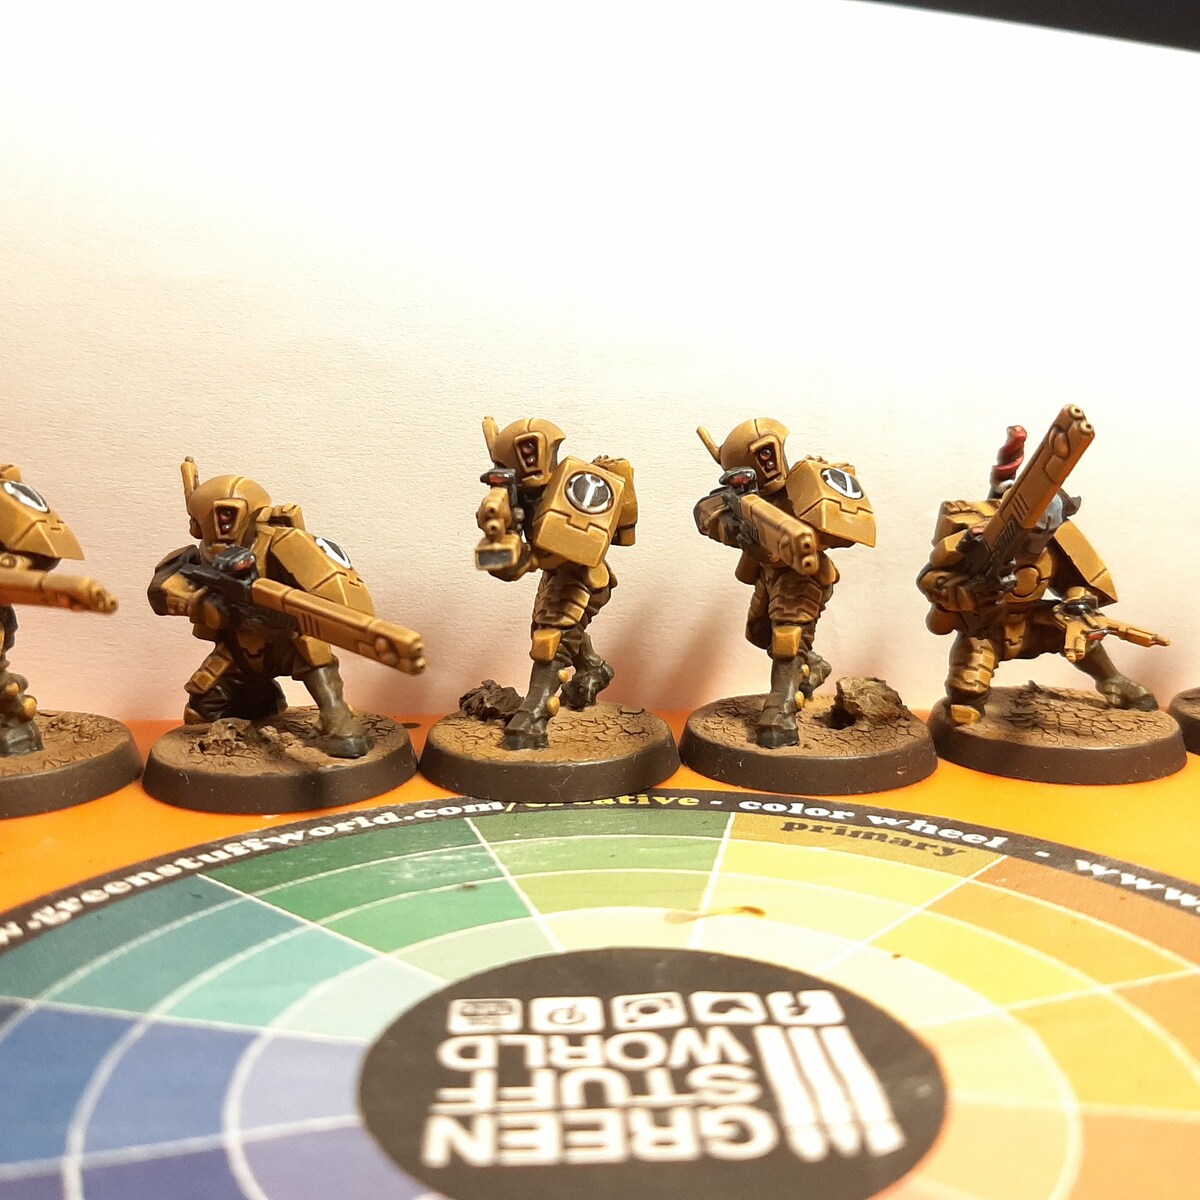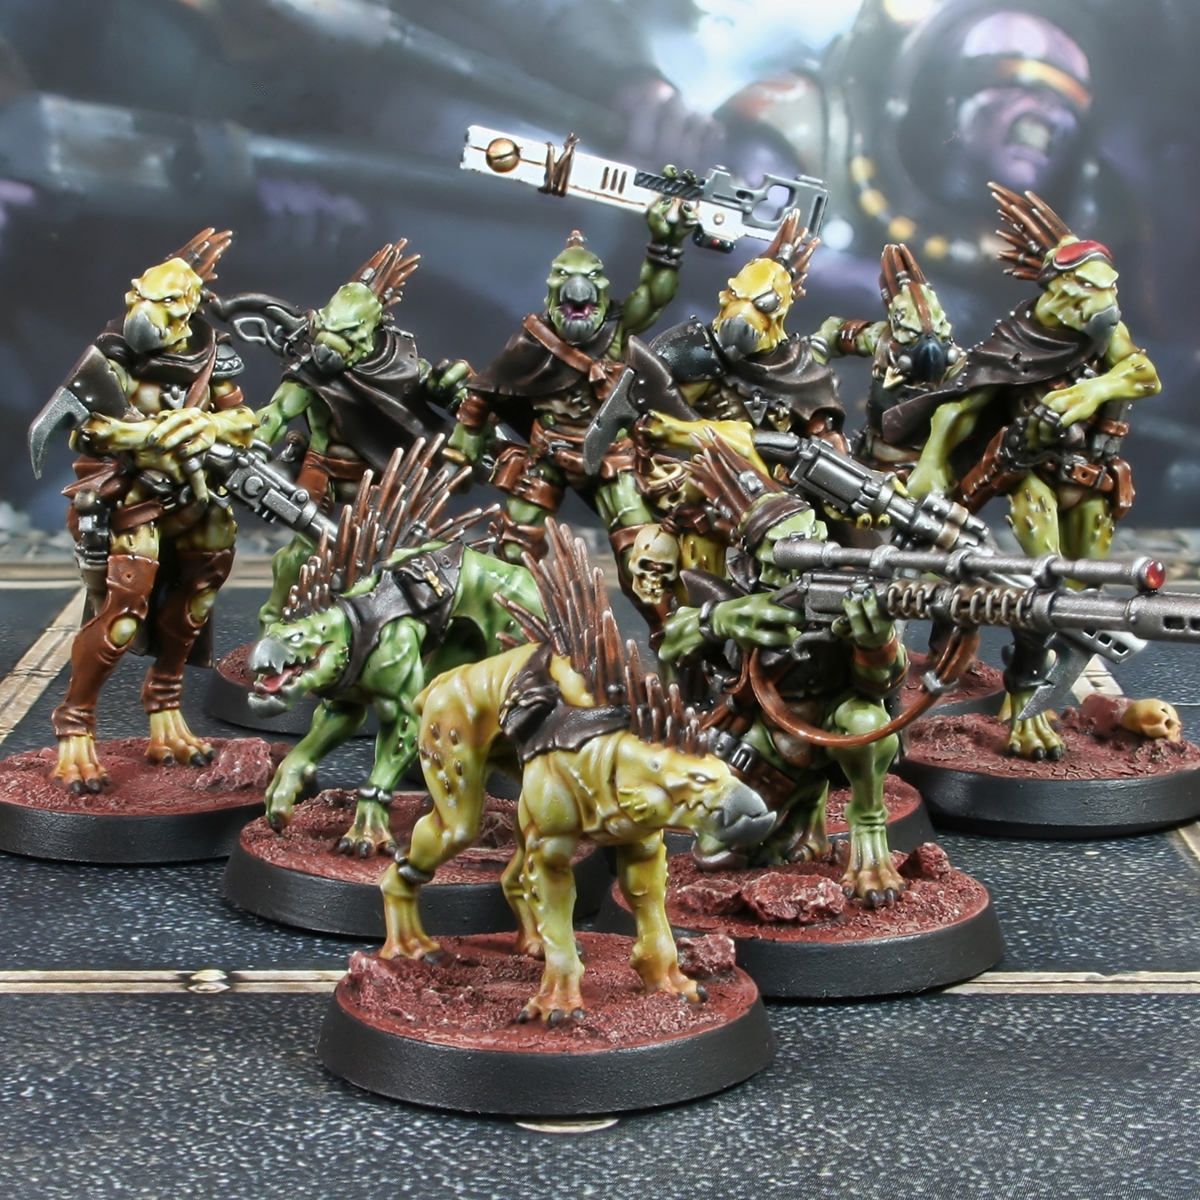

I wasn't 100% sure how to approach the skin of my Kroot, but also wanted some variation in skin tone for these boys. So, I decided to just wing it and have a play. Some of these methods may not be the most efficient, but if you wanted to replicate the results, here is what I did...
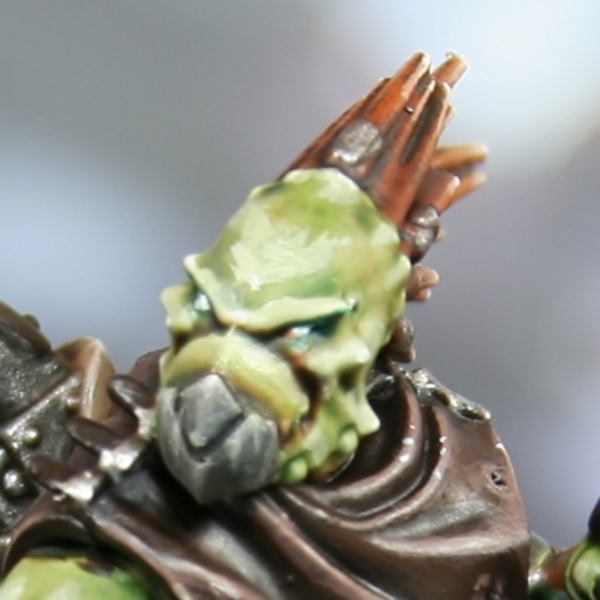
 Yellow-Green Kroot Skin
- Basecoat Nurgling Green .
- Wash with Plaguebearer Flesh , thinned with an equal amount of Contrast Medium .
- Go over all the skin again, this time with Reikland Fleshshade heavily thinned with Lahmian Medium . I am using the old (pre-contrast) formulation so did this with a 1:4 mix.
- Some of the recesses still needed darkening, so I worked some Darkoath Flesh on my wet palette and shaded with a fine brush.
- Reestablish Nurgling Green with general highlights, where you think it is necessary.
- Mix some Nurgling Green 1:1 with Pallid Wych Flesh and selectively highlight within the previous stages highlights. I also like to pick out scars with this colour.
- Finish off the skin with specular highlights of pure Pallid Wych Flesh . I also add dots of this colour to raised texture on scars.
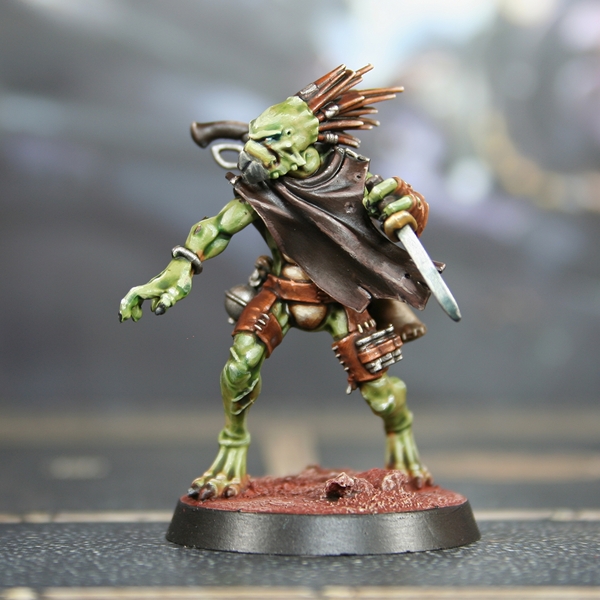
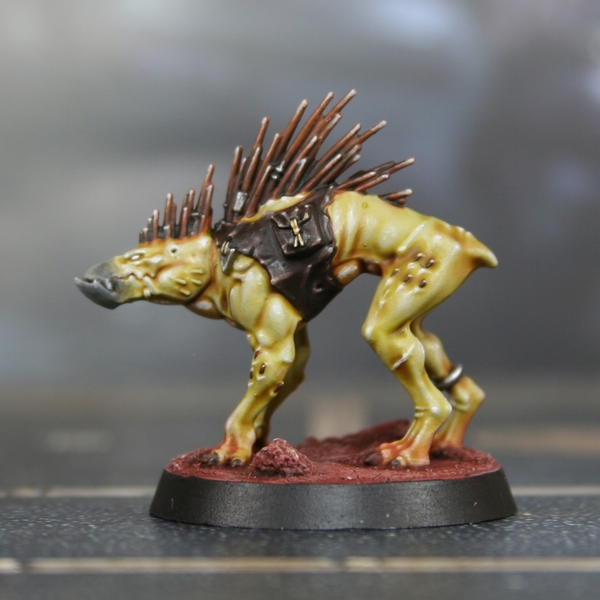 For this Kroot Hound, I switched things up by replacing Nurgling Green with Ionrach Skin . This gave a slightly different result.
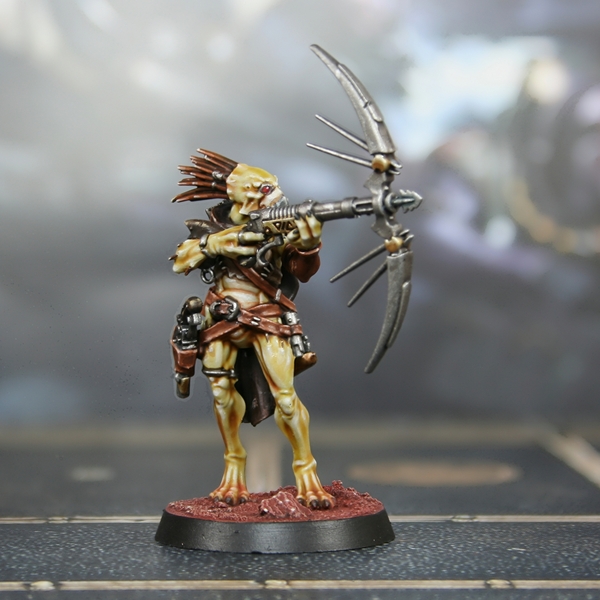 You could even introduce other colours into the contrast mix. My Bow-Hunter uses Ionrach Skin again, but for the wash I used a 3:1 mix of Plaguebearer Flesh and Guilliman Flesh for some extra warmth. I did keep the mix nice and thin still, mixing in as much Contrast Medium as paint.
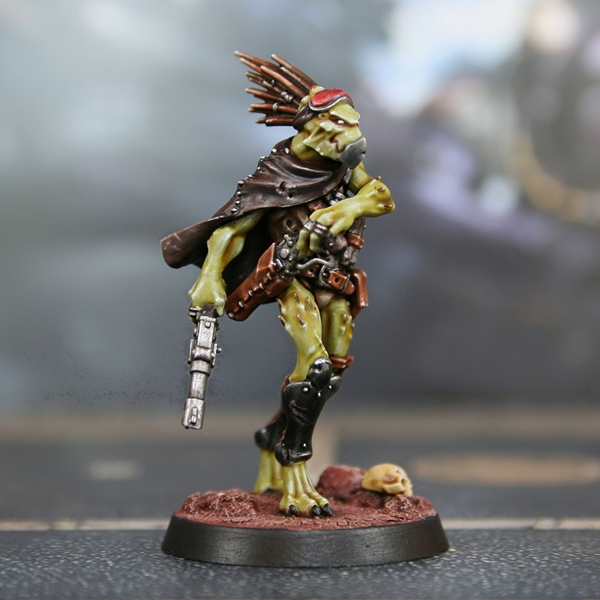
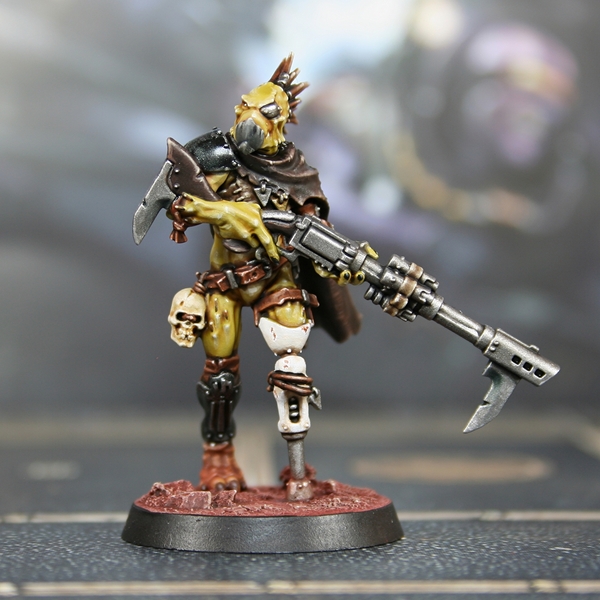 On my Cold-Blood I used Ogryn Camo , not Nurgling Green . This made quite the difference, making the skin much more yellow.
 Green Kroot Skin
- Basecoat Nurgling Green .
- Wash with 1 part Plaguebearer Flesh , 1 part Ork Flesh , 1 part Darkoath Flesh and thinned with 5 parts Contrast Medium .
- Wash the skin with a 1:1 mix of Reikland Fleshshade and Lahmian Medium .
- Reestablish Nurgling Green with general highlights, where you think it is necessary.
- Mix some Nurgling Green 1:1 with Pallid Wych Flesh and selectively highlight within the previous stages highlights. I also like to pick out scars with this colour.
- Finish off the skin with specular highlights of pure Pallid Wych Flesh . I also add dots of this colour to raised texture on scars.
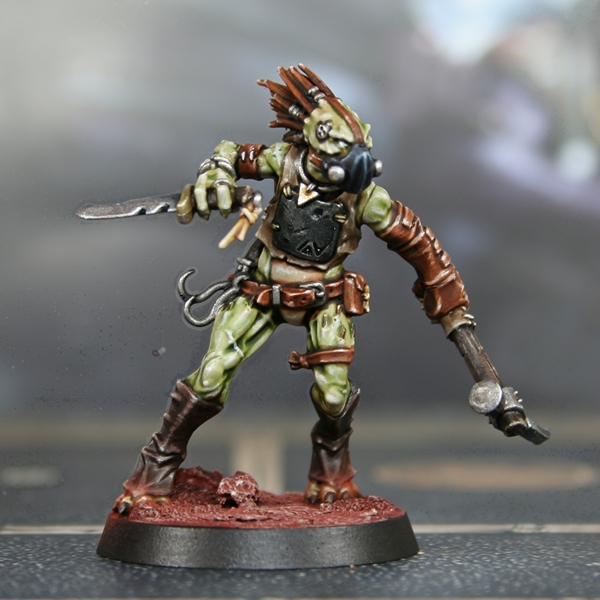 With subtle variation in mind again, I painted this Cut-Skin with Ionrach Skin and not Nurgling Green . All the other paints and steps remained the same though.
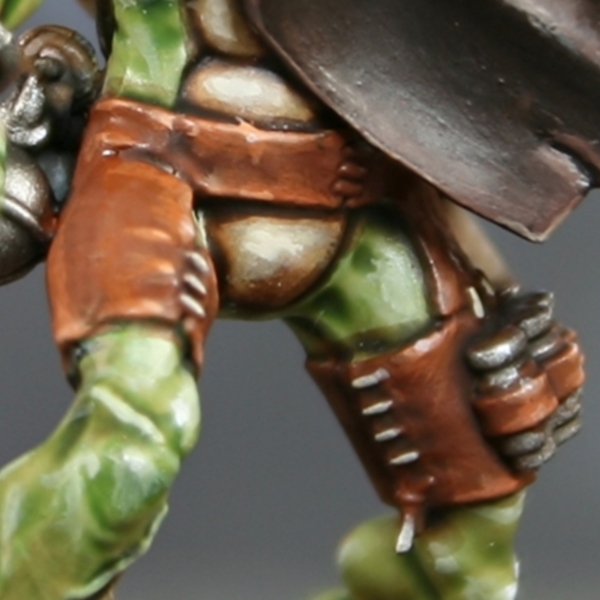
 Tan Belly
- Basecoat with Ushabti Bone .
- Wash the belly with a mix of Darkoath Flesh , Wyldwood and Contrast Medium .
- Glaze and stipple a large highlight with Zandri Dust .
- Glaze and stipple a highlight with Ushabti Bone .
- Glaze and stipple a large highlight with Wraithbone .
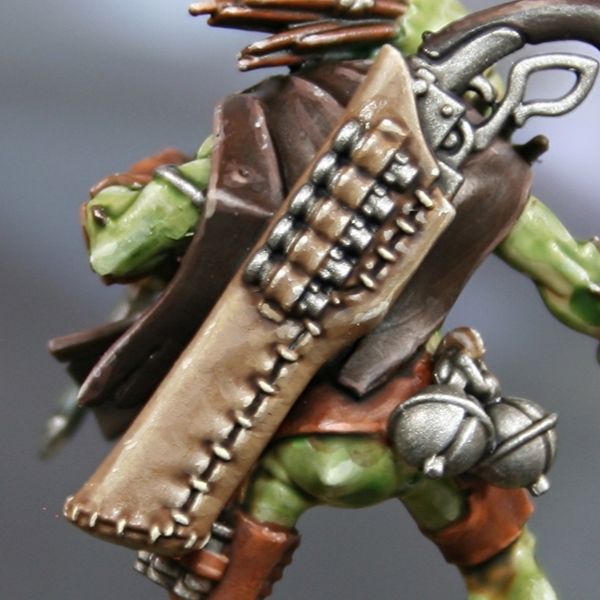
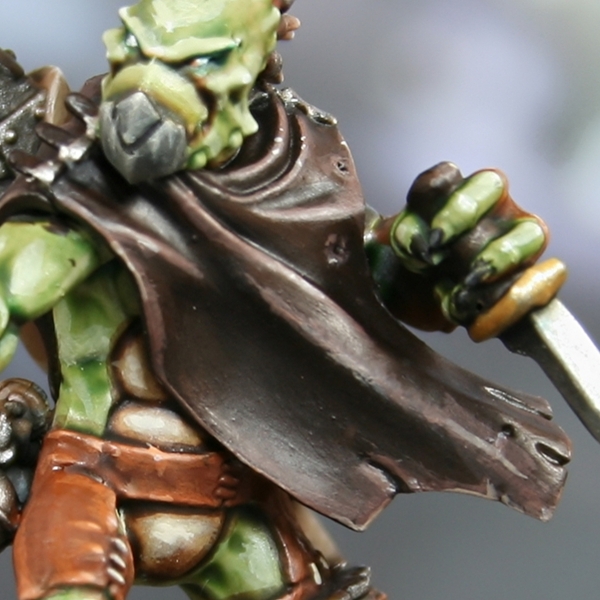 Dark Leather
- Basecoat with a mix of Abaddon Black and Rhinox Hide .
- Recess shade with Nuln Oil .
- Glaze large highlights with pure Rhinox Hide .
- Add chunky highlights of Rhinox Hide mixed with Gorthor Brown .
- Add fine highlights with pure Gorthor Brown .
- Add selective highlights with Baneblade Brown .
- Add a little white or Wraithbone to the Baneblade Brown and add specular highlights where needed.
 Warm Leather
- Basecoat with Mournfang Brown .
- Wash with Agrax Earthshade .
- Add chunky highlights with Skrag Brown .
- Add fine highlights with Deathclaw Brown .
- Mix a little Wraithbone into the Deathclaw Brown and slectively highlight eges.
- Add specular highlights of Wraithbone where needed.
 Tan Leather
- Basecoat with Steel Legion Drab .
- Wash with Agrax Earthshade .
- Mix Steel Legion Drab and Tallarn Sand 1:1 and use this mix to glaze general highlights.
- Now mix some Karak Stone into the mix above, in roughly the same quantity as the other two colours. Use this paint to add chunky highlights.
- With pure Karak Stone , add fine highlights.
- Now mix in a little Wraithbone and selectively highlight the leather.
- Finally, add specular highlights of Wraithbone , where needed.
 Beaks
Beaks
- Basecoat with Skavenblight Dinge .
- Chunky highlight of Stormvermin Fur .
- Mix some Ushabti Bone into the Stormvermin Fur and add fine edge highlights.
- Now mix in some Wraithbone and selectively highlight edges.
- Finally, add specular highlights of pure Wraithbone .
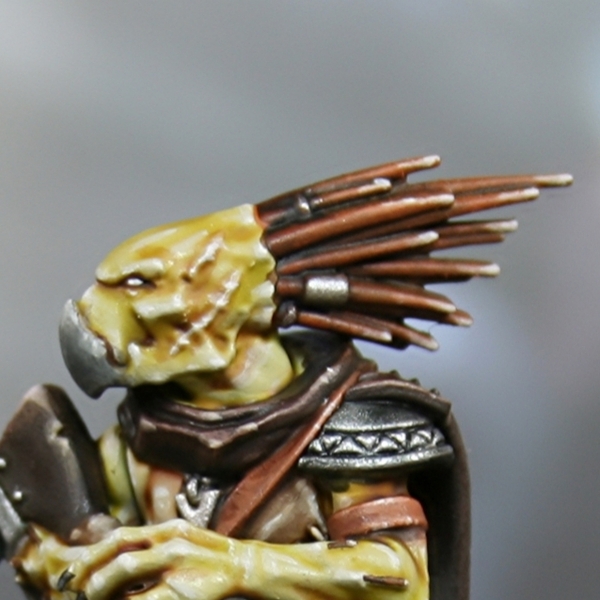 Quills
- Basecoat with Skrag Brown .
- Wash with Wyldwood .
- Drybrush with Skrag Brown , getting heavier handed towards the tips.
- Glaze exposed tips with a mix of Skrag Brown and Ushabti Bone .
- Highlight the very tips with Ushabti Bone .
- Add specular highlights of Wraithbone to the end of the quills.

Rookie Brushes
RookieBrushes
Aspiring miniature painter and biscuit enthusiast. Here to share my hobby and help where I can.
Citadel Painting System 29
Base 7
- Abaddon Black
- Ionrach Skin
- Mournfang Brown
- Rhinox Hide
- Steel Legion Drab
- Wraithbone
- Zandri Dust
Shade 3
- Agrax Earthshade
- Nuln Oil
- Reikland Fleshshade
Layer 12
- Baneblade Brown
- Deathclaw Brown
- Gorthor Brown
- Karak Stone
- Nurgling Green
- Ogryn Camo
- Pallid Wych Flesh
- Skavenblight Dinge
- Skrag Brown
- Stormvermin Fur
- Tallarn Sand
- Ushabti Bone
Technical 2
- Contrast Medium
- Lahmian Medium
Contrast 5
- Darkoath Flesh
- Guilliman Flesh
- Ork Flesh
- Plaguebearer Flesh
- Wyldwood