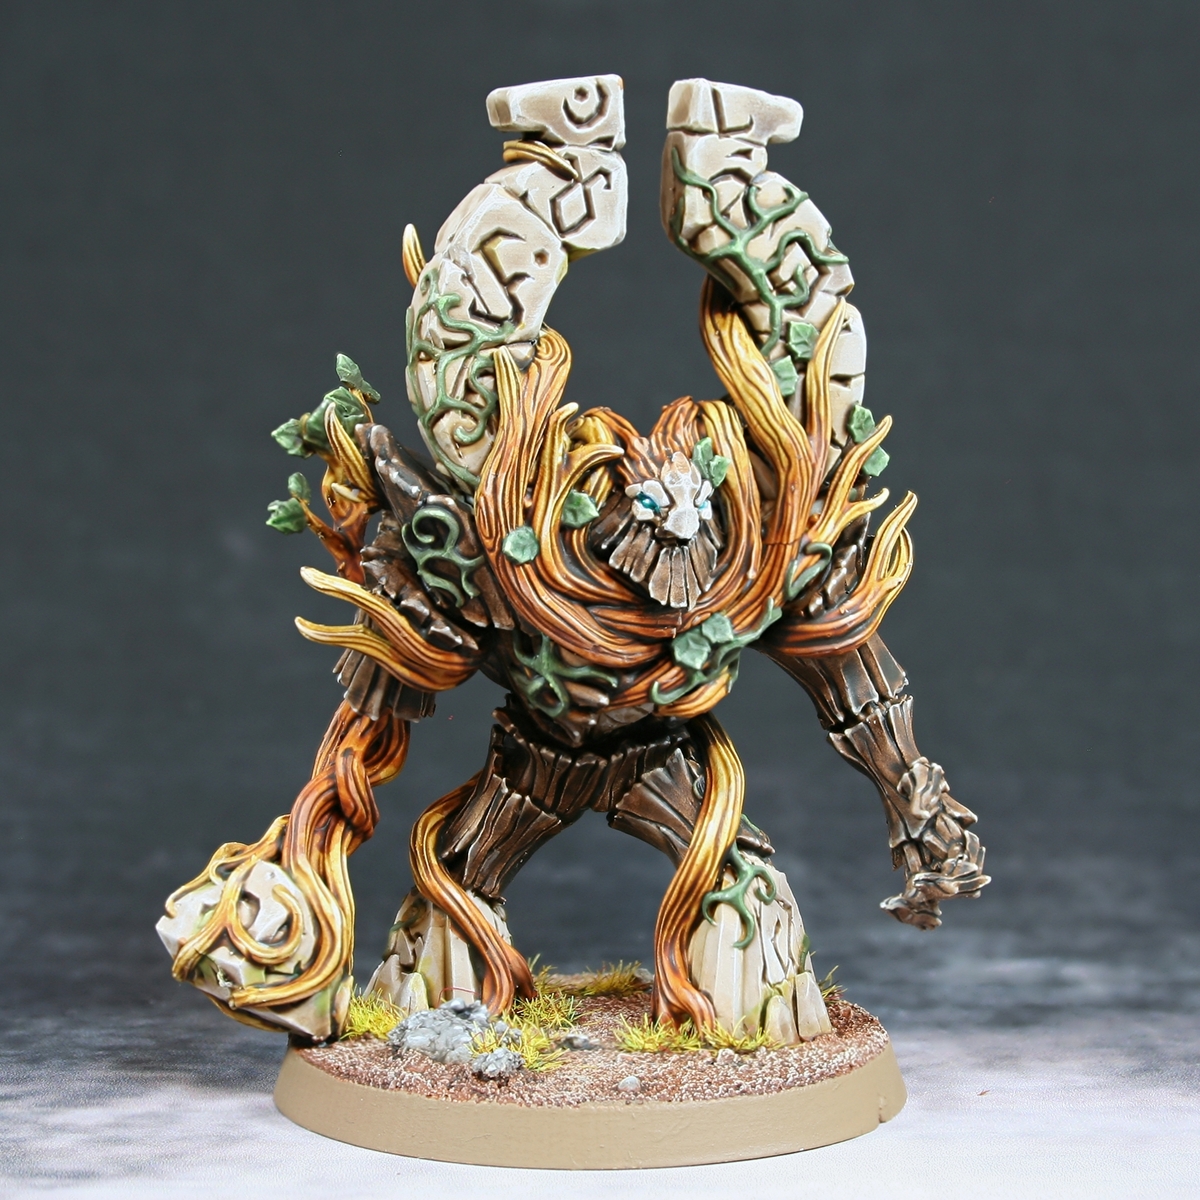
Therianor, the Forest Sanctum Protector
Here is how I painted the the main elements of this Legends of Signum miniature, kindly sent to me by the folk at Signum Games. If you were interested in getting one for yourself, follow the link on my profile.
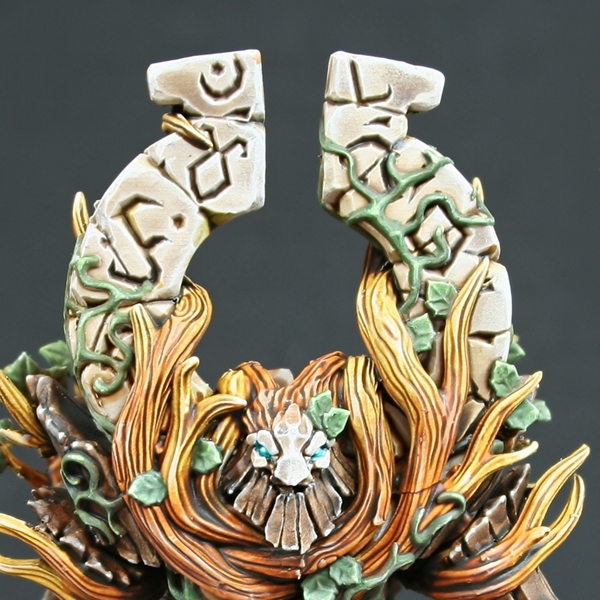 Rock
Rock
- Bascoat with a 1:1 mix of Rakarth Flesh and Grey Seer .
- Wash with Agrax Earthshade , thinned with an equal amount of Lahmian Medium . With this mix, I pull the wash into recessed and/or towards the ground, to pigment collects there. If you were feeling fancy or wanted more control, just glaze with Baneblade Brown .
- If you took your time and used Baneblade Brown in the last step, you may want to recess shade with Dryad Bark . This will add some much needed darkness in there.
- Drybrush exposed areas with Grey Seer .
- Lightly drybrush and edge highlight with a pure white. I like Dead White by Vallejo.
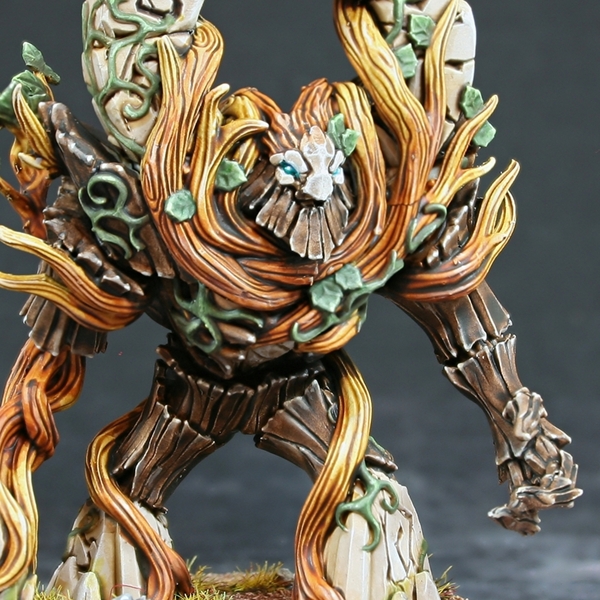 Bark
Bark
- Basecoat/prime with Wraithbone .
- Cover the bark with a layer of Wyldwood .
- Edge highlight with Baneblade Brown .
- Highlight more selectively with Karak Stone .
- Add specular highlights with Wraithbone .
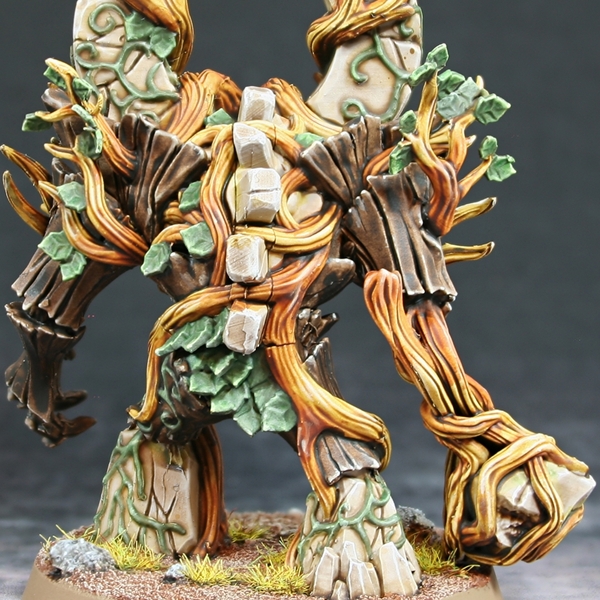 Vines
Vines
- Basecoat/prime with Wraithbone .
- Go over all of the lines with a coat of Aggaros Dunes .
- Take some Gore-grunta Fur , thninned with Contrast Medium and pick out areas closest to the body. Feel free to do a couple of passes to make it look richer towards the "top".
- Thin some Wyldwood in the same way and selectively shade recesses.
- Edge highlight with Deathclaw Brown from the darkest area, untill the highlight isnt noticable. Then switch to Bestigor Flesh and continue. Finally swithing to Ushabti Bone for the lightest areas.
- Selectively highlight in the same way as above, moving up the vine. Start with Bestigor Flesh , then Ushabti Bone and finally Wraithbone .
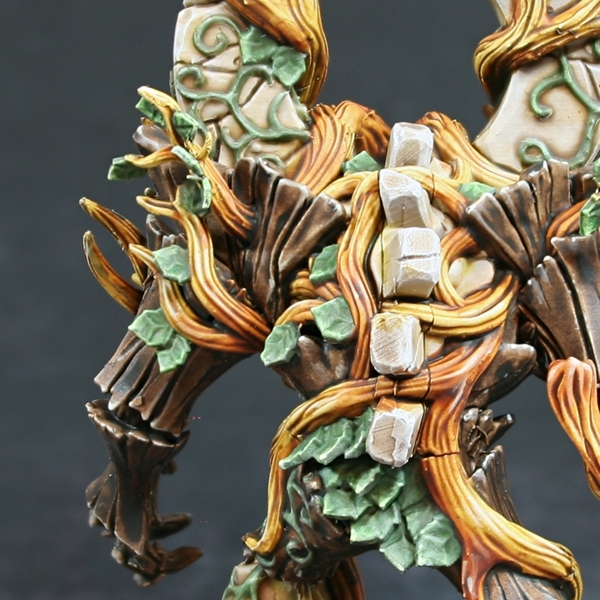 Leaves and Ivy
- Basecoat with Castellan Green .
- With Straken Green edge highlight the ivy and roughly highlight the out third of the leaves.
- Now take Nurgling Green and selectively edge highlight the ivy and the entire outer edge of the leaves.
- Mix Ice Yellow into your Nurgling Green , add a very small highlights to the ivy. I also use this mix to selectively highlight the tip of each leaf and add specular highlights to any prominent points around them too.
- Now add specular highlights of Ice Yellow to the tips of leaves and the points at the ends of the ivy.
- The leaves and ivy looked a little lifeless at this point, so I took a drop of Contrast Medium and added a small amount of both Ork Flesh and warp lightning. With this thin wash/glaze a applied a coat to all of the green, dragging my brush away from the brightest highlights.
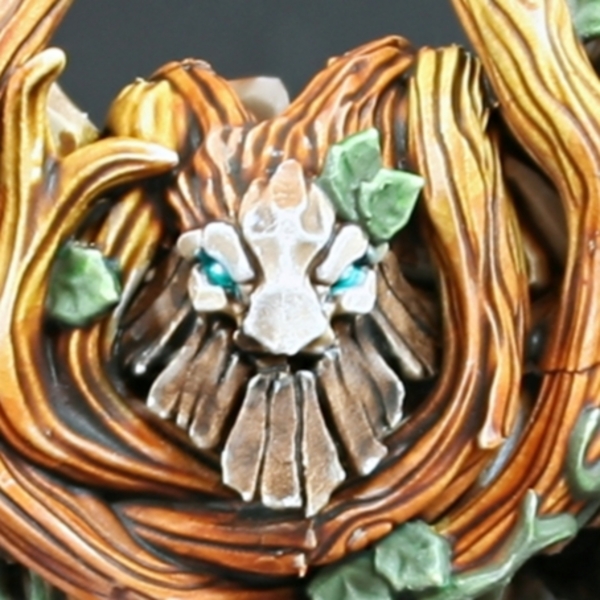 Glowing Blue Eyes
- Paint the eyes and the inside of the socket with a pure white, like Dead White .
- Now paint the eyes and socket with Aethermatic Blue , letting it pool around the eyeball.
- Some areas under the eyebrows looked a little too bright for my taste, so a glazed a little Kantor Blue furthest from the centre.
- Finally, finish off the eyes with a small dot of :dead white. This is both the pupil and the source of light, so try and place it with precision.

Rookie Brushes
RookieBrushes
Aspiring miniature painter and biscuit enthusiast. Here to share my hobby and help where I can.
Citadel Painting System 21
Base 6
- Castellan Green
- Dryad Bark
- Grey Seer
- Kantor Blue
- Rakarth Flesh
- Wraithbone
Shade 1
- Agrax Earthshade
Layer 7
- Baneblade Brown
- Bestigor Flesh
- Deathclaw Brown
- Karak Stone
- Nurgling Green
- Straken Green
- Ushabti Bone
Technical 2
- Contrast Medium
- Lahmian Medium
Contrast 5
- Aethermatic Blue
- Aggaros Dunes
- Gore-grunta Fur
- Ork Flesh
- Wyldwood
Vallejo Game Color
Base 1
- 72.001 Dead White
Vallejo Model Color
Base 1
- 70.858 Ice Yellow
