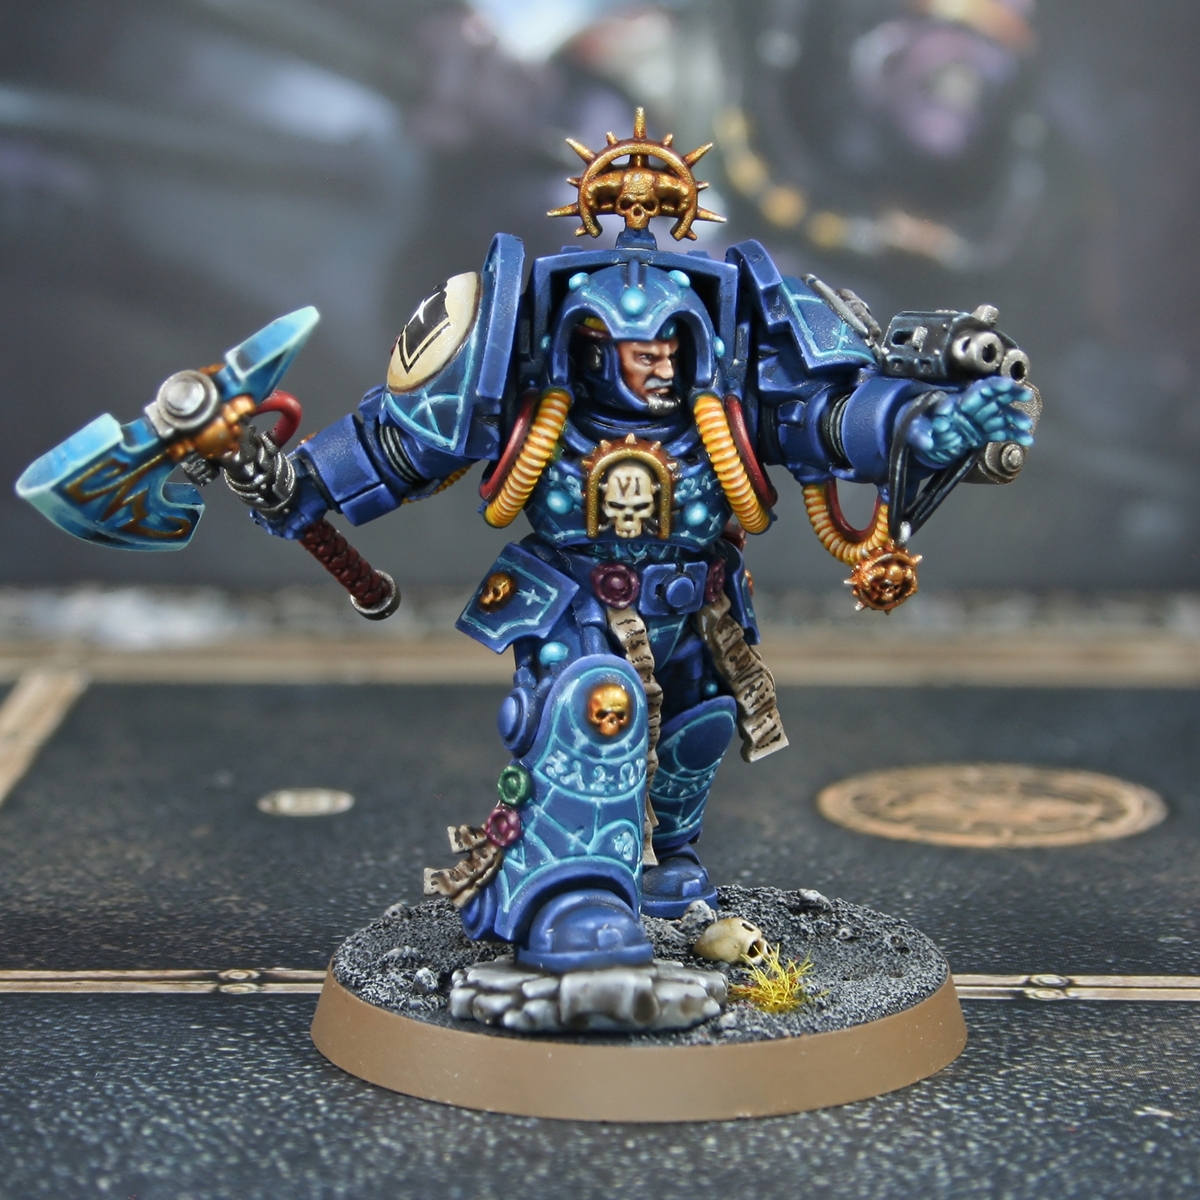
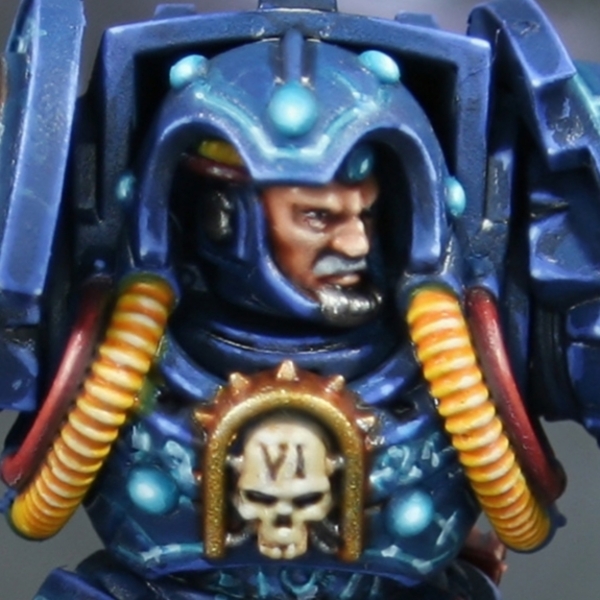
Space Marine Terminator Librarian

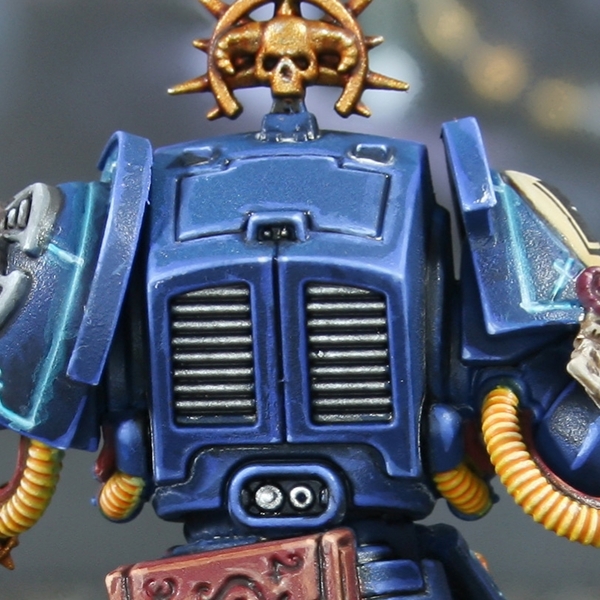 Blue Armour
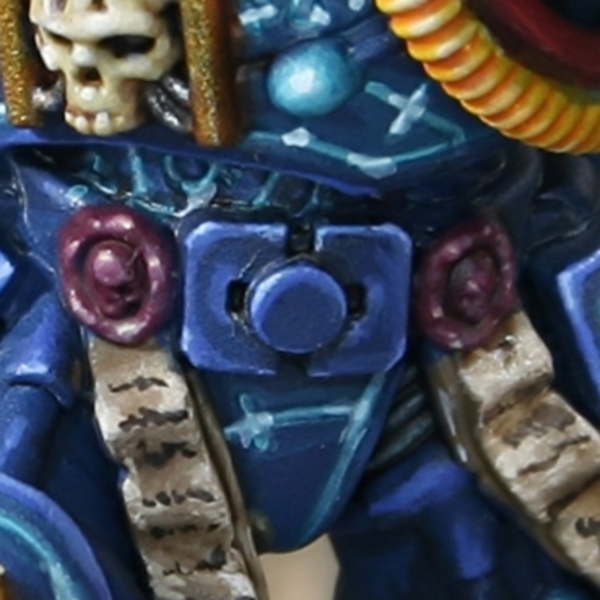
- Basecoat all of the armour with Kantor Blue .
- I then mixed my Kantor Blue 1:1 with Abaddon Black and thinned it down with some water (and optional flow improver). With this thin, wash like mix, I shaded all of the recesses with a fairly chunky line.
- Once this is dry, you can take some pure Abaddon Black and enhance dark recesses. Try to use the tip of the brush and shade within the previous stage, wherever possible.
- Now take some Altdorf Guard Blue and apply chunky highlights to all edges.
- Mix your remaining Altdorf Guard Blue with :an equal amount of Fenrisian Grey and apply fine edge highlights to all edges.
- Now add White to the mix and selectively highlight corvers and exposed curves. You should be adding about the same amount of White to the previous mix as you have paint, so it is a ration of 1:1.
- Finally, increase the amount of White further, until you have a nice off-white colour. With this very bright paint, pick out a few upward facing points with very small dots.
 Force Weapon
- Basecoat with Thousand Sons Blue .
- Begin painting/glazing highlights in with Temple Guard Blue .
- Enhance with Gauss Blaster Green pulling your brush towards the brightest point of the highlight, coverring a smaller area.
- Glaze Incubi Darkness on the opposing side to the highlights, running your brush in the opposite direction to the highlights.
- Enhance this shadow by glazing Abaddon Black away from the highlights, coverring a smaller area again.
- Edge highlight carefully with Gauss Blaster Green .
- Selectively edge highlight tips and corners with White .
If at any point you are unhappy with how the glazing is going, try switching back to the previous colour and glaze in the opposite direction. You can switch back and forth like this at any point, until you are satisfied.
 Grey Undersuit
- Basecoat with Administratum Grey .
- I then washed the tubing using Black Templar .
- Re-establish Administratum Grey where the light would hit.
- Start mixing White into your Administratum Grey , then highlight smaller and smaller as needed.
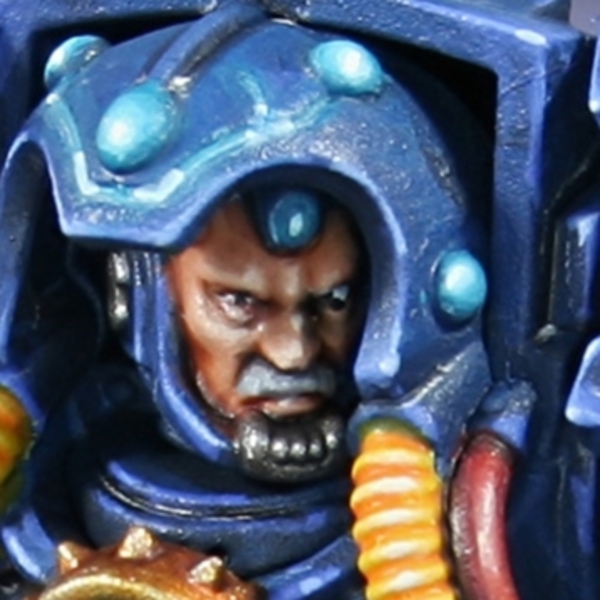 Caucasion Skin
- Basecoat with Cadian Fleshtone .
- Wash with Reikland Fleshshade .
- If any points need extra shading, I would recommend using some thing Doombull Brown .
- Re-establish the basecoat where needed, then mix increasing amounts of White into it, highlighting up raised points.
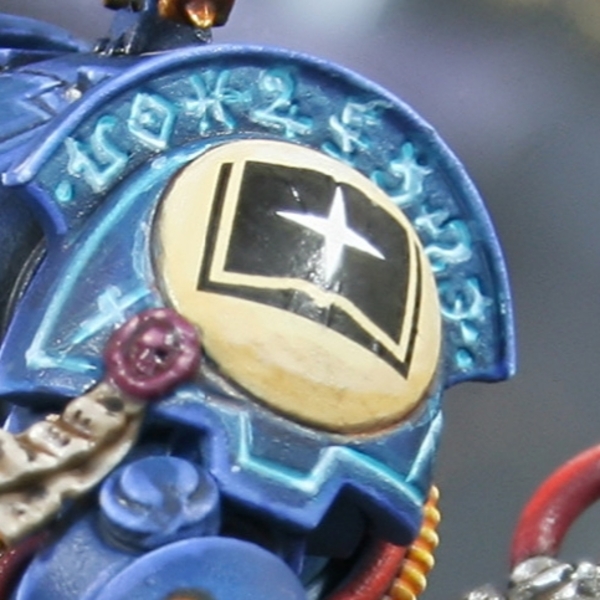
 Glowing Runes
When painting these details, I used a mix of 10 parts water and 1 part flow improver. This is to make the paint run into recesses easier.
- Thin some Sotek Green quite heavily, then run it into recesses. Don't be scared ot let paint get on either side of the recess, I was particuarly forgiving around the runes.
- Now thin some Baharroth Blue and grab a fine brush. WIth this paint I was a lot more careful, trying to just flood the recess.
- Finally, takle some White and thin it again. Fill the glowing runes with this paint and just touch the tip into points where lines meet and corners.
 Glowing Orbs
- Basecoat with Sotek Green .
- Shade armound the orb with a fine line of Stegadon Scale Green . This is to set the orb apart from the armour.
- Glaze towards the central, brightest point with Temple Guard Blue .
- Cover a smaller area with Baharroth Blue .
- Repeat again with a mix of Baharroth Blue and White .
- Finish with a small highlight of White .
 Bone Details
- Basecoat with Ushabti Bone .
- Wash with Skeleton Horde , thinned 1:1 with Contrast Medium .
- Pick out raised details with Screaming Skull .
- Add an increasing amount of White into your Screaming Skull and highlight smaller and smaller areas.
- Finish with a few select dots of pure White .
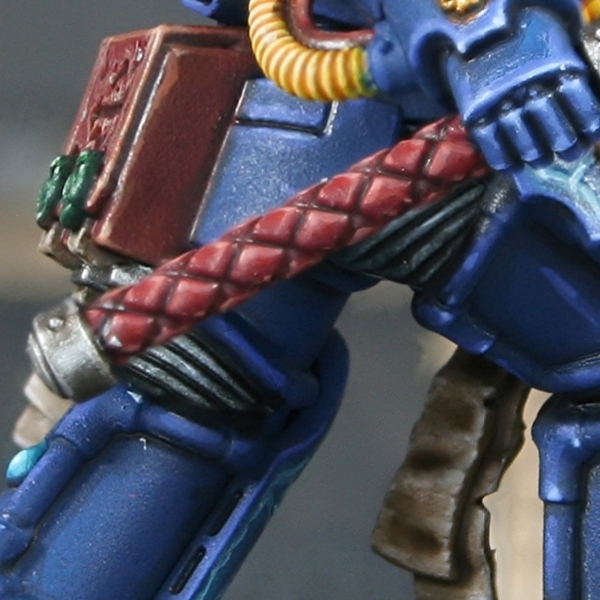
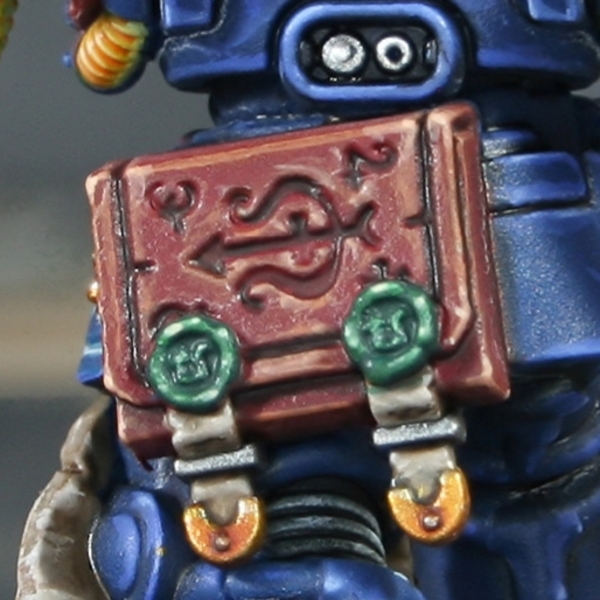 Red Leather
- Basecoat with Khorne Red & Doombull Brown , mixed 1:1.
- Take whatever Khorne Red & Doombull Brown you have left and mix in an equal amount of Abaddon Black . Thin it with a little water and shade all of the recesses with a thin brush.
- Apply chunky highlights of Doombull Brown .
- Fine highlgiht edges with a 1:1 mix of Doombull Brown and Fire Dragon Bright .
- Mix a little Screaming Skull into the prevous mix and selectively highlgiht corners and curves.
- Increase the amount of Screaming Skull again and add specular highlights to corners.
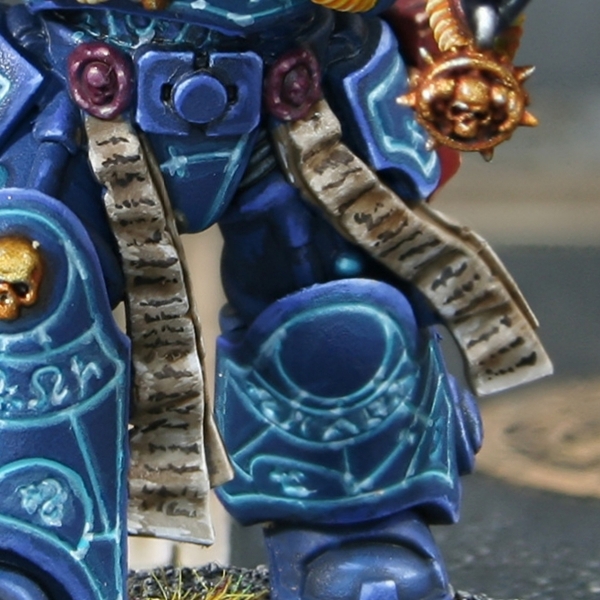 Parchment
- Basecoat with Steel Legion Drab .
- With Karak Stone paint all of the parchment, apart from the recess between the two pieces. Do a few coats for full coverage.
- Use Rakarth Flesh and paint in horizontal lines, picking out the raised details.
- Highlight the detail more selectively, aiming for most extreme folds and points. Use Pallid Wych Flesh for this.
- Glaze towards the "wax" with Agrax Earthshade . Also use this for a recess shade between the parchment an in cuts and splits.
- Selectively highlight edges with small amounts of White Scar or another pure white.
Parchment Text
- Mix Rhinox Hide and Abaddon Black 1:1. Use a brush with a very fine point and paint rows of dots and dashes across the parchment. Do a second pass if needed to make it look more organic and like writing.
 Purple Wax
- Basecoat with Screamer Pink .
- Wash detail with Nuln Oil .
- Highlight raised details with Pink Horror . Highlight using dots and dabs to make it look irregular and let the colours below show.
- With a 1:1 mix of Screamer Pink and Ushabti Bone , add smaller highlights, covering even less area.
- If you are feeling brave, add small specular highlight of pure Ushabti Bone within the previous highlights.
- Glaze with thinned Volupus Pink to unify highlights.
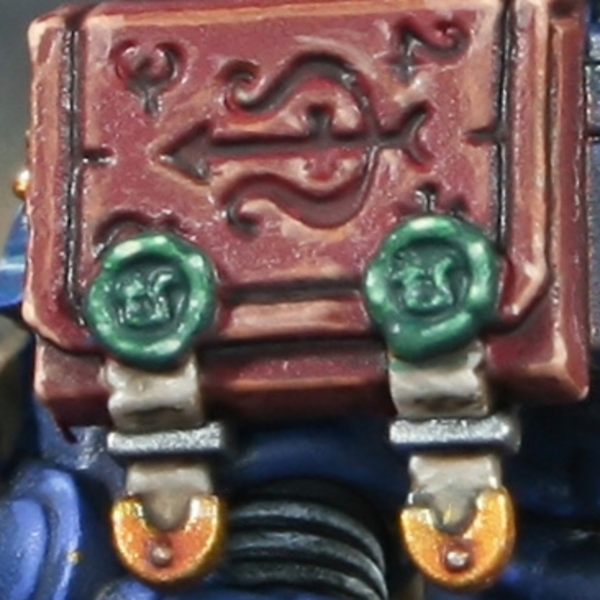 Green Wax
- Basecoat with Caliban Green .
- Highlight raised details with Warpstone Glow . Highlight using dots and dabs to make it look irregular and let the colours below show.
- With a 1:1 mix of Warpstone Glow and Ushabti Bone , add smaller highlights, covering even less area.
- If you are feeling brave, add small specular highlight of pure Ushabti Bone within the previous highlights.
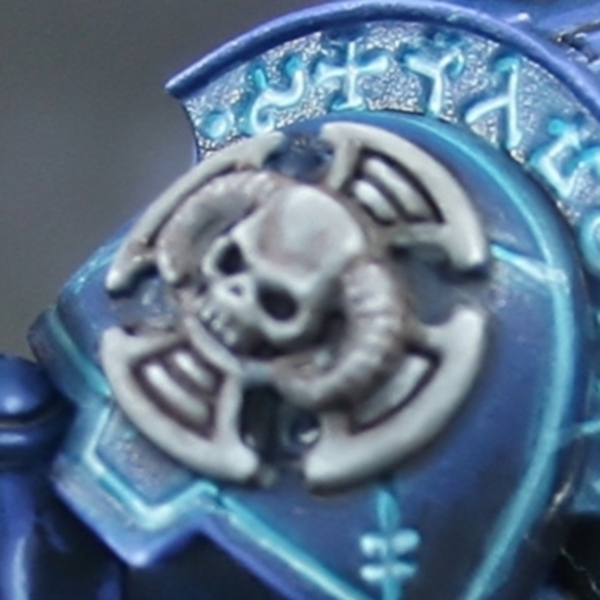 Crux Terminatus
- Basecoat with Dawnstone .
- Soft Shade with a mix of Dawnstone and Rhinox Hide . Thin it with at least the same amoundt of Lahmian Medium , to make the shading as easy as possible.
- In areas that need extra definition, mix Rhinox Hide and Abaddon Black 1:1 and selectively shade.#
- Start to highlight ridges with glazes of Administratum Grey .
- Add some White to your Administratum Grey and apply thin edge highlights.
- Finish with a few small dots of pure White where needed.
 Steel
Steel
- Basecoat with Leadbelcher .
- Wash with Nuln Oil .
- Edge highlight with Ironbreaker .
- Add fine highlights with small amounts of Vallejo Model Air Silver RLM01 Metallic .
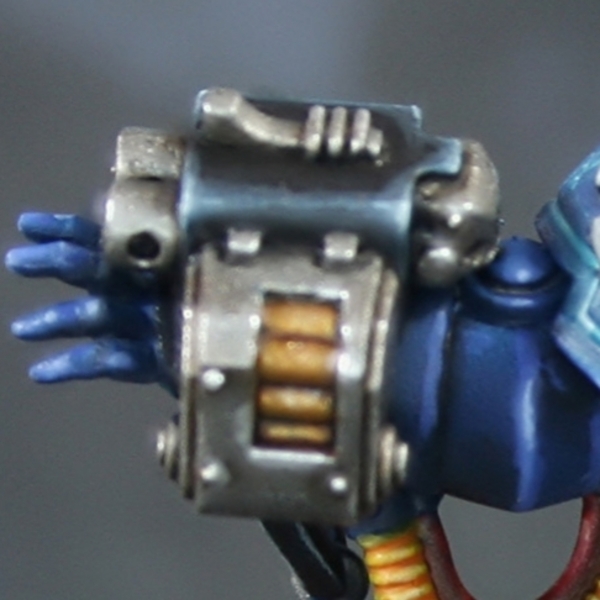 Black Weapon Casing
- Basecoat with Abaddon Black .
- Edge highlight everything with a thick line of Dark Reaper .
- Highlight everything again, this time with a thin line of Thunderhawk Blue . This colour is a good place to put in some scratches too.
- With Fenrisian Grey , selectively highlight upward facing edges, corners and prominent edges. Stick primarily to edges where the light would hit and always drag your brush towards the brightest point. If you added scratches previously, reinforce them with a smaller, thinner line underneath.
- Finally, edge add small highlights to the centre of the previous highlights and corners with Blue Horror . Try to make them very small, dots if at all possible.
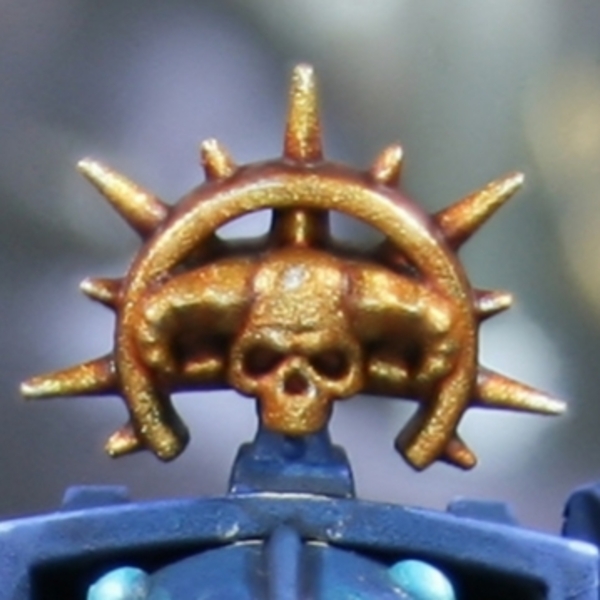 Gold Details
- Basecoat with Retributor Armour .
- Glaze shading in, using Gore-grunta Fur .
- If you need to darken the shading, mix some Rhinox Hide into it and do another (more selective) pass.
- Highlight raised details with Liberator Gold .
- Finish with selective highlights of Silver RLM01 Metallic .
 Yellow Tubing
- Basecoat with Golden Yellow (or Yriel Yellow ).
- Wash with Iyanden Yellow .
- Mix Screaming Skull into your basecolour and edge highlight edges..
- If any points need some extra punch, add small highlights with Wraithbone .

Rookie Brushes
RookieBrushes
Aspiring miniature painter and biscuit enthusiast. Here to share my hobby and help where I can.
Citadel Painting System 49
Base 14
- Abaddon Black
- Caliban Green
- Incubi Darkness
- Kantor Blue
- Khorne Red
- Leadbelcher
- Rakarth Flesh
- Retributor Armour
- Rhinox Hide
- Screamer Pink
- Steel Legion Drab
- Stegadon Scale Green
- Thousand Sons Blue
- Wraithbone
Shade 3
- Agrax Earthshade
- Nuln Oil
- Reikland Fleshshade
Layer 24
- Administratum Grey
- Altdorf Guard Blue
- Baharroth Blue
- Blue Horror
- Cadian Fleshtone
- Dark Reaper
- Dawnstone
- Doombull Brown
- Fenrisian Grey
- Fire Dragon Bright
- Gauss Blaster Green
- Ironbreaker
- Karak Stone
- Liberator Gold
- Pallid Wych Flesh
- Pink Horror
- Screaming Skull
- Sotek Green
- Temple Guard Blue
- Thunderhawk Blue
- Ushabti Bone
- Warpstone Glow
- White Scar
- Yriel Yellow
Technical 2
- Contrast Medium
- Lahmian Medium
Air 1
- Fenrisian Grey
Contrast 5
- Black Templar
- Gore-grunta Fur
- Iyanden Yellow
- Skeleton Horde
- Volupus Pink
Vallejo Model Air
Base 1
- 71.063 Silver RLM01 Metallic
Vallejo Model Color
Base 2
- 70.948 Golden Yellow
- 70.951 White