Glorious Blades
REMEMBER!
- Let layers dry between coats, use hairdryer if necessary
- 1 part flow improver, 1 part thinner 1 part paint as general rule for airbrushing
Airbrush Settings & Paint ratios
PSI 20-25, 3.5MM Needle, Iwata Neo
- Vallejo Primer 1:1 (Flow improver : Paint)
- FW Acrylic Inks add 1-2 drops Flow improver before ink into airbrush, no thinning required.
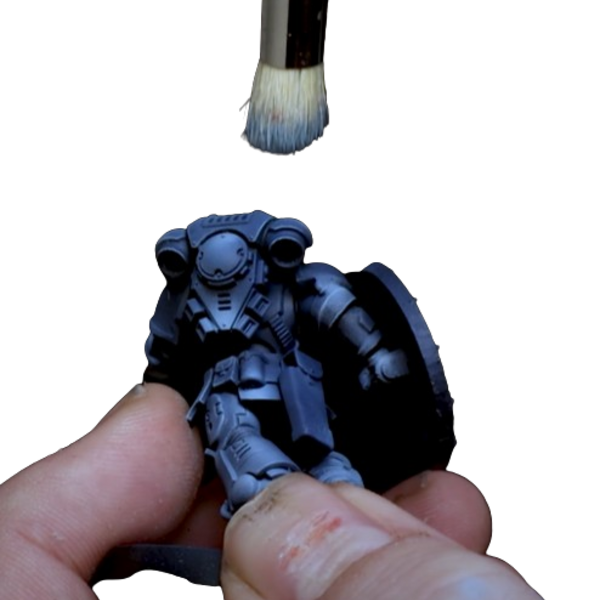
Step 1 - Prime
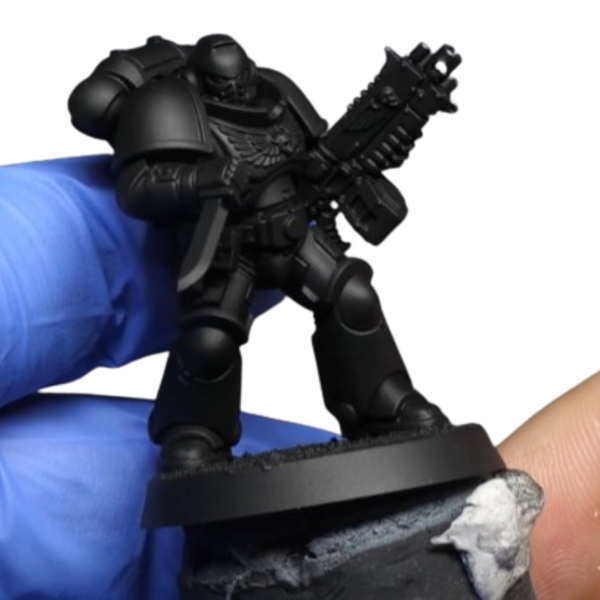 Prime using Black Primer
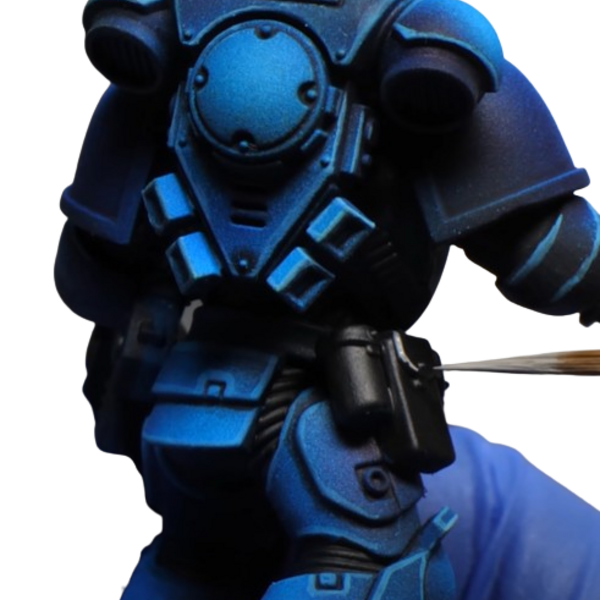
Step 2 - Highlights
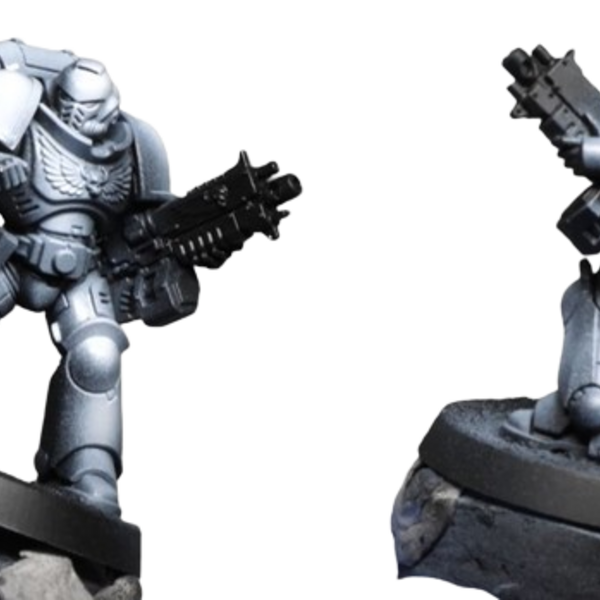 Highlight (using hobby light or photo for reference) with white ink.
Step 3 - Varnish
 Varnish using Mecha Gloss Varnish 1:1 Flow Improver : Varnish
Step 4 - Panel line
- Panel line with TAMIYA PANEL LINE ACCENT COLOUR BLACK, fixing any mistakes with white spirit or thinner on a cotton bud.
Step 5 - Base colour
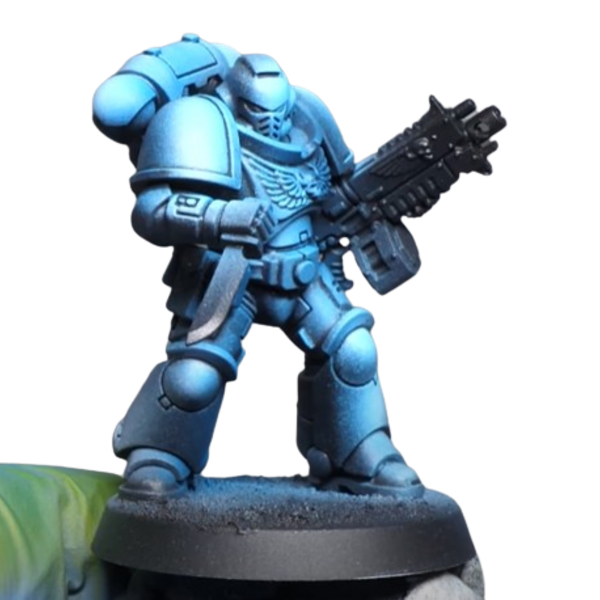 Using Purple Lake cover entire mini in thin coats, making sure not to obscure the details.
Step 6 - Edge highlighting/Drybrushing
 From a low angle gently drybrush Purple catching the edges of the model
Step 7 - Main Armor Details
 Black out areas to be painted metallic and any other accessories with :ProAcryl/PaynesGrey
Step 8 - Blocking out colours
Paint/Block out any of the below extraneous details (or skip if not relevant)
- Block out leather/pouches with Barbarian Brawn
- Block out undersuit with Payne's Grey
- Purity Seals Paper, tabards/cloth and crusader crosses/crux terminatus (shoulders, knees etc.) with Olive Flesh
- Bolter/Weapons casings, Purity seal wax, Capes/Ceremonial ropes Bold Pyrrole Red .
Metallics in next step will cover up any errors/overspill.
Step 9 - Blocking out metallics
- Metallics in Silver Bolter (Sight, Magazine, grip, muzzle), tubing, helmet details & backpack bottom vents.
- Chest Aquila and shoulders with Gold
Step 10 - Washes
- Wash pouches, and other brown details with Sepia Wash
- Wash chest aquila (gold), Purity Seals, Tabards and crusader crosses/crux terminatus with Sepia Wash allow to dry before any further work.
- Wash metallic (silver) details with Nuln Oil
Step 11 - Edge highlighting
- Edge highlight undersuit with Neutral Grey
- Highlight non-recessed areas of tabards with Olive Flesh allow to dry before next step
- Edge highlight tabard topmost areas and edges, Purity seal paper & crusader crosses/crux terminatus with Ivory
- Highlight soft brown details/leather (Belts/Pouches) with a 70-30 mixture of Barbarian Brawn mixed with Bold Titanium White and then gently dry brush up from base of pouches to simulate wear
- Edge highlight purity seal wax and bolter/weapon casings with Raging Rose
- Edge highlight Metallic silver details with Stormhost Silver
- Edge highlight both chest aquila and shoulders with White Gold
Lenses
- Paint base of eyes with Ice Yellow :
- Glaze with Green Glaze - if overfilled use clean brush to suck up excess
- paint shine line in upper left half of lenses with Bold Titanium White
Bases
- Prime Black Primer
- Dry brush Neutral Grey
- Wash with Dark Tone paying attention to deep cracks
- Lightly dry brush highlight of Stone Grey
- Generously wash with Mortarion Grime
- Light drybrush highlight of Stone Grey
- Final gentle drybrush highlight of Bold Titanium White in a circle around the edge (leaving a small untouched circle in middle of base to simulate shadow of model)
- Paint Dirty down moss into random areas on base, allow to dry at least 5 minutes
- Mix PVA Glue and flocking/grass of choice with small amount of water- paint this in small blotches to create moss effect
- Place dots of mod podge on base, press base into flower container to adhere flower flocking, knock any excess back into container
- Paint rim of base Black Primer
- Seal with Mecha Satin Varnish
Hot blades (Power weapons)
- Don’t wipe your brush on a paper towel. Wipe it on a dry non-porous surface (Such as a cutting mat/plastic cutting board)
- Keep a sponge slightly damp on your work area (Damp makeup sponge on wet palette) and rub your brush lightly into it, but not too much. The dry in dry-brushing is misleading, and where the chalkiness comes from.
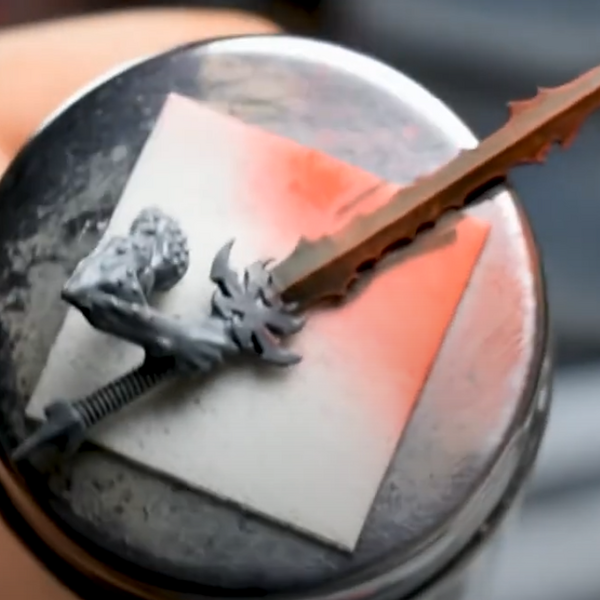 Dry brush Bold Pyrrole Red working down from the top of the blade, make sure to leave some black especially towards the hilt
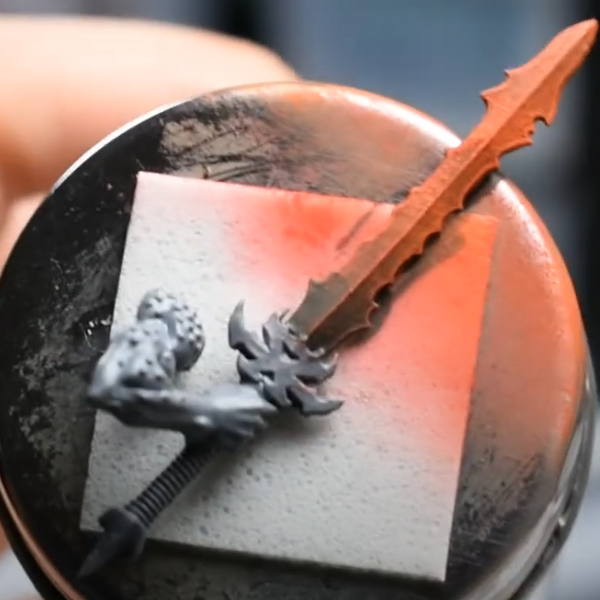 As before, work down from the top with Fanatic Orange covering slightly less of the blade toward the hilt
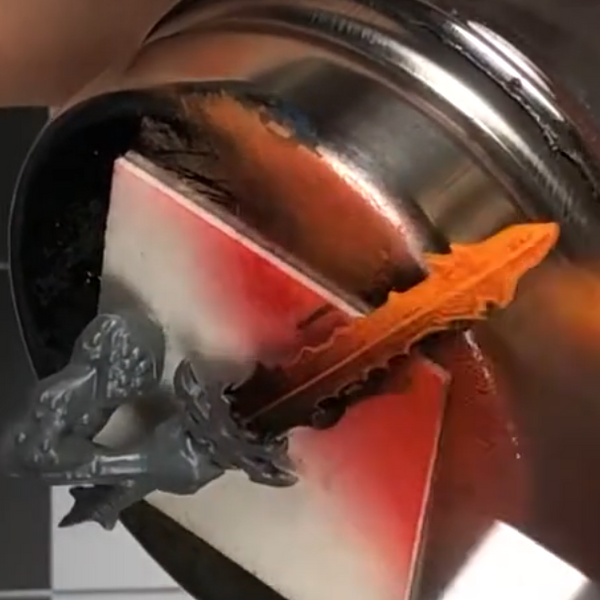 As before, work down from the top covering about half of the blade and VERY lightly towards the lower half with Orange Flare
 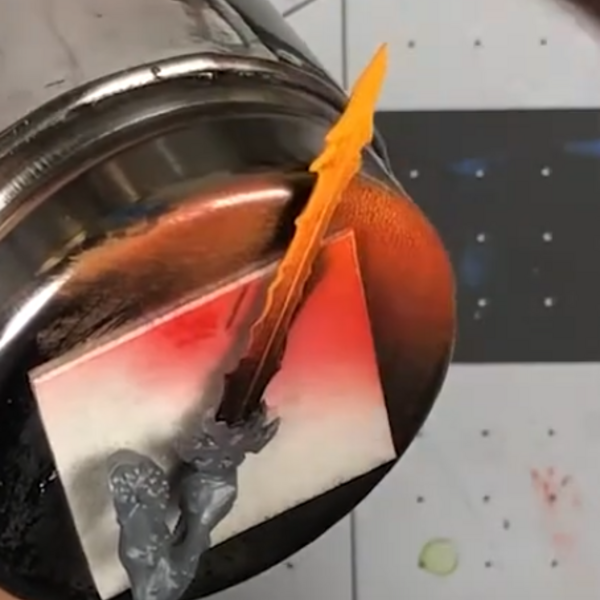 As before, focus Skulker Yellow : on the very top of the blade with a lighter drybrush on the top 30% of the blade
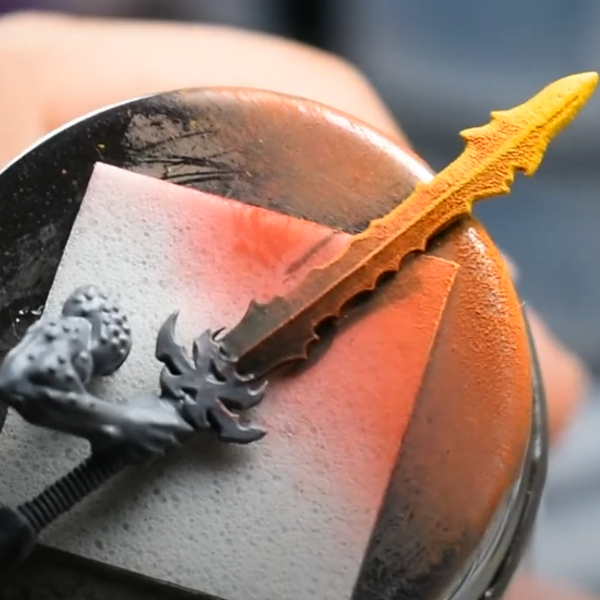 Finally for drybrushing focus on the top 20% of the blade with Yellow Flame with a light drybrush on the upper half.
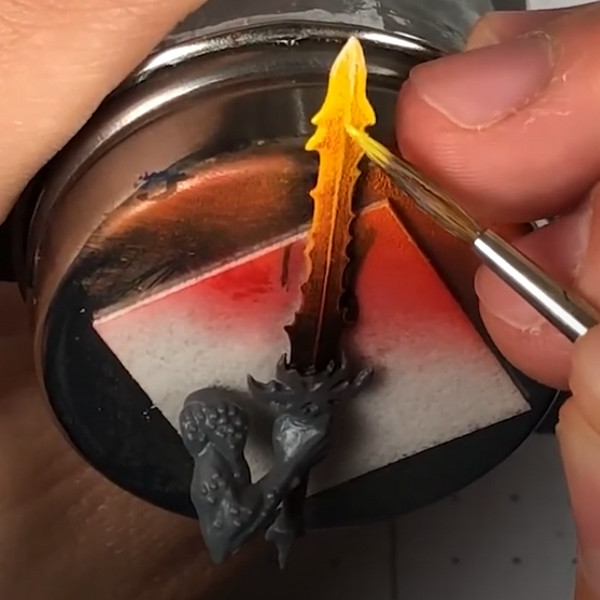 Edge highlight upper portion of blade with your brightest yellow (In this case, Yellow Flame )
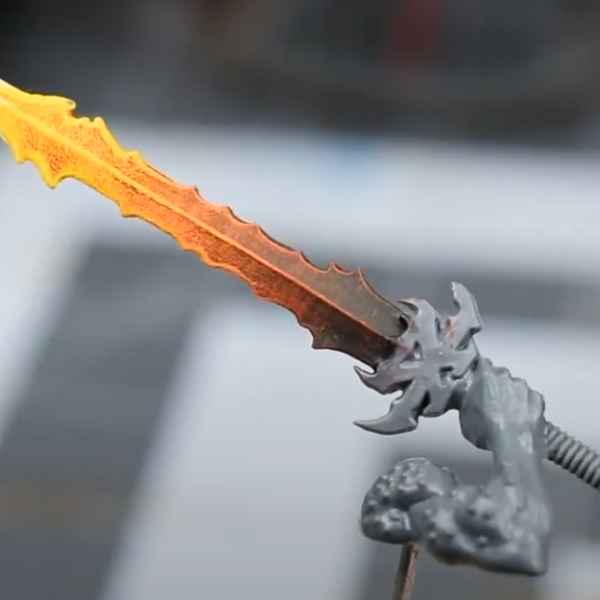 Finally edge highlight the very top 20% of the blade where blade would be hottest with Bold Titanium White
Daler-Rowney
FW Acrylic Ink 1
- Purple Lake
Monument Hobbies Pro Acryl 8
Base 6
- 001 Bold Titanium White
- 003 Bold Pyrrole Red
- 010 Purple
- 023 Ivory
- 041 Olive Flesh
- 075 Neutral Grey
Metallic 1
- 029 White Gold
Signature Series: Vince Venturella 1
- S02 Payne's Grey
The Army Painter Warpaints
Quickshade 1
- Dark Tone
The Army Painter Warpaints Fanatic
Acrylic 2
- Ice Yellow
- Raging Rose
Two Thin Coats 6
Shade 1
- Barbarian Brawn
Midtone 2
- Fanatic Orange
- Skulker Yellow
Highlight 2
- Orange Flare
- Yellow Flame
Glaze 1
- Green Glaze
Vallejo Game Color
Wash 1
- 72.200 Sepia Wash
Vallejo Mecha Color
Base 3
- 69.701 Mecha Gloss Varnish
- 69.703 Mecha Satin Varnish
- 70.642 Black Primer
Vallejo Metal Color
Base 2
- 77.724 Silver
- 77.725 Gold
Vallejo Model Color
Base 1
- 70.884 Stone Grey