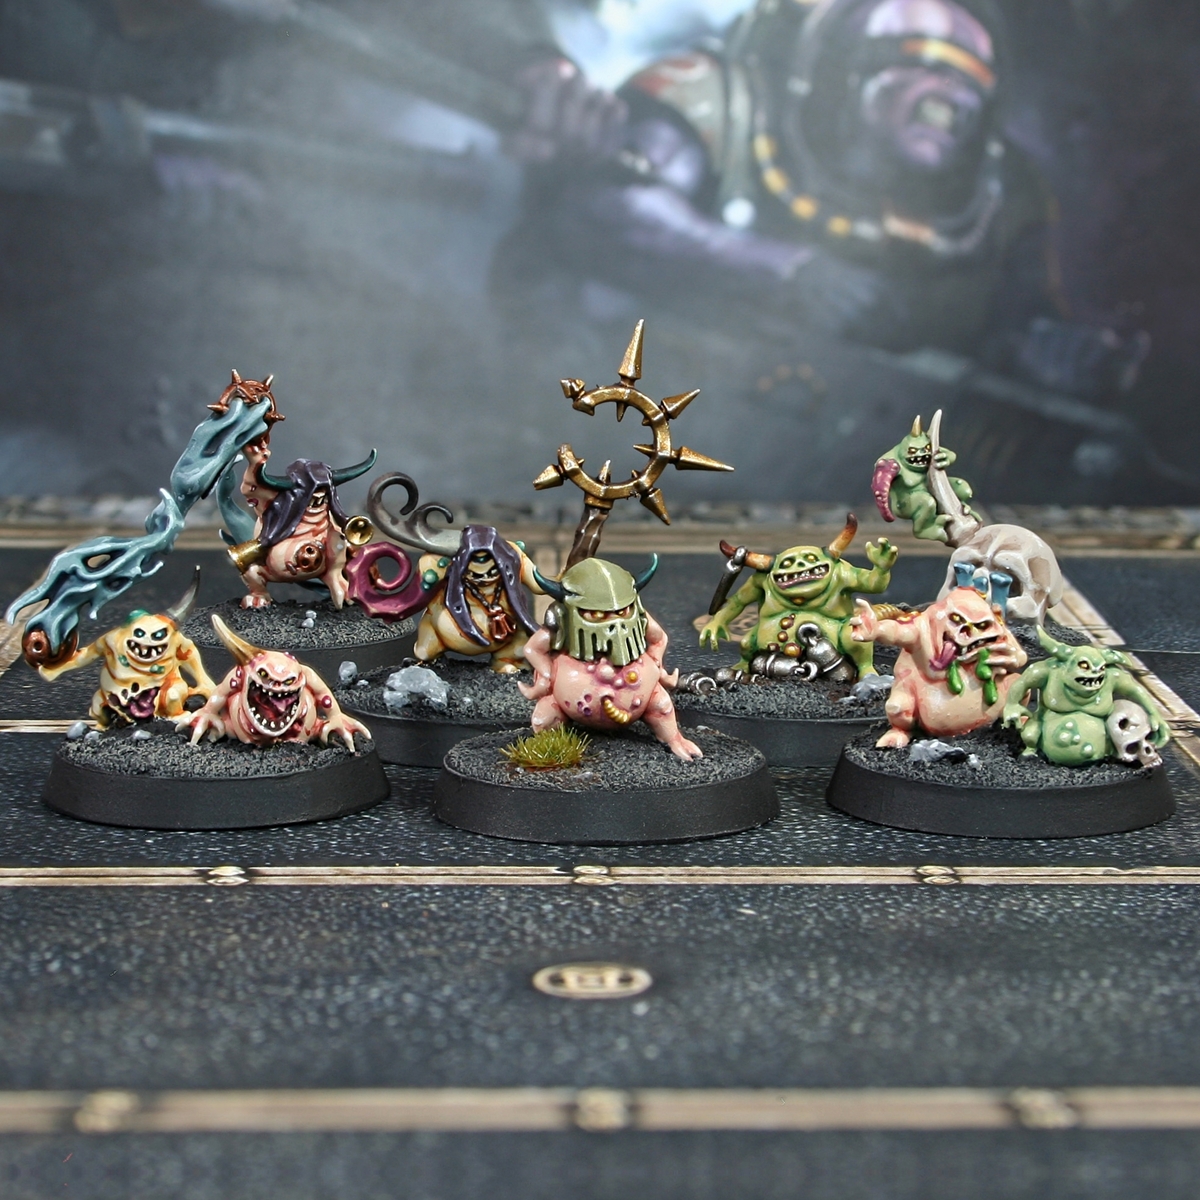

This started as a pure "How to paint Sassy Nurgling" guide, but he had far too many cute little mates to leave it there. Enjoy! Whilst I tend to remove them from my Death Guard miniatures, I really appreciate the sculpts and will happily paint them separately.
Since I am painting a whole bunch of pretty unique sculpts, I will start by tackling the main element they al have in common, the skin. Games Workshop have approached it in different way over the years, so I have used a few different colours too, depending upon what I though suited the sculpt best.
I will include the minor elements that may be of interest below the skin.
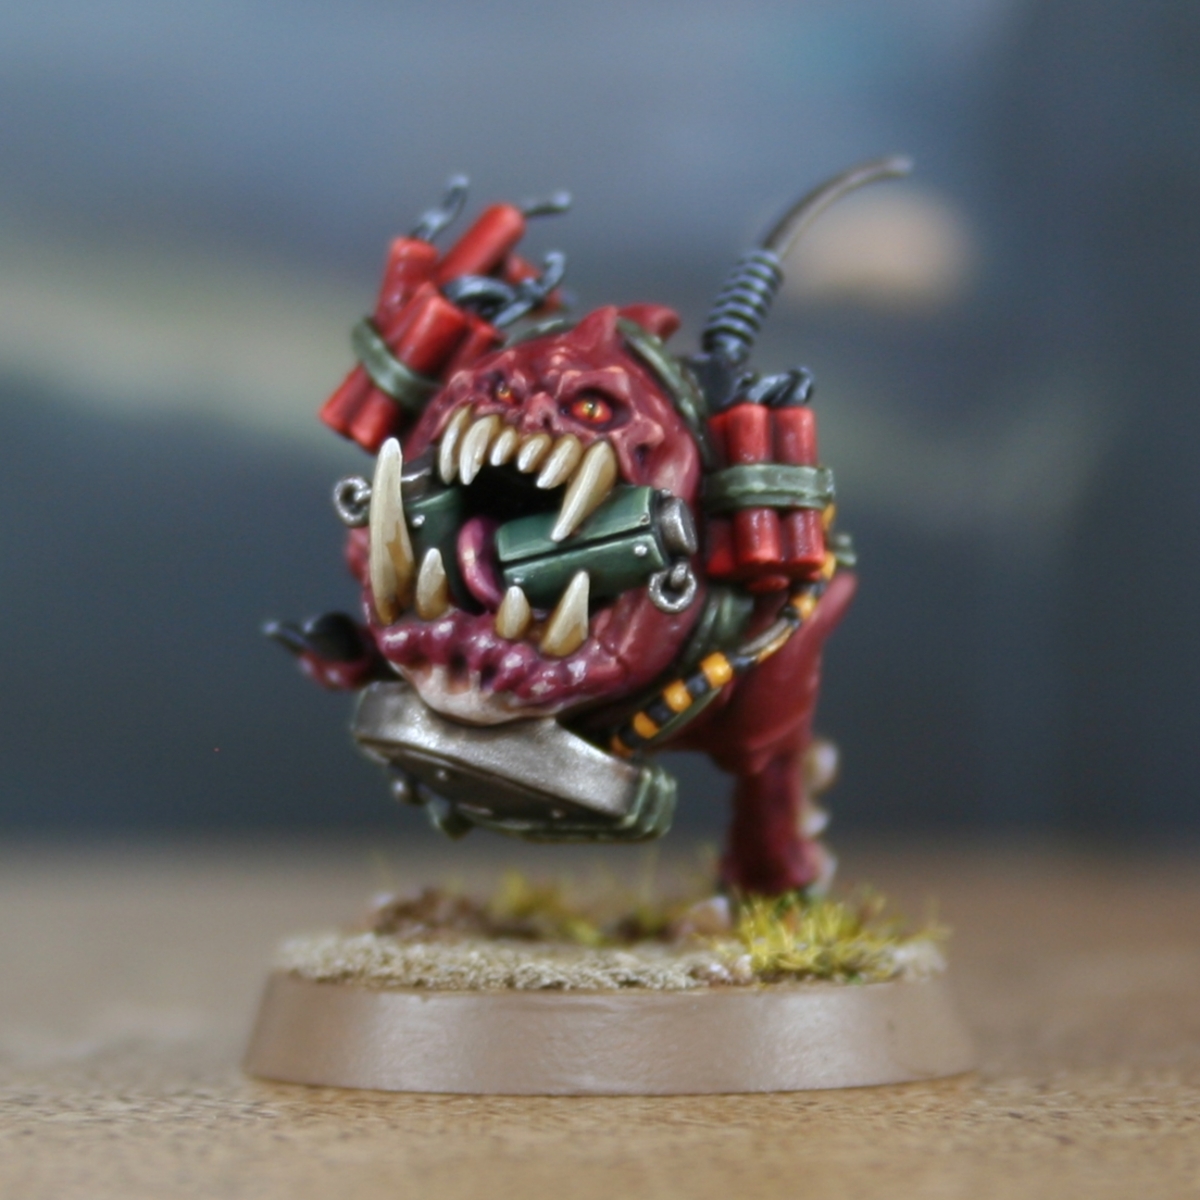
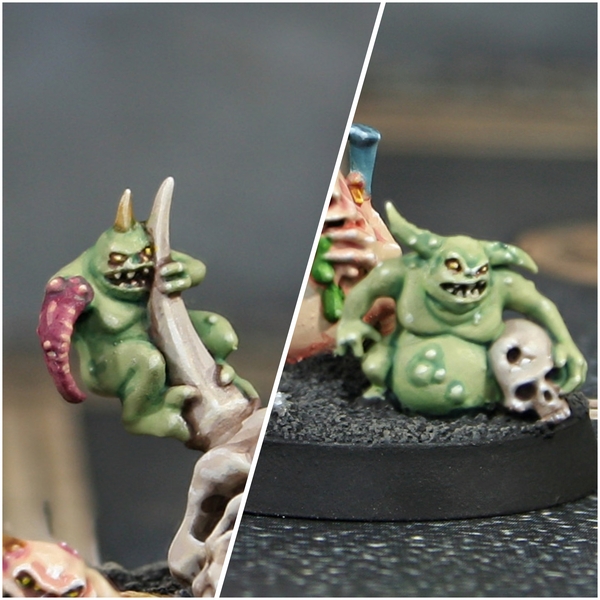
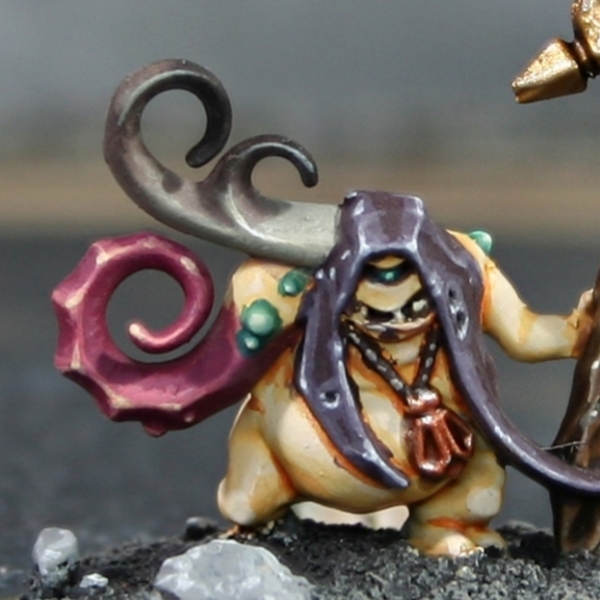
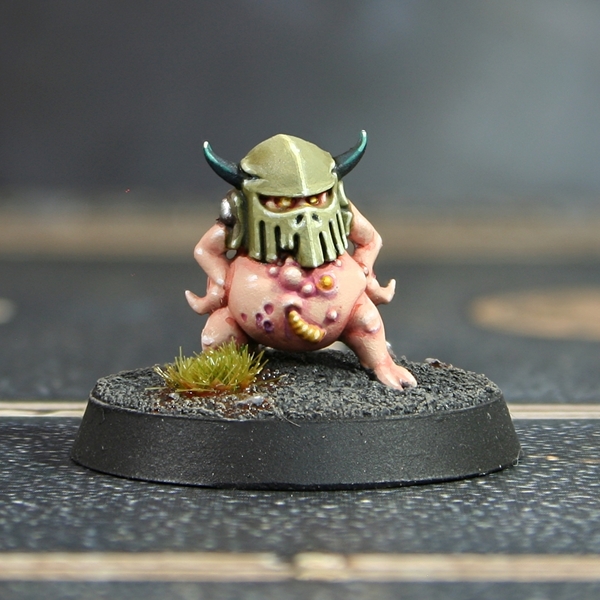 Sassy Nurgling
- Basecoat the skin with a mix of 3 parts Cadian Fleshtone , 2 parts White and 1 part Administratum Grey . This is quite a complex mix, but you only need to do it the once. I would advise mixing a decent amount, then just taking a small blob whenever you need it in future steps.
- Mix you base mix 1:1 with Doombull Brown , then thin it with a substantial amount of Lahmian Medium , until it is at a glaze consistency. Now use this to glaze in some general shading.
- Add extra definition to recesses with some thin Doombull Brown , all by itself. I use this colour purely for very deep folds, to show the break between his "hands" and his belly, plus to separate dem cheeks.
- Around boils and areas of soreness, glaze Screamer Pink , made more manageable with some Lahmian Medium .
- If you wanted to make any areas look extra grim, pop a small amount of Xereus Purple in there. I stuck to using this for little drips from a few wounds, mimicking the box art.
- Now mix your basecoat colour 1:1 with White and pick out some general highlights.
- Finish highlighting the skin with a few specular highlights of pure White .
For the boils, I simply covered them with a a small amount of Iyanden Yellow , then highlights with Screaming Skull .
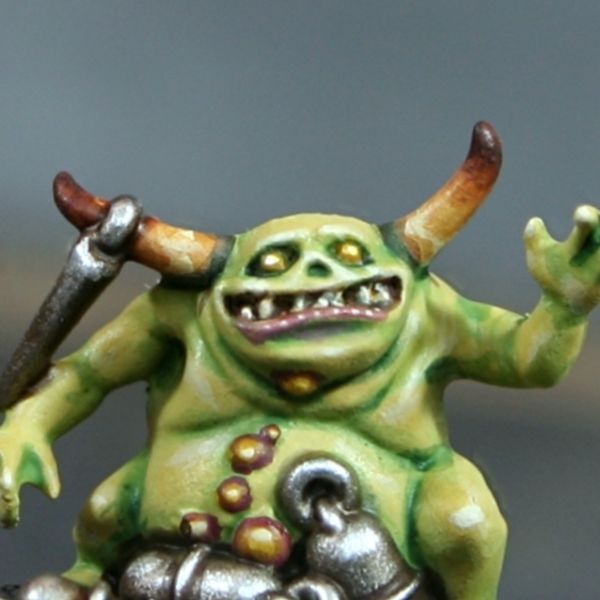
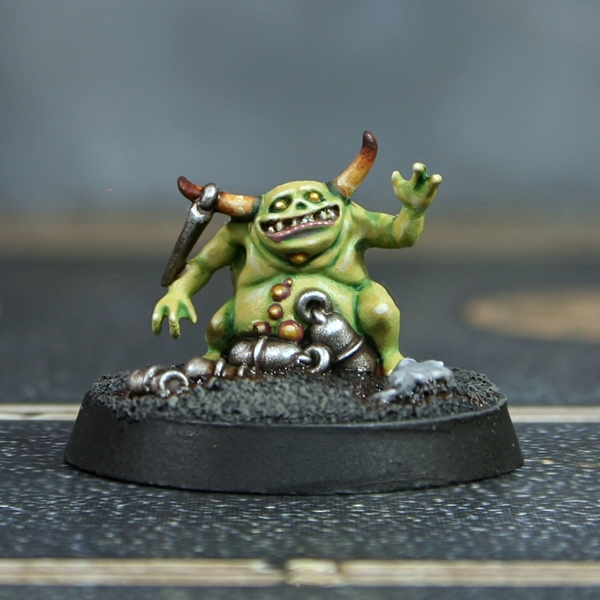 Minor Unclean One
- Basecoat with Ogryn Camo .
- Soft shade with Warboss Green .
- Shade deep recesses and define the breaks between skin with smaller amounts of Caliban Green .
- Glaze highlight with 2:1 Ogryn Camo and Zamesi Desert .
- Selectively highlight with Ushabti Bone .
- Finish with specular highlights of 1:1 Ushabti Bone and White .
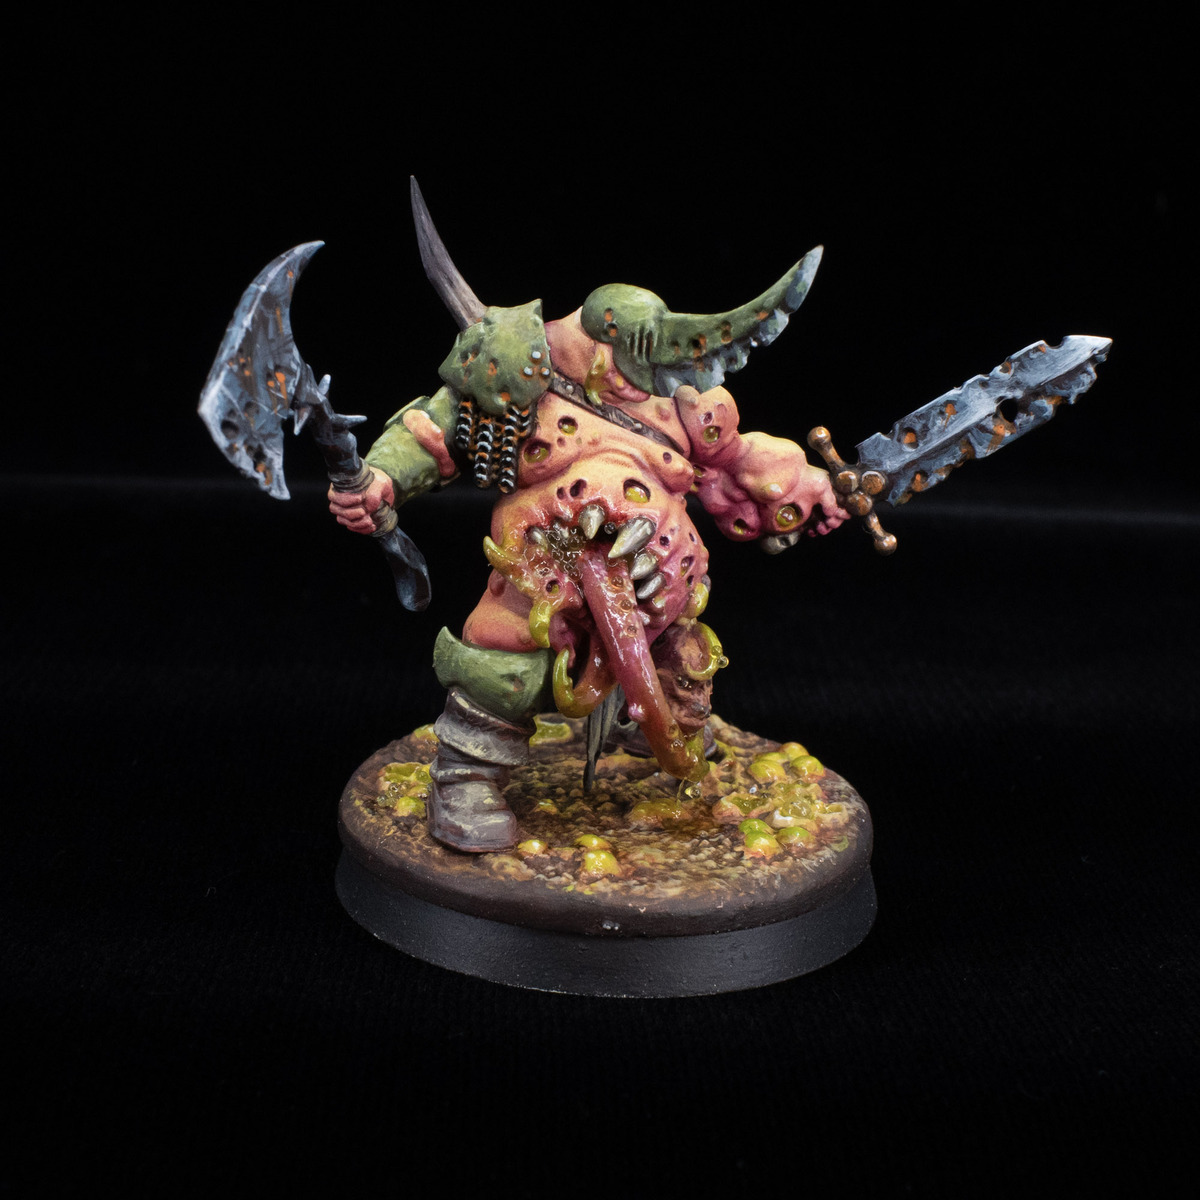
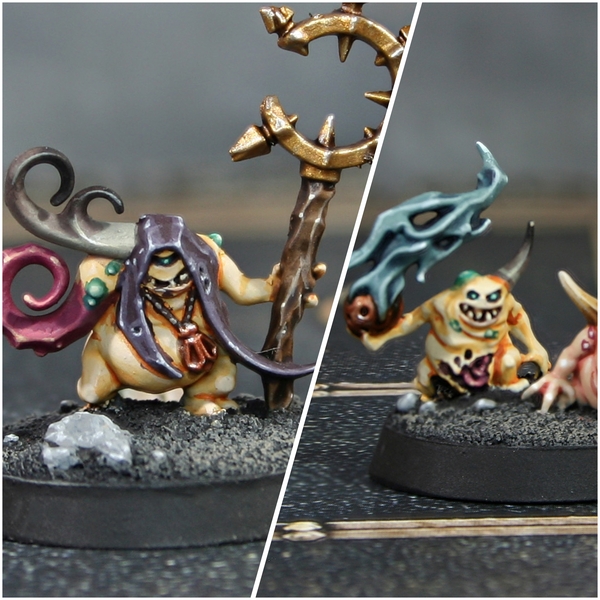
 Rotigus Jr.
- Basecoat with Flayed One Flesh .
- Thin Ungor Flesh with some Lahmian Medium and glaze in some general shading.
- Shade deep recesses and define the breaks between skin with smaller amounts of Skrag Brown .
- Highlight with 1:1 Flayed One Flesh and White .
- Finish with a few White highlights.
- For the boils, I simply covered them with a wash of thin Kabalite Green . Then mixed in ;flayed one flesh for the highlights, finishing with a dot of pure Flayed One Flesh .
 Green Nurglings
- Basecoat with Nurgling Green .
- Soft shade with Skarsnik Green thinned 1:2 with Lahmian Medium .
- Shade more carefully with 1:1 Skarsnik Green and Coelia Greenshade .
- Deep shade with Coelia Greenshade .
- Highlight with 1:1 Nurgling Green & Krieg Khaki .
- Add fine highlights with Krieg Khaki .
- Finish with very small highlights, using a Krieg Khaki and White mix.
 Green Armour
- Basecoat with Death Guard Green .
- Thin some Athonian Camoshade with an equal amount of water (or medium) and add some general shading to the recesses.
- Mix Rhinox Hide and Caliban Green 1:1 and shade deeper recesses with fine lines. I keep this mix pretty thin to control it easier.
- Add chunky highlights with Ogryn Camo , with a little Death Guard Green mixed in. Probably around 4:1.
- Add smaller, fine highlights with Krieg Khaki .
- Mix some White into the Krieg Khaki and selectively highlight corners.
- Finish the armour with specular highlights of White where needed.
 Yellow Eyes
- Pick out the eyes with Balor Brown .
- Highlight with Ice Yellow .
- Glaze with Iyanden Yellow , pulling the pigment away from the centre.
- Finish with a specular highlight of White .
 Green Eyes
- Wash the eye ant the surrounding socket with Incubi Darkness .
- Pick out the eyeball with Kabalite Green .
- Highlight with Sybarite Green .
- Finish with a specular highlight of Gauss Blaster Green .
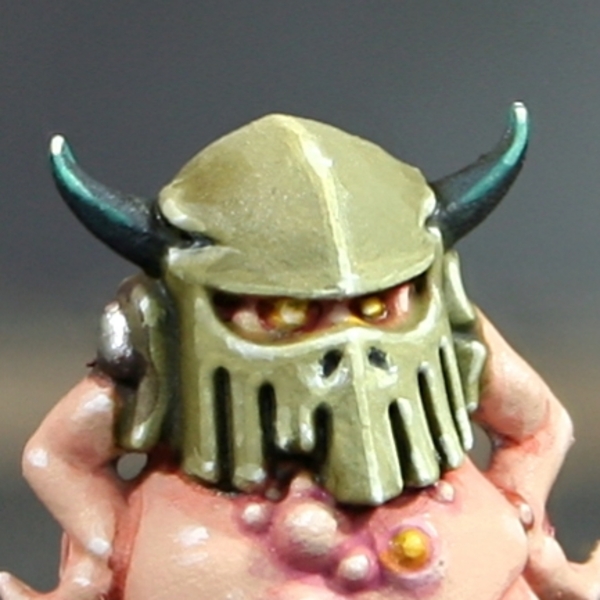 Dark Horns
- Basecoat with 1:1 Incubi Darkness and Black .
- Add cunky highlight with Incubi Darkness .
- Add fine highlights with Kabalite Green .
- More selectively highlight with 1:1 Kabalite Green and Ushabti Bone .
- Finish with a specular highlight of Screaming Skull .
 Bone Horns
- Basecoat with Ushabti Bone .
- Glaze the majority of the Horn with XV-88 , pulling your brush towards the tip.
- Repeat, covering three quarters of the previous area with Mournfang Brown .
- Now cover roughly half of the area with a glaze of Doombull Brown .
- Finish by glazing the quarter closest to the tip with Rhinox Hide .
You'll probably want to shade where the bone meets skin, to separate the materials. Just grab some XV-88 to add general shading, then define the break with a very small, thin line of one of the latter colours, like Rhinox Hide .
 Grey Horns
- Basecoat with 1:1 Skavenblight Dinge and Ushabti Bone .
- Mix a little Rhinox Hide into your basecoat and thin to a wash consistency. Now glaze half of the horn, pulling your brush towards the tip.
- Now add Abaddon Black to the previous mix and glaze about one third of the horn towards the tip.
- Glaze pure Abaddon Black on just the tip.
- Now highlight the lower half of the horn, by mixing some :ushabti bone into your basecoat and picking out ridges.
- Use pure Ushabti Bone to selectively highlight.
- Mix some White into your Ushabti Bone for a few very small highlights.
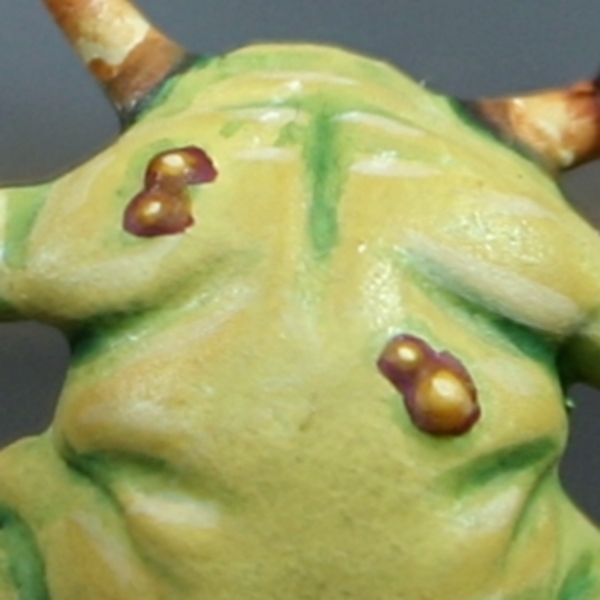 Yellow Boils
On green skin, I like to separate the boils from the skin more substantially. This is just because the purple shading around the base complements the skin so nicely.
- Start by basecoating with Screamer Pink , coverring both the boils and a little of the surrounding area. Assuming the skin is already painted and highlighted at this point, you are probably safe to apply this like a controlled wash.
- Pick out the boils themselves with Balor Brown .
- On particuarly large boils, you may want to highlight with 1:1 Balor Brown and Ushabti Bone .
- Highlight selectively with Ushabti Bone .
- Glaze with Iyanden Yellow , pulling the pigment away from the centre.
- Finish with a specular highlight of Ushabti Bone .
 Fleshy Tentacles
- Basecoat with Screamer Pink .
- With a 1:1 mix of Screamer Pink and Pink Horror Horror cover most of the flesh with a thick glaze. Pulling paint towards the centre always. Paint everything just outside of recesses where the dried shade has dried.
- Paint a smaller area with pure Pink Horror . Use the same technique as above to ensure a smooth transition. This time go over around two thirds of the area, painting higher to simulate where light would hit and adding the illusion of depth below.
- With a 1:1 mix of Pink Horror and Kislev Flesh flesh paint an even smaller area, pulling even closer to the centre and higher.
- With pure Kislev Flesh paint a very small area. For some tentacles I add this highlight as multiple small lines to add texture.

Rookie Brushes
RookieBrushes
Aspiring miniature painter and biscuit enthusiast. Here to share my hobby and help where I can.
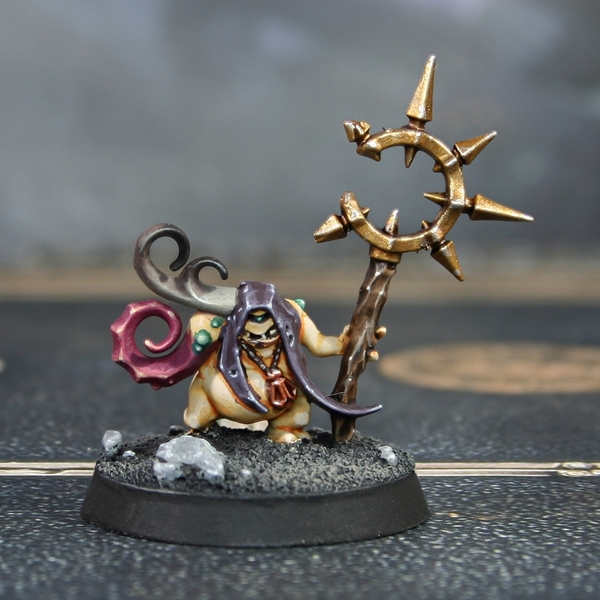
Citadel Painting System 34
Base 8
- Abaddon Black
- Caliban Green
- Death Guard Green
- Incubi Darkness
- Mournfang Brown
- Rhinox Hide
- Screamer Pink
- XV-88
Shade 2
- Athonian Camoshade
- Coelia Greenshade
Layer 22
- Administratum Grey
- Balor Brown
- Cadian Fleshtone
- Doombull Brown
- Flayed One Flesh
- Gauss Blaster Green
- Kabalite Green
- Kislev Flesh
- Krieg Khaki
- Nurgling Green
- Ogryn Camo
- Pink Horror
- Screaming Skull
- Skarsnik Green
- Skavenblight Dinge
- Skrag Brown
- Sybarite Green
- Ungor Flesh
- Ushabti Bone
- Warboss Green
- Xereus Purple
- Zamesi Desert
Technical 1
- Lahmian Medium
Contrast 1
- Iyanden Yellow
Vallejo Model Color
Base 3
- 70.858 Ice Yellow
- 70.950 Black
- 70.951 White