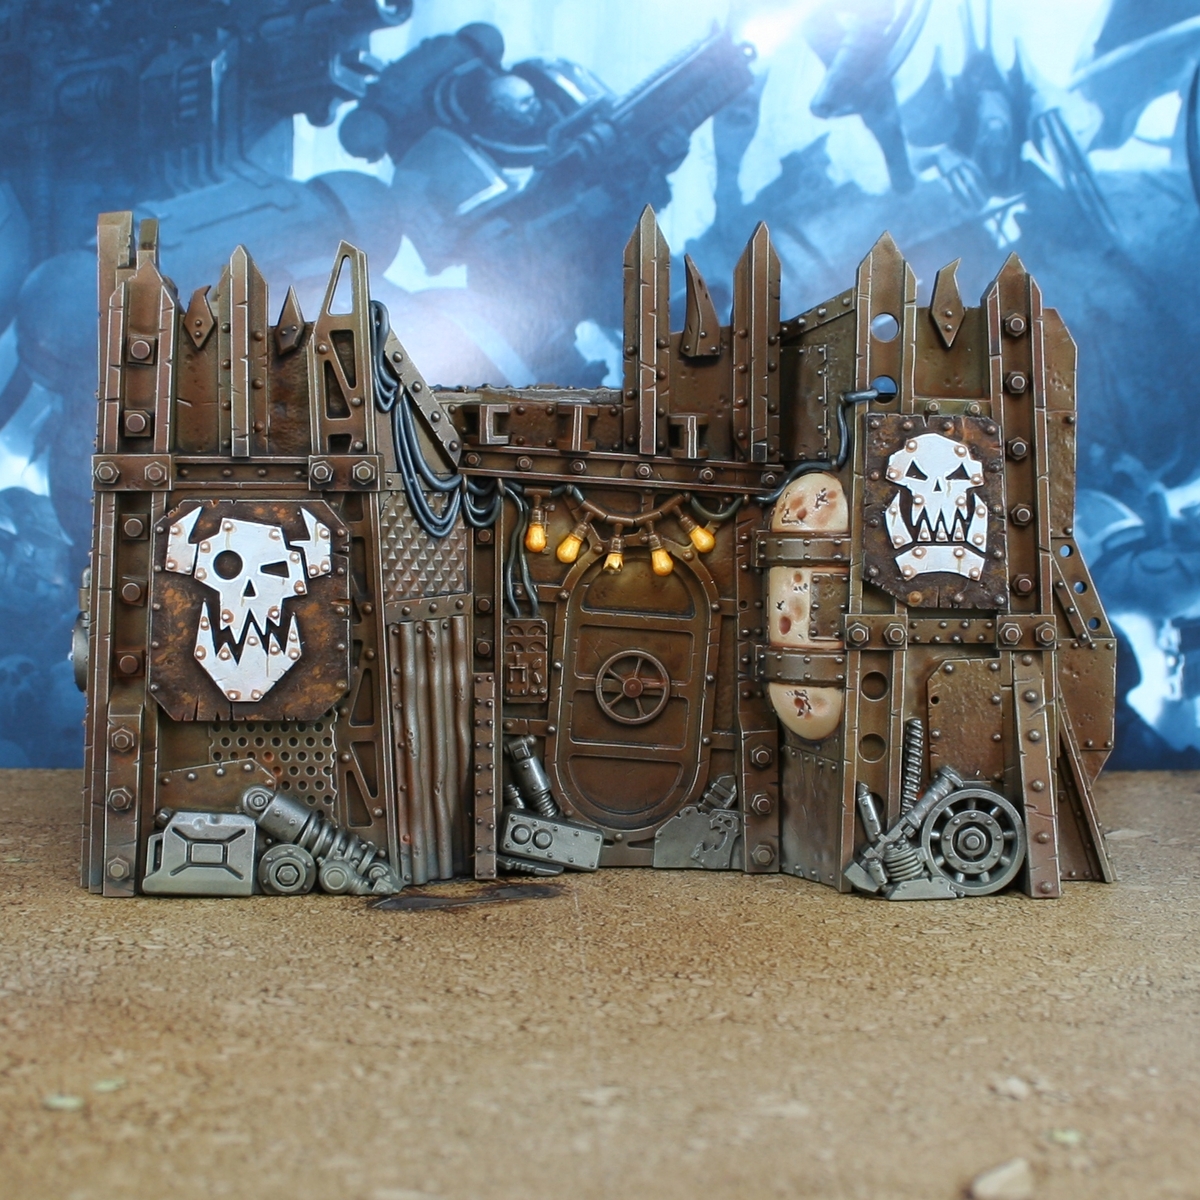

I wanted to get the scenery from Kill Team Octarius done quickly, so painted it with the (relatively) quick method. It is not perfect and I won't be picking out every detail, but I think it looks great on the table.
 Dirty Rusted Buildings
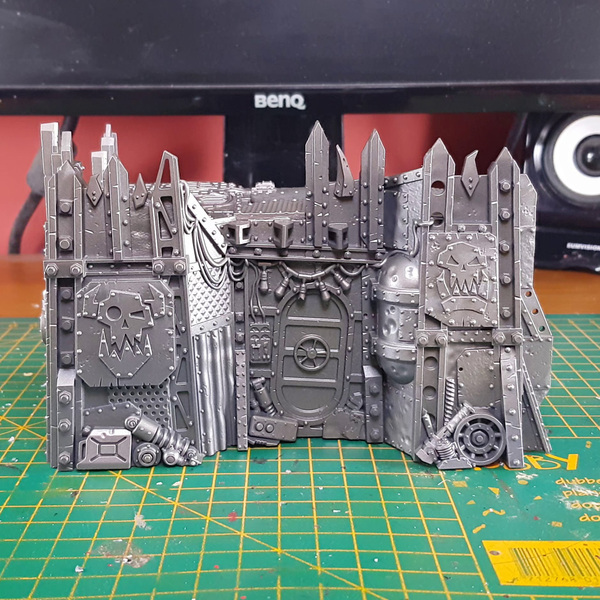 First, prime the terrain. I gave the building a quick blast with Chaos Black from underneath and then sprayed them from the top and sides with Leadbelcher . I don't plan on giving the inside of the buildings much attention, so I will keep these areas in shadow.
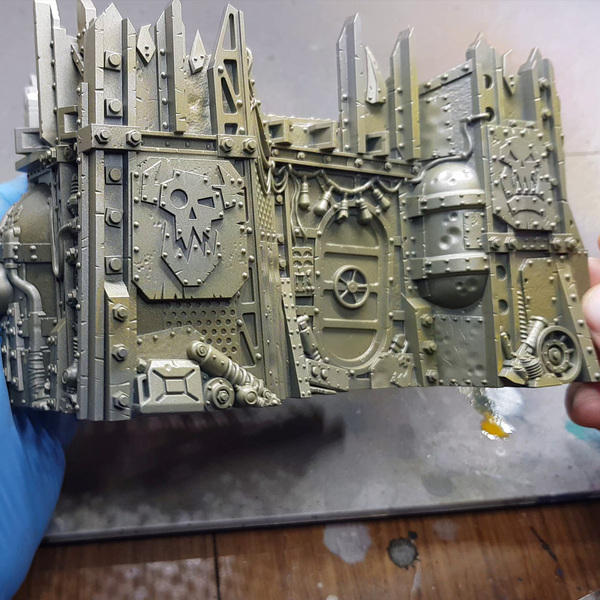 Spray a dirty-yellow roughly, over any areas where water and grime may settle. I used Plague Brown . For this stage and the next two, keep these paints very thin, to give them some transparency. If you are using Games Workshop paints, Zamesi Desert is pretty close.
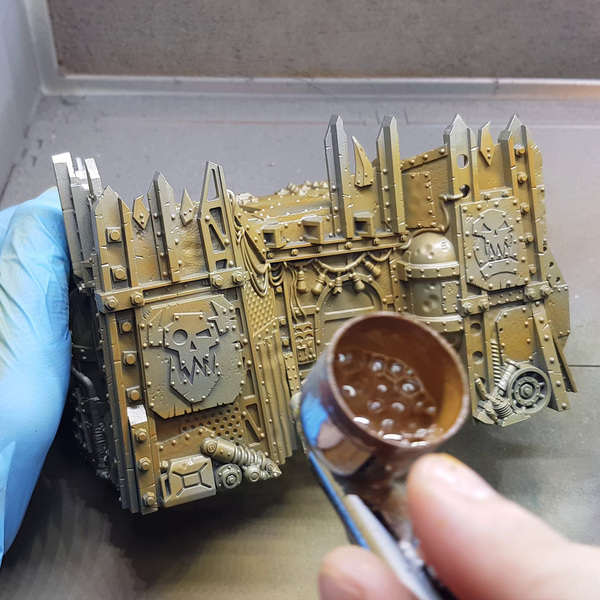 Being slightly more precise, use a saturated light brown to cover a majority of the same area again. This time be a little more precise. I used Beasty Brown for this step. If you are using Games Workshop paints, I would recommend Mournfang Brown .
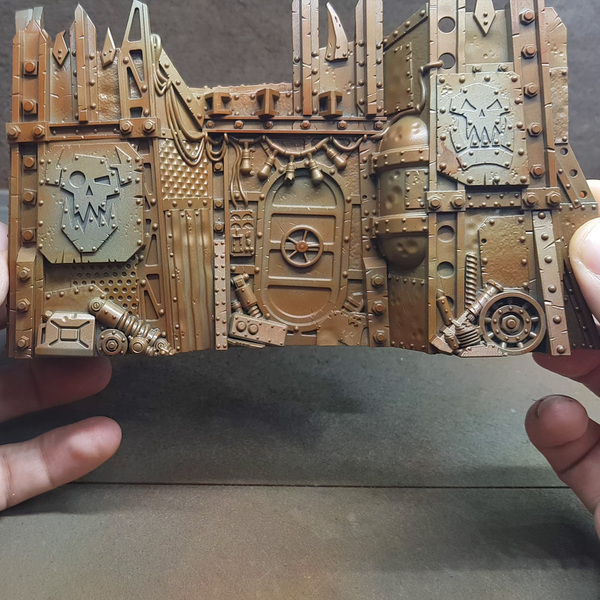 Trace rivets, panel lines and corners from the previous step as closely as possible. This time use a red brown, like Dark Fleshtone . From Games Workshops range, Doombull Brown is the equivalent.
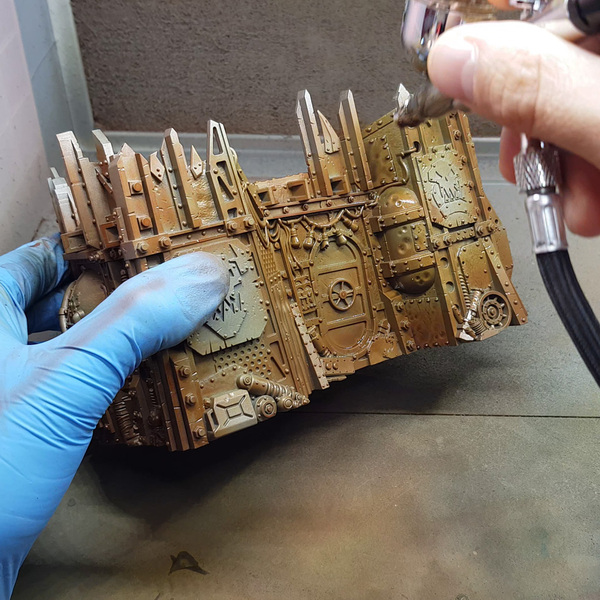 Spray the whole surface with a mix of washes, to get a grimy colour. I used equal parts Nuln Oil , Seraphim Sepia , and Agrax Earthshade . I gave it a couple of passes and adjusted the ratio to get the shade I wanted.
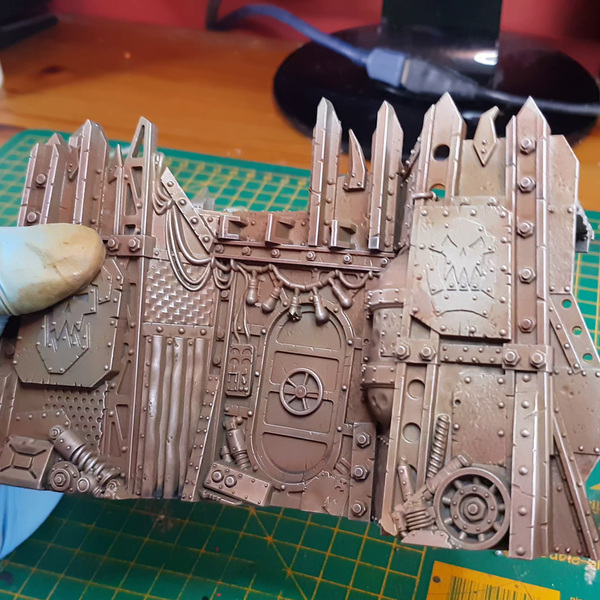 Drybrush with a light metal, just enough to pick out edges and rivets. I used Necron Compound with a large drybrush.
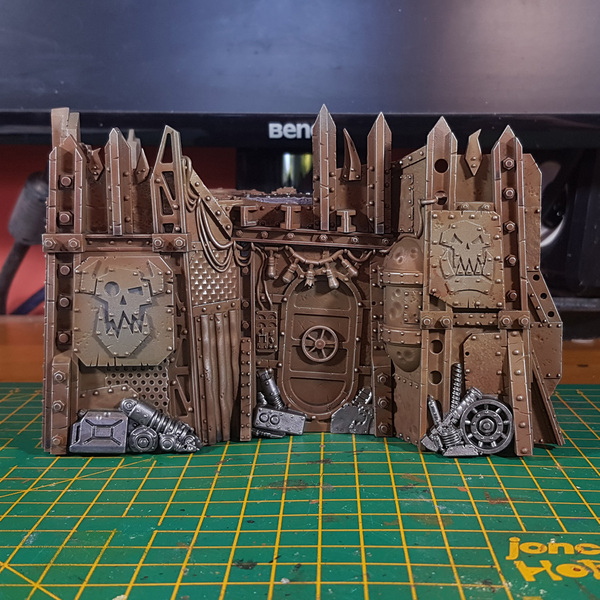 I felt that the overall tone of the metal was still too bland at this point, so wanted to add some variety. To do this I picked out the random pieces around the bottom and bits that looked like new additions with Steel , but Leadbelcher would have been fine too.
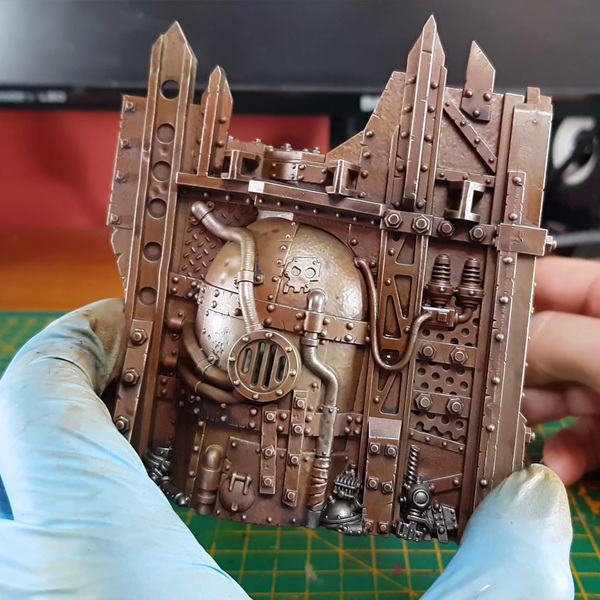 Now we re-unify everything with an oil wash. I first gave the buildings a thin coat of gloss varnish and then slapped some thin Vandyke Brown by Winton all over the metal. This darkened the recessed nicely too.
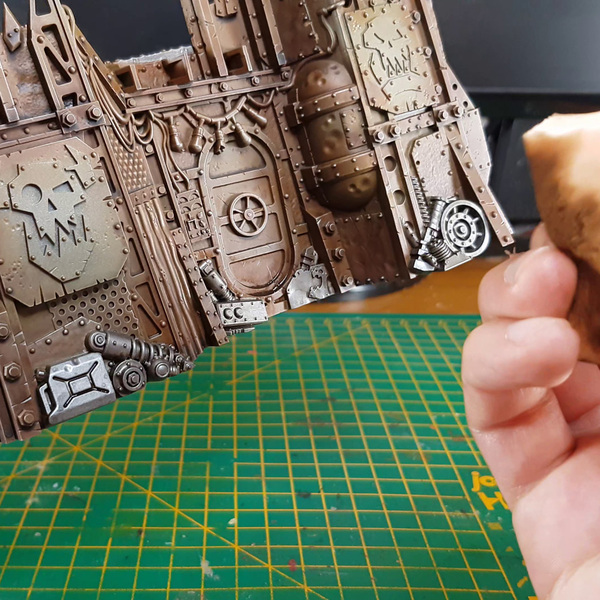 After 2 hours of drying I roughly ran dry make-up sponges all over the model, picking up any excess from exposed areas.
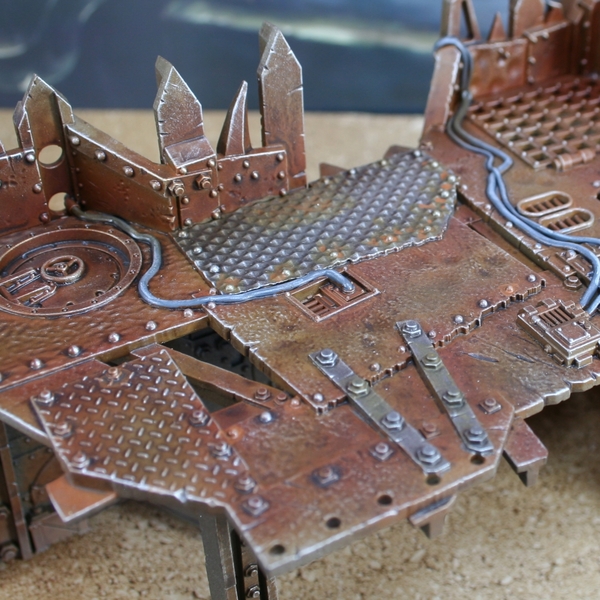 Now dry brush everything again with Necron Compound or another light metal, reestablishing the light areas from previously.
You could call the buildings done at this point and have something that looks OK on the table. If however you wanted to add some additional quick weathering to the rusted metals, check out the steps below.
- For silver details that needed dirtying up, I mixed 4:1 Agrax Earthshade and Rust . I brush this into recesses and areas where I can see the oil wash has pooled more. I bring my brush into the centre, to avoid too much pooling.
- To add some quick and easy rust effects, I just water down Skrag Brown . I pop this into deep recesses and around rivets. Try to stick to areas that look bland and don't be too uniform. Most of the water will just evaporate and the paint will dry much darker than when it is wet, so feel free to go pretty heavy.
- In particularly rusty looking areas I pop a small amount of Rust . If you don't have this paint, I would recommend Ryza Rust mixed with a little water or just a heavily thinned bright orange.
To break up the uniformity of the buildings and add some visual confusion, I decided to chuck in some different colours. I wanted to stick close to the games workshop scheme, but decided to do heavily desaturated versions and avoid typical ork clan colours.
 Dark Rusted Metal
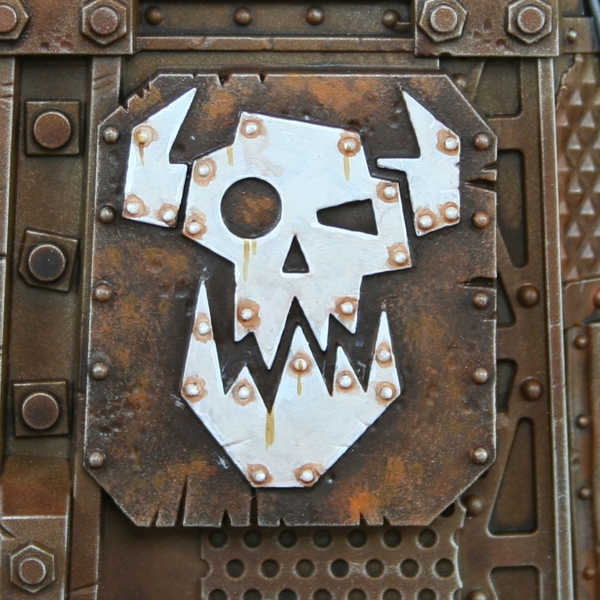
- Paint all of the surronds of the ork faces with Rhinox Hide . Dont worrky about keeping it off of the faces/skulls, these will be painted later.
- Now sponge the area from the last step with Mournfang Brown , to add some texture.
- Sponge a smaller area with Deathclaw Brown
- Glaze the area with Seraphim Sepia to help the three previous browns blend together.
- Stiple small areas of thin Skrag Brown within the lightest brown patches.
 Rusted Whitewashed Metal
- Basecoat with Corax White .
- Wash all of the white with very thin Reikland Fleshshade . I used three drops of thinner to one drop of wash.
- While the wash is still a little wet, pop small amounts of thinned Mournfang Brown into places you want to be dirtier. The wet wash should help it stick to recesses.
- I like to add occasional drips with a 4:1 mix of Agrax Earthshade and Rust here and there.
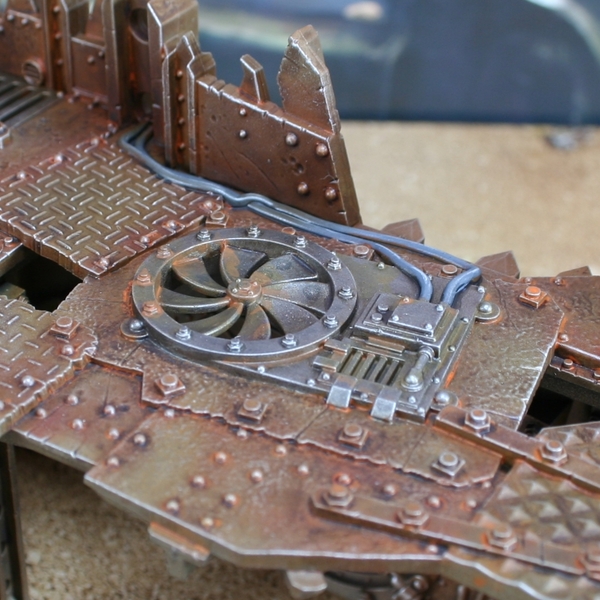
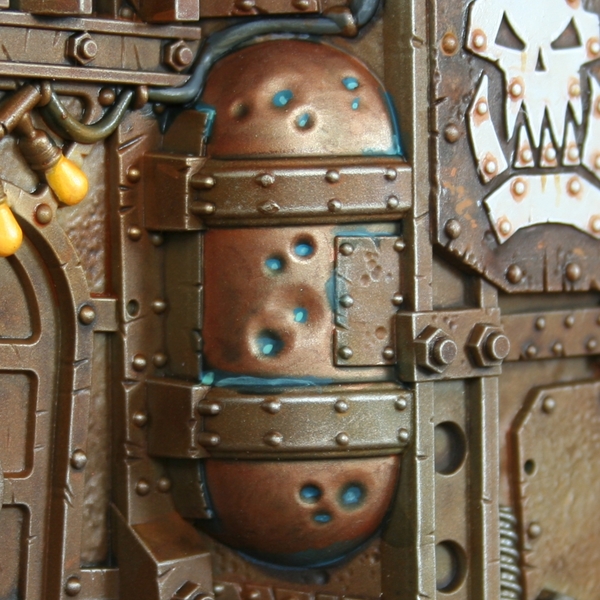 Oxidized Copper
- Basecoat the metal with Copper .
- Stiple highlights of Hashut Copper on raised and exposed areas.
- Wash the metal with equal parts Agrax Earthshade and Aethermatic Blue .
- In areas where the previous wash has dried and collected, pop some thinned Sotek Green .
- Put very small amounts of Nihilakh Oxide within the previous colour. This represents the most oxidized parts.
- If you wanted to add a little additional "pop", consider adding dots of pure white in areas where oxidisation would have REALLY built up.
 Aged Cream Paintwork
- Basecoat with Ushabti Bone .
- Add small patches of Rhinox Hide for chipping. I recommend creating this with patches of small dots, to make it look more organic.
- Wash with Reikland Fleshshade , pushing pigment into details and recesses.
- Underline the earlier chipping with Wraithbone . I like to do this with small dots also.
- Add edge highlights to raised details and points with Wraithbone . If you want to add a specular highlight here and there, I would recommend Pallid Wych Flesh .

Rookie Brushes
RookieBrushes
Aspiring miniature painter and biscuit enthusiast. Here to share my hobby and help where I can.
Citadel Painting System 23
Base 5
- Corax White
- Leadbelcher
- Mournfang Brown
- Rhinox Hide
- Wraithbone
Shade 4
- Agrax Earthshade
- Nuln Oil
- Reikland Fleshshade
- Seraphim Sepia
Layer 8
- Deathclaw Brown
- Doombull Brown
- Hashut Copper
- Pallid Wych Flesh
- Skrag Brown
- Sotek Green
- Ushabti Bone
- Zamesi Desert
Dry 2
- Necron Compound
- Ryza Rust
Technical 1
- Nihilakh Oxide
Spray 2
- Chaos Black
- Leadbelcher
Contrast 1
- Aethermatic Blue
Vallejo Game Color 4
Base 3
- 72.039 Plague Brown
- 72.043 Beasty Brown
- 72.044 Dark Fleshtone
Special effect 1
- 72.131 Rust
Vallejo Metal Color
Base 1
- 77.712 Steel
Vallejo Model Color
Metallic 1
- 70.999 Copper