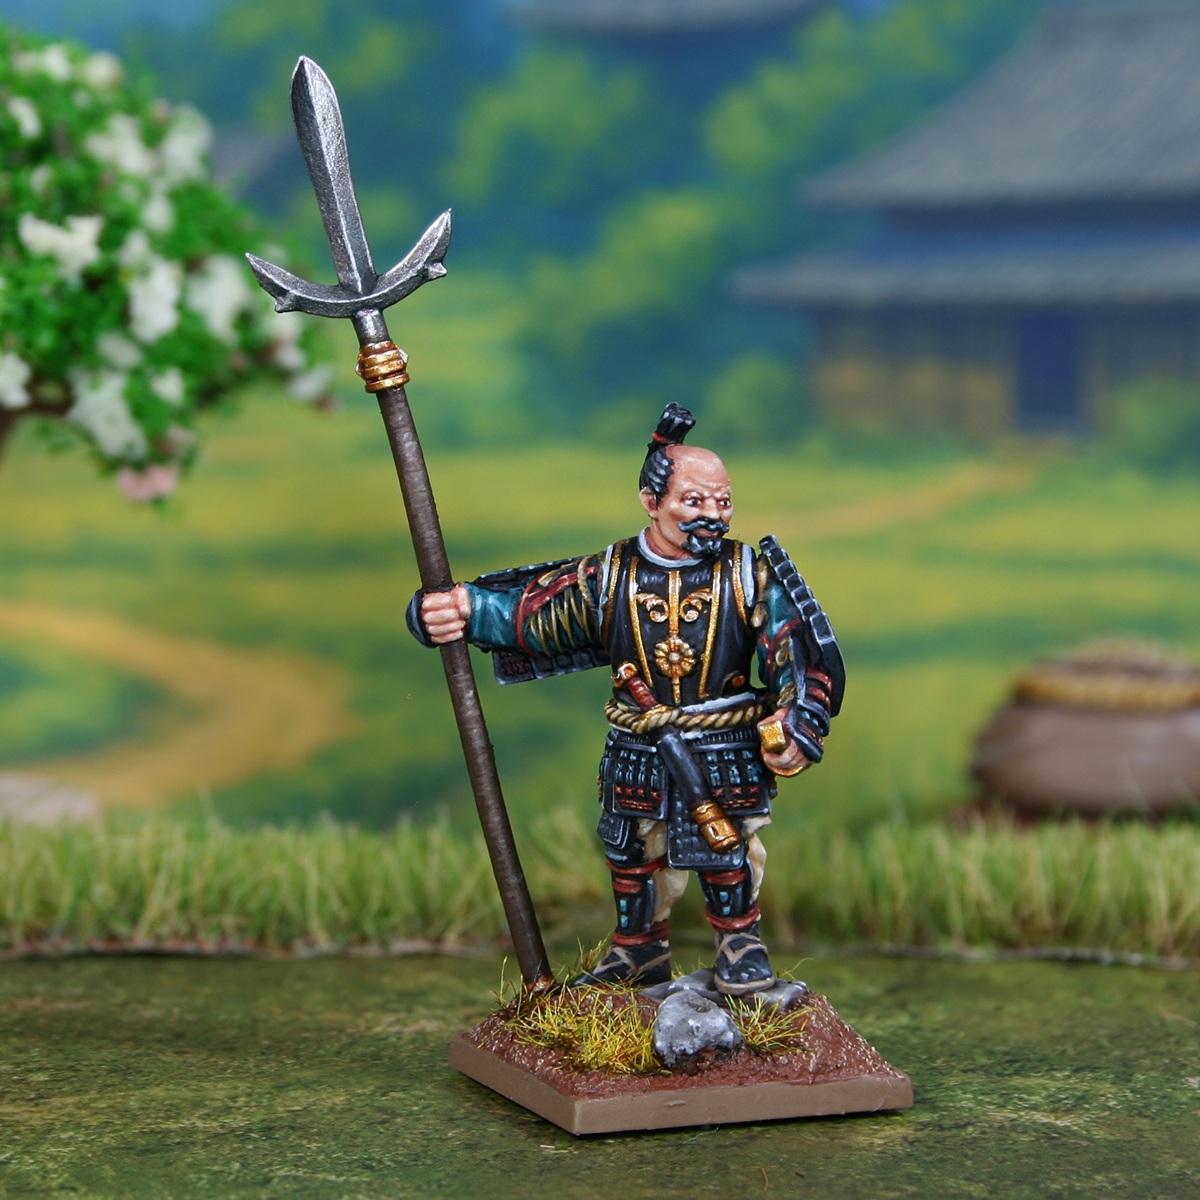

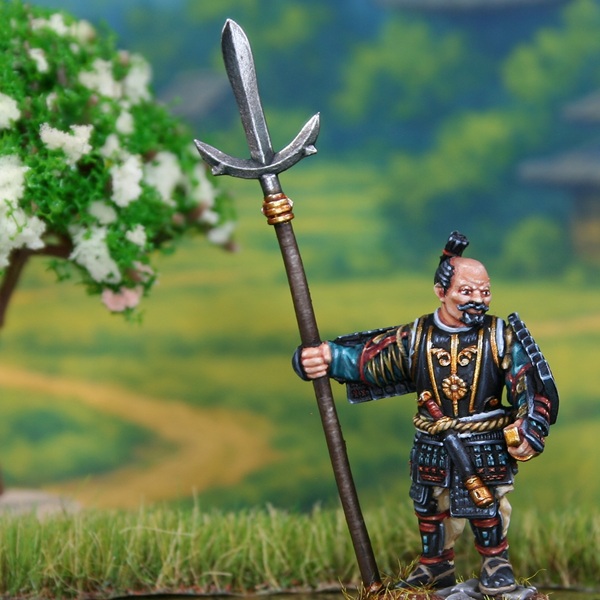
Here is how I painted Oda Nobunaga from the excellent "Daimyos" set from Warlord Games. These miniatures have been designed for the Pike & Shotte gaming system, but could be used in a variety of games.
.jpg) Skin
Skin
- Basecoat with 2:1 Cadian Fleshtone and Mournfang Brown .
- Increase the amount of Mournfang Brown in the above mix and shade the skin.
- Mix the base colour 2:1 with Ushabti Bone and add chunky highlights.
- Increase the amount of Ushabti Bone in the above mix, so it is about 1:2 now. use this for finer highlights.
- Mix in a little White and selectively highlight.
- Increase the amount of White in the mix, until it is a subtle off-white. Now pick out a few specular highlights.
When it came to the shaved portion in the centre of his head, I highlighted as normal, then mixed a little Dawnstone into the initial highlight colour. With this mix, glaze the section then highlight if needed. This should add a subtle grey.
.jpg) Hair
Hair
- Basecoat with Black .
- Pick out hair strands with a 1:1 mix of Abaddon Black and Kantor Blue .
- Mix some Kabalite Green into the previous mix and selectively highlight curved edges.
- Now mix in some Fenrisian Grey and pick out an even smaller area.
- Finally, use pure Fenrisian Grey to very selectively highlight curved edges where the light would hit.
(1).jpg) Black Armour
Black Armour
- Basecoat with Black .
- Add chunky highlights of Dark Reaper .
- Edge highlight everything with fine lines of Thunderhawk Blue
- Selectively highlight corners and curves with Fenrisian Grey .
- Finish with a few specular Blue Horror highlights
.jpg) I also used this black recipe for the body of his swords saya.
I also used this black recipe for the body of his swords saya.
(1).jpg) Turquoise Cloth
Turquoise Cloth
- Basecoat with 1:1 Sotek Green and Kabalite Green .
- Wash with Drakenhof Nightshade .
- Mix the base colour with an equal amount of Blue Horror and apply edge highlights to the folds.
- Increase the amount of Blue Horror in the above mix and selectively highlight the folds.
- Finish with a few specular highlights of pure Blue Horror .
(2).jpg) Cream Cloth
Cream Cloth
- Basecoat with Ushabti Bone .
- Shade with a thin mix of 1:1 Ushabti Bone and Steel Legion Drab .
- Increase the amount of Steel Legion Drab in the abobe mix, so it is now roughly 1:2. use this to more selectively shade, especially where the cloth meets other materials.
- Edhe highlight with Screaming Skull .
- Mix a little White into your Screaming Skull and selectively highlight corners and curves.
(3).jpg) Red Details
Red Details
- Basecoat with Khorne Red .
- Apply chunky highlights with Evil Sunz Scarlet .
- Now add fine highlights of Troll Slayer Orange .
- Selectively highlight corners and curves with Fire Dragon Bright .
- Finish with very small/specular highlights of 1:1 Fire Dragon Bright and White
.jpg) Yellow Cord
Yellow Cord
- Basecoat of 1:1 Rhinox Hide & Balor Brown .
- Rhinox Hide
- Highlight raised details with Balor Brown .
- Mix the Balor Brown 1:1 with Ushabti Bone then selectively highlight.
- Add a little White to the above mix, then add some very small highlights.
.jpg) White Trim
White Trim
- Basecoat with 1:1 Celestra Grey and :white.
- Mix Dark Reaper into the base colour, then shade. Feel free to do this in a couple of pases, adding more Dark Reaper as you go.
- Highlight with White .
(2).jpg) Sandals
Sandals
- Basecoat with Baneblade Brown
- Mix a little Rhinox Hide into the Baneblade Brown and use it to gently shade where needed.
- Highlight with Karak Stone .
- Mix some White into your Karak Stone and highlight more selectively.
 Yari Wooden Staff
- Basecoat with Thondia Brown .
- Shade with Rhinox Hide .
- Highlight and add woodgrain with a mix of 2:1 Thondia Brown and Steel Legion Drab . I applied this with a drybrush on what was the "centre" from the main viewing angle.
- Take the above paint and mix it 1:1 with Administratum Grey . Now use this for finer highlights. This stage, and the following highlights, are best applied with a mix of stippled dots and slashes, always within the previous stages boundary.
- Increase the amount of Administratum Grey again, then add selectively highlight.
- Finish with a few specular highlights of pure Administratum Grey .
.jpg) Yari Blade
Yari Blade
- Basecoat with Steel .
- Shade with a few glazes of Gryph-charger Grey , then add a little Black and shade more selectively.
- Mix a little Silver RLM01 Metallic into your Steel and highlight. Add it in as gradually as you like, and do this in as many passes as you need.
- Finish with edge highlights of Silver RLM01 Metallic , and a small highlight towards the tip.
.jpg) Gold Trim
Gold Trim
- Mix a little Silver RLM01 Metallic into Retributor Armour , until you see the colour desaturate to a point when you are happy. Now basecoat all gold details.
- Wash/recess shade with Gore-grunta Fur , where needed.
- Where you want to emphasize deep recesses or a define a change in material, use some Rhinox Hide and a very fine brush. We are aiming for a fine line here.
- Increase the amount of Silver RLM01 Metallic in your Retributor Armour and highlight.
- Finish with some specular highlights of Silver RLM01 Metallic .

Rookie Brushes
RookieBrushes
Aspiring miniature painter and biscuit enthusiast. Here to share my hobby and help where I can.
Citadel Painting System 29
Base 9
- Abaddon Black
- Celestra Grey
- Kantor Blue
- Khorne Red
- Mournfang Brown
- Retributor Armour
- Rhinox Hide
- Steel Legion Drab
- Thondia Brown
Shade 1
- Drakenhof Nightshade
Layer 17
- Administratum Grey
- Balor Brown
- Baneblade Brown
- Blue Horror
- Cadian Fleshtone
- Dark Reaper
- Dawnstone
- Evil Sunz Scarlet
- Fenrisian Grey
- Fire Dragon Bright
- Kabalite Green
- Karak Stone
- Screaming Skull
- Sotek Green
- Thunderhawk Blue
- Troll Slayer Orange
- Ushabti Bone
Contrast 2
- Gore-grunta Fur
- Gryph-charger Grey
Vallejo Metal Color
Base 1
- 77.712 Steel
Vallejo Model Air
Base 1
- 71.063 Silver RLM01 Metallic
Vallejo Model Color
Base 2
- 70.950 Black
- 70.951 White