
The skin part of this recipe is based heavily on a YouTube tutorial from Infernal Brush titled "How to paint Ork Skin the 'Eavy Metal way". I changed a few bits to simplify the process, so if you want a more comprehensive guide, please check out his video.
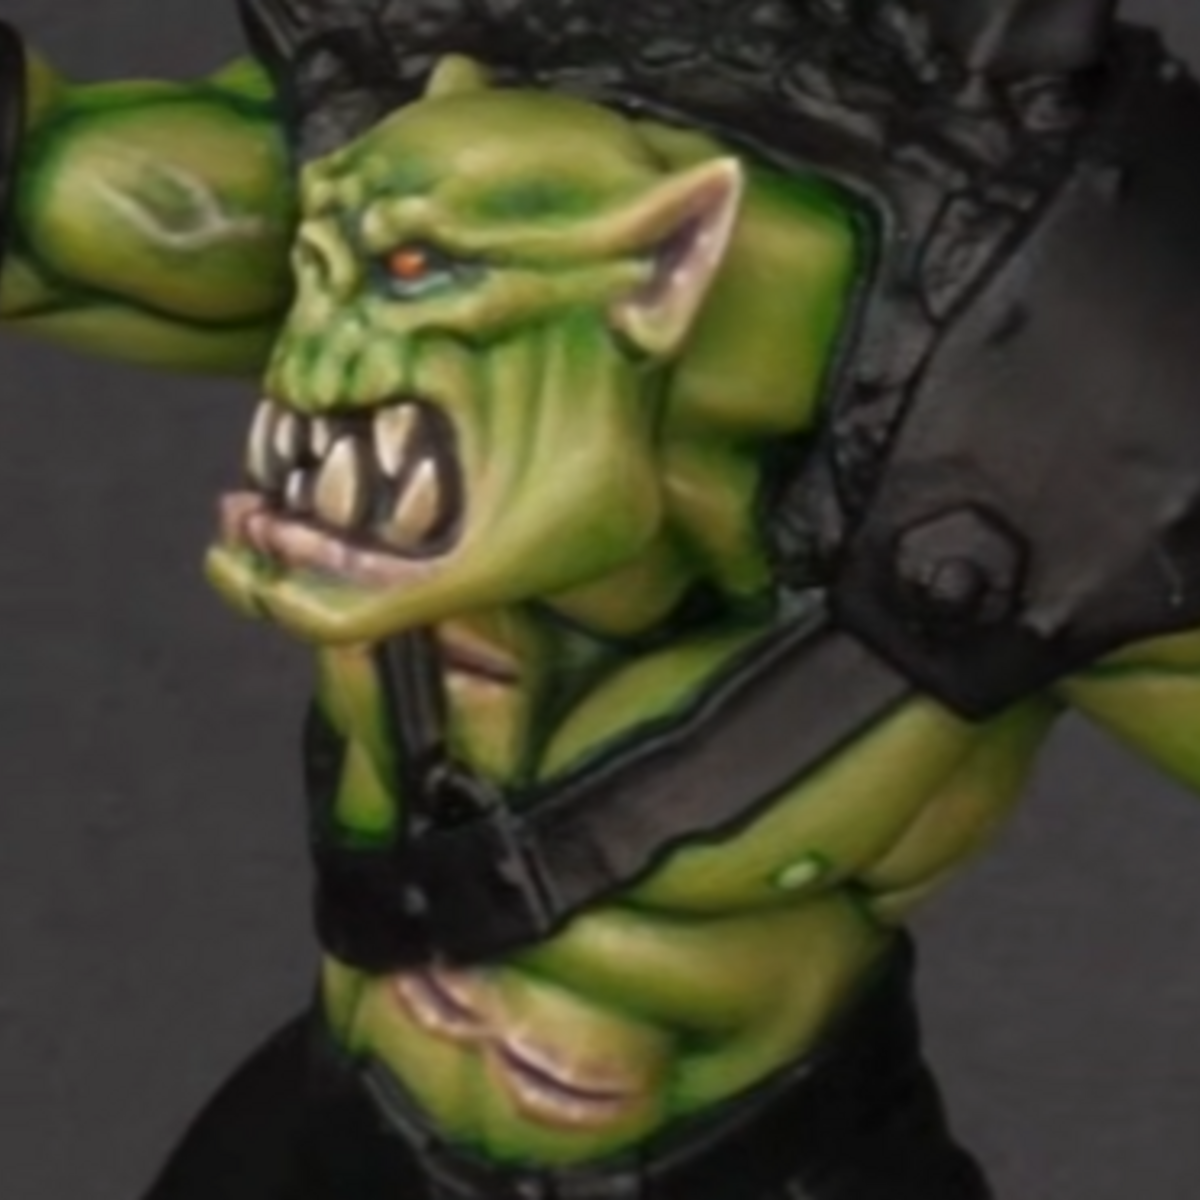
Green Flesh
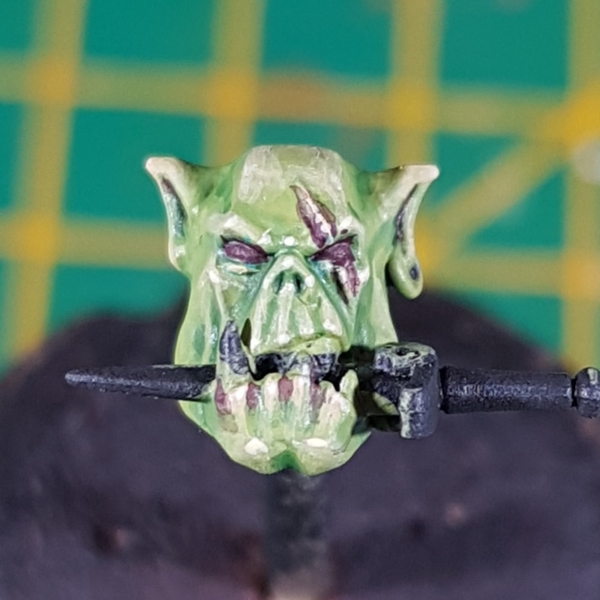
 Basecoat the skin with Orruk Flesh .
 Take the previous Orruk Flesh and mix it 2:1 with Ork Flesh . Use this mix to add general shading to recesses and shadowed areas.
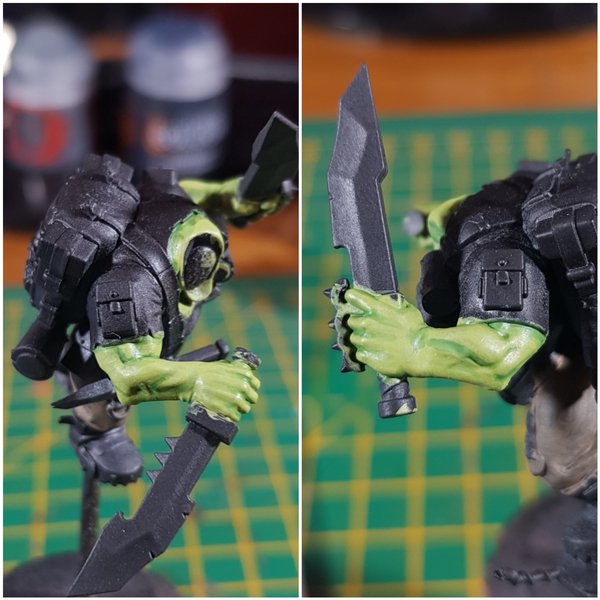 Increase the amount of Ork Flesh in the mix, so that it is roughly 2:1 with the Orruk Flesh . Now add thinner and more precise recess shades to the skin.
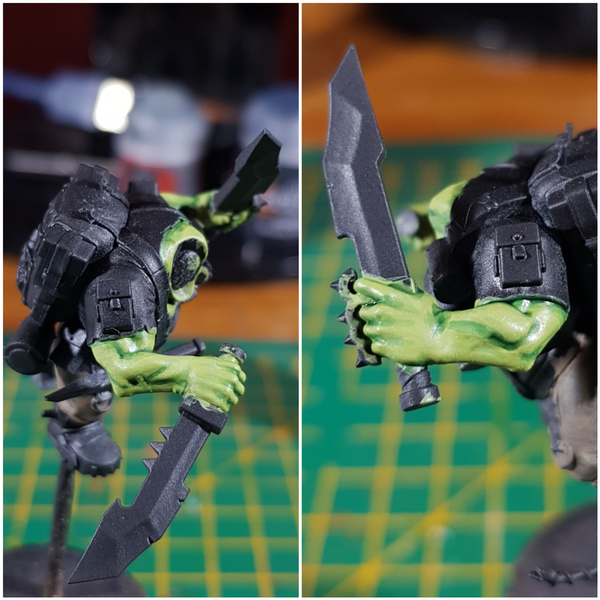 With Coelia Greenshade thinned 1:1 with Lahmian Medium , add extra definition to the deepest recesses.
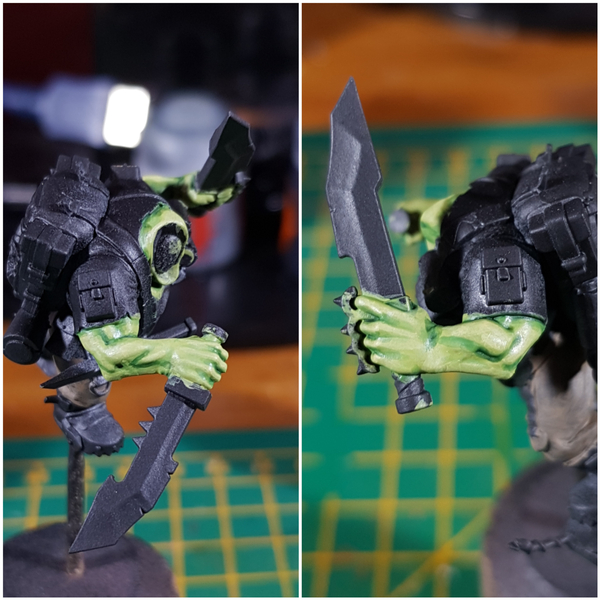 Glaze Ogryn Camo over raised details and upward facing portions of the muscle.
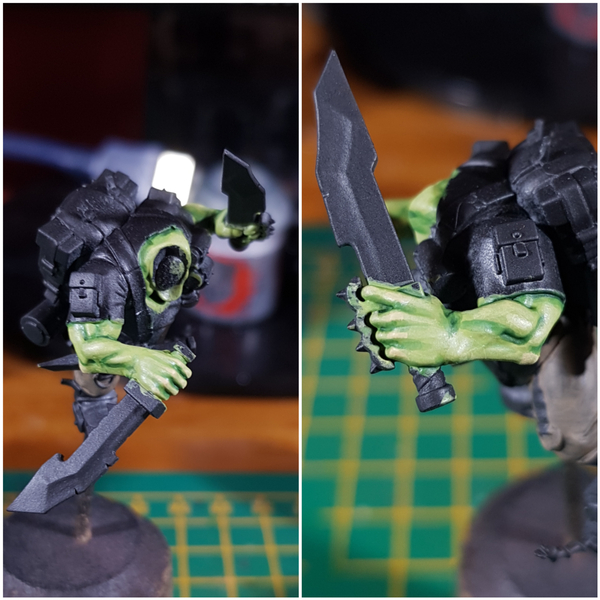 Mix equal parts Kislev Flesh and Ogryn Camo and selectively highlight more fleshy areas. I stuck to the lower lip, ear tips, scars, knuckles, elbows and veins.
 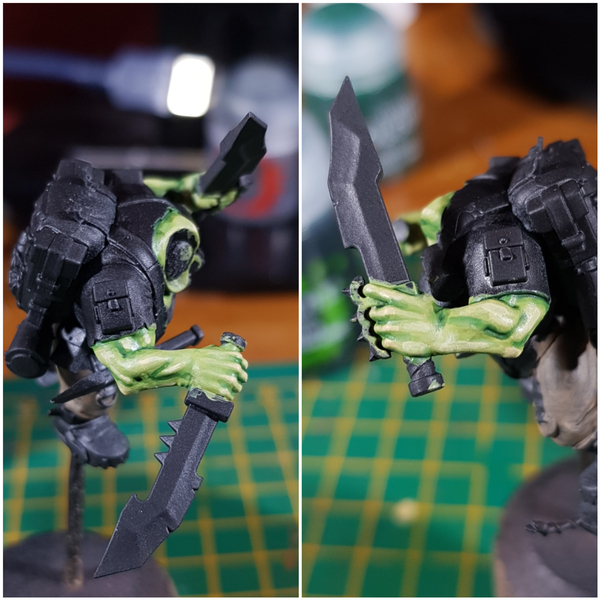 With a 1:1 mix of Ogryn Camo and Ushabti Bone , add general highlights to the rest of the skin. When you are done, thin it some more and glaze smaller areas within the previous pure Ogryn Camo highlight.
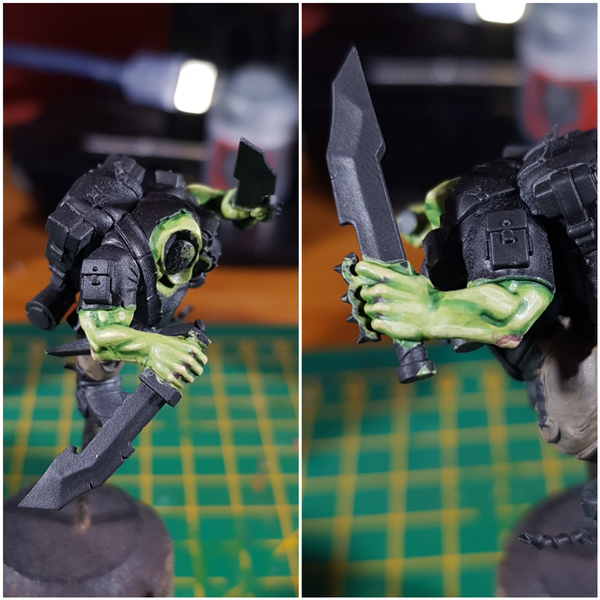 Take a mix of Khorne Red and Incubi Darkness and glaze around the fleshy areas we established earlier. This is good armound wounds or other areas where"blood" would be close to the surface. You can add in a little Cadian Fleshtone too for areas where the transition is too harsh.
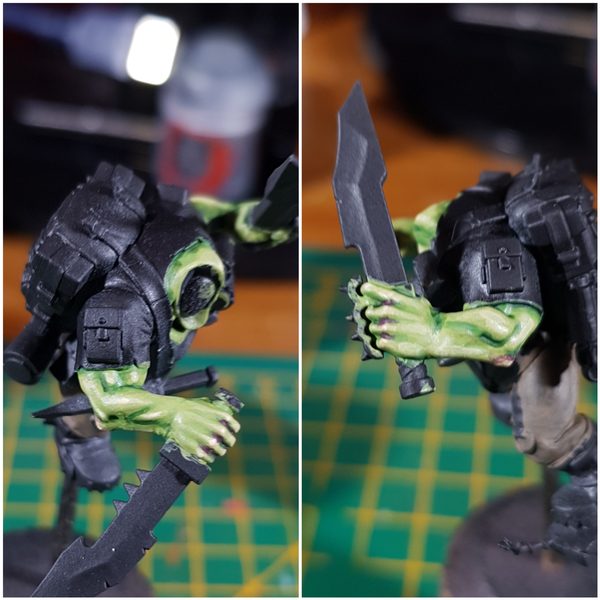 With Ushabti Bone , add very small highlights to the most extreme points of the Kislev Flesh and Ogryn Camo areas highlighted earlier. Small dots are great for adding texture to scars and wounds too.
 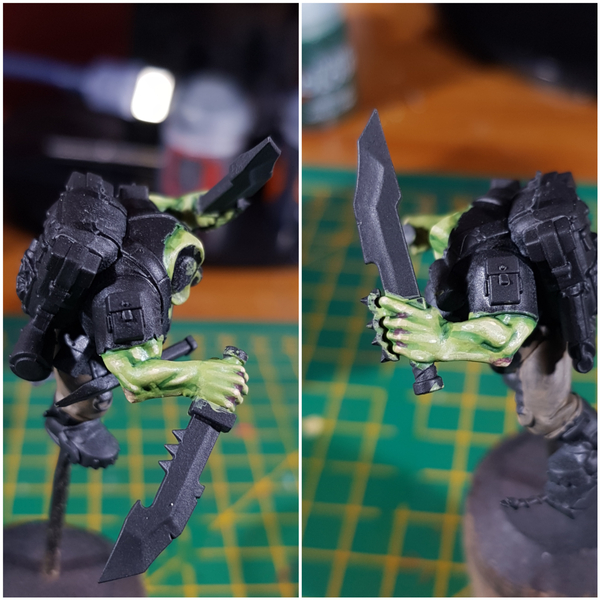 Take your Ogryn Camo and Ushabti Bone mix from earlier, add a little white in and add very small highlights to the rest of the greeny flesh. Make these specular highlights added to the very centre of the previous layering. These are meant to represent glints of light.
Eyes
 Glaze the eyeball itself and the recess around it with the mix of Khorne Red and Incubi Darkness from earlier.
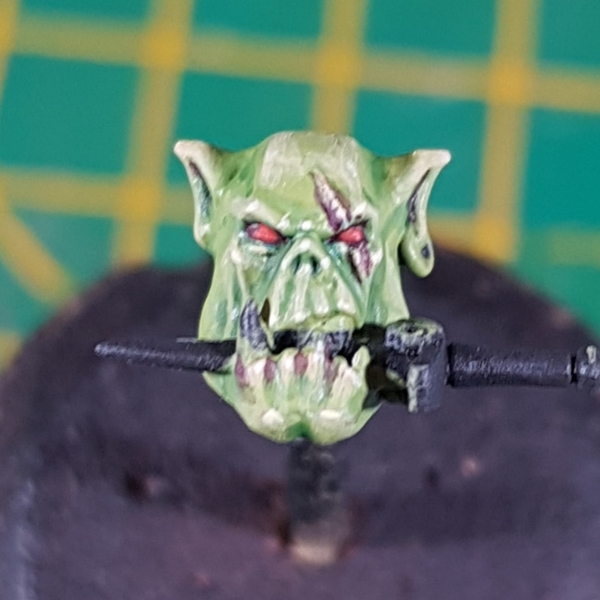 Basecoat the eyes with Evil Sunz Scarlet . Try to cover just the eyeball itself.
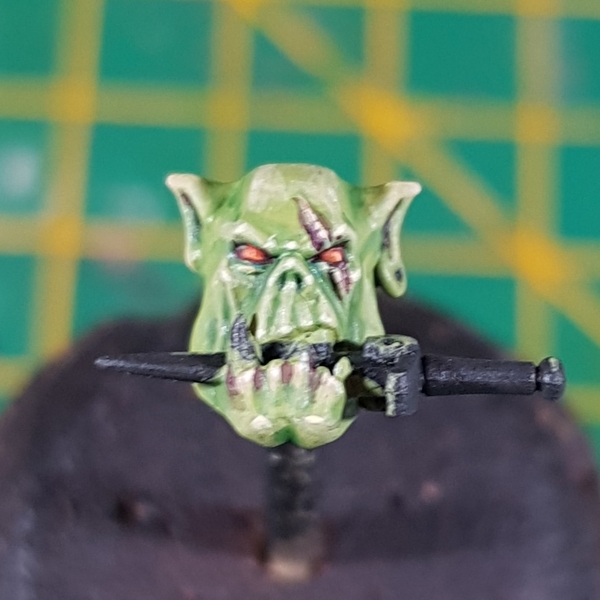 Add a small highlight of a vibrant orange (like Troll Slayer Orange ) to the raised part of the eye.
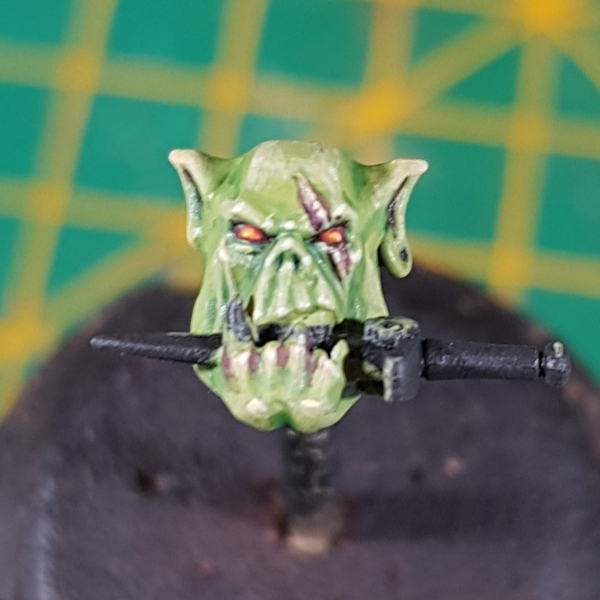 Pop the smallest dot highlight of Flash Gitz Yellow you are capable of to the centre of the eye.
Teeth
- Basecoat with Zandri Dust .
- Highlight with some Ushabti Bone .
- Mix a little White Scar in with the Ushabti Bone and add small highlights to the tips.
- Add spot highlights of a pure white to the points only.
Claws
- Basecoat with Incubi Darkness .
- Highlight with Kabalite Green .
- Add selective highlight of Sybarite Green .
- Put specular highlight of Deepkin Flesh on the points only.
Grey Cloth
- Basecoat with Dawnstone .
- Wash with Nuln Oil , but thin it with two parts of Lahmian Medium . Make sure it doesn't pool anywhere undesirable.
- Mix Dawnstone and Administratum Grey 1:1 and highlight edges and raised portions. Do this by dragging the point of your brush towards the most exposed point in this lines.
- Add smaller highlights with pure Administratum Grey . Do this mostly as a fine edge highlight, but put occasional longer lines in (again, dragged towards the edge) in areas where the previous highlight was quite large.
- With Ulthuan Grey , add specular highlights and random dots to edges, corners and raised details.
Drab Brown Cloth
- Basecoat with Steel Legion Drab .
- Wash with Agrax Earthshade , but thin it with two parts of Lahmian Medium . Make sure it doesn't pool anywhere undesirable.
- Mix Steel Legion Drab and Tallarn Sand 1:1 and highlight edges and raised portions. Do this by dragging the point of your brush towards the most exposed point in this lines.
- Add smaller highlights with pure Tallarn Sand . Do this mostly as a fine edge highlight, but put occasional longer lines in (again, dragged towards the edge) in areas where the previous highlight was quite large.
- Add smaller highlights with pure Tallarn Sand . Do this mostly as a fine edge highlight, but put occasional longer lines in (again, dragged towards the edge) in areas where the previous highlight was quite large.
- Add some Pallid Wych Flesh to the previous Karak Stone , then add specular highlights and random dots to edges, corners and raised details.

Rookie Brushes
RookieBrushes
Aspiring miniature painter and biscuit enthusiast. Here to share my hobby and help where I can.
Citadel Painting System 27
Base 5
- Incubi Darkness
- Khorne Red
- Orruk Flesh
- Steel Legion Drab
- Zandri Dust
Shade 3
- Agrax Earthshade
- Coelia Greenshade
- Nuln Oil
Layer 17
- Administratum Grey
- Cadian Fleshtone
- Dawnstone
- Deepkin Flesh
- Evil Sunz Scarlet
- Flash Gitz Yellow
- Kabalite Green
- Karak Stone
- Kislev Flesh
- Ogryn Camo
- Pallid Wych Flesh
- Sybarite Green
- Tallarn Sand
- Troll Slayer Orange
- Ulthuan Grey
- Ushabti Bone
- White Scar
Technical 1
- Lahmian Medium
Contrast 1
- Ork Flesh