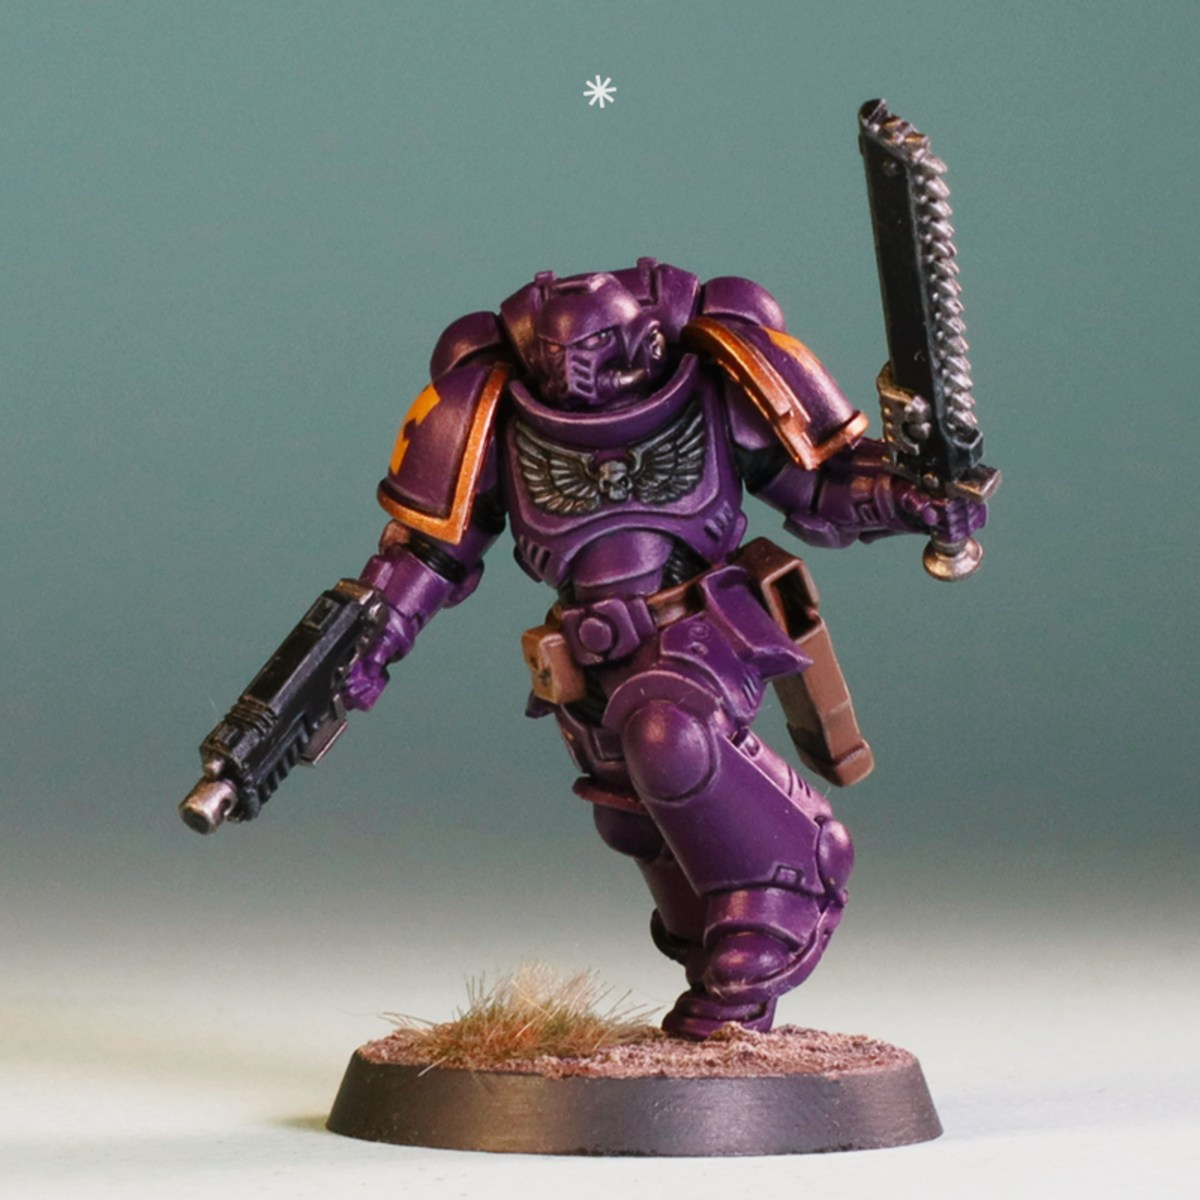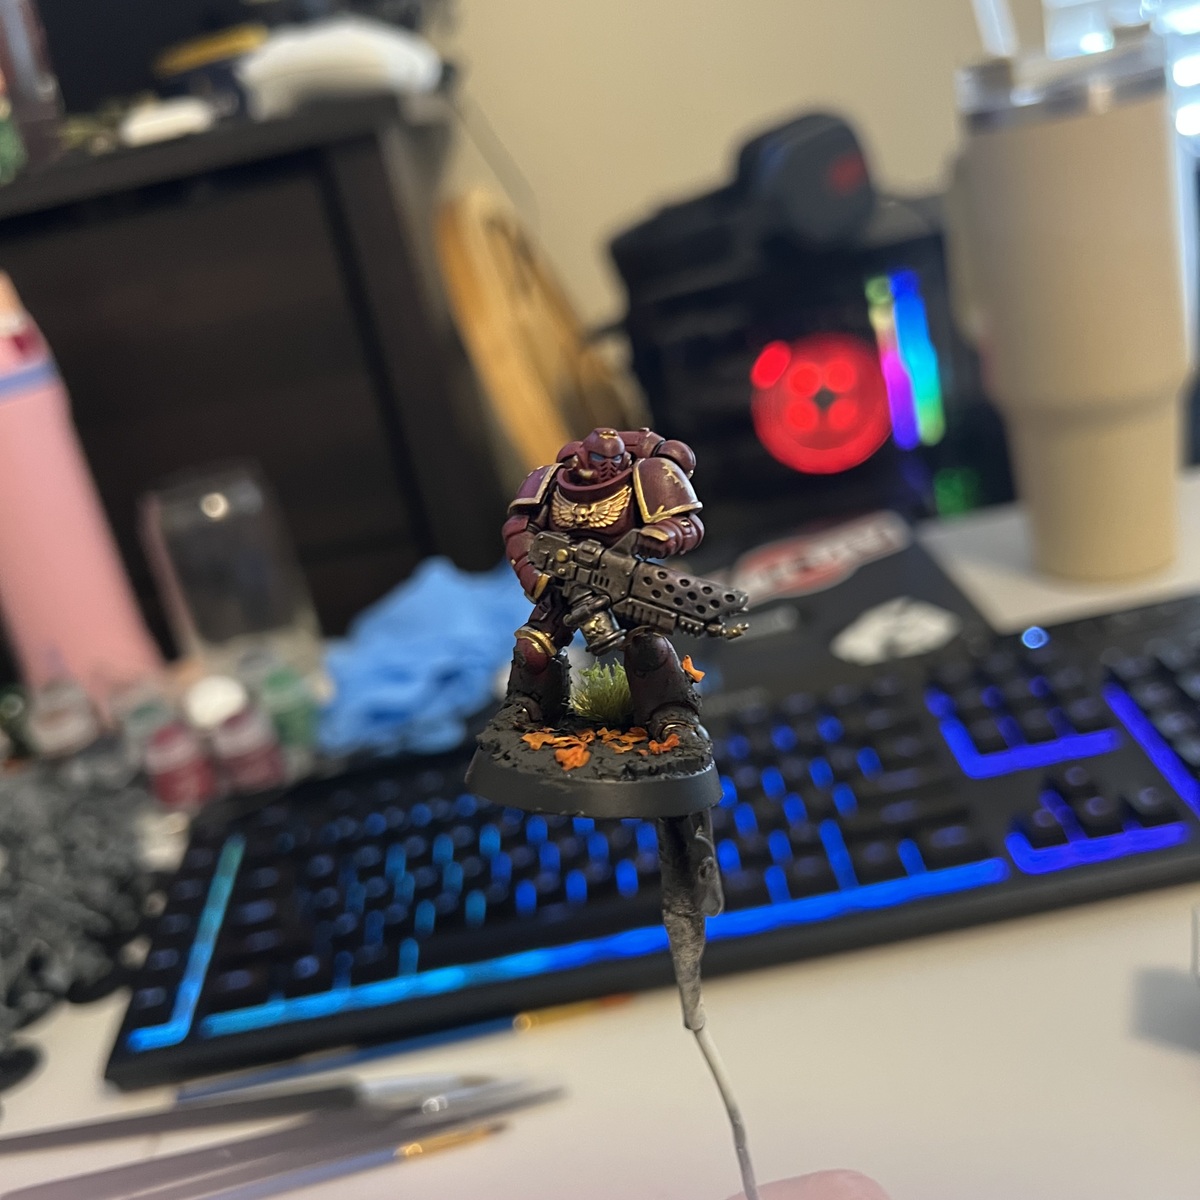
This is how I painted the armor and trim on my models. Weapons will be in another recipe as I did those separately
Base/Prime
- Chaos Black spray this into the hard to reach places, behind weapons, war gear, any hanging accoutrements (i.e chains, holsters, bags, etc) doing quick sprays 3-5 inches away from the models, spraying for 1-2 seconds per pass, it should be fast and thin enough to cover the model in those spaces but enough to let dry before the next pass. DO NOT HOLD THE NOZZLE FOR ONE CONTINUOUS SPRAY.
- Abaddon Black after the primer has dried, go over THE ENTIRE MODEL, using a mixer of thin dry brushing and thin wet brush coats, (2-3 coats). this should fill in any odd spots missed by the primer and allowing the model to have a little texture as well for the worn look later. (use a #2 flat brush)
Main Color
- Khorne Red dry brush one layer, thick enough to make the model red, but thin enough to allow black to show through making the red look faded and worn but still very visible. allow this to dry and look over the model dry brushing additional areas to achieve preferred "red" color (use a #2 flat brush)
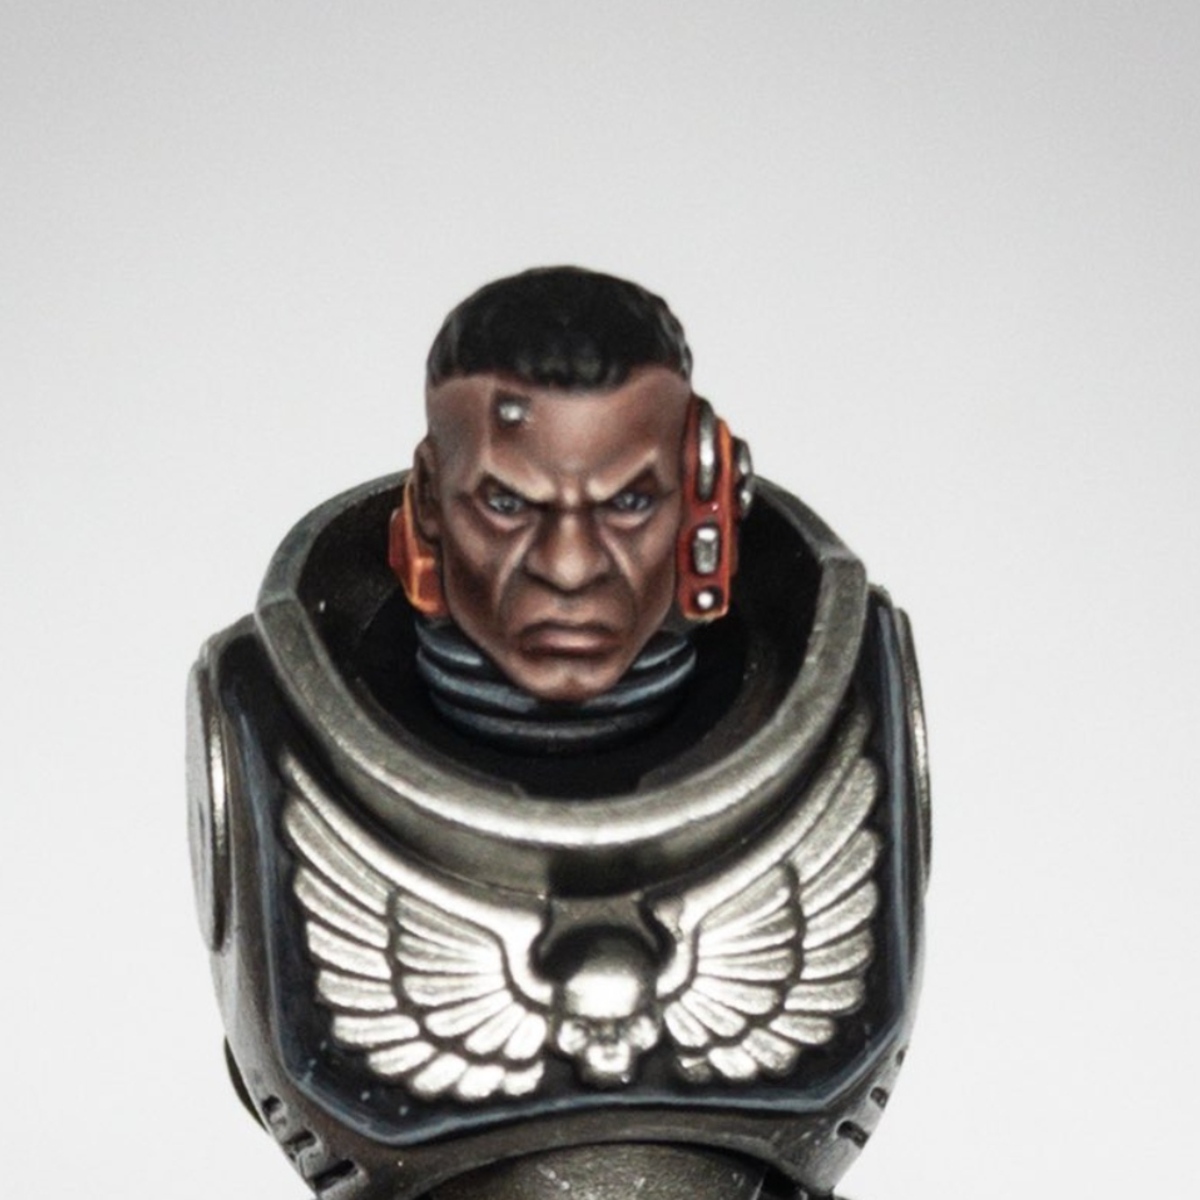
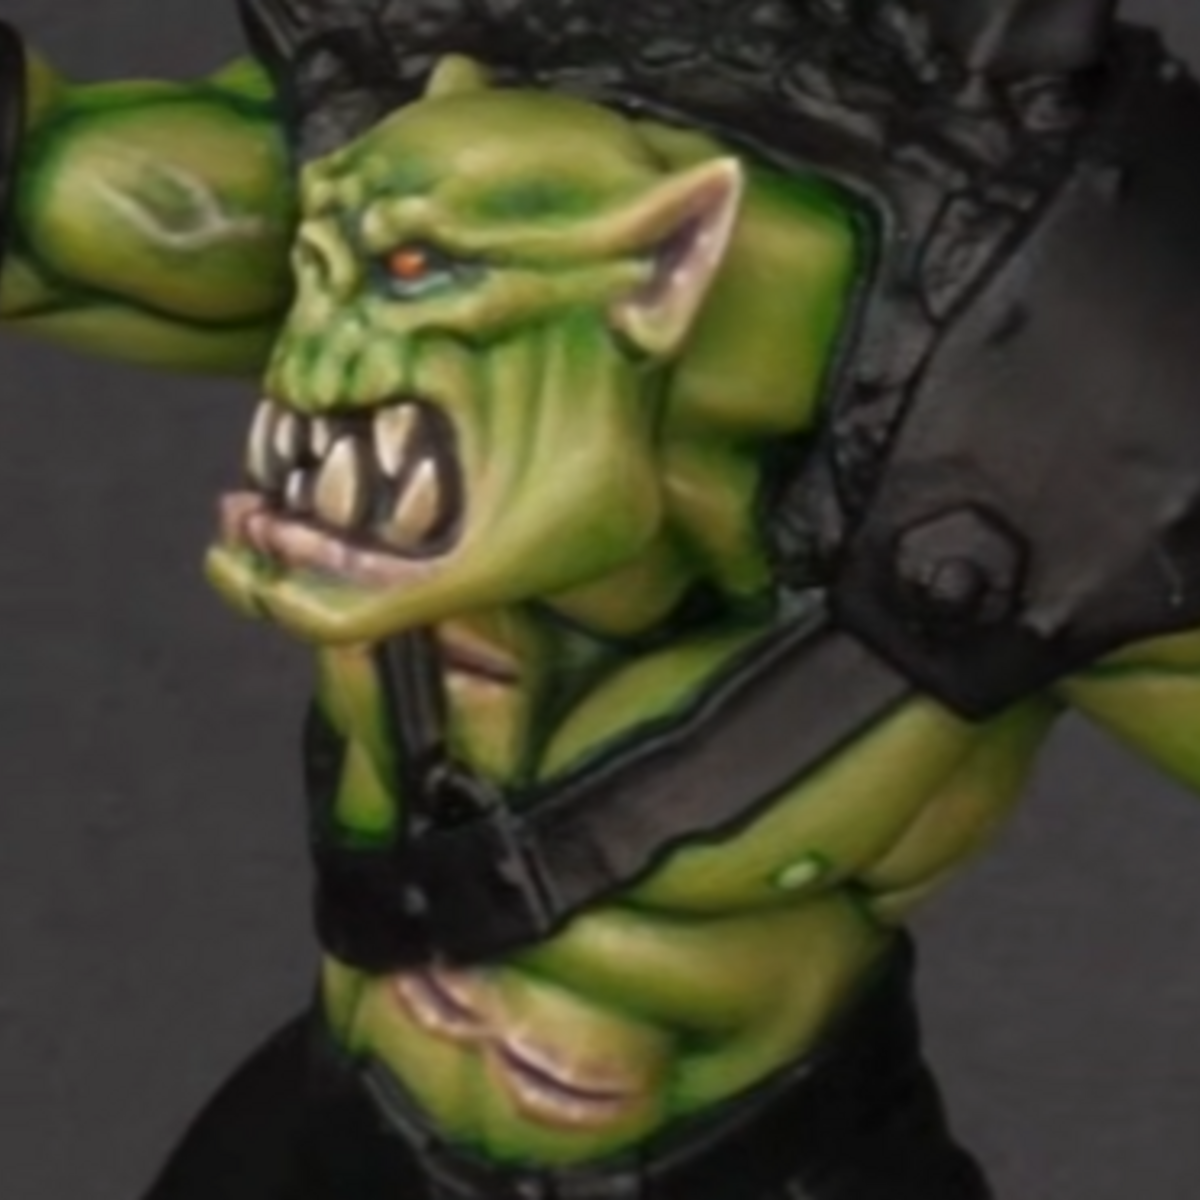
- Cadian Fleshtone Bugman's Glow i used these two paints to paint any and all exposed "skin" on the models, if applicable. I started with a healthy coat of bugman, then a dry brush of Cadian until it looked "fleshy"
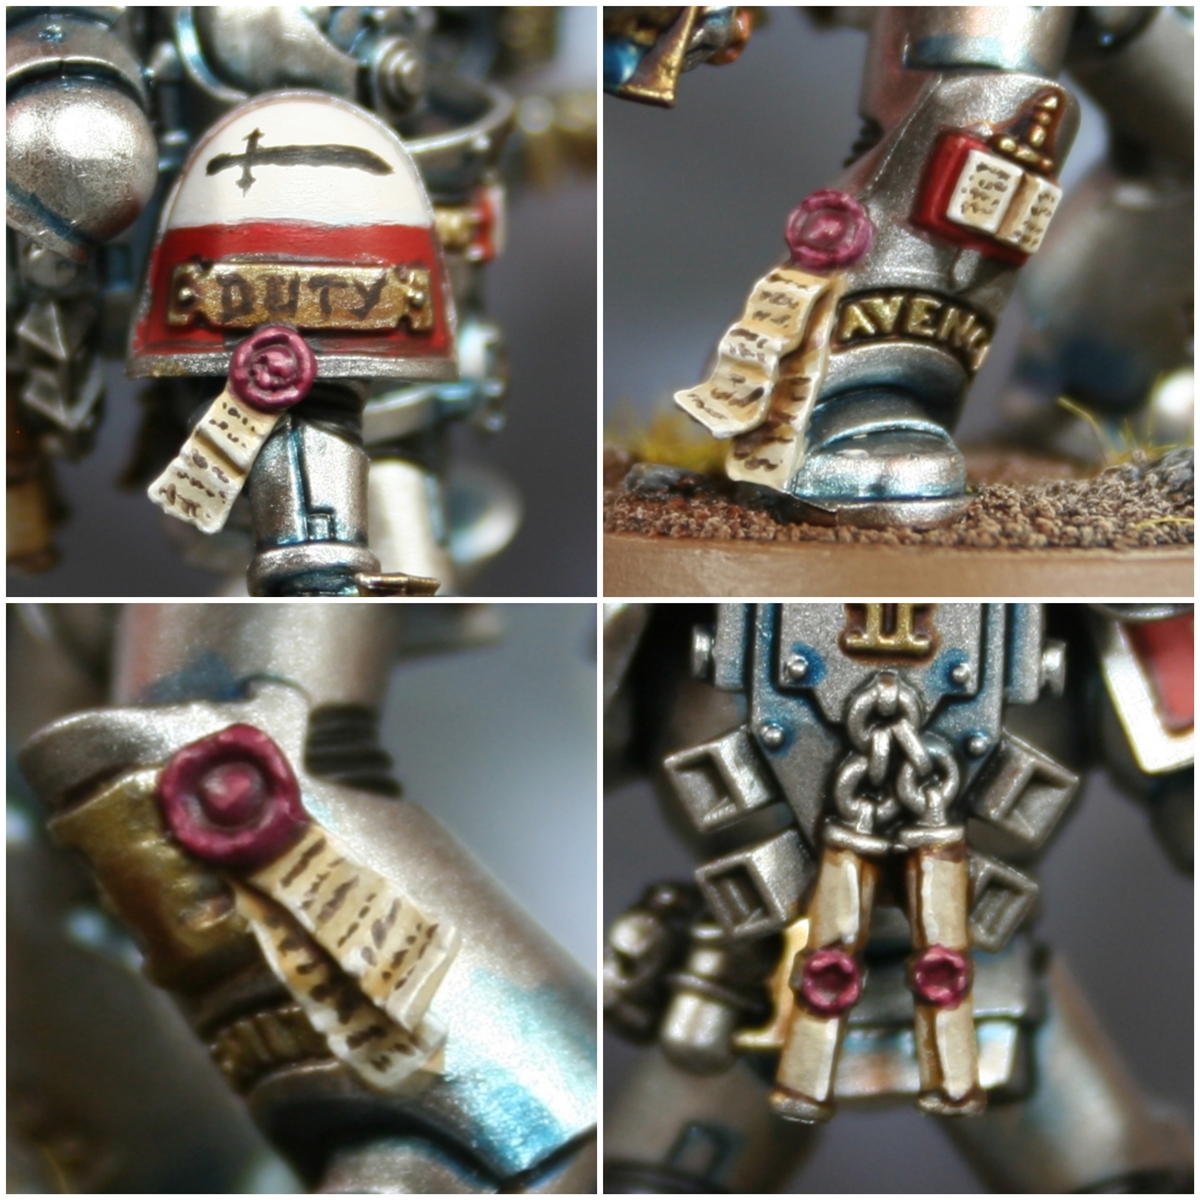
Trim
- Skullcrusher Brass VERY CARFULLY, using a 5/0 brush go over EVERY TRIM PIECE making sure to coat the trim in the brass. if you touch the red with the brass thats ok, its part of the process. we can touch up later. Look for any trim, "buttons" or places you want to see "gold".
Pouches or "Leather"
- Cadian Fleshtone This color is a little strange but it will turn out, honest. use whatever brush you see fit. dry brush the color onto the "leather" you're trying to color. I found 2-3 coats was sufficient but you can vary that as you need. LET DRY COMPLETLY. It will look strange until it dries and the contrast is added later.
CONTRAST
- Reikland Fleshshade This is the important make or break step. ONLY THE TRIM OR ANYTHING PAINTED WITH THE BRASS. Carefully, spread the shade over the brass paint. 1-2 thin coats per brass painted piece. IF you touch the red you can either leave it or clean it off with a wet brush. The goal is just the trim but a little touching here and there is inevitable. use this technic on the "leather" you painted. The trim and leather should have this reddish hue to them, warming them up a little.
- Agrax Earthshade FOR THE EXPOSED SKIN PARTS ONLY: Light 1 coat wash of the "skin", it will make it look a little darker and "dirtier" like they've been fighting for a LONG time
EYES
- Thousand Sons Blue I used Thousand sons blue, you can use WHATEVER color you want, I just liked they way the blue contrasted against everything.
Optional
- Blood For The Blood God you can do this now or after you have your weapon painted or after the finish, but I splattered the "blood" all over the hands and face and body of the model to look like spray from the chain weapons,
Complete!!!
- Finished!!! you can now add any decals and finishes you want to your model. i personally used Microscale-Micro coat FLAT for a slight flat finish but i will leave that to you : )
Citadel Painting System 10
Base 4
- Abaddon Black
- Bugman's Glow
- Khorne Red
- Thousand Sons Blue
Shade 2
- Agrax Earthshade
- Reikland Fleshshade
Layer 2
- Cadian Fleshtone
- Skullcrusher Brass
Technical 1
- Blood For The Blood God
Spray 1
- Chaos Black