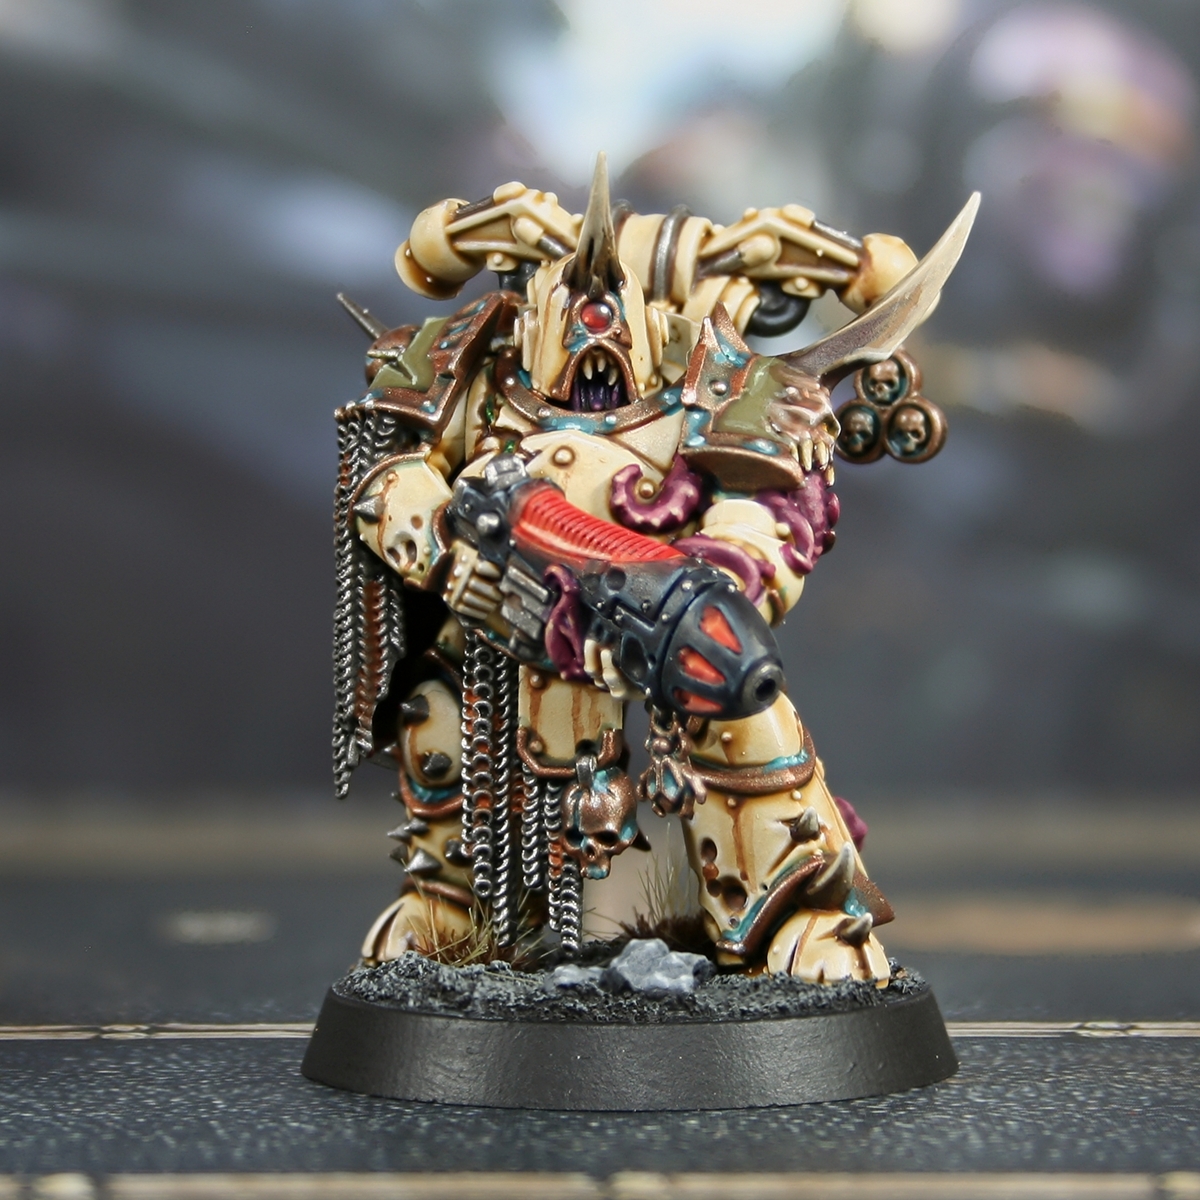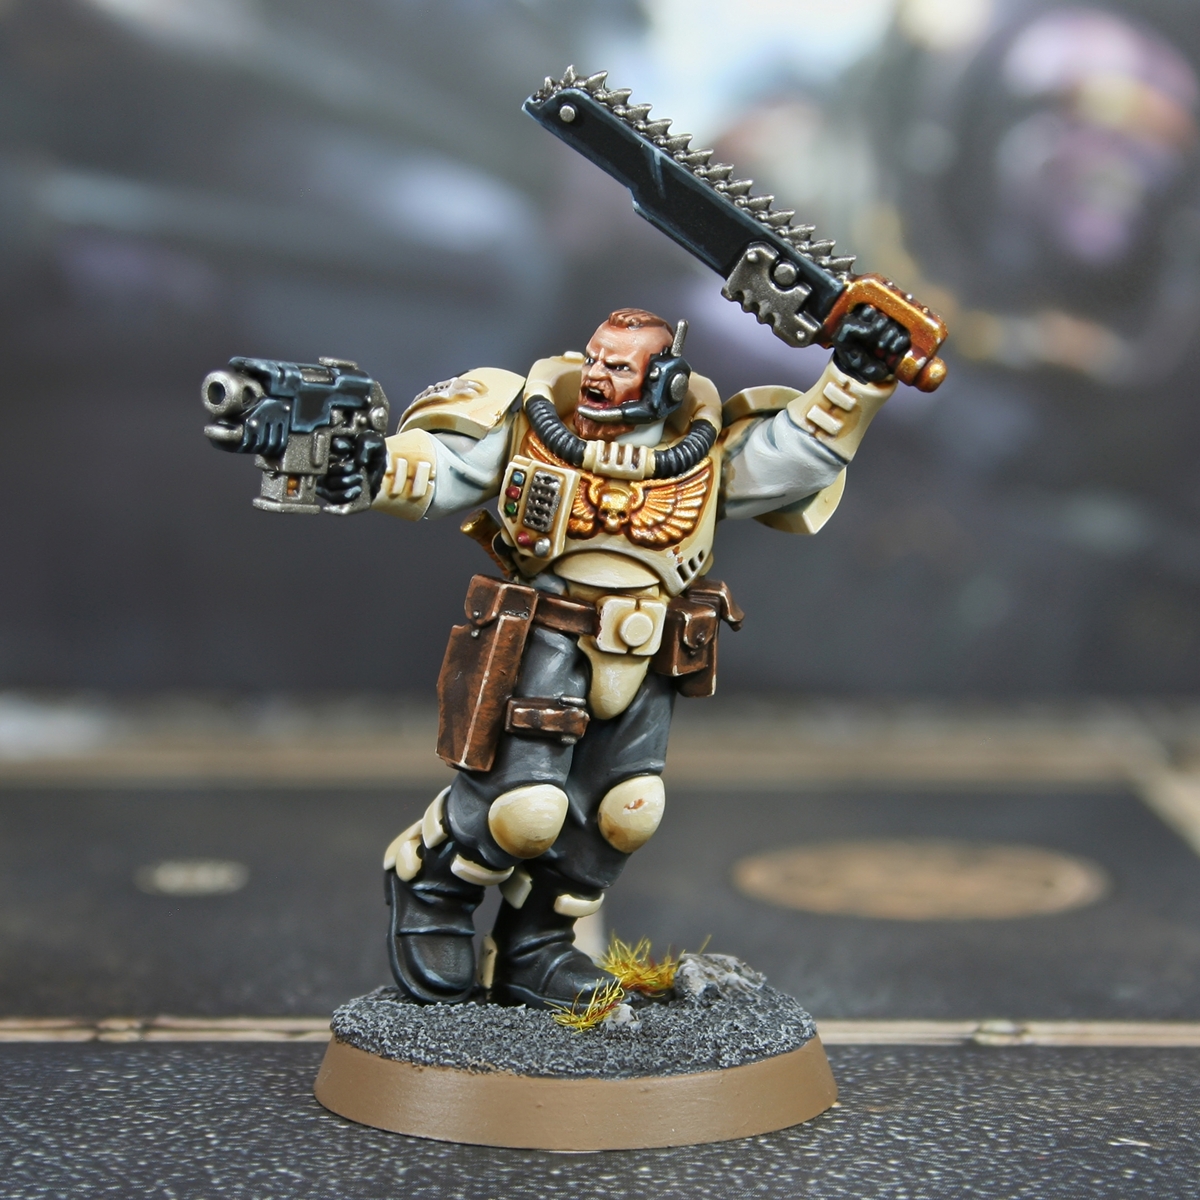
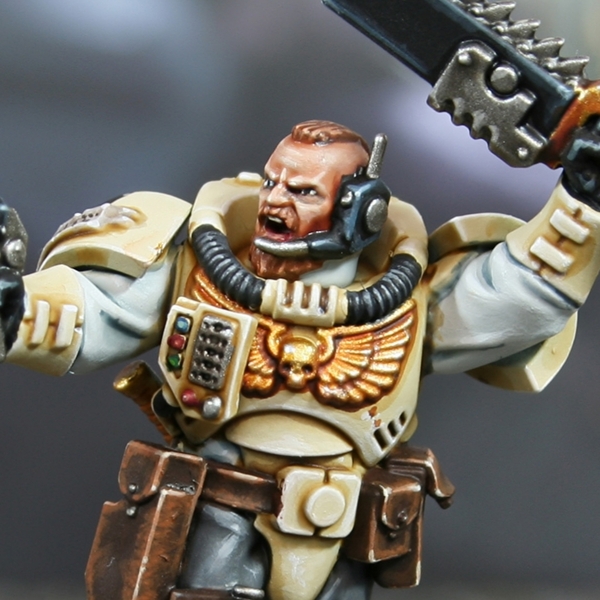
Tome Keepers Space Marine Scouts

My revised scheme for the newly released Space Marine Scouts Kill Team. This Tome Keepers recipe collection is similar to me previous one, but has a few tweaks to compliment the new design, and also reflect my growth as a painter.
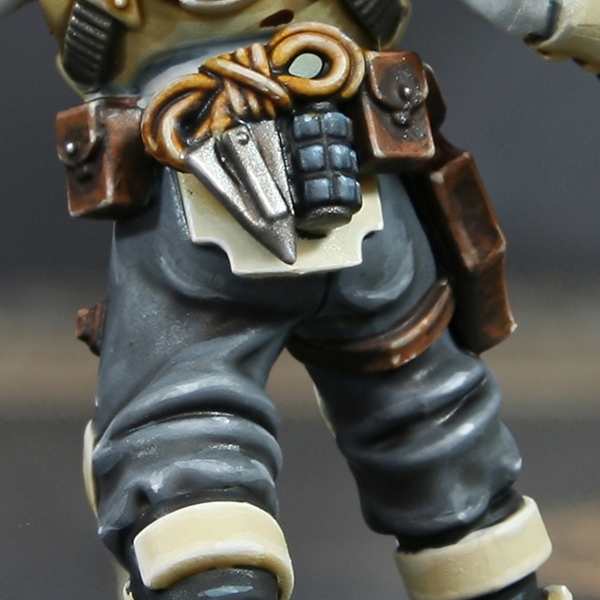
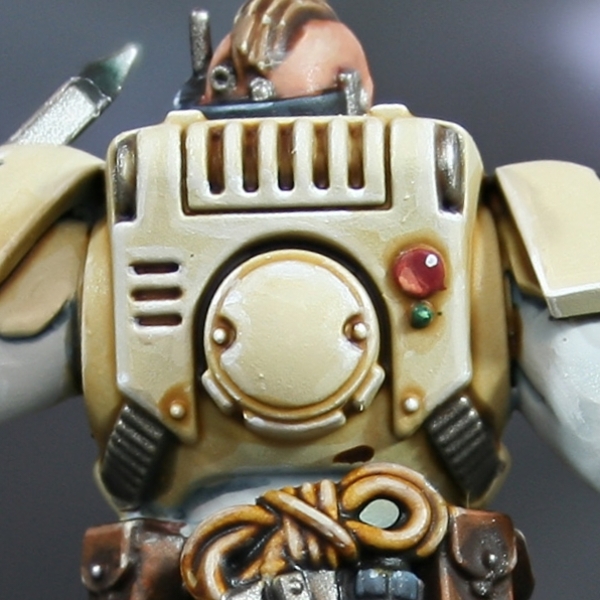
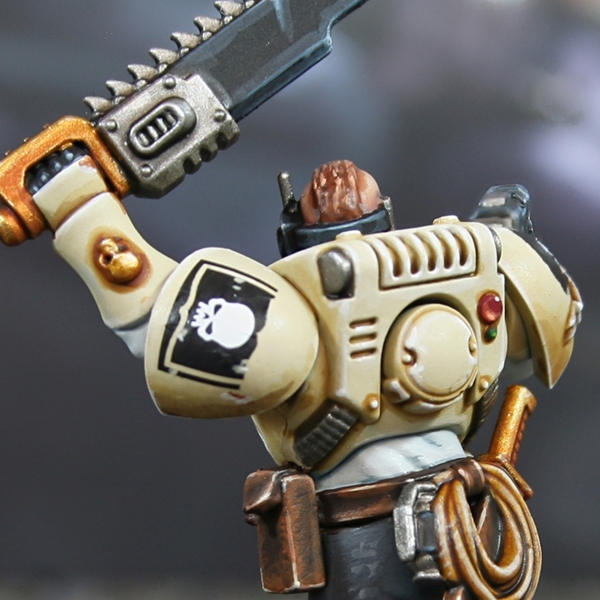 Bone Armour
I would recommend priming with Wraithbone or any other light and slightly warm colour. This will make getting a nice tone to the armour easier. I personally used Vallejo Surface Primer Desert Tan for this project.
- Basecoat armour with Ushabti Bone .
- Either zenethal highlight with thinned Screaming Skull from a downward 45 degree angle or glaze in where the light would hit. Since there isn't tones of armour on these boys, you could easily skip this step.
- Recess shade with Skeleton Horde thinned with Contrast Medium 1:1. Don't be too neat, the contrast should pull towards the recess and give something like a transition. Now is also a good time to paint the under-suit/tubing by your preferred method.
- Recess shade everything again, this time being careful, and using Agrax Earthshade . I used is straight out of the pot, but you could mix in a little contrast if you wanted to make life a little easier. Alternatively, thinned Rhinox Hide works well for this and is easier to control.
- Add a chunky highlights of Screaming Skull to all edges and where relevent on panels.
- Edge highlight everything again with fine lines of Pallid Wych Flesh .
- Selectively edge highlight the most exposed curved edges and corners where highlights meet with a pure white of your choice, like White Scar .
Optional: Battle Damage
- Add small patches of Mournfang Brown using dots with a fine brush. Try to stick to edges and corners where damage would occur, mostly towards the front of the Space Marine.
- Underline the damage from the last step with fine lines of Pallid Wych Flesh .
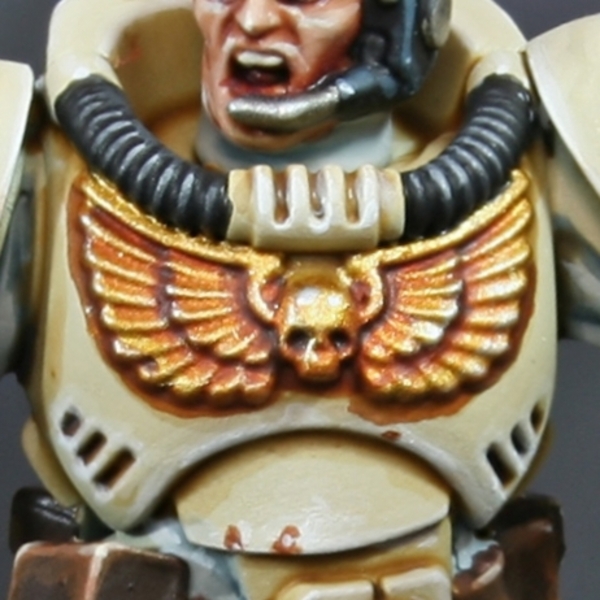 Gold Details
- Basecoat with Retributor Armour .
- Shade with Gore-grunta Fur . To make it easier to handle, I like to work this contrast paint on my wet palette a little, thinning it.
- Shade deep recesses with Doombull Brown .
- Mix the Retributor Armour with some Silver RLM01 Metallic and pick out edges.
- Selectively highlight with pure Silver RLM01 Metallic .
 White Cloth Sleeves
- Basecoat with Corax White .
- Wash the cloth with Apothecary White , thinned with an equal amount of Contrast Medium .
- Shade recess shade with Thunderhawk Blue or Dark Reaper , depending on the depth of the recesses and definition needed.
- Edhe highlight folds with Ulthuan Grey .
- Define points and particularly raised edges with a pure white (like White Scar ).
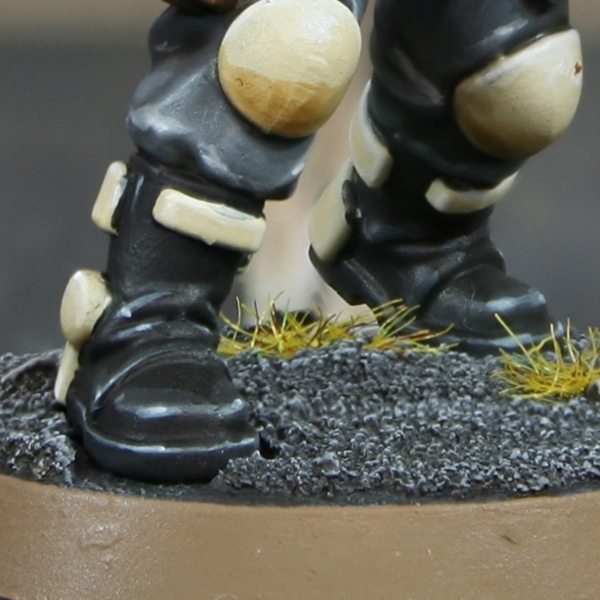
 Grey Trousers
- Basecoat with Mechanicus Standard Grey .
- Wash with Nuln Oil .
- Mix Mechanicus Standard Grey 1:1 with Dawnstone and do a round of general highlighting of the cloth. I try and do it in scratchy lines moving the brush in the same direction if possible, to create a little texture.
- Highlights all edges with Dawnstone .
- Add selective highlights of Administratum Grey .
- Mix some White into the Administratum Grey and pick out points where the light would hit with specular highlights.
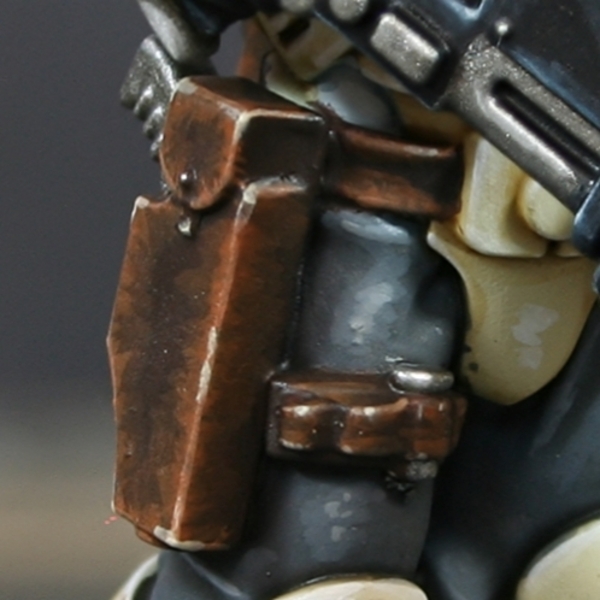 Dark Brown Leather Pouches
- Basecoat the leather area with Rhinox Hide .
- Glaze most of the leather with thinned Mournfang Brown . Use quite a small brush and drag towards edges in rough lines. This should create some extra texture.
- Add a chunky edge highlight of Skrag Brown to all edges.
- Highlight everything again, this time with a fine line of Skrag Brown and Ushabti Bone mixed 1:1. This is a good mix to throw in occasional fine lines as scratches too.
- With pure Ushabti Bone , selectively highlight corners and exposed edges of the leather. Put a dot of this colour where the additional scratched above meet edges too.
- Add a little pure white (like Dead White ) to your Ushabti Bone and add dot highlights to corners.
 Black Leather
- Basecoat with Abaddon Black or a Black of your choice.
- Add a chunky highlight to edges with 1:1 Abaddon Black and Baharroth Blue .
- With pure Baharroth Blue add smaller, finer highlights.
- Selectively highlight with very small highlights of Blue Horror .
- Finally mix the Blue Horror 1:1 with White Scar and add specular highlights to select areas.
 Black Rubber Tubing
- Basecoat with Abaddon Black or a Black of your choice.
- Pick out ridges with Eshin Grey .
- Selectively highlight with Dawnstone .
- Add small highlights of Administratum Grey towards the apex of the curve, where the light would hit.
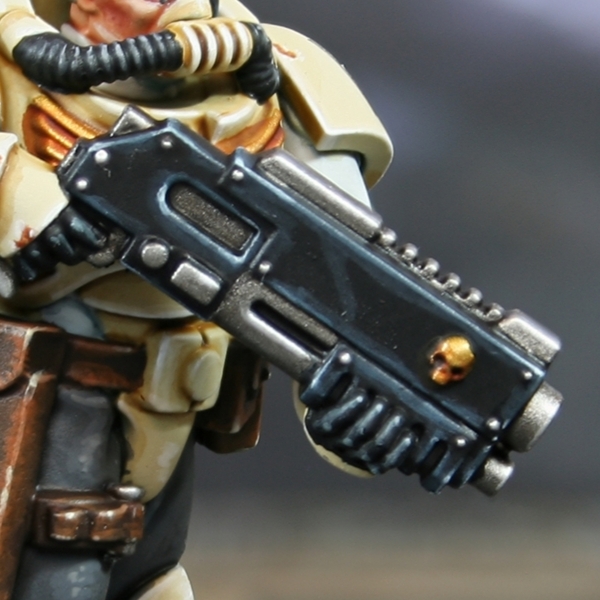 Black Weapon Casing
- Basecoat with Abaddon Black or a Black of your choice.
- Edge highlight everything with a thick line of Dark Reaper .
- Highlight everything again, this time with a thin line of Thunderhawk Blue . This colour is a good place to put in some scratches too.
- With Fenrisian Grey , selectively highlight upward facing edges, corners and prominent edges. Stick primarily to edges where the light would hit and always drag your brush towards the brightest point. If you added scratches previously, reinforce them with a smaller, thinner line underneath.
- Finally, edge add small highlights to the centre of the previous highlights and corners with Blue Horror . Try to make them very small, dots if at all possible.
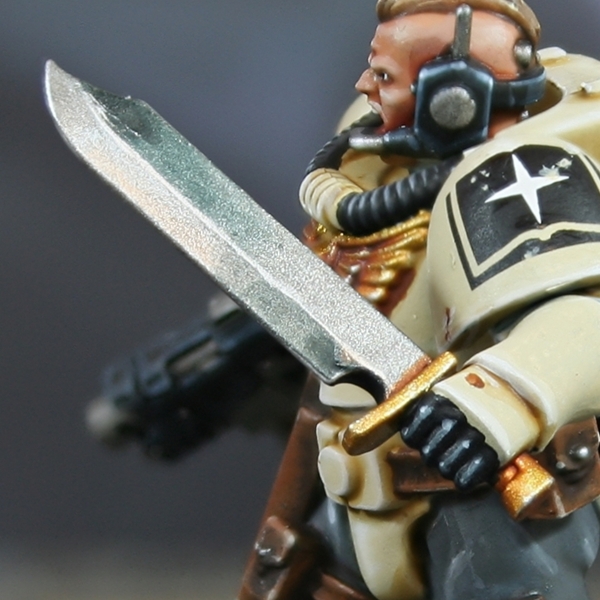
 Steel
Steel
- Basecoat with Leadbelcher .
- Wash with Nuln Oil .
- Add highlights with Ironbreaker .
- Now selectively highlight with Vallejo Model Air Silver RLM01 Metallic .
- If you wanted to add some dirt in recesses, try glazing with thin Agrax Earthshade , Seraphim Sepia or any brown wash/contrast paint.
 Red Bulb
- Basecoat with Khorne Red .
- Paint the lower left or right portion with a layer of Evil Sunz Scarlet , leaving enough room for reducing its size 2 more times.
- Paint a smaller area with Wild Rider Red .
- Add some Lugganath Orange to your Wild Rider Red and paint an even smaller patch, working further into your chosen side.
- With some pure Lugganath Orange , paint an even smaller patch, working further into your chosen side.
 Green Bulb
- Basecoat with Caliban Green .
- Paint a small patch of Warpstone Glow as close to the cantre as you can.
- Paint a smaller area with Moot Green .
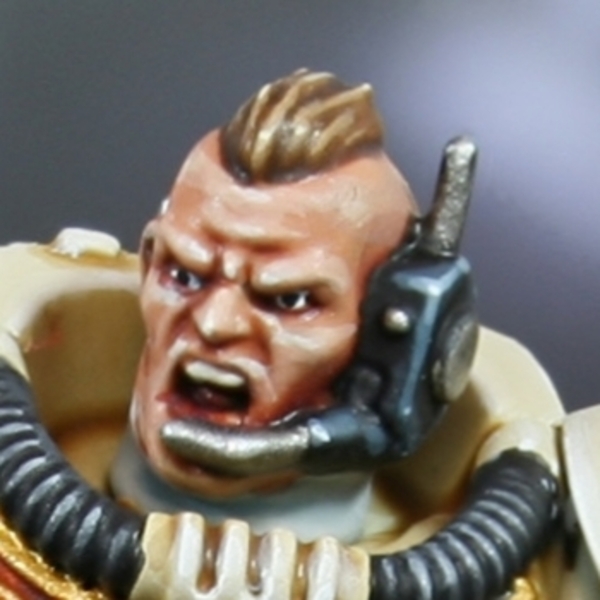 Caucasian Skin
- Basecoat with pure Cadian Fleshtone .
- Wash with Reikland Fleshshade .
- Shade around the eyes with thin Rhinox Hide .
- Shade under the eyes carefully with Drakenhof Nightshade or Cadian Fleshtone mixed with Thunderhawk Blue .
- If you want to add more warth to temples, cheeks, lips or scarring, now is a good time to glaze with Khorne Red . Consider mixing it with Cadian Fleshtone for more subtle results.
- With a 2:1 mix of Cadian Fleshtone and Wraithbone pick our chunky highlights.
- Add finer highlights with a lighter, 1:2 mix of Cadian Fleshtone and Wraithbone .
- Selectively highlight with :wraithbone.
- To make features towards the centre of the face stand out, consider specular highlights of Pallid Wych Flesh .
To paint the eyes, I simply picked out the eyeball with Ulthuan Grey and painted in the pupil with Black .
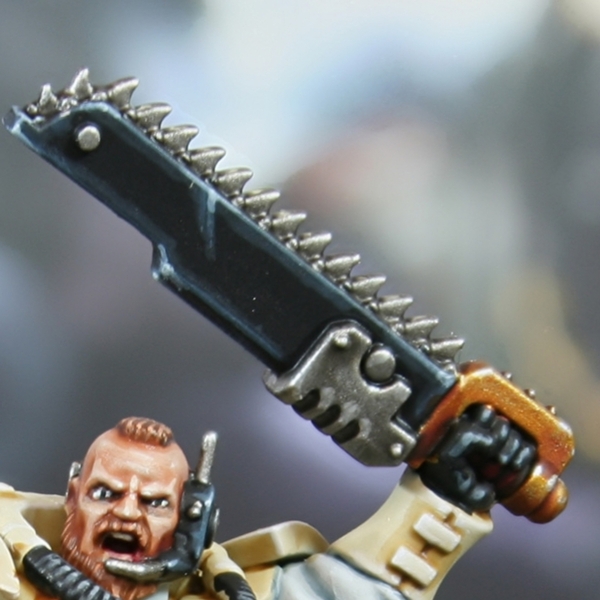
 TMM Blades
- Basecvoath with Leadbelcher .
- Glaze Gryph-charger Grey from the mid point, towards the darkest point on the blade. Do a couple of passes to re-enforce darker areas if needed.
- If you want to darken the blade further, consider mixing some Nuln Oil into your contrast paint and glaze a smaller area with this on later passes. You could even glaze with pure Nuln Oil when needed.
- Glaze Ironbreaker towards the lightest point on the flat of the blade. Repeat as needed.
- Furtther highlight with glazes of Stormhost Silver .
- Edge higlight with Silver RLM01 Metallic .
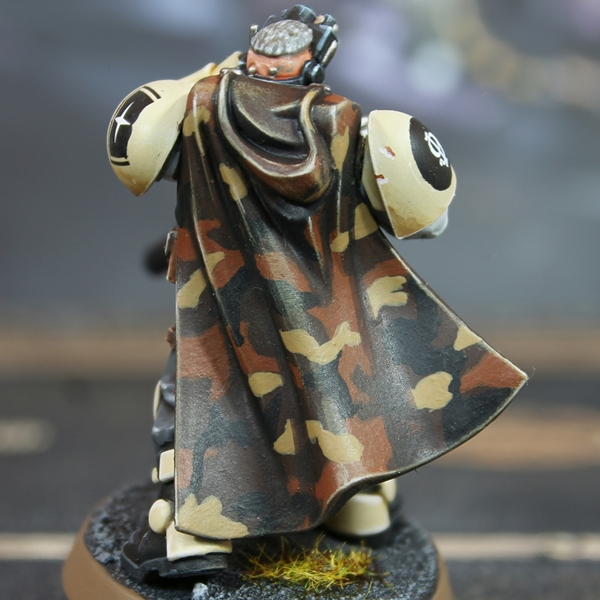 Brown Camo Cloak
- Basecoat the cloak with Rhinox Hide .
- Stipple Mournfang Brown in random patches evenly across the cloak.
- Stipple more patches, this time with Abaddon Black . Try and cover roughly the same amount of area.
- Small stippling patches of Tallarn Sand .
- Recess shade with glazes of 1:1 Rhinox Hide and Abaddon Black .
- In very deep recesses, shade with a thin line of Black .
- Gently drybrush and edge highlight with Tallarn Sand .
- Edge highlight the most prominent edges with Karak Stone . Small scratches are also good in this colour.
- Specular highlights with Wraithbone . Make these super small and selective, on the most exposed part of the edges and corners.

Rookie Brushes
RookieBrushes
Aspiring miniature painter and biscuit enthusiast. Here to share my hobby and help where I can.
Citadel Painting System 46
Base 10
- Abaddon Black
- Caliban Green
- Corax White
- Khorne Red
- Leadbelcher
- Mechanicus Standard Grey
- Mournfang Brown
- Retributor Armour
- Rhinox Hide
- Wraithbone
Shade 5
- Agrax Earthshade
- Drakenhof Nightshade
- Nuln Oil
- Reikland Fleshshade
- Seraphim Sepia
Layer 25
- Administratum Grey
- Baharroth Blue
- Blue Horror
- Cadian Fleshtone
- Dark Reaper
- Dawnstone
- Doombull Brown
- Eshin Grey
- Evil Sunz Scarlet
- Fenrisian Grey
- Ironbreaker
- Karak Stone
- Lugganath Orange
- Moot Green
- Pallid Wych Flesh
- Screaming Skull
- Skrag Brown
- Stormhost Silver
- Tallarn Sand
- Thunderhawk Blue
- Ulthuan Grey
- Ushabti Bone
- Warpstone Glow
- White Scar
- Wild Rider Red
Technical 1
- Contrast Medium
Spray 1
- Wraithbone
Contrast 4
- Apothecary White
- Gore-grunta Fur
- Gryph-charger Grey
- Skeleton Horde
Vallejo Game Color
Base 1
- 72.001 Dead White
Vallejo Model Air
Base 1
- 71.063 Silver RLM01 Metallic
Vallejo Model Color
Base 2
- 70.950 Black
- 70.951 White
Vallejo Surface Primer
Base 1
- 70.613 Desert Tan


.jpg)