Dusk Raiders - 40k
Before the Death Guard were the Hulking mass of Plague and Disease, Before their betrayal of the Emperor, Before uniting with their Father Mortarion they were the Dusk Raiders.
Primer
- Prime in Mechanicus Standard Grey
Grey Armour - Step 1
Stippling and Sponging is always super fun so when I decide to do this scheme i add the stippling to give the grey some texture
- Wash all armoured areas expect the right arm and shoulder pad with Basilicanum Grey
- Heavy Stippling/Sponging of Dawnstone (Do not over do)
- Highlight of Dawnstone on the any armour cracks or corners
- Edge Highlight of Administratum Grey but only sparsely
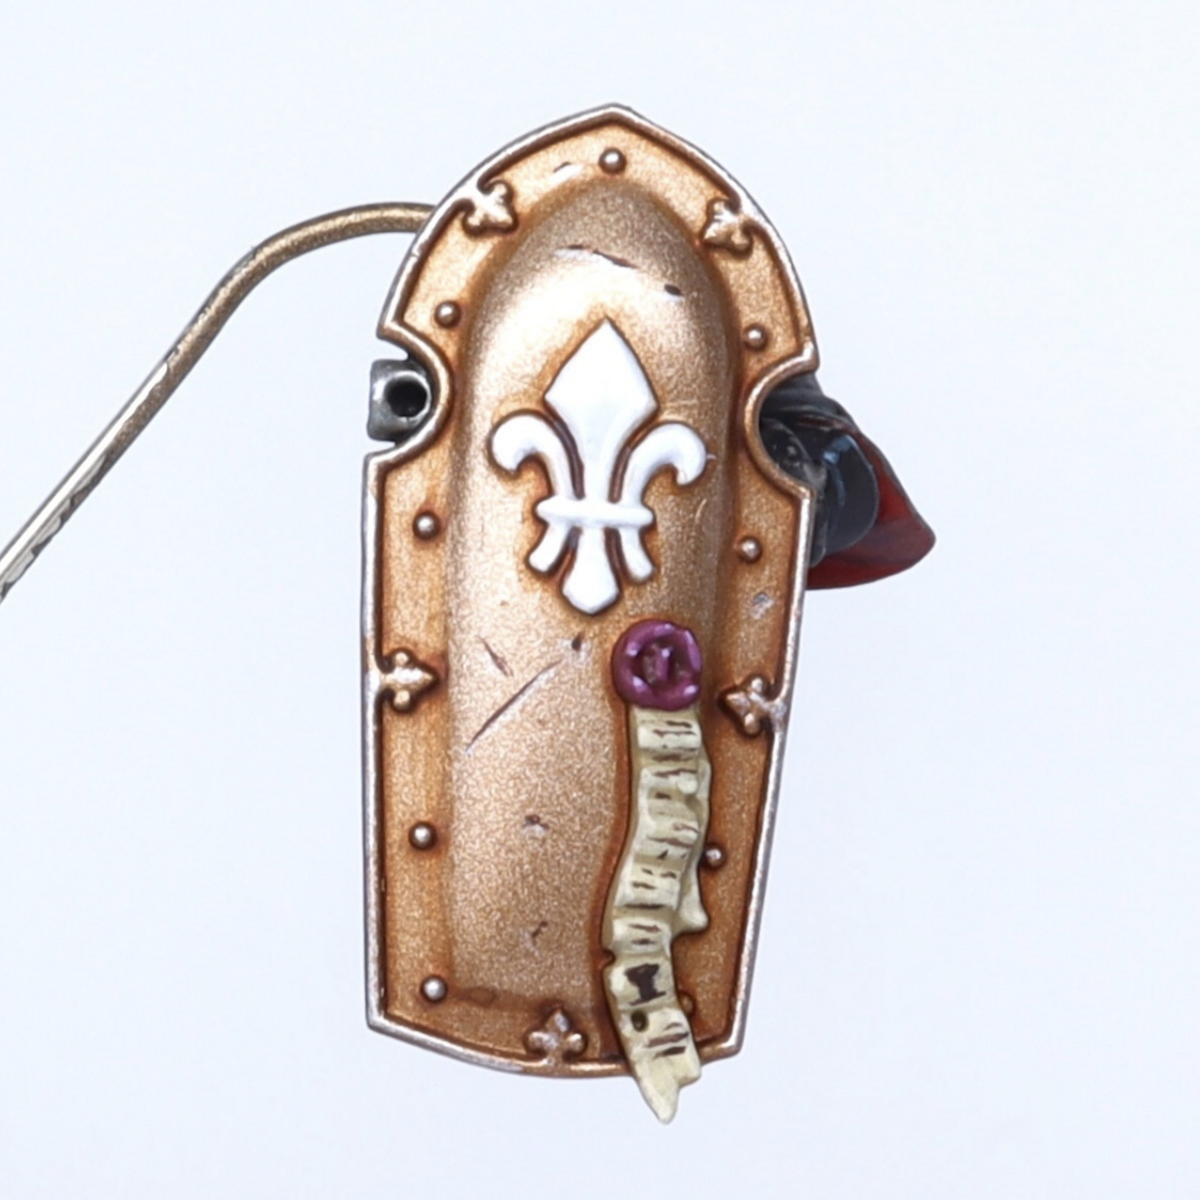
Red Armour - Step 2
The thing I love most is when i get to do patterns or non symmetrical colours, add so much more interest then just your standard flat base colour (looking at you....every space marine Founding chapter)
On Vehicles i Like to add off centre racing stripes, adds a little characters and means i get to add red armour to things that don't have arms.
- Apply Khorne Red
- Wash the red with Carroburg Crimson
- Highlight with Wazdakka Red
Brass/Bronze Trim/Metals - Step 3
Warplock Bronze is the final colour in our unholy trinity of main colours, everything from the armour Trim to your Deathshroud termies scythes will sport this colour.
- Apply Warplock Bronze to all trim and weapons
- Wash with Agrax Earthshade
Steel/ Silvers - Step 4 (Can be done at the same time as the Red Cloth)
- Apply Iron Warriors to all chainmail, gun barrels and other mechanical parts
- Wash with Nuln Oil
- We want to keep the metallics dark but as a bonus step create a glaze of Skrag Brown and add spot around the armour to add rust spots.
Red Cloth and Leather Weapon Wraps - Step 4
- I wanted more red on the models so i
- Apply Mephiston Red
- Wash with Nuln Oil
- Second coat of Nuln Oil ( i wanted to really dark
- Highlight with Mephiston Red
- Edge Highlight of Evil Sunz Scarlet
Grey Cloth - Alt Step. (For Models Like Mortarion or if you want to break it up)
- This was mainly only for Morty Cape but also any model that has the Cloth with patched with another cloth.
- Apply Skavenblight Dinge
- Wash with Nuln Oil
- Highlight with Stormvermin Fur
Green - Skin, Nurglings, Tentacles, Maggots, Ooze and Cables - Step 5
I really wanted to paint radioactive green, its such a fun colour and you never see it outside of maybe Skaven. I go overboard on my dudes cause i just love the way it breaks up the Dull colours i use for the armour. Feel free to tone it down and use other colours for the maggots and Cables and Oooze but i wanted to get the feeling of that Glowing Radiation from Cartoons.
- Base all Skin, Tentacles, Maggots, Ooze and Cables (not all cables but the ones you think would be filled with Radioactive Liqiud) in Waaagh! Flesh
- Heavy layer of Warpstone Glow only leave the Waaagh! Flesh in the very recesses.
- Layer rough spots of Moot Green
- Add White to the eyes.
- Glaze Pustulus, Eyes, and Raised areas with Yellow Green (70.954) this will help add that Fluorescent feel to the green.
- Vanish any open liquid Slimes,Oooze or anything that you want to feel "wet" with Ardcoat or whatever gloss vanish you have to add that liquid-y Shine to it
Bones - Step 6
Classic GW-style bones, Nothing to Unique on this one
- Start with a base of Zandri Dust
- Wash with Agrax Earthshade
- Highlight with Ushabti Bone
- Edge and "Raw" bone with Screaming Skull
Extras
Biologus Putrifier Pots
- Such a cool model but man I'm glad I only need 1. Also when I say rough layer I mean jab and splotch the paint onto the area, gives it a texture.
- Purple - Apply Naggaroth Night
- Purple - Wash with Druchii Violet
- Purple - Rough Layer towards the bottom of the vials of Xereus Purple
- Blue - Apply Caledor Sky :
- Blue - Wash with Drakenhof Nightshade
- Blue - Rough Layer towards the bottom of the vials of Lothern Blue
- Bronze - Apply Balthasar Gold
- Bronze - Wash with Agrax Earthshade
Plasma
- Apply a coat of Grey Seer over the plasma coils
- Apply Fire Giant Orange over the Grey seer
Citadel Painting System 31
Base 10
- Balthasar Gold
- Caledor Sky
- Grey Seer
- Iron Warriors
- Khorne Red
- Mephiston Red
- Naggaroth Night
- Waaagh! Flesh
- Warplock Bronze
- Zandri Dust
Shade 5
- Agrax Earthshade
- Carroburg Crimson
- Drakenhof Nightshade
- Druchii Violet
- Nuln Oil
Layer 12
- Administratum Grey
- Dawnstone
- Evil Sunz Scarlet
- Lothern Blue
- Moot Green
- Screaming Skull
- Skavenblight Dinge
- Skrag Brown
- Stormvermin Fur
- Warpstone Glow
- Wazdakka Red
- Xereus Purple
Technical 1
- Ardcoat
Air 1
- Ushabti Bone
Spray 1
- Mechanicus Standard Grey
Contrast 1
- Basilicanum Grey
The Army Painter Speedpaint 2.0
Speedpaint 1
- Fire Giant Orange
Vallejo Model Color
Base 2
- 70.951 White
- 70.954 Yellow Green (70.954)

.jpg)