Nighthaunt alternative color scheme
- 1) Assemble, gap fill, and mold line removal
- Prime: Grey. Photo is AP grey brush on primer. Alternatively you could prime the model black and then prime\base the outside and everything grey after. Grey leaves the inside of the model a little bright, so you can darken it at this step, or later when we base the robes.
- Typhus Corrosion heavy application on trim of robe.
- Typhus Corrosion light application with an old brush and stabbing motion from the edges of the robe to the center\back of the model. Goal is to build a transition of sorts, but detail or specificity not required, goal is a dirty textured look which is best served by random application.
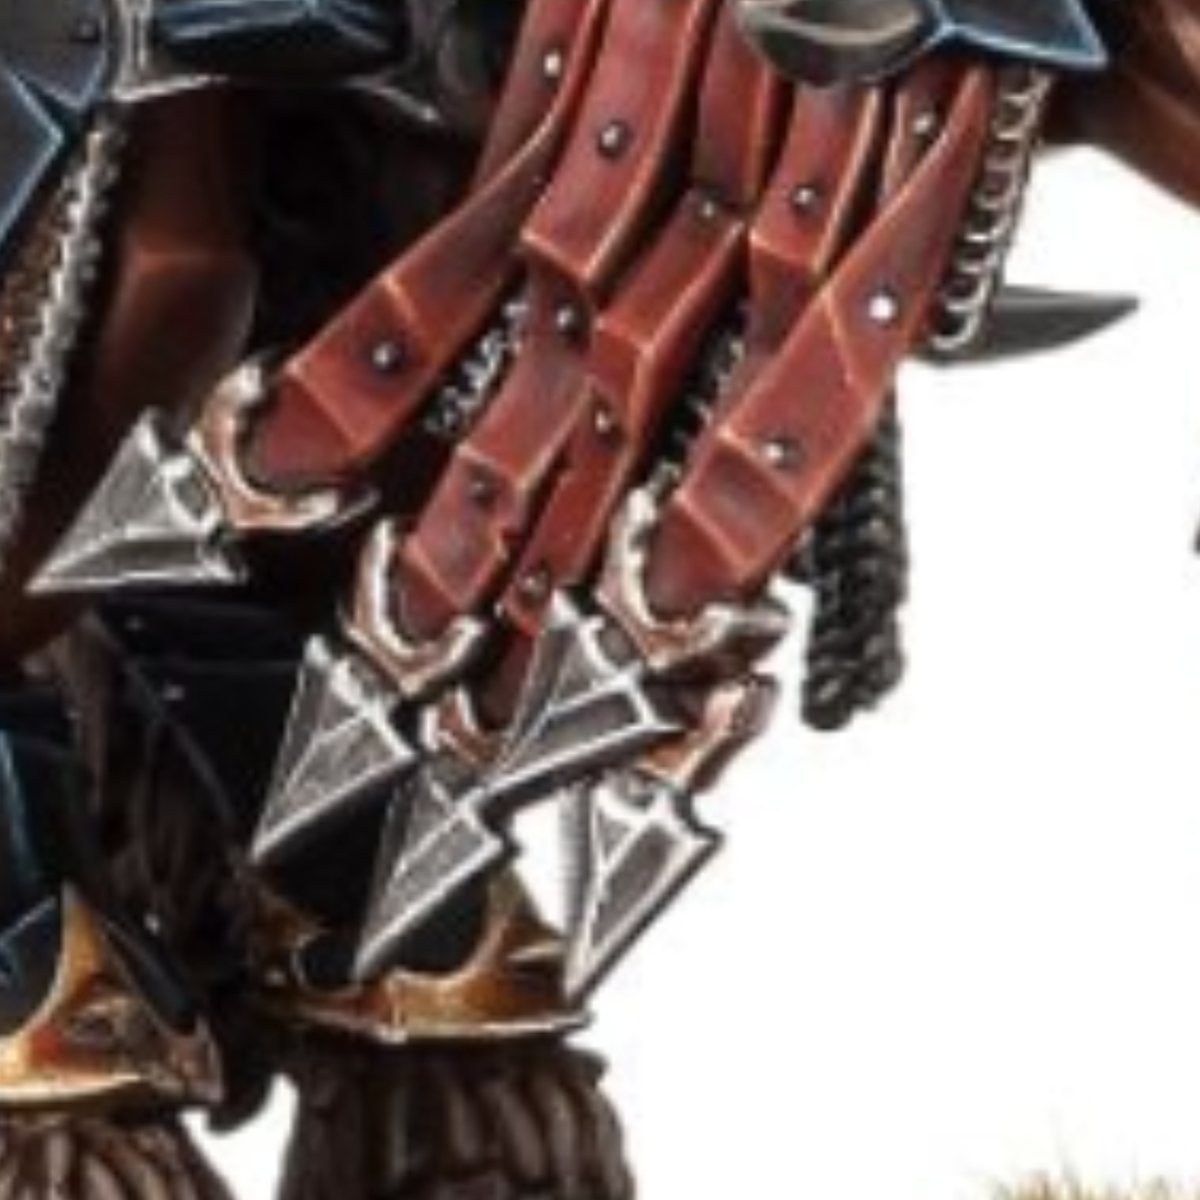
- Typhus Corrosion on chains and metal parts of the weapon/metal. Light or heavy is your choice.
- Coelia Greenshade all over the skin and skull. Do not let it pool.
- Rhinox Hide All over Robes. Make sure to get the inside of the model.
- Mummy robes (AP) + Lahmian Medium 1 part paint, 3 part medium. Glaze\thin consistency. Start from the head and shoulders and brush stroke down. Built up layers. Heaviest on top of head and top of shoulder. More emphasis on top robe than the bottom robe.
- Reikland Fleshshade all over robes. Don't let it pool. Heavier application on bottom of bottom robes.
- Inktense Wood (Scale 75) If wooden shaft: Thin black and white (any) lines simulating wood grain. Let dry. Cover with Scale75 Inktense wood. let dry. If too bright, mix 1:1 inktense wood and Nuln Oil (GW Shade). Give light application.
- If wooden shaft - alternative. When applying the simulating wood grain, apply no lines for approx 1 mm above and below where the hand grips. Apply no inktense wood to this section either, or if you are applying multiple layers, apply 1 less layer to this portion. Should create an effect where the handle appears worn.
- Hexwraith Flame = apply to tops of hands and skull.
- Rakarth Flesh + Lahmian Medium 1:1. lightly cover skin and skull, raised areas as if highlight. Aiming for a ghostly feel so uniformity no needed or required.
- Black Metal (Scale 75) + Plate Mail metal (AP). 1:2. Cover all metal and chains.
- Black Metal (Scale 75) + Plate Mail Metal (AP). 1:1. Paint only bottom half of chains, and bottom parts of any other metal\weapon, as if painting a shadow or recess
- Nuln Oil . On all metal. Light application
- Black matte paint: All flame items coming from the ground and tips of robe near those flames.
- Miami Sunset (TurboDork Colorshift). On all flames and tip of robe you painted black. This paint needs multiple layers to really shine, so overpaint on the robes to build a slight transition.
- Alternative - after painting these portions matte black, base with Let Them Eat Cake (TurboDork Colorshift) for 1-2 layers before switching to Miami Sunset.
- Stirland Mud On base. For added effect leave some indents to make puddles.. Once dry add Vallejo water texture or other water simulating medium to desired effect.
- Matte varnish.
Citadel Painting System 9
Base 2
- Rakarth Flesh
- Rhinox Hide
Shade 3
- Coelia Greenshade
- Nuln Oil
- Reikland Fleshshade
Technical 2
- Lahmian Medium
- Typhus Corrosion
Texture 1
- Stirland Mud
Contrast 1
- Hexwraith Flame