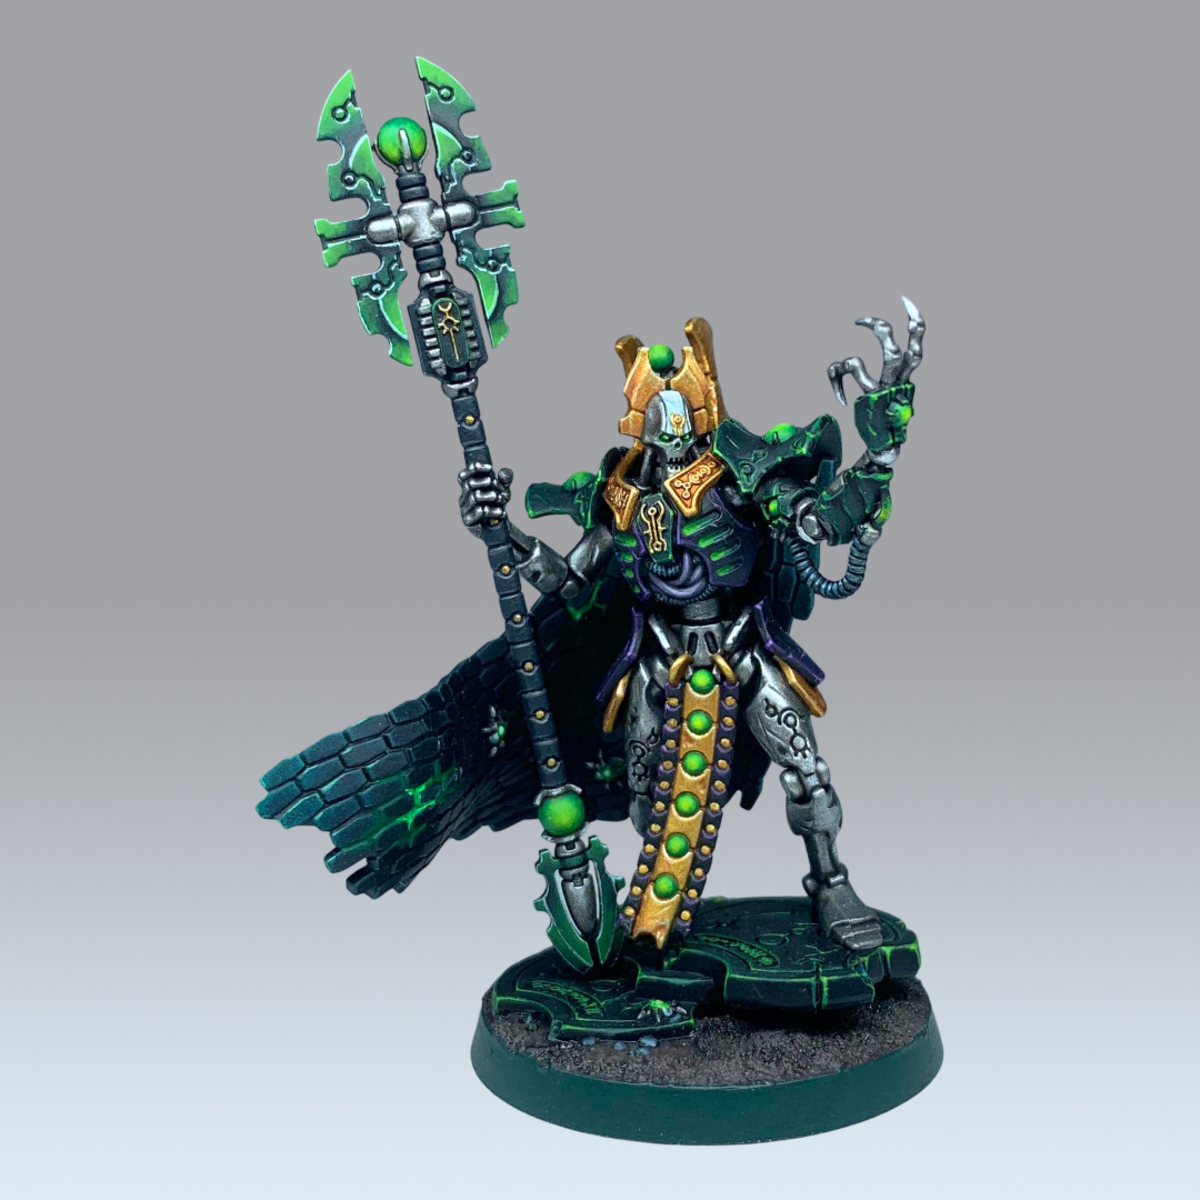
How I painted the new Imotekh the Stormlord, as a text supplement to my video tutorial.
I started Imotekh in subassemblies - I primed and painted the base before anything else. I left the cape and the staff off, built the rest. This helps get your brush around the cloak, which would be a nuisance if it was attached, and also lets me prime them in different colours to help speed up some steps. When everything was primed, I attached him to the base to make handling the mini easier.
Cloak
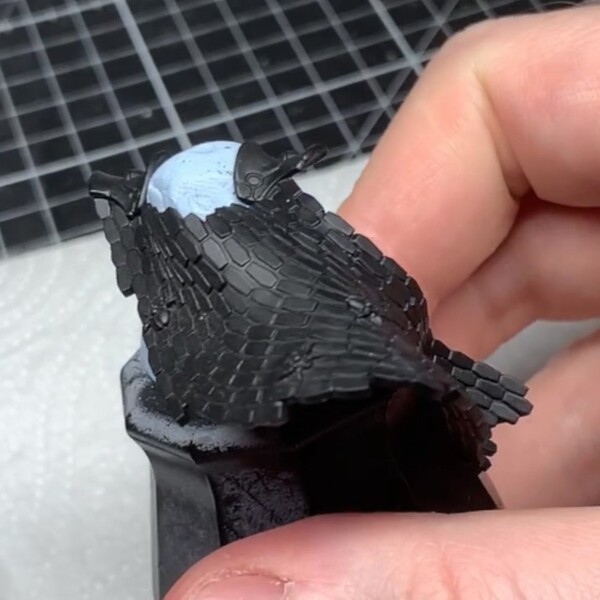 I primed the cloak with a black spray primer - The particular primer doesn't matter, just wants to be black. I'd recommend painting over a layer of your usual black after that to help with fixing any errors later!
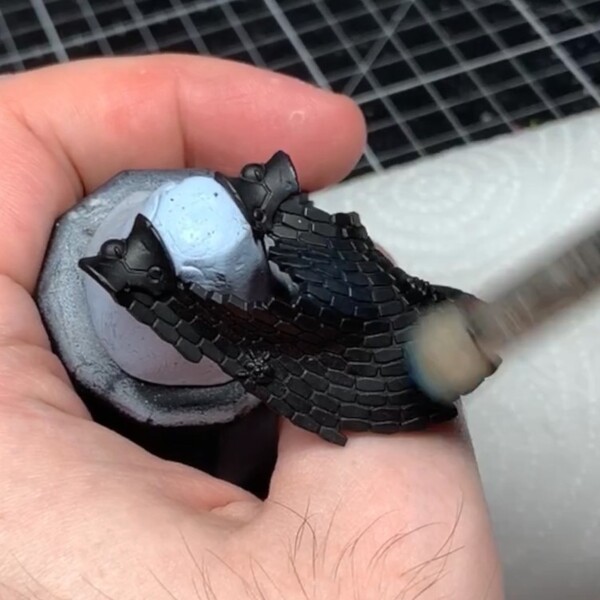 Start with a healthy drybrush of Incubi Darkness . I held the cloak up to my painting lamp to see where the light was catching and tried to paint those areas, giving a nice a dark teal cloak.
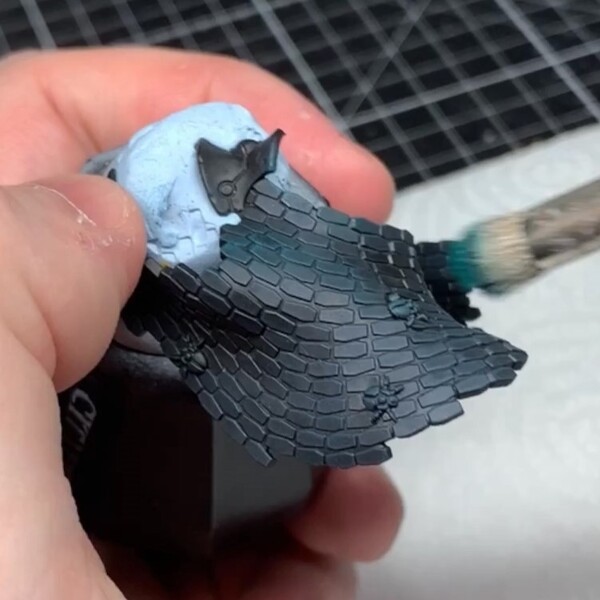 Lighter drybrush then of Kabalite Green , covering a smaller area than the last step as well as a little around all the edges.
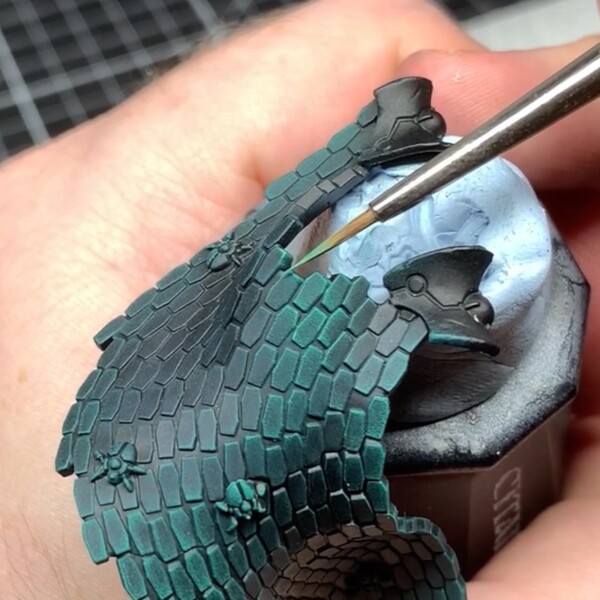 A final drybrush of Sybarite Green , followed by some selective edge highlights. You just want to pick the edges and corners of the plates that'll be in the brightest spots on the cloak.
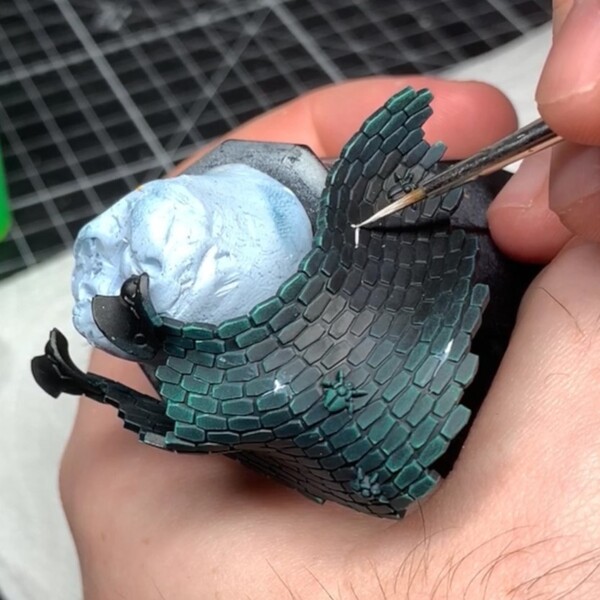 Despite being called the Stormlord, he's really lacking in any lightning representation, so I tried to add some by thinning White and running it into some of the spaces between the plates. I want a kind of 'lightning in thunder clouds' look.
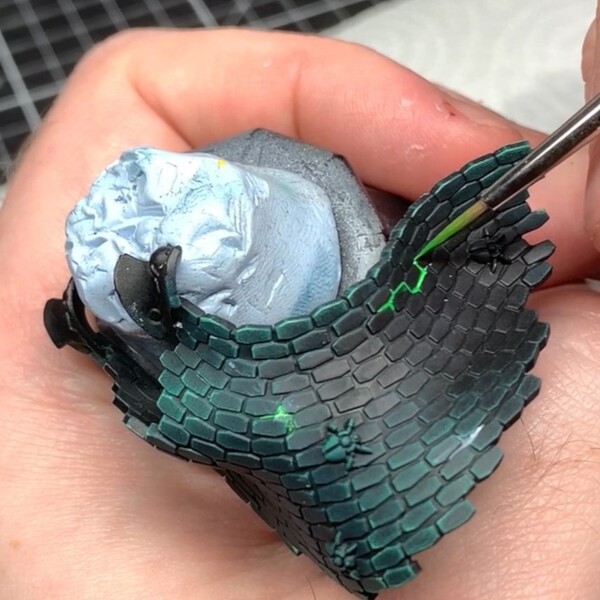 Run some Green Fluorescent over the white to get a vibrant, green Necron energy feel.
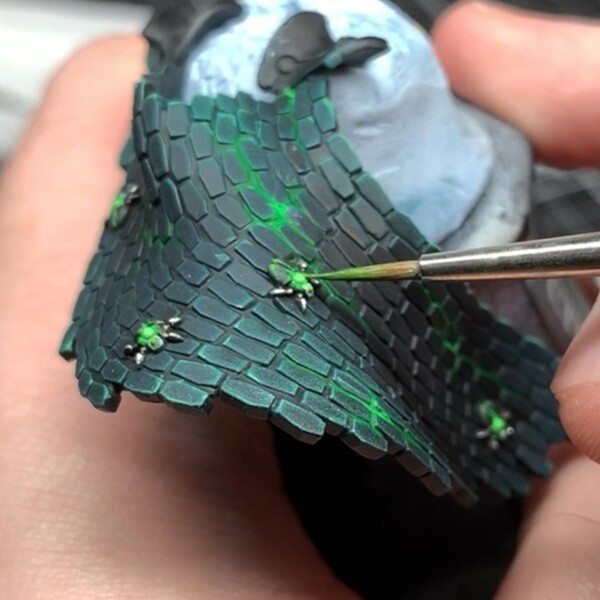 I'll then paint all the Scarabs on the cloak. To save some time - I started by painting the silver with Leadbelcher , Nuln Oil and Stormhost Silver . The black carapaces I did with Doom Death Black , Caliban Green , Warpstone Glow and Moot Green . The white faces are Celestra Grey , Ulthuan Grey , Gryph-charger Grey , Ulthuan Grey again and White . The eyes are just a dot of Moot Green , and the orb in the back is alternating layers of Corax White and Green Fluorescent .
Put the cloak to one side for now, we'll worry about the shoulders later.
Silver
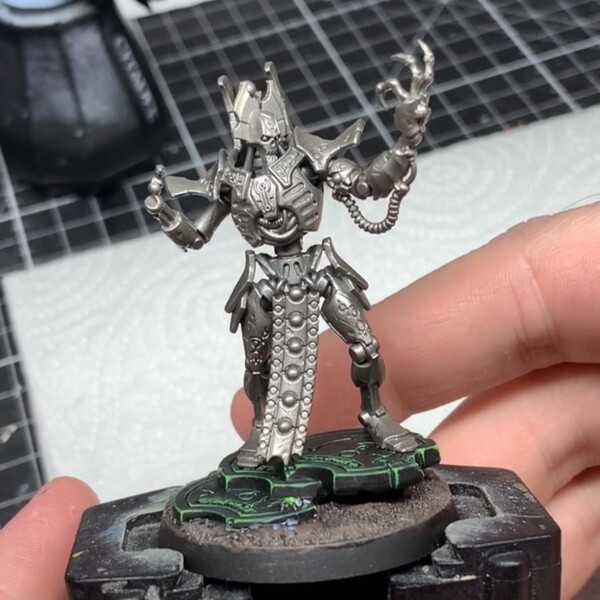 I primed the body and staff with Leadbelcher .
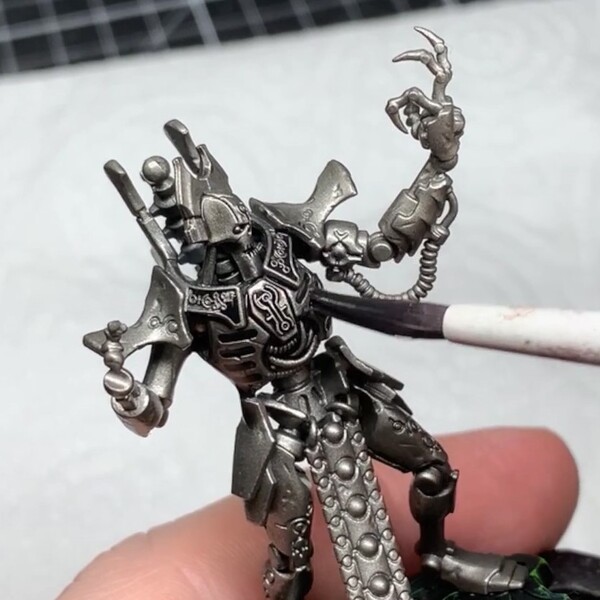 Douse the whole mini with Nuln Oil - This doubles as not only shading back the silver, but also helping with the smoothness Leadbelcher spray gives. I often have problem with paint beading on the surface, an all over wash helps combat it.
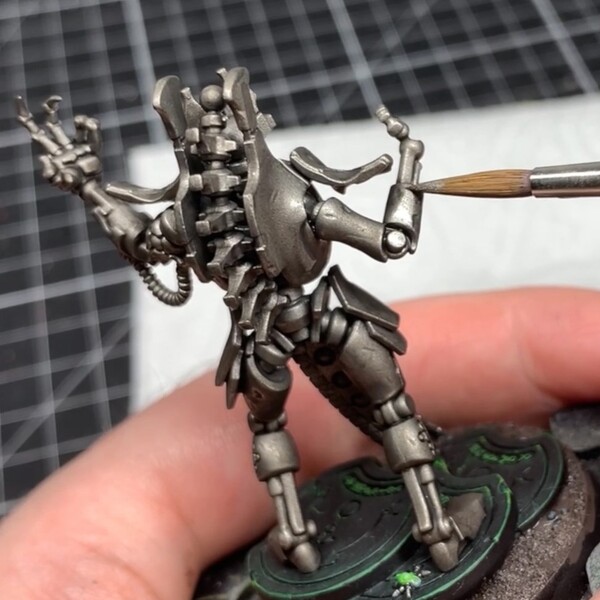 Relayer the silver areas with Ironbreaker .
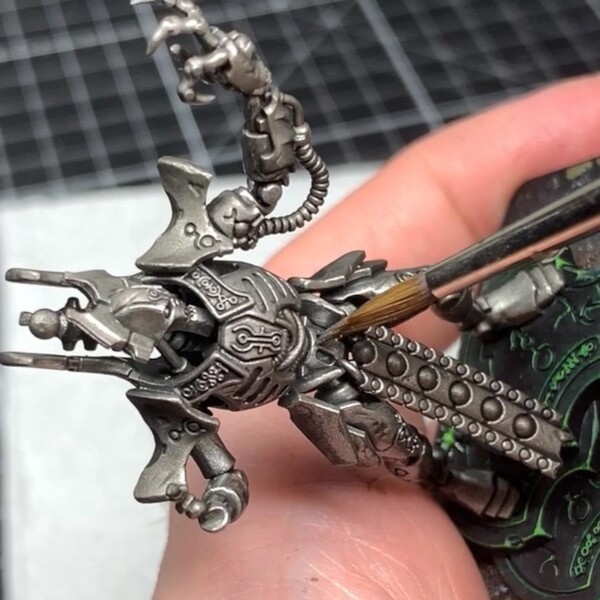 Edge highlight and glaze with Stormhost Silver . Water down the paint to just the flake when glazing with metallics and pull toward the top of each silver section to make it look really shiny.
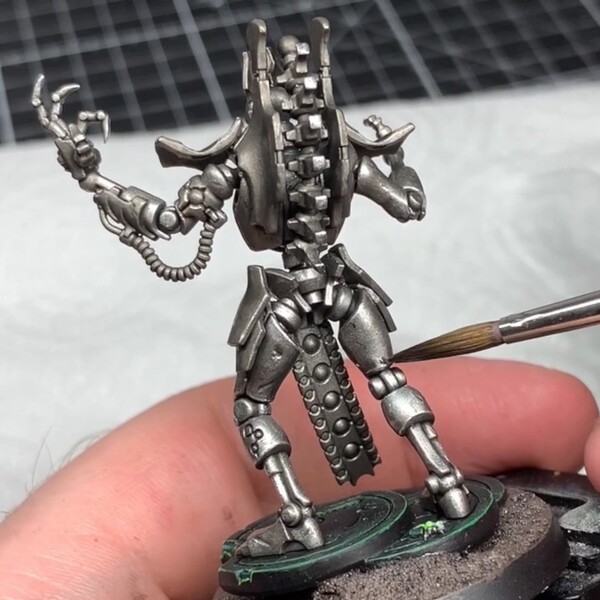 I counter shade towards the bottom of each silver section with thinned Basilicanum Grey .
Gold
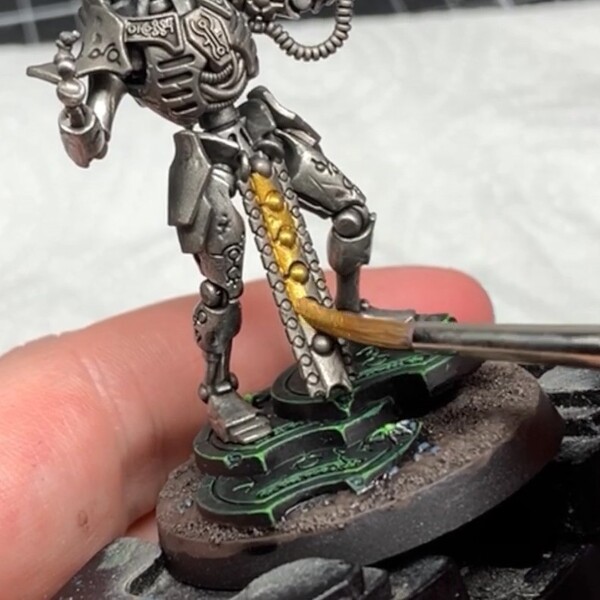 Block in the gold areas with Retributor Armour . I did his head crest, the collar and attached shoulder plates, the loincloth and the lower plates at his hips.
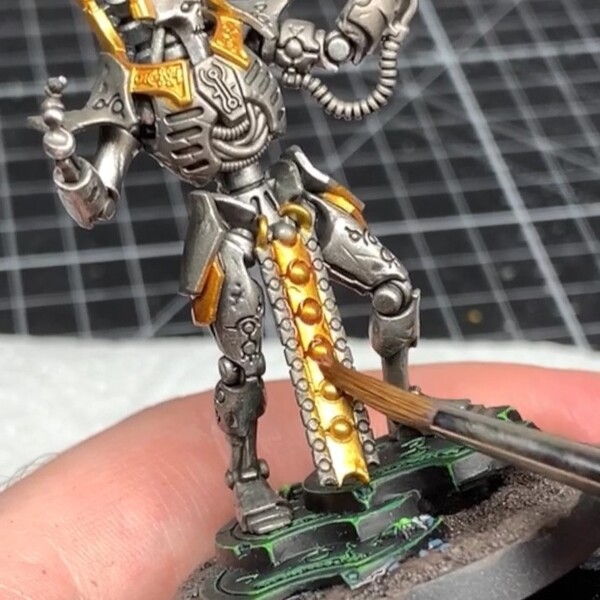 Give the gold a good wash of Reikland Fleshshade .
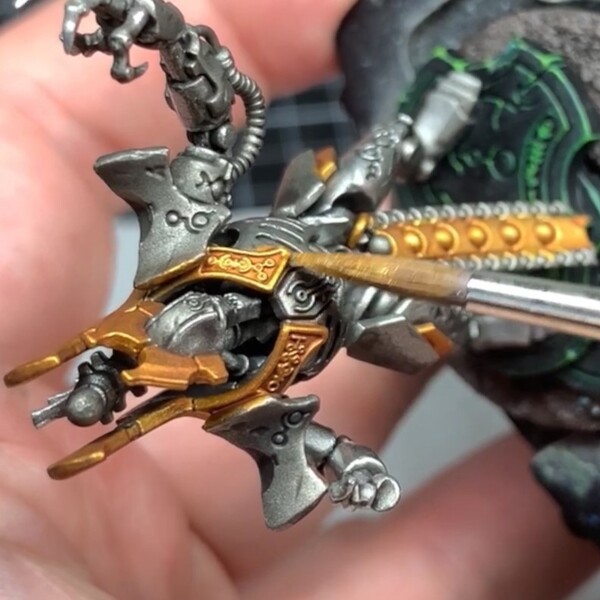 Relayer up with Auric Armour Gold . This paint will need a couple layers to get nice an solid.
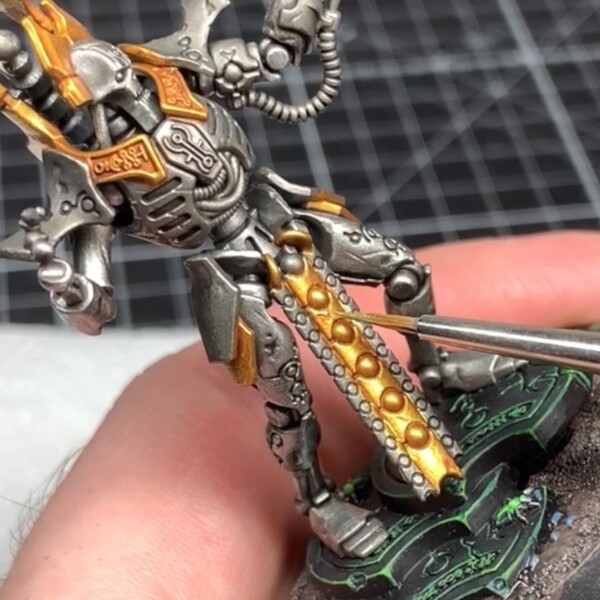 Edge highlight the gold with a 60:40 mix of Liberator Gold and Stormhost Silver . No need to be exact on the ratio, you just want more gold and silver in the mix.
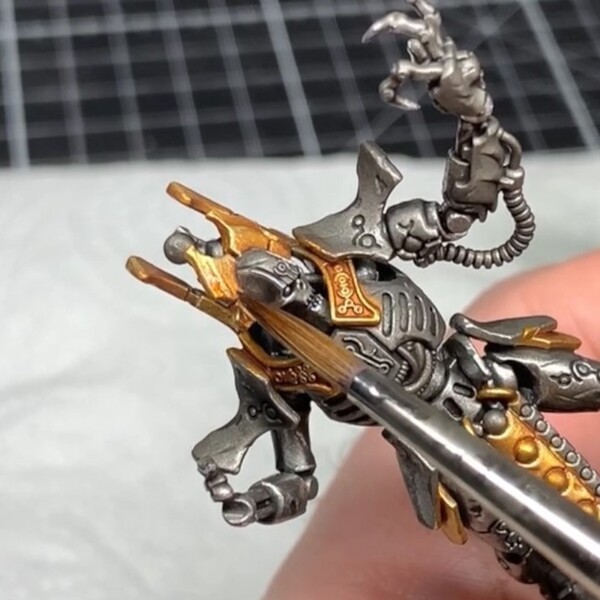 I brought back Reikland Fleshshade to push some of the shading a little darker. Relayering can take a bit of the edge off, so I like to add some thinned wash to push back gradients and help other details (Like the runes in the collar) pop out a bit more.
White
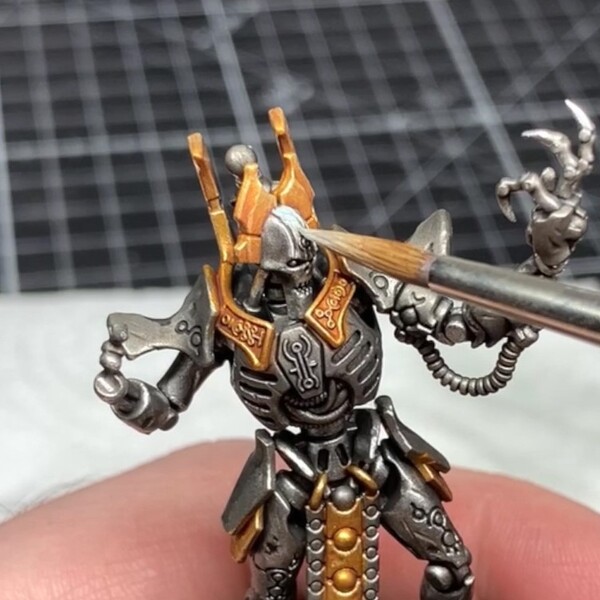 My Overlords all have a white stripe on the forehead, so I did the same to Imotekh to have him match my army. I based the stripe in with Celestra Grey - Do a couple thin layers to keep texture build up to a minimum, and to not soften the edges around the forehead symbol. We'll paint that in as gold later.
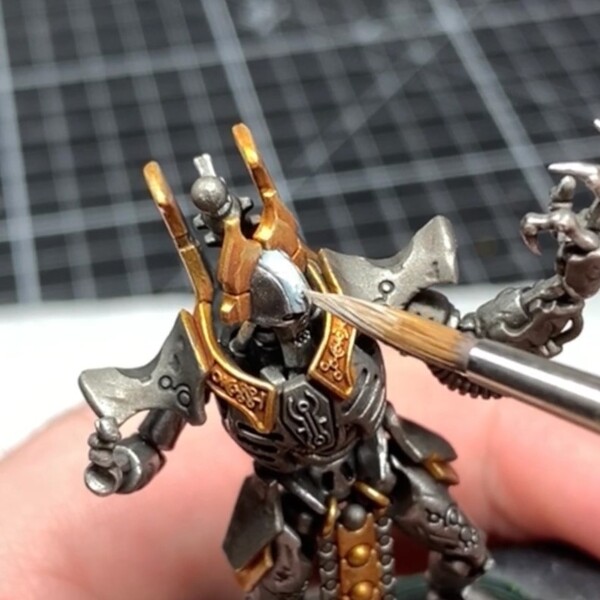 Relayer the stripe with Ulthuan Grey . I do Celestra first to help this colour with coverage, but you still want to try and keep any texture build up to a minimum, so keep your paint thin and do 2 or 3 coats for a strong blue-white.
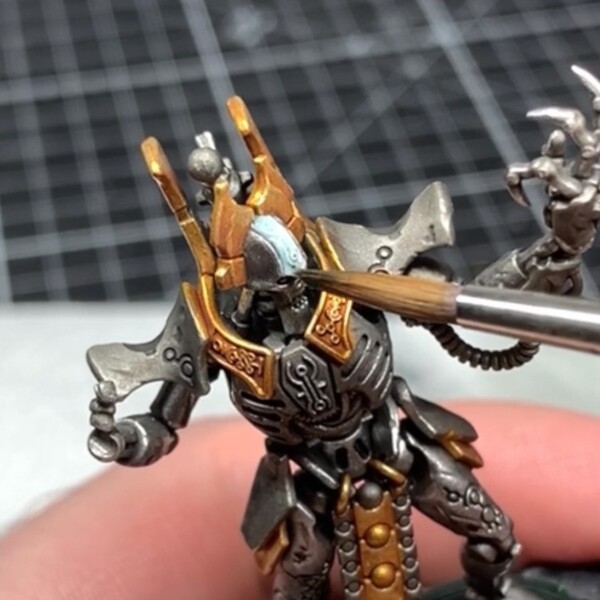 Wash down towards his eyes with Gryph-charger Grey .
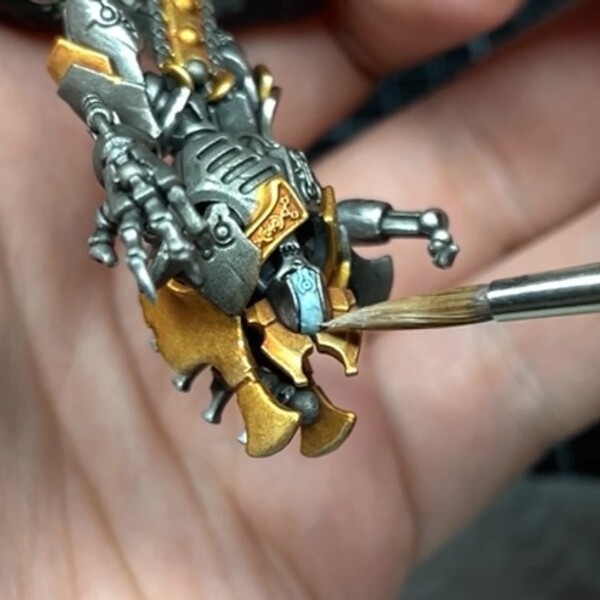 Layer back up to the top of the head with Ulthuan Grey again, keeping a gradient for a bit of visual interest. I also edge highlight the shaded section with the same colour.
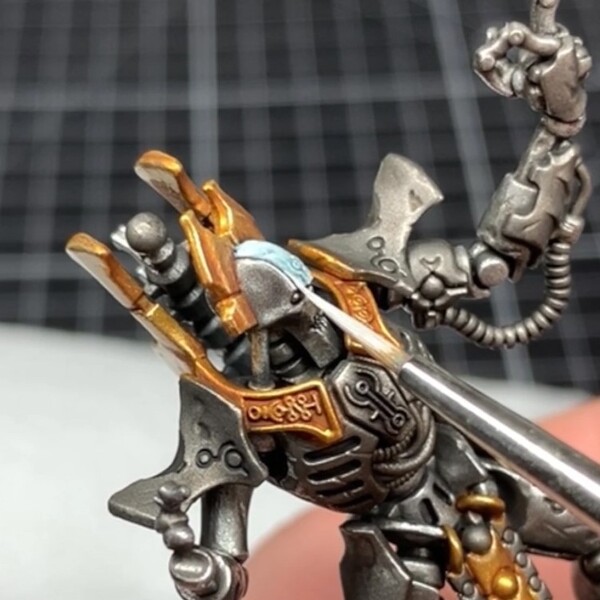 Last edge and point highlight with White .
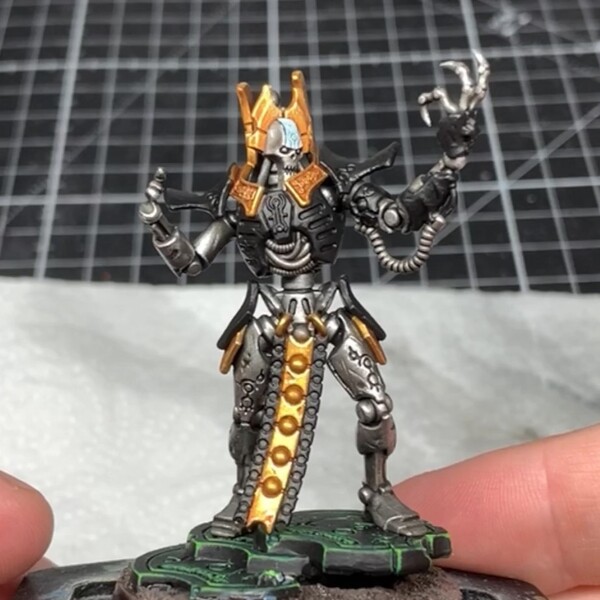 At this point I kill a couple birds with the same stone by blocking in any black sections with Doom Death Black - In my case I painted the ribcage and cartouche, the raised segments on the left arm, the upper plates at the hips, and the thinner sections of the loincloth.
Purple
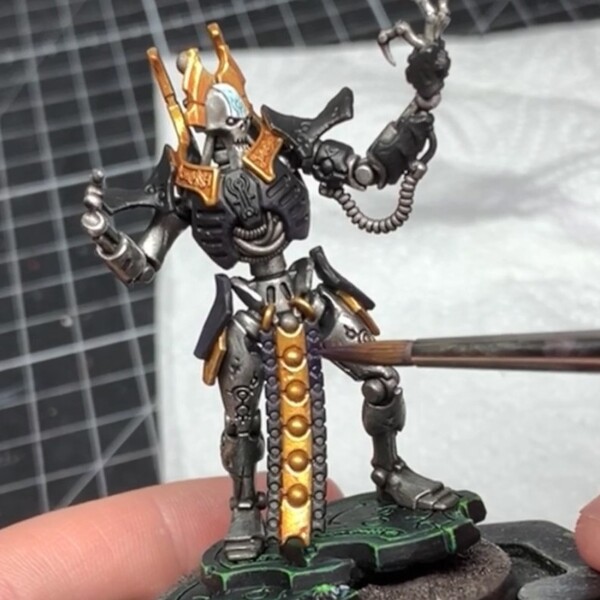 I painted an old Finecast Imotekh a while back, and I loved the purple ribcage they did on the boxart, so I'm going to that here! I started by glazing down towards the bottom of the rib cage and black hip plates with Naggaroth Night for a hint of colour.
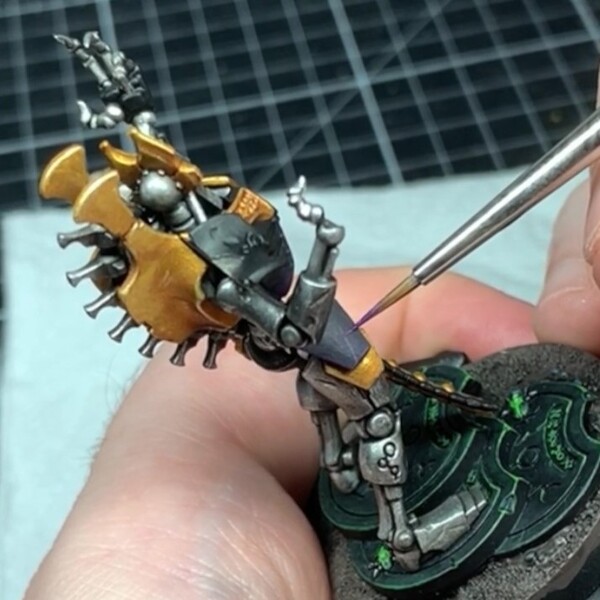 Edge highlight with Xereus Purple , adding some small scuffs where you want to.
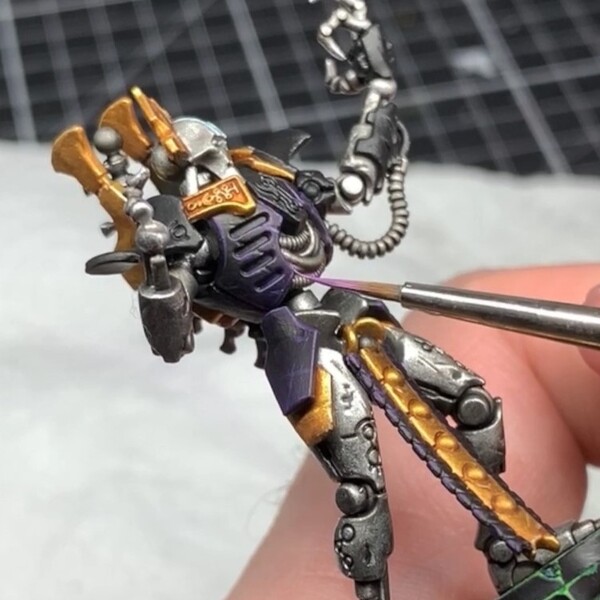 Point highlight with Genestealer Purple .
Cables
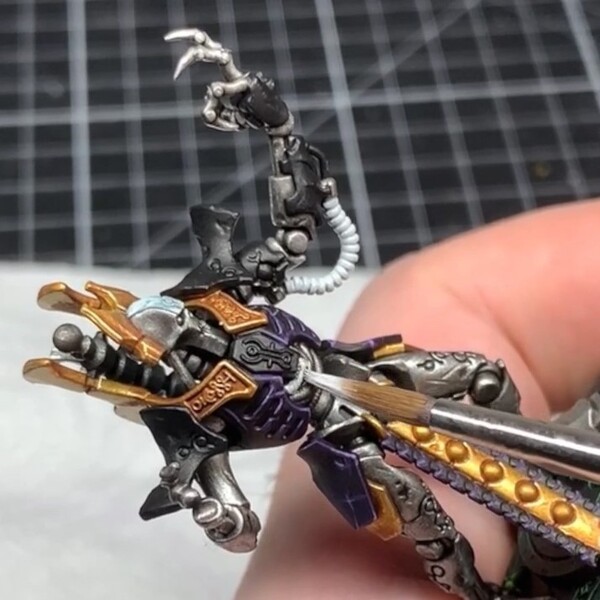 There's a couple flavours of cable on the mini which you can feel free to paint all the same if you like. I like to differentiate, and I start by blocking the ribbed cables in with Corax White .
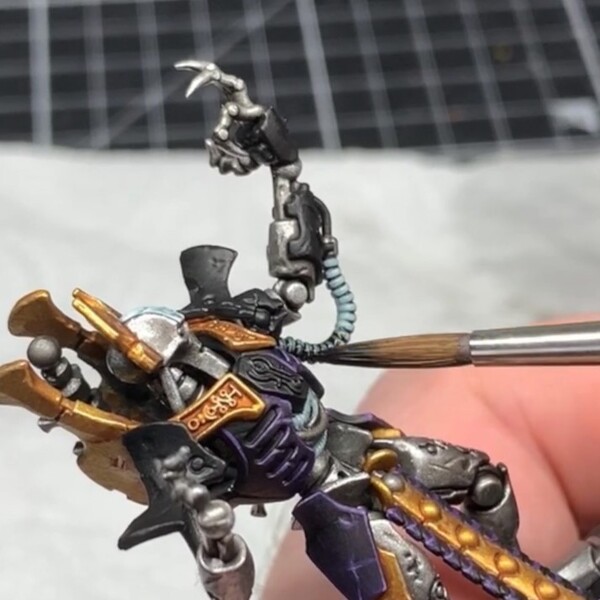 Wash all over with Gryph-charger Grey , then when dry with Black Templar . This'll leave the cables with a blue-black colour.
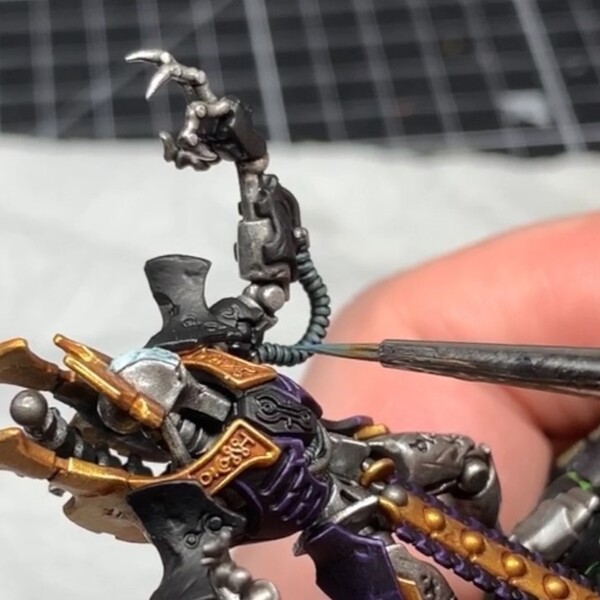 Edge highlight the ribs with Thunderhawk Blue .
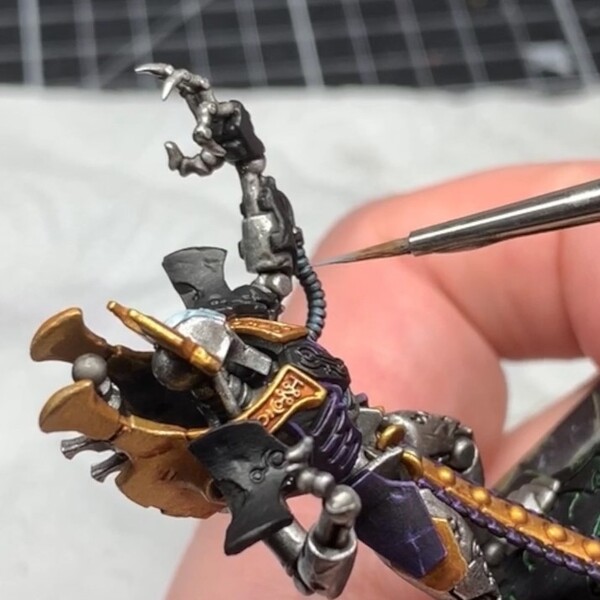 One last smaller highlight with Fenrisian Grey .
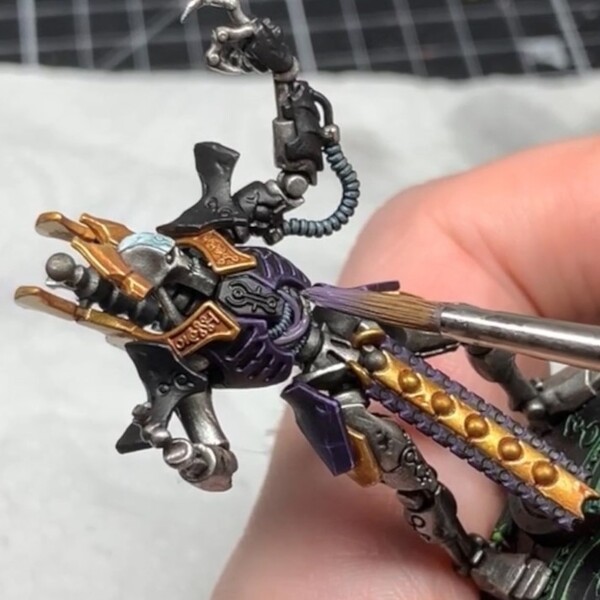 The smooth cables I do an off-purple, give a vague internal organ feeling to the ribcage danglies. I base those in with Daemonette Hide .
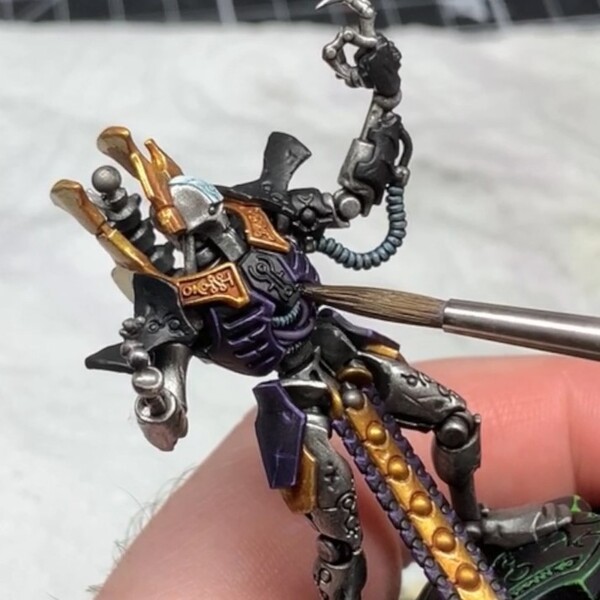 Wash with Nuln Oil .
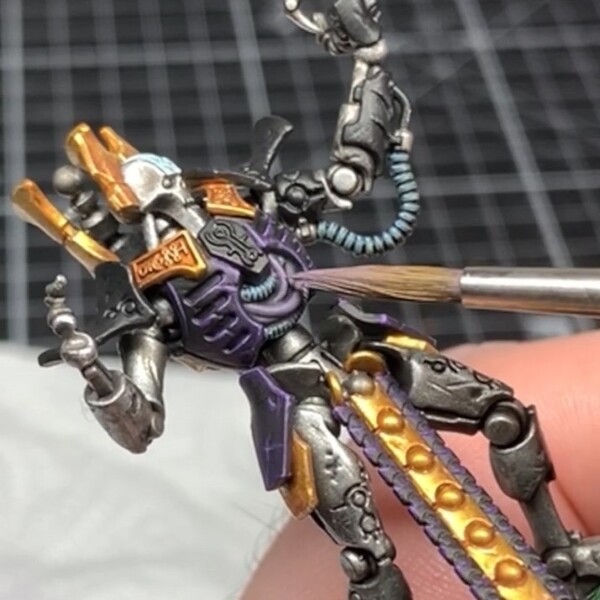 Layer Warpfiend Grey towards the middle of the cables. I put another small wash of Nuln Oil towards either end to help blend the gradient.
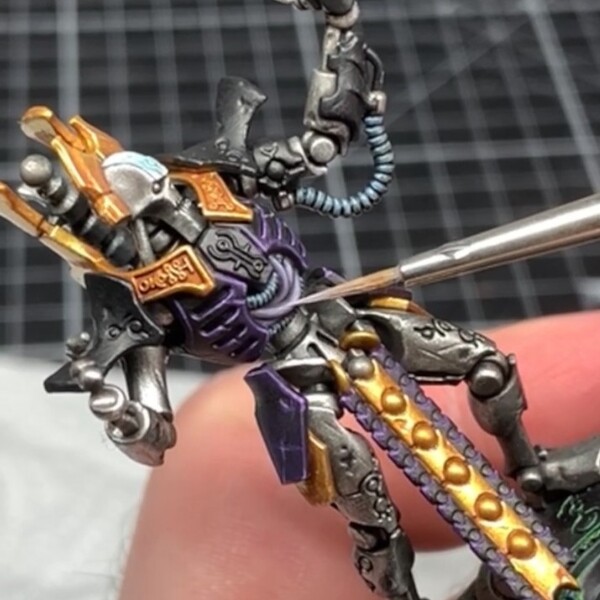 Line highlight with Slaanesh Grey .
Green
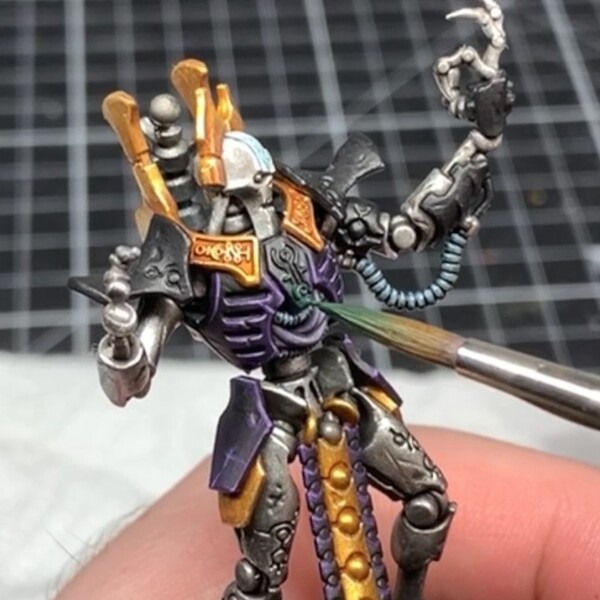 A couple green areas to tackle next. Starting with Caliban Green : First, I glazed towards the bottom of the cartouche and around the Gauntlet of Fire to get a hint of colour on them.
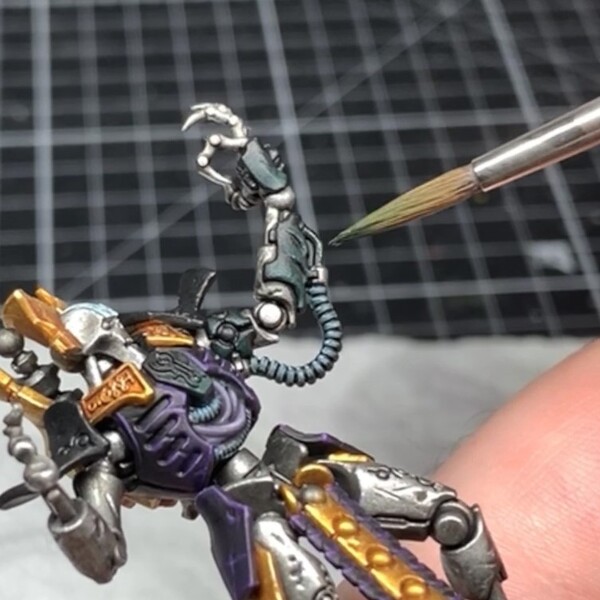 The last cable, on the back of the Gauntlet, I want to be a glowing green, so I also glaze towards the center of this cable with Caliban Green . Leave a little black showing where it meets the Gauntlet.
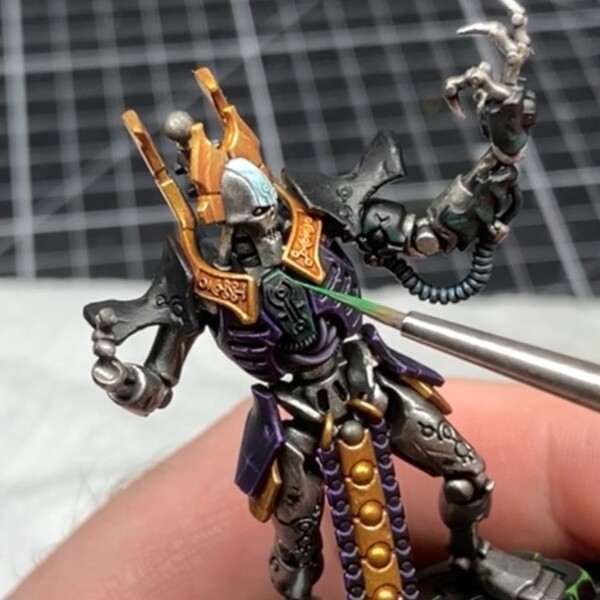 Next Warpstone Glow : I edge highlight the cartouche and Gauntlet, adding small lines to simulate cracks to break up larger areas. Also block in any orbs on the mini.
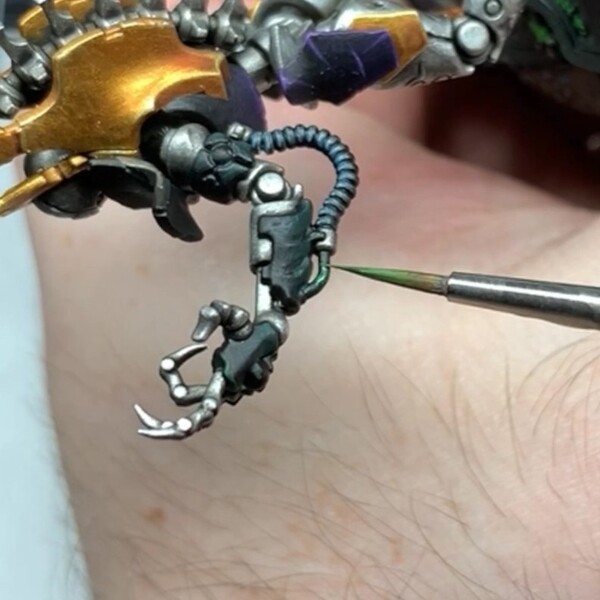 I'll also glazed the small cable again, just over a smaller area than before to build the gradient in, and blocked in any orbs that I want to look glowy.
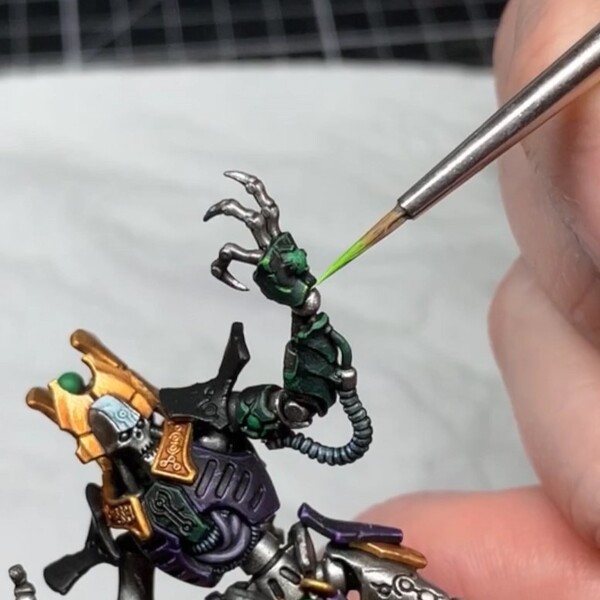 Then Moot Green : Just a small point highlight onto the cartouche and Gauntlet with this.
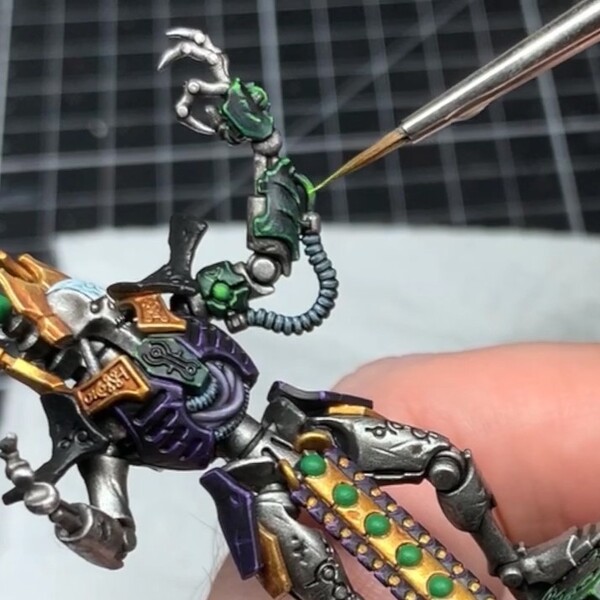 There's also one small glaze right towards the center of the small cable, and towards the center of the orbs leaving a little Warpstone Glow around the edge.
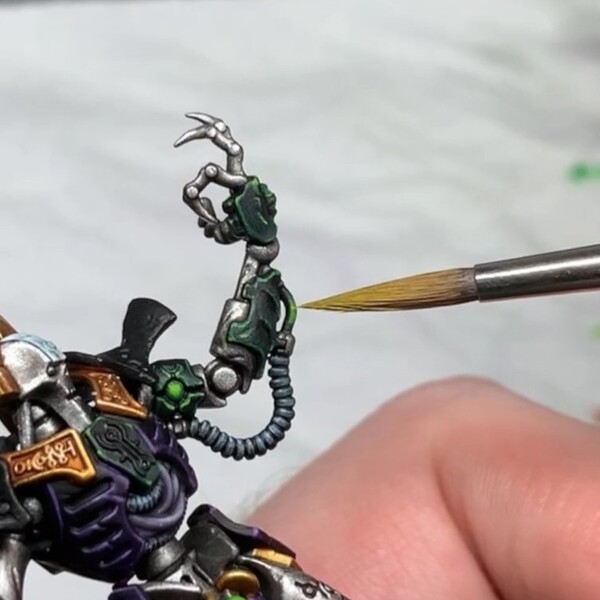 Lastly, I put a thin glaze of Yriel Yellow onto the cable and orbs to create a hot spot.
Last Details
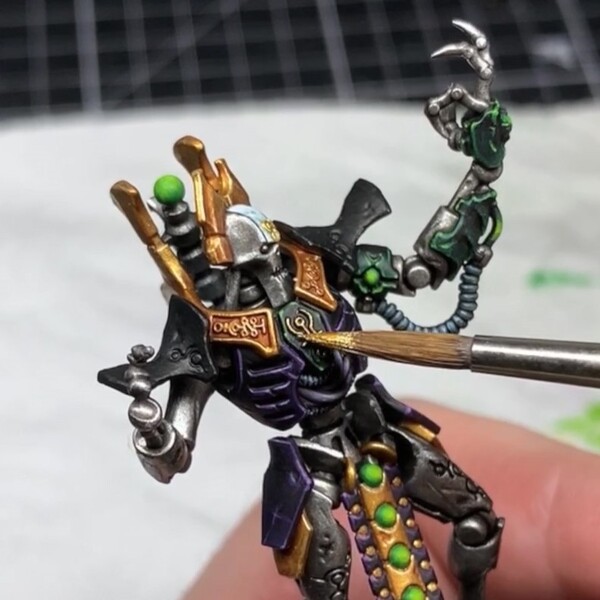 Before moving on to the staff, I went back over the mini and finished up anything I hadn't done yet - Namely the gold details I skipped earlier, basing with Retributor Armour and highlighting with a 60:40 mix of Liberator Gold and Stormhost Silver .
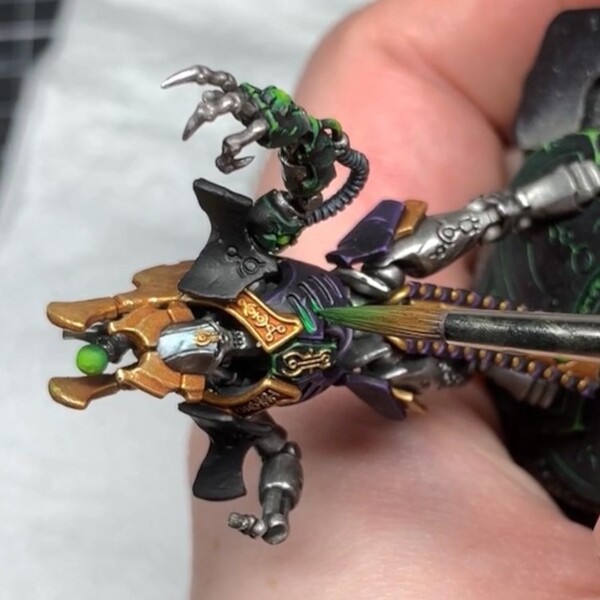 I also forgot a somewhat important step - There's no glow in the eyes or ribs...
I watered down Warpstone Glow and flooded the eye sockets and ribs, pulling the paint towards the cartouche to build a glow in the middle.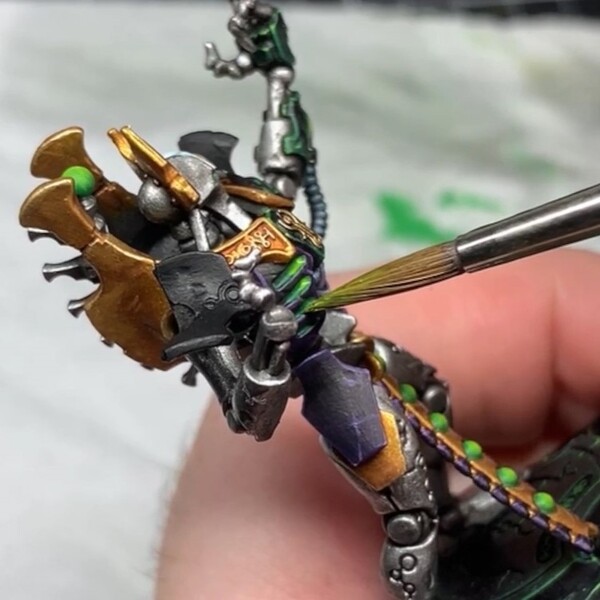 I repeat the flooding step in the ribs with Moot Green , as well as basing in the eyeballs.
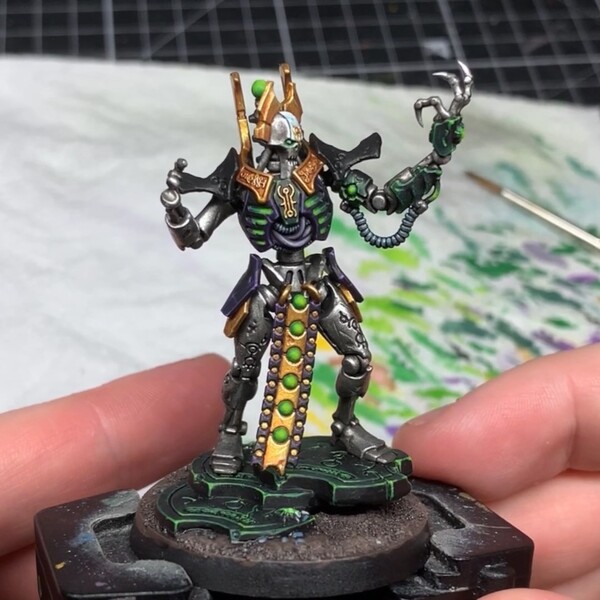 I dot the eyes with Gauss Blaster Green .
Staff Grip
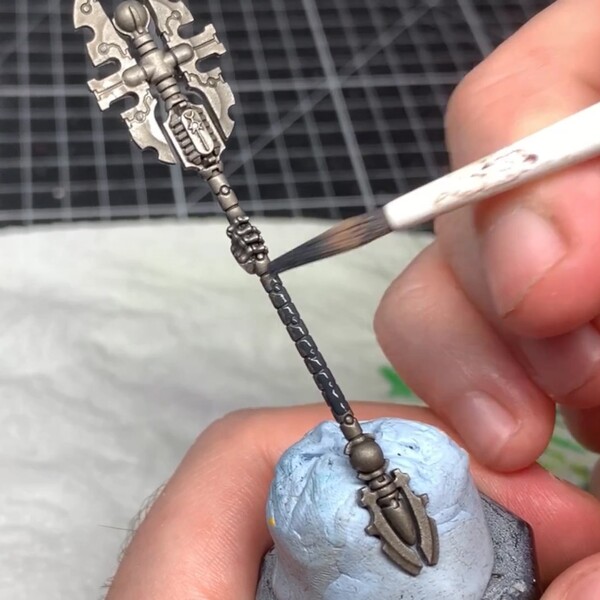 Now for the Staff of the Destroyer. Up to this point, I'd washed the whole thing when I did Imotekh and painted the hand up in the same way. I then focused on the grip, as it's one of the bigger areas on the weapon. I started by blocking in with Corvus Black .
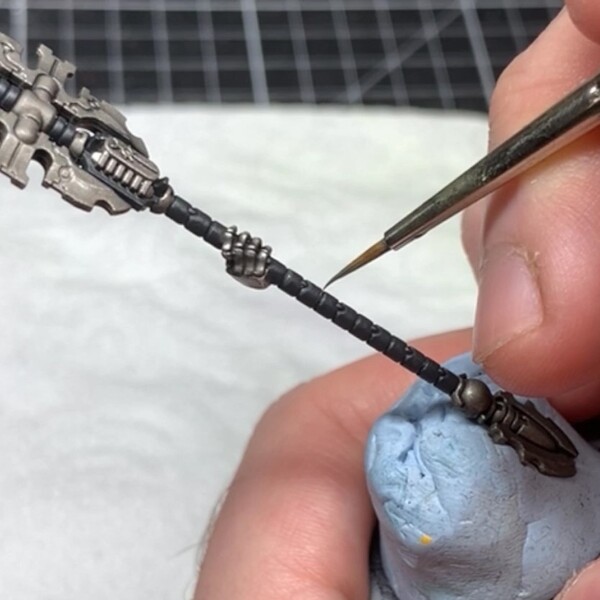 Each ridge on the grip then got an edge highlight, top and bottom, with Skavenblight Dinge .
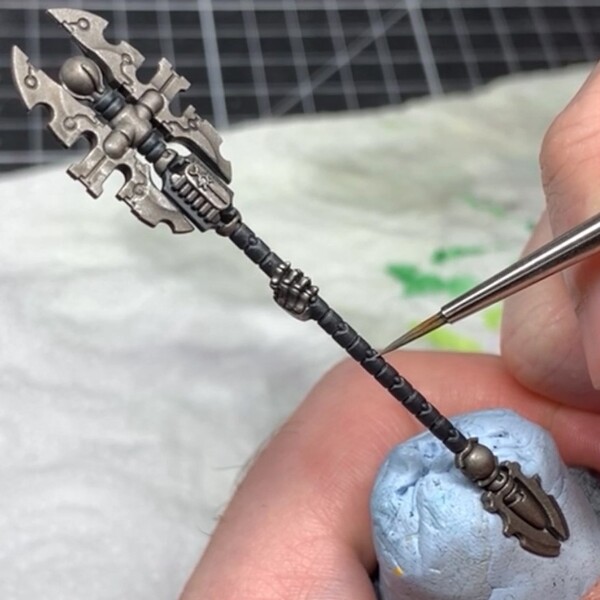 I did a small highlight just on the top of each ridge towards the center with Stormvermin Fur .
Staff Metallics
 Next I focussed on the metallics, blocking in the tiny circles in the handle with Retributor Armour . These are so small that they just need a solid basecoat, no need for washes or highlights.
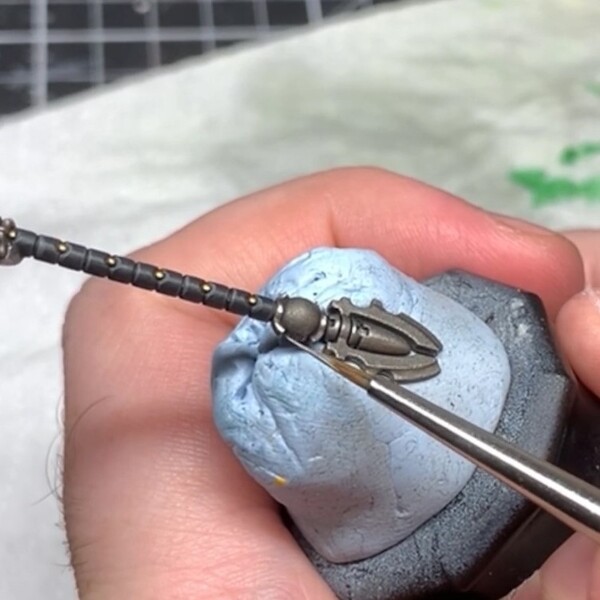 I then highlighted all the silver with Stormhost Silver , since it's already had a black wash.
Blades
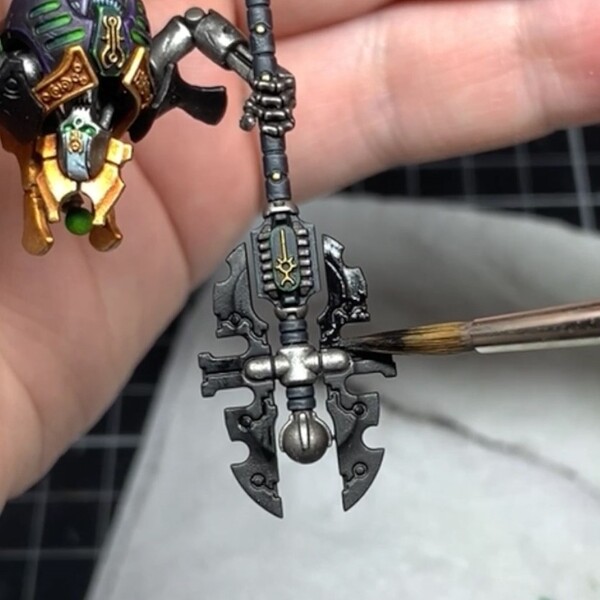 Now for those classic Necron energy blades. Start by blocking the blades in with a few layers of thin Doom Death Black . Much like when painting the white, you want as little texture build up as possible for that smooth finish.
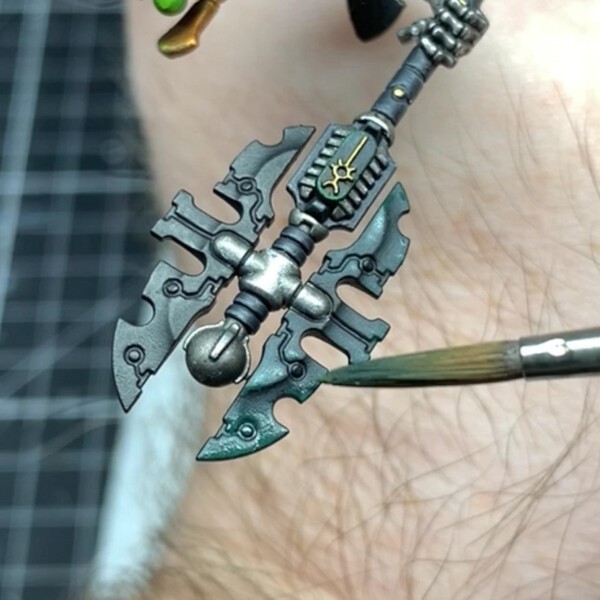 I glaze Caliban Green in the classic NMM blade pattern, alternating the highlight across each surface.
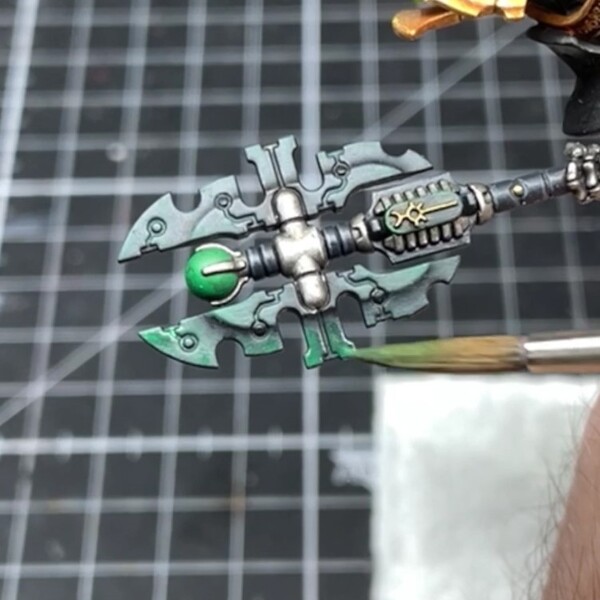 Repeat the glazing, but with Warpstone Glow over a smaller surface area.
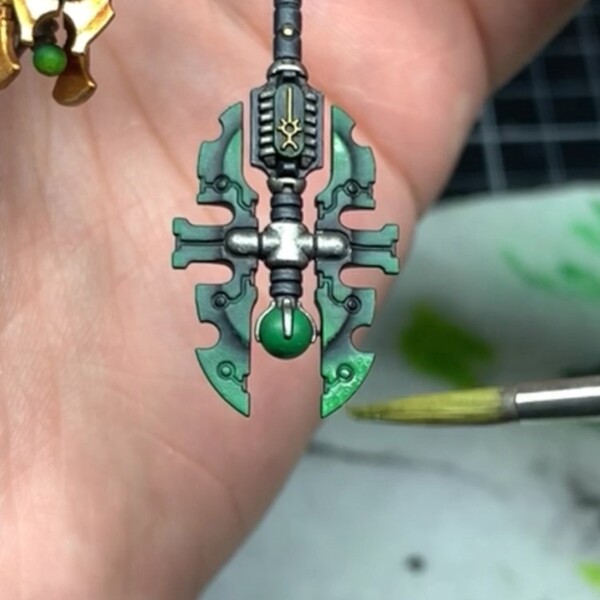 I did one last glaze highlight of a 1:3 mix of Moot Green and Lahmian Medium . I do this a good few times as this is the brightest colour I want on the blades, so I want solid coverage. If this jump in colour is hard to control, mix Moot Green and Warpstone Glow 1:1 and glaze with that first, it'll help the transition.
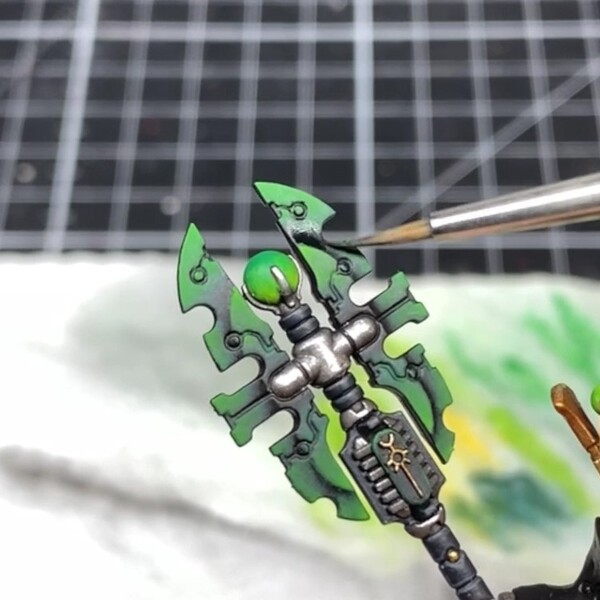 At this point I clean up the black areas. Overspill's bound to happen, but clean up on the black isn't too bad - Just use Doom Death Black again and apply thinly to get the boundaries of the blades back how you like. You can use your other colours to help smooth out the gradient if need be as well.
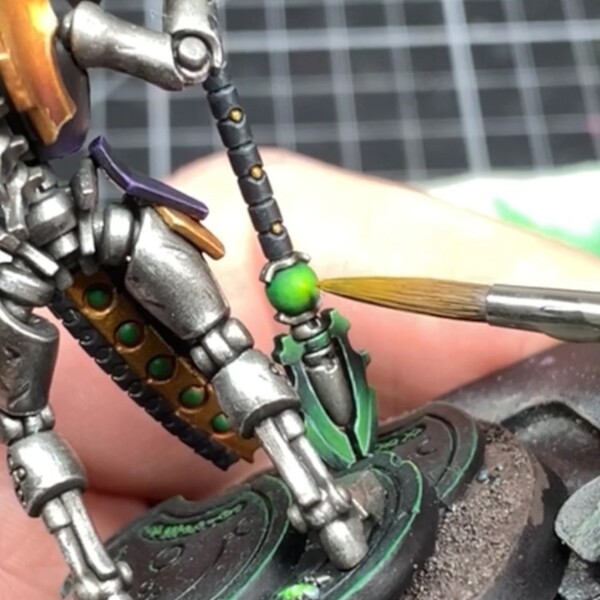 As a last touch, I give the orbs on the Staff a glaze of Yriel Yellow as a hot spot in the center.
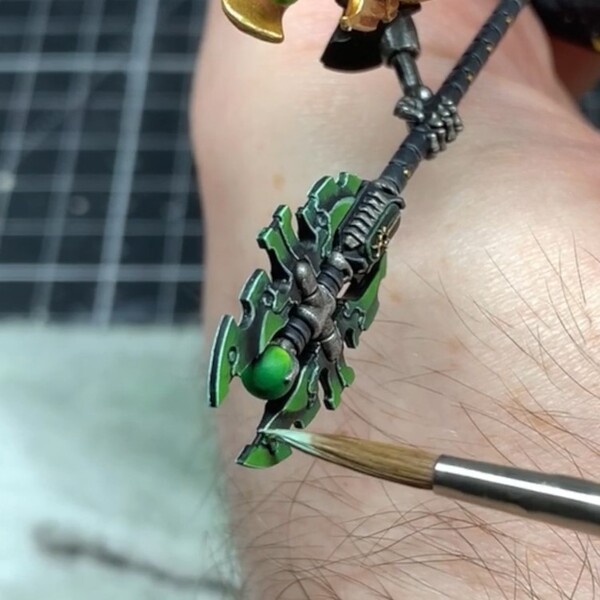 To finish the blades off, I edge highlight with Gauss Blaster Green . Straight up, GBG sucks to edge highlight with, I mostly ended up just doing the upper facing edges where I could but it came out nice regardless.
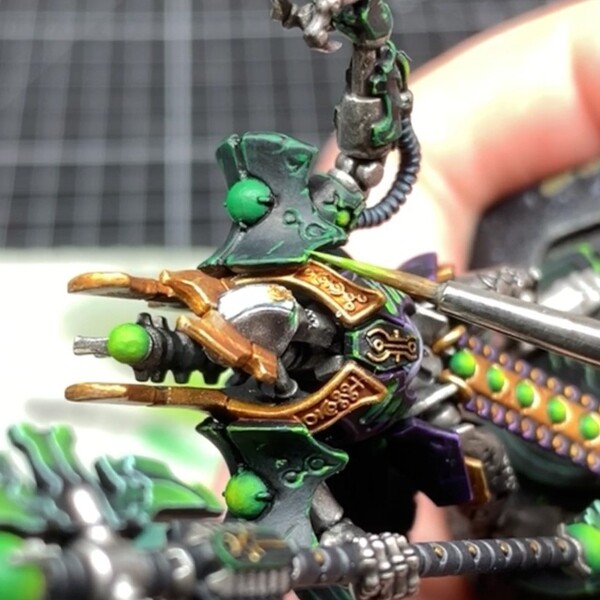 At this point, I attach the cloak to the shoulders and paint the pauldrons in dark green - Doom Death Black , Caliban Green , Warpstone Glow and Moot Green - and the orbs like the others on the mini - Warpstone Glow , Moot Green and Yriel Yellow .

Adz
HowAdzPaints
I'm a casual mini painter who's fallen into the tutorial space. Documenting my progress and recipes as I go!
Citadel Painting System 35
Base 9
- Caliban Green
- Celestra Grey
- Corax White
- Corvus Black
- Daemonette Hide
- Incubi Darkness
- Leadbelcher
- Naggaroth Night
- Retributor Armour
Shade 2
- Nuln Oil
- Reikland Fleshshade
Layer 19
- Auric Armour Gold
- Fenrisian Grey
- Gauss Blaster Green
- Genestealer Purple
- Ironbreaker
- Kabalite Green
- Liberator Gold
- Moot Green
- Skavenblight Dinge
- Slaanesh Grey
- Stormhost Silver
- Stormvermin Fur
- Sybarite Green
- Thunderhawk Blue
- Ulthuan Grey
- Warpfiend Grey
- Warpstone Glow
- Xereus Purple
- Yriel Yellow
Technical 1
- Lahmian Medium
Spray 1
- Leadbelcher
Contrast 3
- Basilicanum Grey
- Black Templar
- Gryph-charger Grey
Daler-Rowney
FW Acrylic Ink 1
- White
Two Thin Coats
Shade 1
- Doom Death Black
Vallejo Model Color
Fluorescent 1
- 70.737 Green Fluorescent

.jpg)
