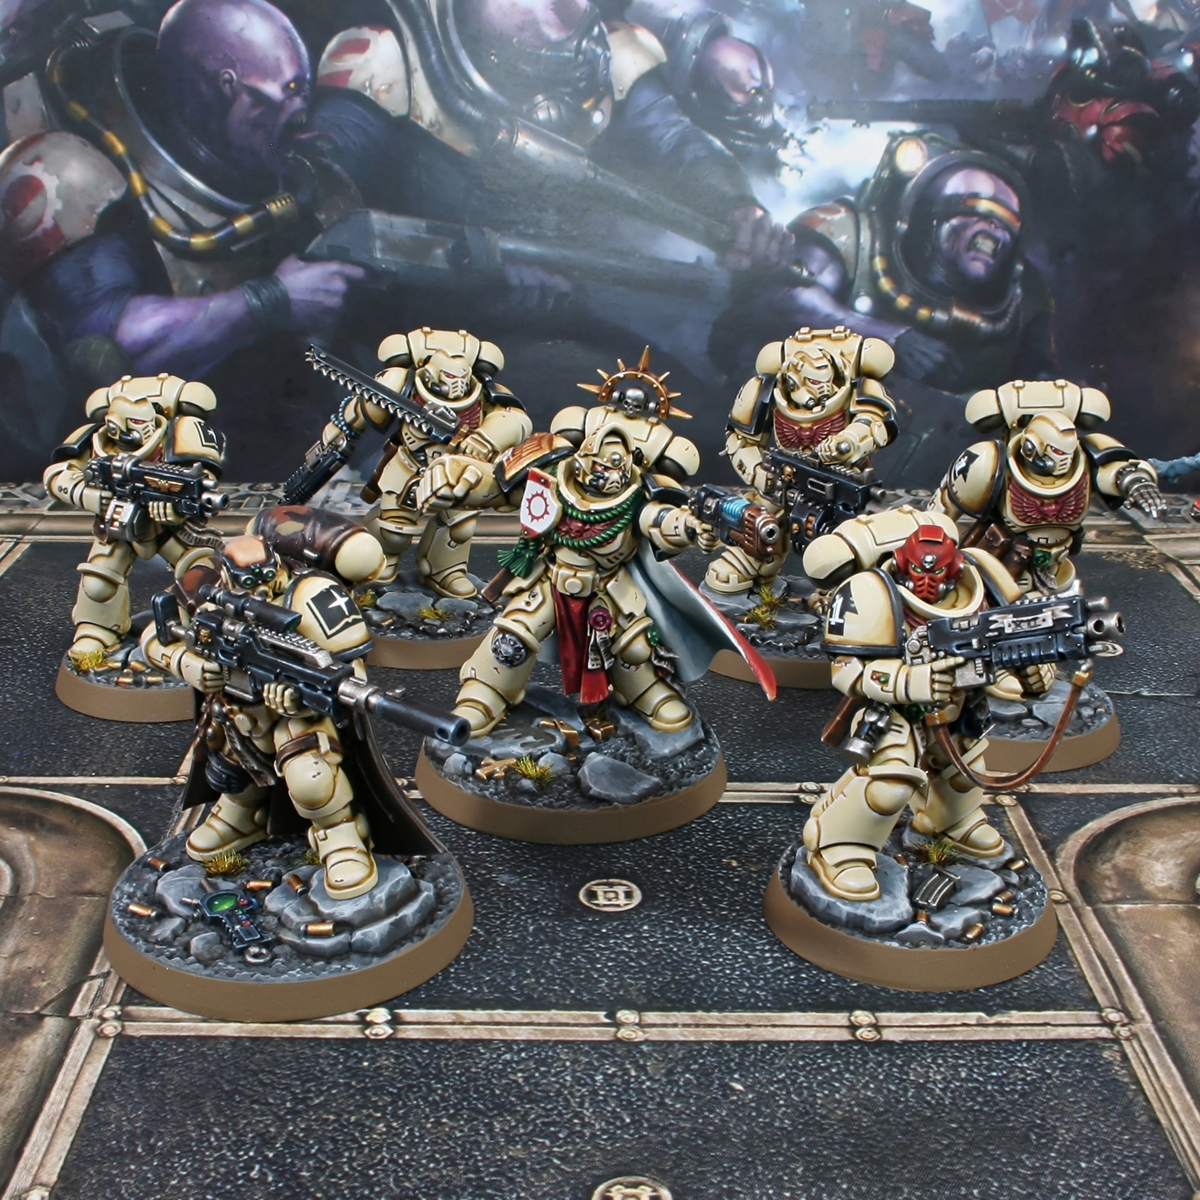
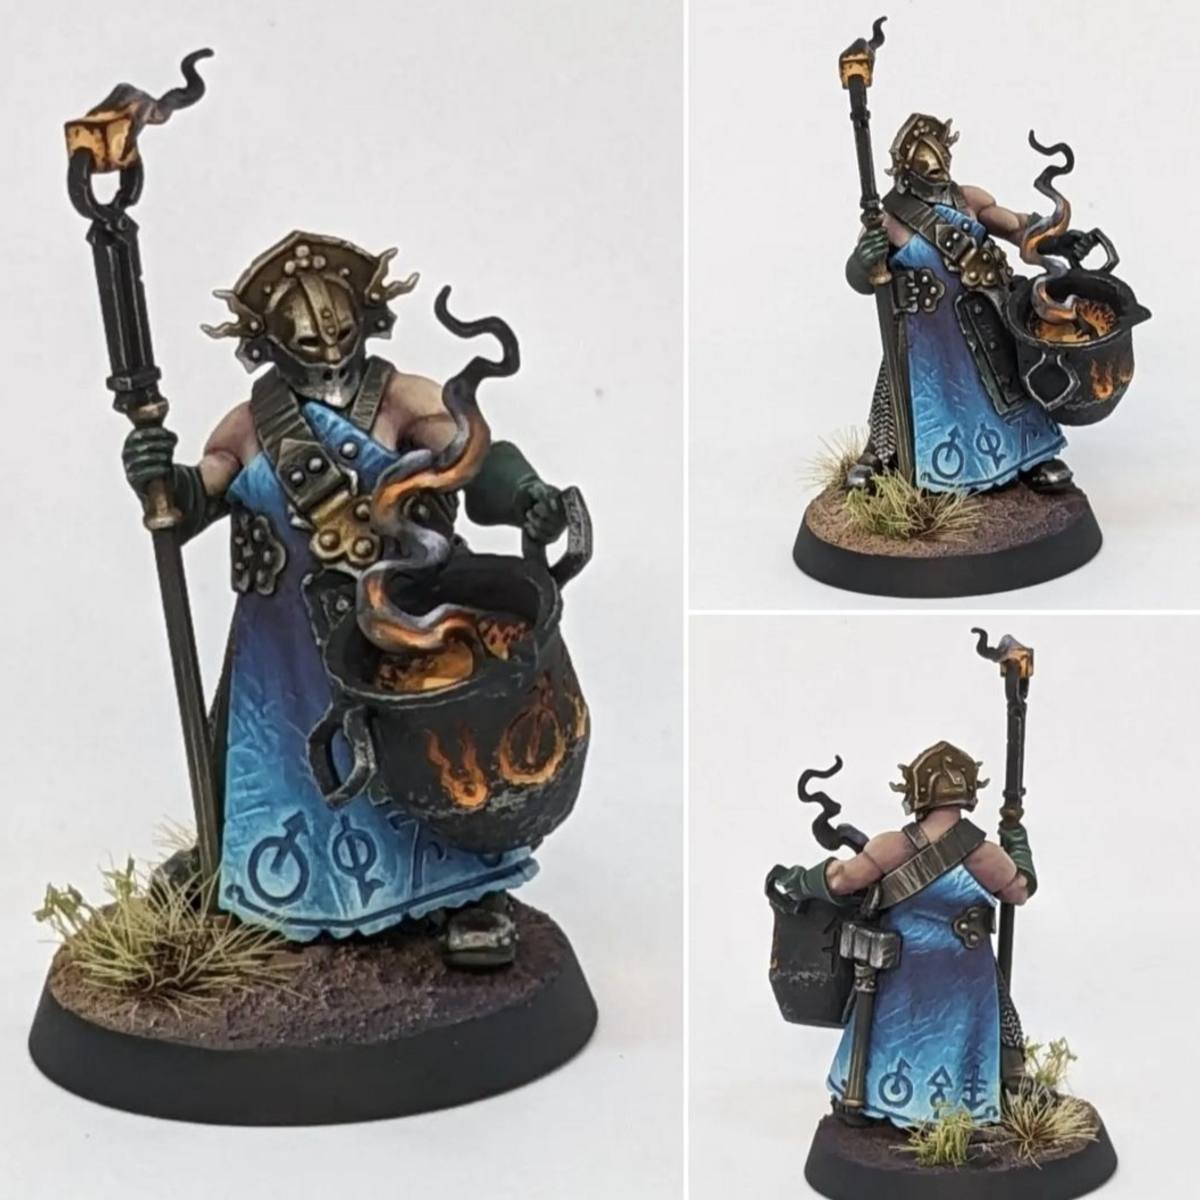
Tome Keepers: Angels of Death Kill Team
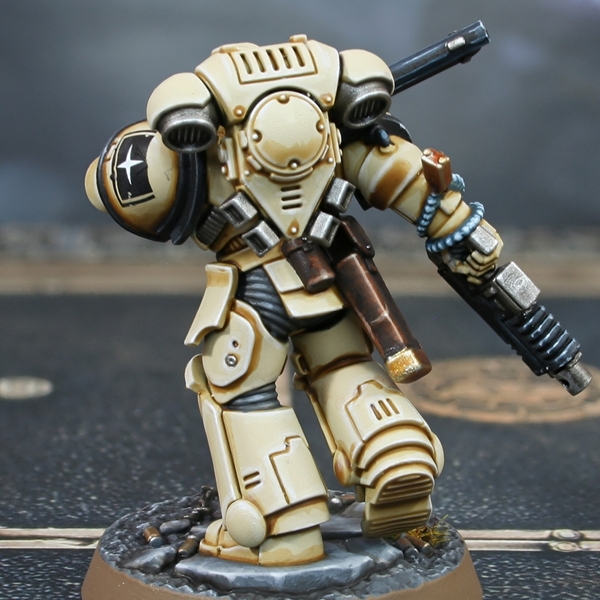 Bone Coloured Armour
- I would recommend priming with Wraithbone or any other light and slightly warm colour. This will make getting a nice tone to the armour easier.
- Basecoat armour with Ushabti Bone .
- Either zenethal highlight with thinned Screaming Skull from a downward 45 degree angle or glaze/drybrush in where the light would hit.
- Recess shade with Skeleton Horde thinned with Contrast Medium 1:1. Don't be too neat, the contrast should pull towards the recess and give something like a transition. Now is also a good time to paint the under-suit/tubing by your preferred method.
- Recess shade deep areas, this time being careful, and using Agrax Earthshade . I used is straight out of the pot, but you could mix in a little contrast if you wanted to make life a little easier.
- Add a chunky highlight of Screaming Skull to all edges.
- Edge highlight everything again with fine lines of Pallid Wych Flesh .
- Selectively edge highlight the most exposed curved edges and corners where highlights meet with a pure white of your choice, like White Scar .
Optional: Battle Damage
- Add small patches of Mournfang Brown using dots with a fine brush. Try to stick to edges and corners where damage would occur, mostly towards the front of the Space Marine.
- Underline the damage from the last step with fine lines of Pallid Wych Flesh .
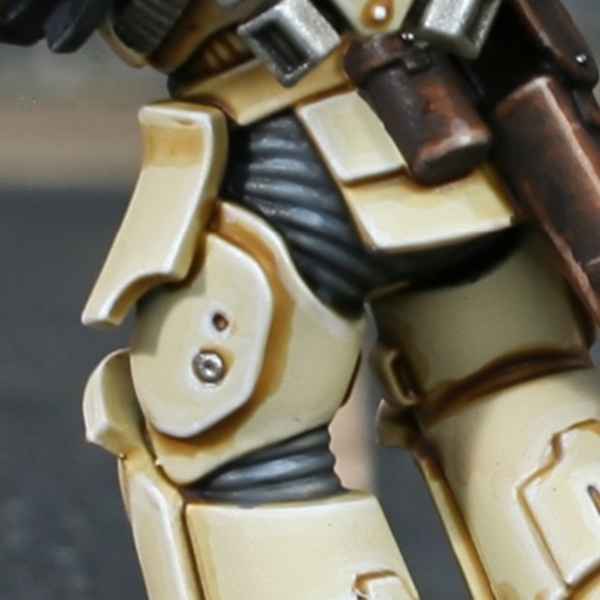 Dark Grey Undersuit
- Basecoat with Mechanicus Standard Grey .
- Wash with Nuln Oil .
- Edge highlight with Dawnstone .
- Selectively edge highlight with Administratum Grey .
- Mix some White into you Administratum Grey and add very small/specular highlights.
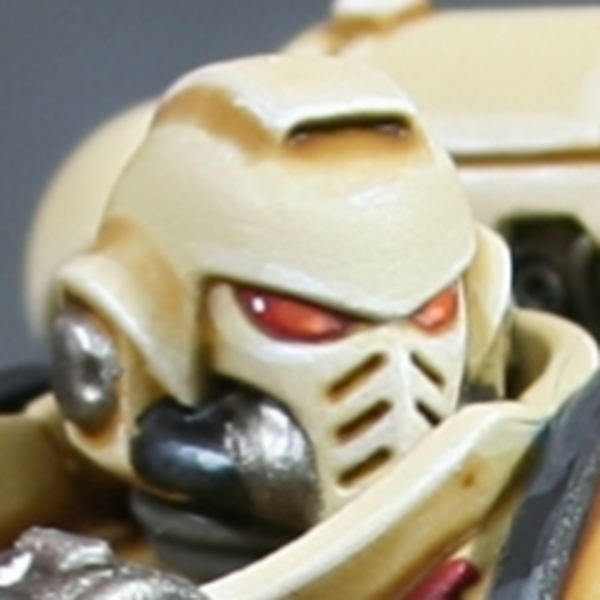 Red Eye Lenses
- Basecoat with Khorne Red .
- Highlight the two thirds of the lenses closes to the nose with Evil Sunz Scarlet .
- Repeat, covering the closest third with Troll Slayer Orange . This may take a couple of coats to affect the cover sufficiently, since coverage isnt great.
- Add a specular highlight of Lugganath Orange next to the nose.
- Finish with a specular highlight of White in the opposite corner.
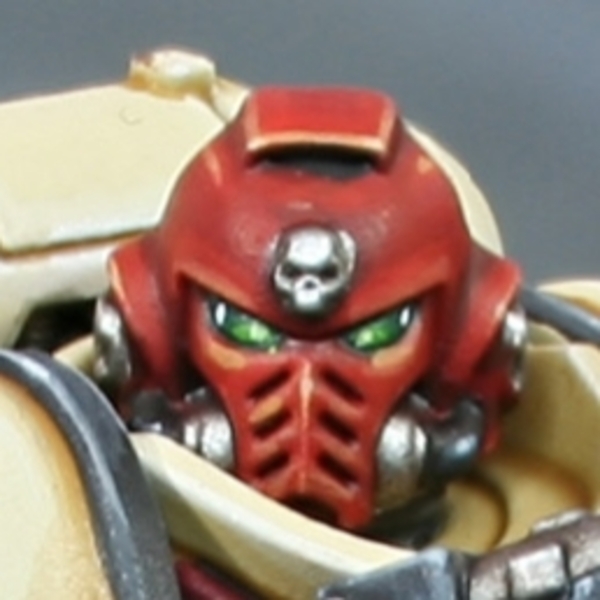 Red Helmet
I also used this recipe for the stripe on the smoke grenade.
- Basecoat with Mephiston Red .
- Mix the Mephiston Red 1:1 with Abaddon Black and shade the recesses with fine lines. I glazed this in a few places too.
- Apply chunky highlights of Evil Sunz Scarlet .
- With a 1:1 mix of Evil Sunz Scarlet and Tau Light Ochre . Apply fine edge highlights to everything.
- Slectively edge highlight with Tau Light Ochre .
- Mix some White into your Tau Light Ochre , then add specular highlights.
 Green Lenses
- Basecoat with Caliban Green .
- Highlight the two thirds closest to the nose with Warpstone Glow .
- Now cover just the closest third with Moot Green .
- Add some Ice Yellow (or Dorn Yellow ) into your Moot Green and then add a specular highlight next to the nose.
- Finish with a specular highlight of White in the opposite corner.
 Skin
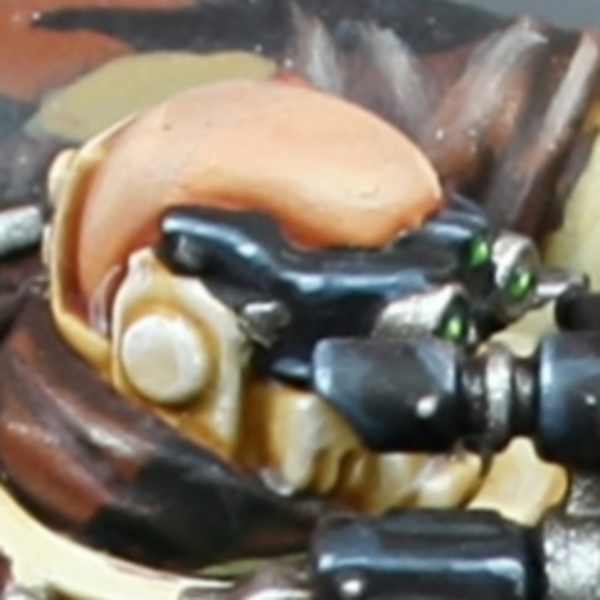
Skin
- Basecoat with Kislev Flesh .
- Wash with Reikland Fleshshade .
- You can enhance shading with Doombull Brown .
- Then add White into your Kislev Flesh gradually, highlgihting smaller and smaller.
On the shaved head, I mixed Dawnstone and Kislev Flesh then glazed on stubble.
 Eyes
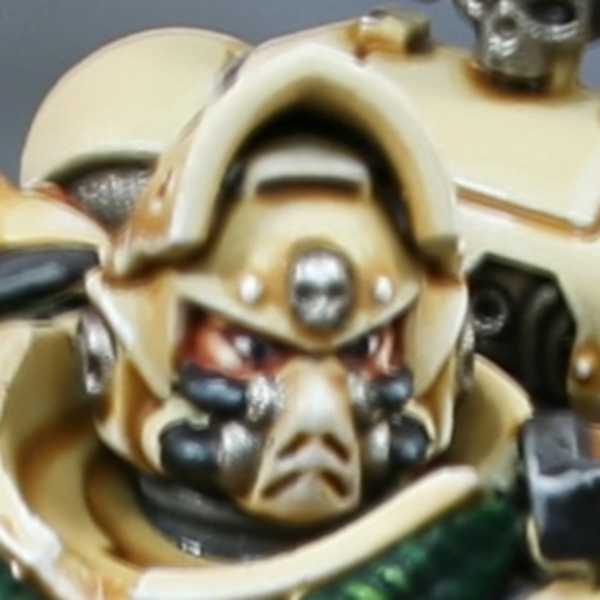
Eyes
- For the eyes, I began by glazing a dark red brown around the eye sockets. This was a mix of Khorne Red and Rhinox Hide I had on my palette.
- Then I basecoated the eyes with Ulthuan Grey .
- I finished them with a Black pupil.
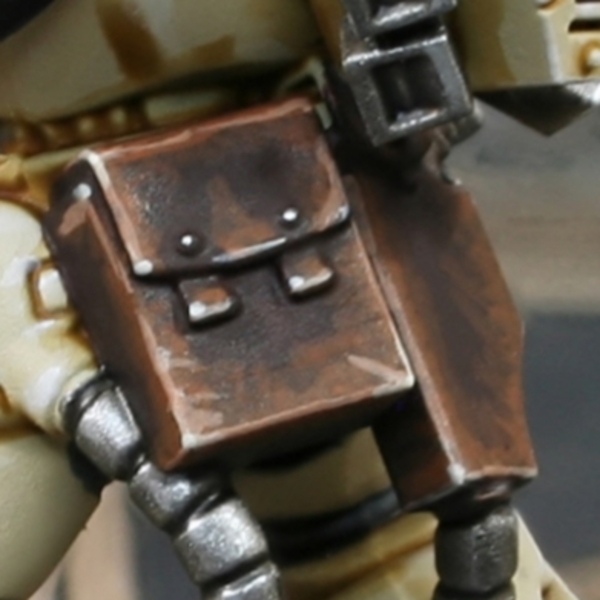 Dark Brown Leather
- Basecoat the leather area with Rhinox Hide .
- Glaze most of the leather with thinned Mournfang Brown . Use quite a small brush and drag towards edges in rough lines. This should create some extra texture.
- Add a chunky edge highlight of Skrag Brown to all edges.
- Highlight everything again, this time with a fine line of Skrag Brown and Ushabti Bone mixed 1:1. This is a good mix to throw in occasional fine lines as scratches too.
- With pure Ushabti Bone , selectively highlight corners and exposed edges of the leather. Put a dot of this colour where the additional scratched above meet edges too.
- Add a little pure white (like Dead White ) to your Ushabti Bone and add dot highlights to corners.
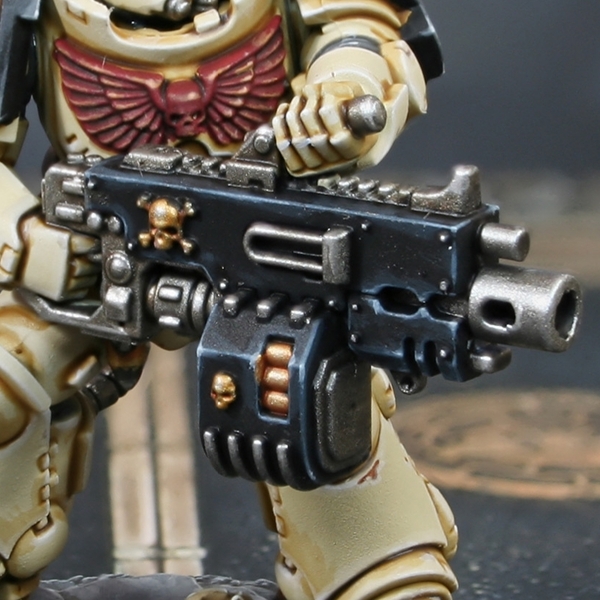 Black Weapon Casing
I also used this recipe on a few other places around the miniature like the Eliminator visor and the tubing on the helmets.
- Basecoat with Black .
- Edge highlight everything with a thick line of Dark Reaper .
- Highlight everything again, this time with a thin line of Thunderhawk Blue . This colour is a good place to put in some scratches too.
- With Fenrisian Grey , selectively highlight upward facing edges, corners and prominent edges. Stick primarily to edges where the light would hit and always drag your brush towards the brightest point. If you added scratches previously, reinforce them with a smaller, thinner line underneath.
- Finally, edge add small highlights to the centre of the previous highlights and corners with Blue Horror . Try to make them very small, dots if at all possible.
Steel
- Basecoat with Leadbelcher .
- Wash with Nuln Oil .
- Glaze some Agrax Earthshade or a brown of your choice into areas you want to look dirtier.
- Edge highlight with Ironbreaker .
- Add fine highlights with small amounts of Vallejo Model Air Silver RLM01 Metallic .
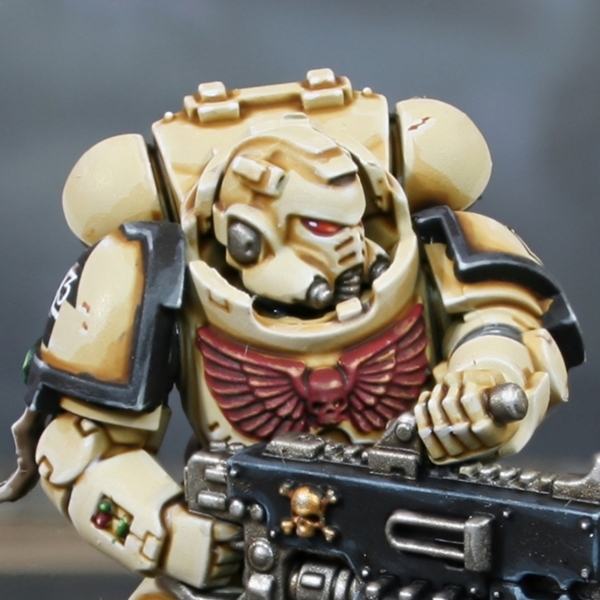 Black Armour Trim
- Basecoat with Black .
- Edge highlight everything with Eshin Grey .
- Edge highlight most of the edges again with Dawnstone .
- Selectively edge highlight curved edges and corners with Administratum Grey .
- Add dot highlights of White to points corners and more exposed edges that were highlighted in the last step.
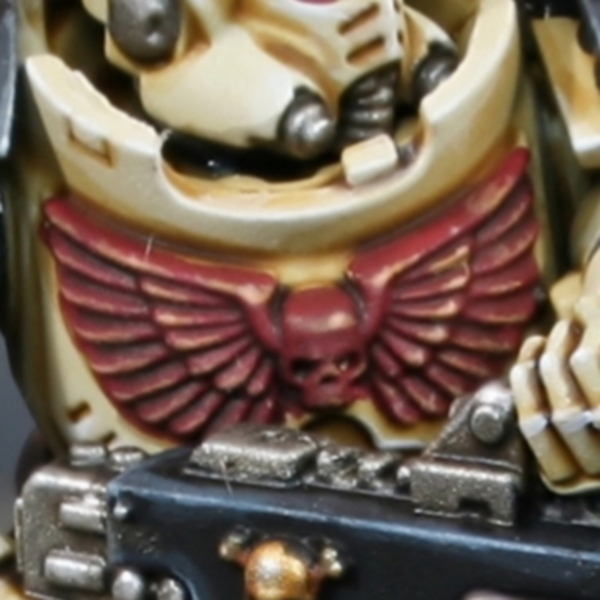 Dark Red Chest Device
- Basecoat with Khorne Red .
- Shade with Agrax Earthshade .
- Pick out edges with Wazdakka Red .
- More selectively edge highlight with Tau Light Ochre .
- Add specular highlights of Lugganath Orange .
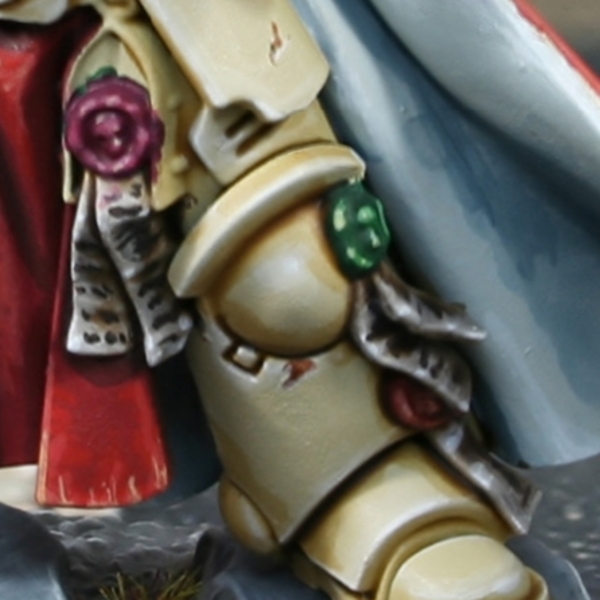 Parchment
- Basecoat with Steel Legion Drab .
- With Karak Stone paint all of the parchment, apart from the recess between the two pieces. Do a few coats for full coverage.
- Use Rakarth Flesh and paint in horizontal lines, picking out the raised details.
- Highlight the detail more selectively, aiming for most extreme folds and points. Use Pallid Wych Flesh for this.
- Glaze towards the "wax" with Agrax Earthshade . Also use this for a recess shade between the parchment an in cuts and splits.
- Selectively highlight edges with small amounts of White Scar or another pure white.
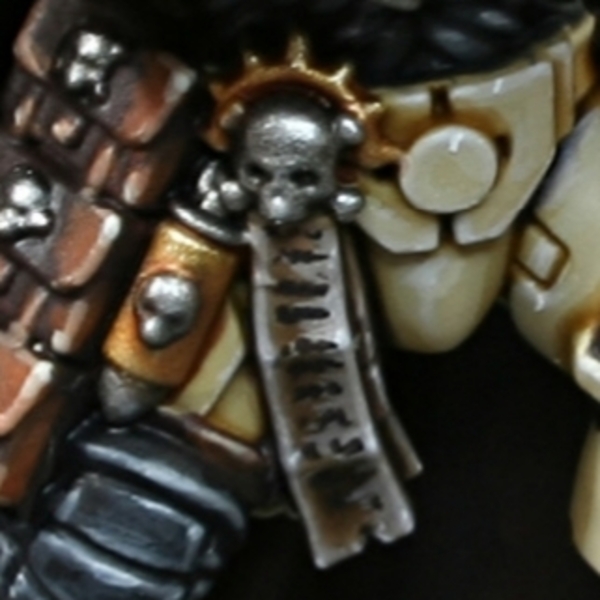 Parchment Text
Mix Rhinox Hide and Abaddon Black 1:1. Use a brush with a very fine point and paint rows of dots and dashes across the parchment. Do a second pass if needed to make it look more organic and like writing.
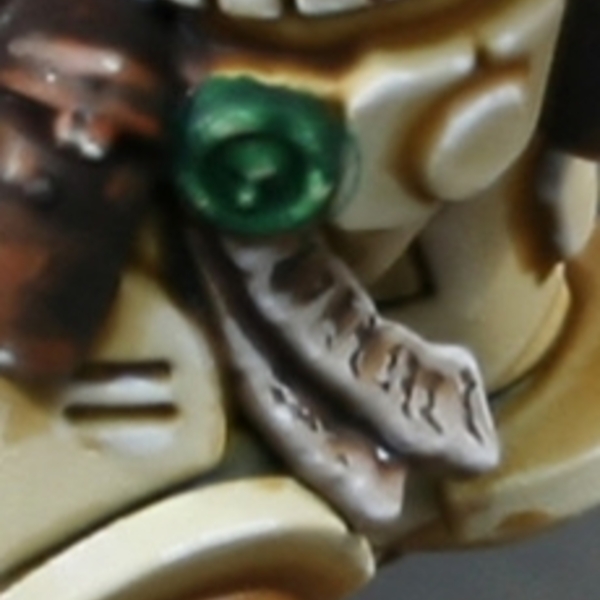 Green Wax
- Basecoat with Caliban Green .
- Highlight raised details with Warpstone Glow . Highlight using dots and dabs to make it look irregular and let the colours below show.
- With a 1:1 mix of Warpstone Glow and Ushabti Bone , add smaller highlights, covering even less area.
- If you are feeling brave, add small specular highlight of pure Ushabti Bone within the previous highlights.
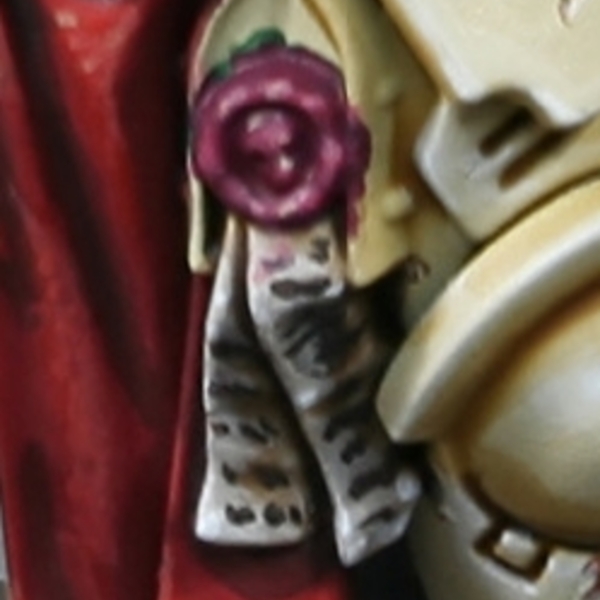 Purple Wax
- Basecoat with Screamer Pink .
- Wash detail with Nuln Oil .
- Highlight raised details with Pink Horror . Highlight using dots and dabs to make it look irregular and let the colours below show.
- With a 1:1 mix of Screamer Pink and Ushabti Bone , add smaller highlights, covering even less area.
- If you are feeling brave, add small specular highlight of pure Ushabti Bone within the previous highlights.
- Glaze with thinned Volupus Pink to unify highlights.
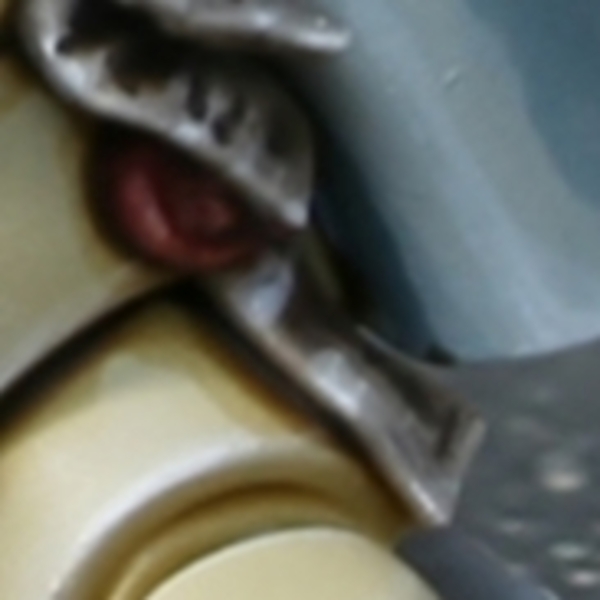 Red Wax
- Basecoat with Khorne Red .
- Wash detail with Nuln Oil .
- Highlight raised details with Mephiston Red . Highlight using dots and dabs to make it look irregular and let the colours below show.
- With a 1:1 mix of Mephiston Red and Ushabti Bone , add smaller highlights, covering even less area.
- If you are feeling brave, add small specular highlight of pure Ushabti Bone within the previous highlights.
- Glaze with thinned Flesh Tearers Red to unify highlights.
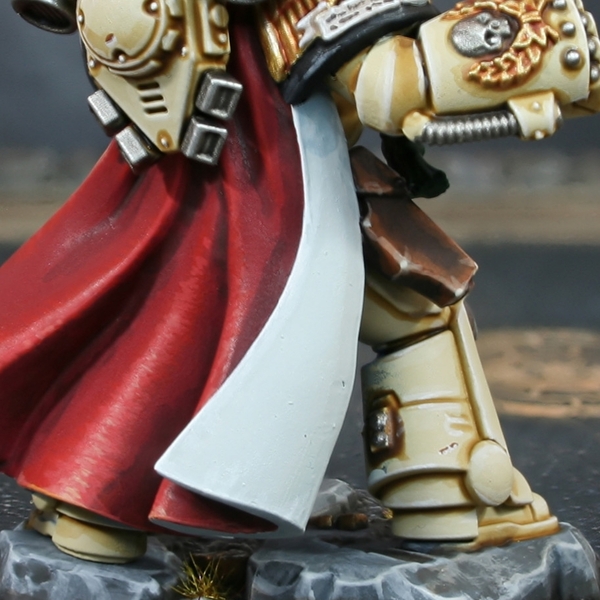 White Cape Lining
- Basecoat with 1:1 Celestra Grey and White .
- Add s small amount of Dark Reaper into the base mix and glaze in some general shading.
- Now steadily increase the amount of Dark Reaper in the mix, until you are eventually shading the deepest folds with a thin line of almost pure Dark Reaper .
- Mix Celestra Grey and White 2:1 and edge highlight the cloth and folds.
- Selectively highlight with pure White .
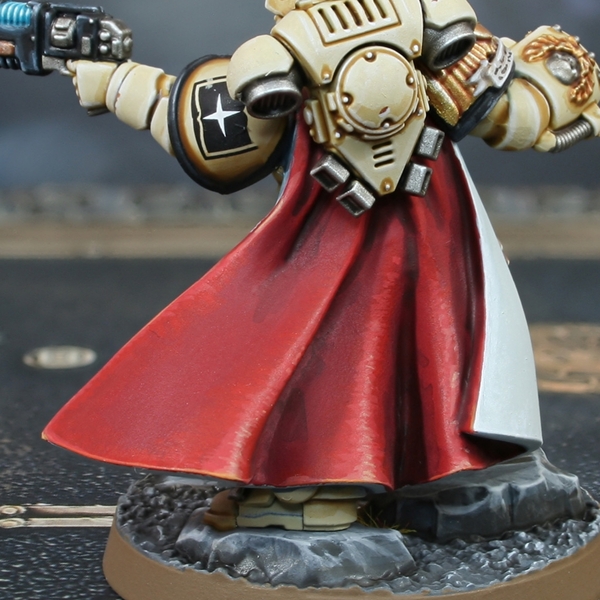 Red Cape
- Basecoat with an equal parts mix of Khorne Red , Wazdakka Red and Evil Sunz Scarlet .
- Shade with 1:1 Khorne Red and Abaddon Black .
- Add general highlighting with Evil Sunz Scarlet .
- Apply finer highlights with 2 parts Evil Sunz Scarlet , 1 part Ungor Flesh and 1 part Ushabti Bone .
- Selectively highlight raised areas with the above mix, but containing roughly twice as much Ungor Flesh . So this would now be 2:2:1.
- Finish with small highlights of Ungor Flesh .
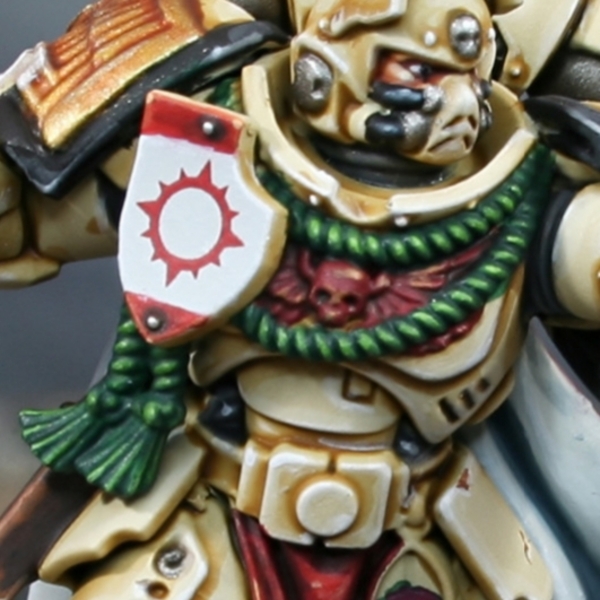 Green Rope
- Basecoat with Caliban Green .
- Pick out ridges with 1:1 Waaagh! Flesh and Moot Green .
- Selectively highlight the most exposed portions with small highlights of pure Moot Green .
- Mix some Wraithbone intot the Moot Green , then add specular highlights.
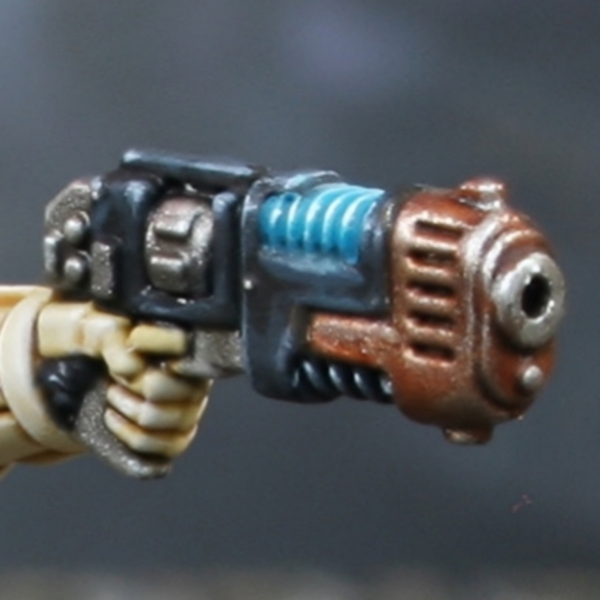 Plasma Coil
- Basecoat with 1:1 Gauss Blaster Green and Thousand Sons Blue .
- Wash with thin Sotek Green .
- Edge highlight with Gauss Blaster Green .
- Selectively highlight the coil with a mix of Gauss Blaster Green and White .
- Finish with specular White highlights.
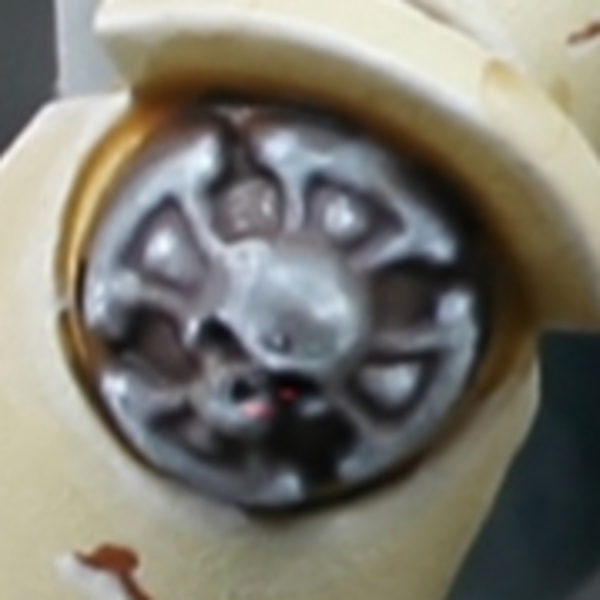 Crux Terminatus
- Basecoat with Dawnstone .
- Soft Shade with a mix of Dawnstone and Rhinox Hide . Thin it with at least the same amoundt of Lahmian Medium , to make the shading as easy as possible.
- In areas that need extra definition, mix Rhinox Hide and Abaddon Black 1:1 and selectively shade.
- Start to highlight ridges with glazes of Administratum Grey .
- Add some White to your Administratum Grey and apply thin edge highlights.
- Finish with a few small dots of pure White where needed.
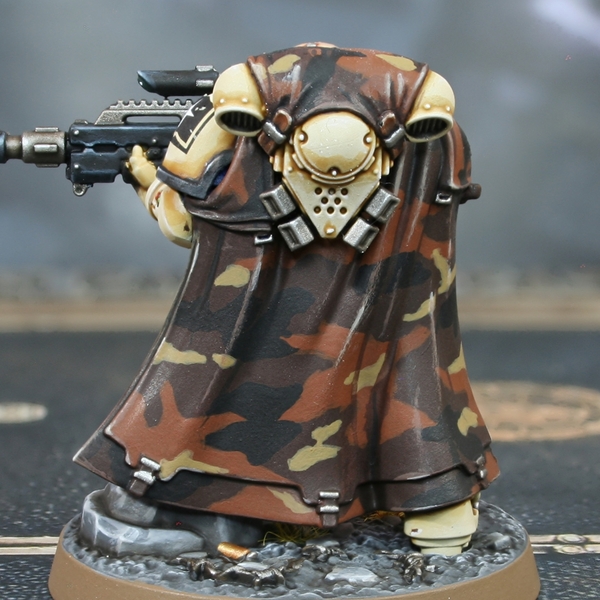 Brown Camo Cloak
- Basecoat with Rhinox Hide .
- Block in some patches of colour with Mournfang Brown . I like to Google reference photos to make the pattern look authentic.
- Repeat, this time applying roughly the same amount of patches with Black .
- Complete the pattern with some small patches of Tallarn Sand .
- Shade the recesses on the cape. For the light browns, I used Rhinox Hide . For the rest, I used Abaddon Black .
- Edge highlight everything with Gorthor Brown .
- Selectively edge highlight with Baneblade Brown .
- Finish with very small Screaming Skull . I stuck to sharp corners, the apex of upward facing curves and edges that ran through Tallarn Sand patches.
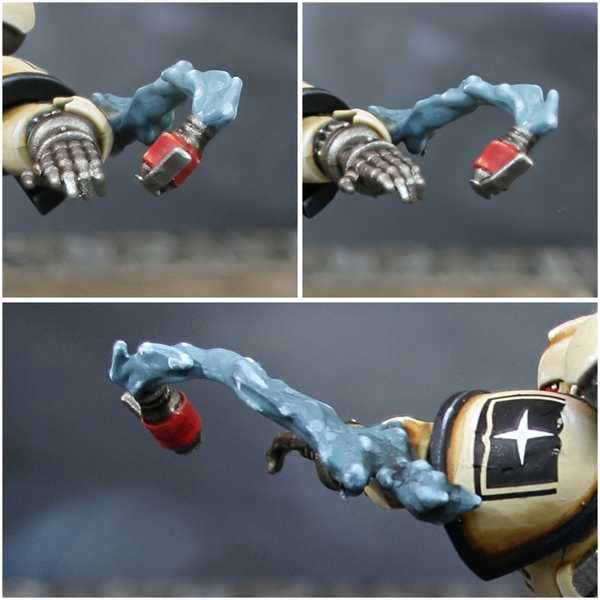 Smoke
Smoke
- Basecoat with a 1:1 mix of Thunderhawk Blue and Administratum Grey .
- Glaze/shade half of the smoke trail with Dark Reaper .
- Repeat, shading only the last quarter with a mix of Dark Reaper and Abaddon Black .
- Add White to your base mix then highlight, all the smoke trails. Highlight all of the raised detail appropriately, taking it up to pure White close to where the smoke is coming out of the grenade.
 Rosary Beads
- Basecoat with Thunderhawk Blue .
- Carefully shade around the outside of the string of beads with some thin Dark Reaper .
- Mix some White into your Thunderhawk Blue and pick out the beads. Or you could just use Fenrisian Grey .
- Increase the amount of White again, then apply specular highlights to each bead. Again, feel free to use something like Ulthuan Grey or Blue Horror if you like, my personal goal was just to desaturate the colour as much as possible.
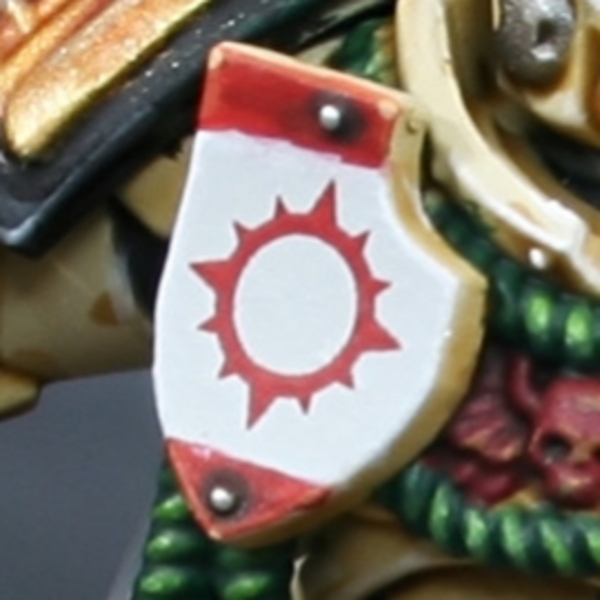 Tilt Plate
- Basecoat with Corax White .
- Shade around rivets with thin Administratum Grey .
- Enhance the shading with very small amounts of Dawnstone .
- Highlight with a 1:1 mix of Corax White and White .
- Finish with more selective highlights of White .
I then added in the smaller details with the "Red Helmet" recipe from earlier.

Rookie Brushes
RookieBrushes
Aspiring miniature painter and biscuit enthusiast. Here to share my hobby and help where I can.
Citadel Painting System 57
Base 16
- Abaddon Black
- Caliban Green
- Celestra Grey
- Corax White
- Khorne Red
- Leadbelcher
- Mechanicus Standard Grey
- Mephiston Red
- Mournfang Brown
- Rakarth Flesh
- Rhinox Hide
- Screamer Pink
- Steel Legion Drab
- Thousand Sons Blue
- Waaagh! Flesh
- Wraithbone
Shade 3
- Agrax Earthshade
- Nuln Oil
- Reikland Fleshshade
Layer 32
- Administratum Grey
- Baneblade Brown
- Blue Horror
- Dark Reaper
- Dawnstone
- Doombull Brown
- Dorn Yellow
- Eshin Grey
- Evil Sunz Scarlet
- Fenrisian Grey
- Gauss Blaster Green
- Gorthor Brown
- Ironbreaker
- Karak Stone
- Kislev Flesh
- Lugganath Orange
- Moot Green
- Pallid Wych Flesh
- Pink Horror
- Screaming Skull
- Skrag Brown
- Sotek Green
- Tallarn Sand
- Tau Light Ochre
- Thunderhawk Blue
- Troll Slayer Orange
- Ulthuan Grey
- Ungor Flesh
- Ushabti Bone
- Warpstone Glow
- Wazdakka Red
- White Scar
Technical 2
- Contrast Medium
- Lahmian Medium
Spray 1
- Wraithbone
Contrast 3
- Flesh Tearers Red
- Skeleton Horde
- Volupus Pink
Vallejo Game Color
Base 1
- 72.001 Dead White
Vallejo Model Air
Base 1
- 71.063 Silver RLM01 Metallic
Vallejo Model Color
Base 3
- 70.858 Ice Yellow
- 70.950 Black
- 70.951 White
