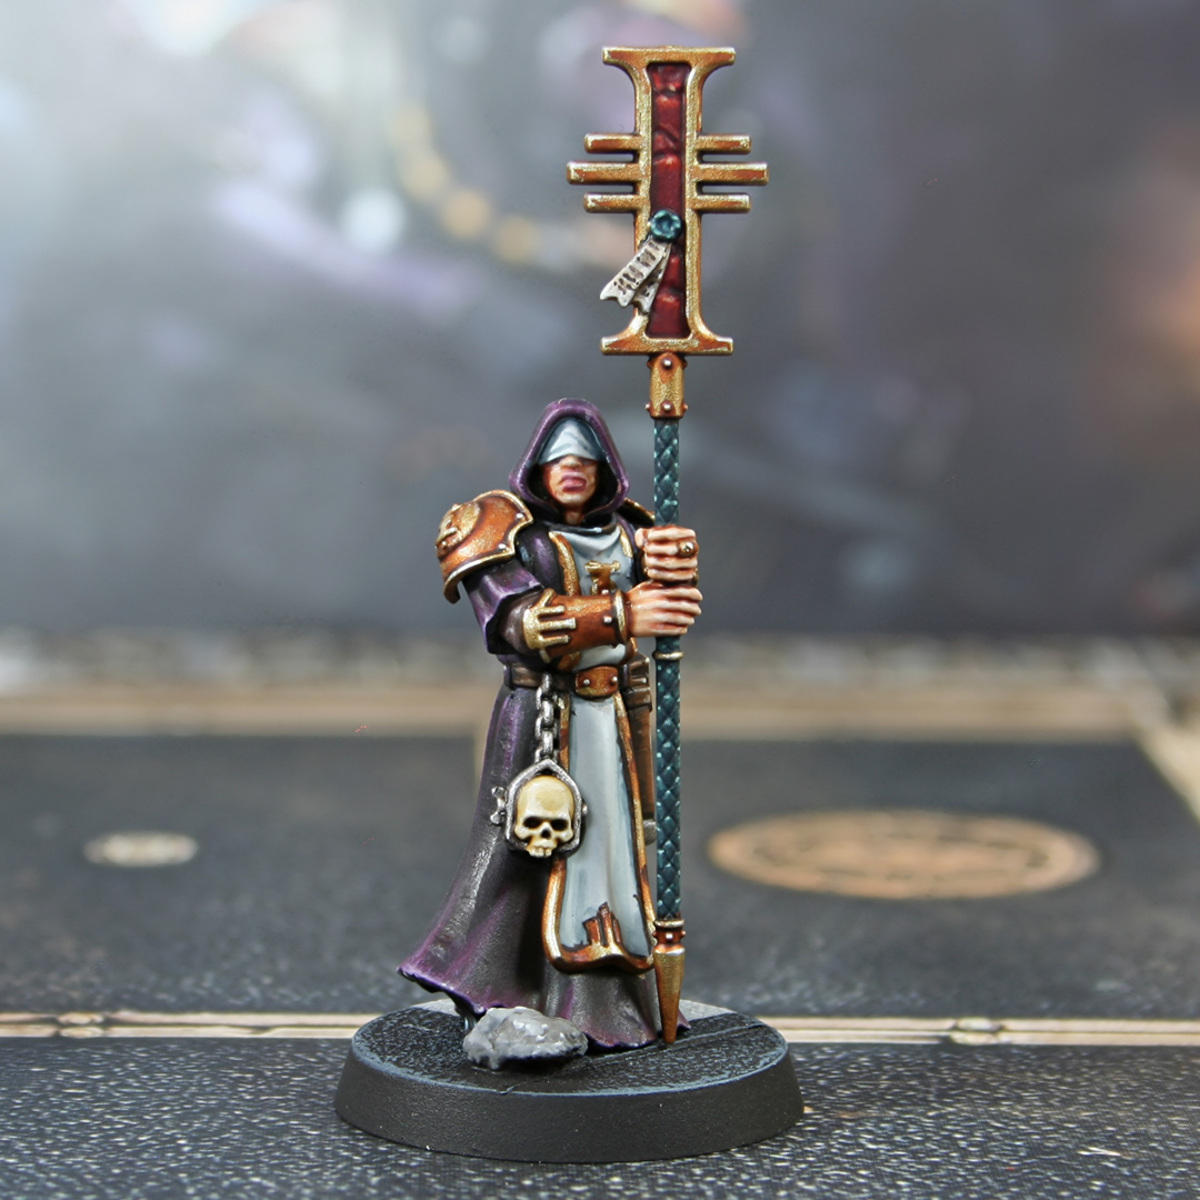
Inquisition: Mystic Agent

Purple Robe
- Basecoat with Abaddon Black .
- Glaze highlights with Naggaroth Night Night. I'd recommend doing a few passes or easing the transition with a black and purple mix initially.
- Chunky highlights of 2:3 Naggaroth Night & Screamer Pink .
- Fine highlights of Genestealer Purple .
- Selective highlights of Administratum Grey .
- Spot high lights of 1:1 Dechala Lilac and White .
When the robe was finished, I felt it could do with being a little more pink. So, I took some Volupus Pink , worked it on my wet palette and applied it as a glaze. I started at the highest highlights and dragged my brush to recesses.
White Cloth
- Basecoat with 1:1 Celestra Grey and White .
- Wash with Apothecary White .
- Add a increasing amount of Dark Reaper to your Apothecary White and shade the recesses.
- Add White to the base mix and apply highlights.
- Add final small highlights of White .
Teal Quilting (and Wax)
- Basecoat with Incubi Darkness .
- Pick out raised portions with Lupercal Green .
- Glaze towards the top of the diamond shapes with Sons of Horus Green .
- Pick out the top edges with the finiest line of Sybarite Green you can.
- Finish with dots of Wraithbone at the top.
Caucasian Skin
- Basecoat with an equal parts mix of Cadian Fleshtone , Kislev Flesh and White Scar .
- Wash with Reikland Fleshshade .
- If any points need extra shading, I would recommend using some thing Doombull Brown .
- Re-establish the basecoat where needed, then mix increasing amounts of White Scar into it, highlighting up raised points.
Dark Brown Leather
- Basecoat the leather area with Rhinox Hide .
- Glaze most of the leather with thinned Mournfang Brown . Use quite a small brush and drag towards edges in rough lines. This should create some extra texture.
- Add a chunky edge highlight of Skrag Brown to all edges.
- Highlight everything again, this time with a fine line of Skrag Brown and Ushabti Bone mixed 1:1. This is a good mix to throw in occasional fine lines and scratches.
- With pure Ushabti Bone , selectively highlight corners and exposed edges of the leather. Put a dot of this colour where the additional scratched above meet edges too.
- Add a little pure white (like Dead White ) to your Ushabti Bone and add dot highlights to corners.
Skull
- Basecoat with Ushabti Bone .
- Wash with a 1:1 mix of Skeleton Horde and Contrast Medium .
- Pop some :agrax into deep recesses and glaze into ones that need enhancing.
- Add chunky highlights of Screaming Skull .
- Mix some White into your Screaming Skull and add finer, more selective highlights.
- Finishe with specular highlights of White .
Black Leather
- Basecoat with Abaddon Black .
- Add a chunky highlight to edges with 1:1 Abaddon Black and Baharroth Blue .
- With pure Baharroth Blue add smaller, finer highlights.
- Selectively highlight with very small highlights of Blue Horror .
- Finally mix the Blue Horror 1:1 with White Scar and add specular highlights to select areas.
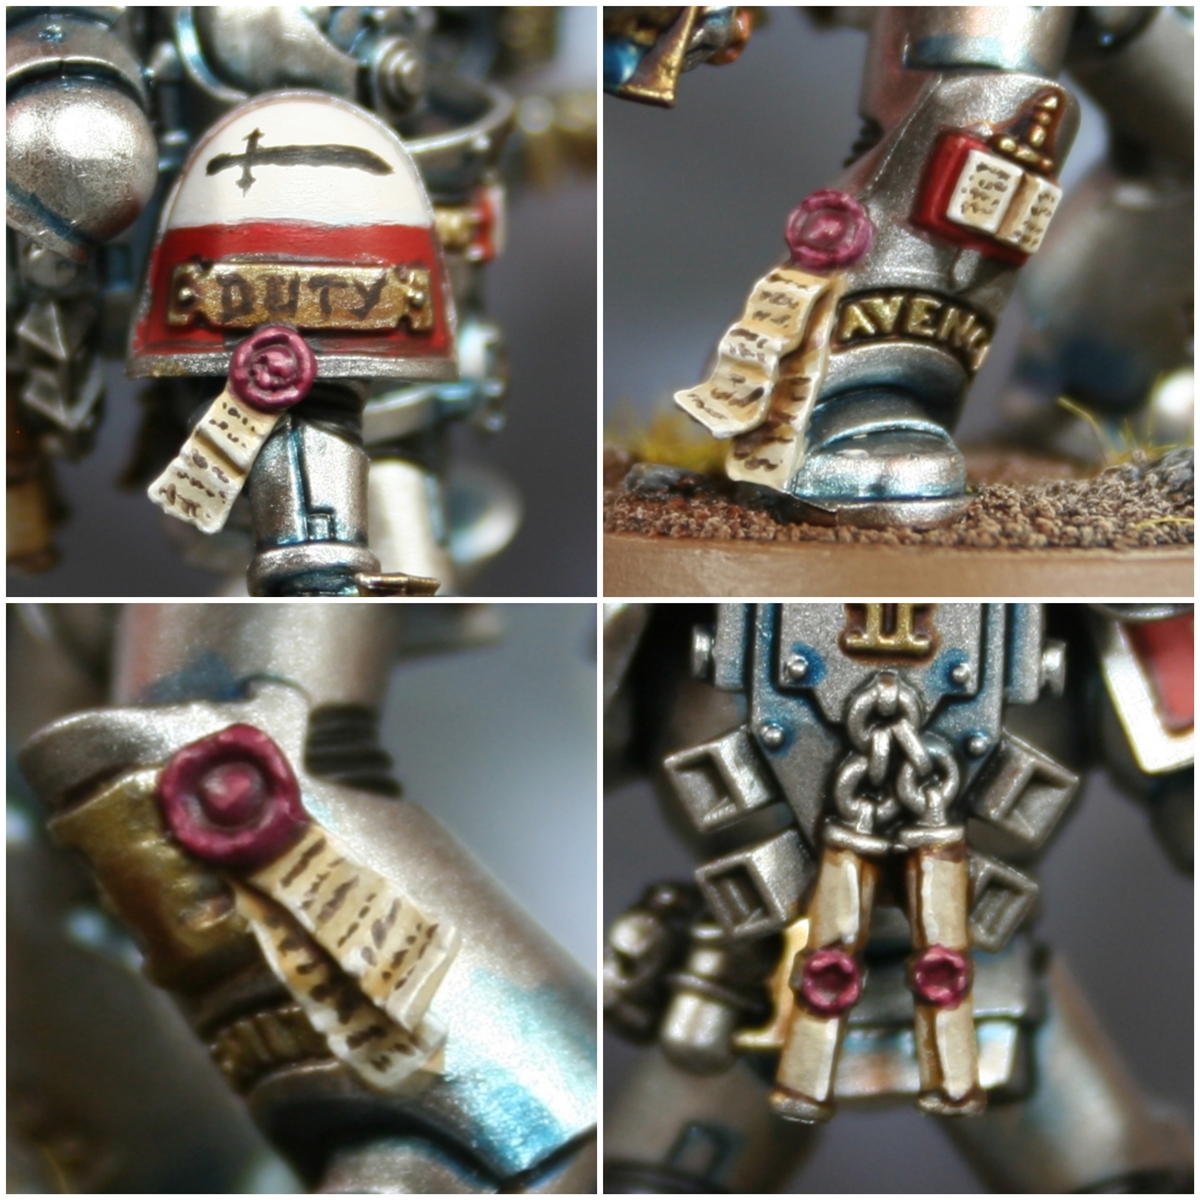
Steel
- Basecoat with Leadbelcher .
- Wash with Nuln Oil .
- Add highlights with Ironbreaker .
- Now selectively highlight with Vallejo Model Air Silver RLM01 Metallic .
Gold
- Basecoat with a 3:1 mix of Vallejo Metal Color Gold and Copper .
- Shade with Gore-grunta Fur . This with water or medium as needed and pull towards the recesses.
- Enhance with thin lines of Cygor Brown or another dark brown where needed.
- Pick out highlights with Gold
- Fine highlights with Vallejo Model AIr Silver RLM01 Metallic .
Red Marble
- Basecoat with Mephiston Red .
- Shade the recesses with 2:1 Khorne Red and Black .
- Chunky highlights of Evil Sunz Scarlet .
- Fine highlights of Wild Rider Red .
- Selective highlights of Cadian Fleshtone .
Parchment
- Basecoat with Steel Legion Drab .
- With Karak Stone paint all of the parchment, apart from the recess between the two pieces. Do a few coats for full coverage.
- Use Rakarth Flesh and paint in horizontal lines, picking out the raised details.
- Highlight the detail more selectively, aiming for most extreme folds and points. Use Pallid Wych Flesh for this.
- Glaze towards the "wax" with Agrax Earthshade . Also use this for a recess shade between the parchment an in cuts and splits.
- Selectively highlight edges with small amounts of White Scar or another pure white.

Rookie Brushes
RookieBrushes
Aspiring miniature painter and biscuit enthusiast. Here to share my hobby and help where I can.
Citadel Painting System 43
Base 14
- Abaddon Black
- Celestra Grey
- Incubi Darkness
- Khorne Red
- Leadbelcher
- Lupercal Green
- Mephiston Red
- Mournfang Brown
- Naggaroth Night
- Rakarth Flesh
- Rhinox Hide
- Screamer Pink
- Steel Legion Drab
- Wraithbone
Shade 3
- Agrax Earthshade
- Nuln Oil
- Reikland Fleshshade
Layer 20
- Administratum Grey
- Baharroth Blue
- Blue Horror
- Cadian Fleshtone
- Dark Reaper
- Dechala Lilac
- Doombull Brown
- Evil Sunz Scarlet
- Genestealer Purple
- Ironbreaker
- Karak Stone
- Kislev Flesh
- Pallid Wych Flesh
- Screaming Skull
- Skrag Brown
- Sons of Horus Green
- Sybarite Green
- Ushabti Bone
- White Scar
- Wild Rider Red
Technical 1
- Contrast Medium
Contrast 5
- Apothecary White
- Cygor Brown
- Gore-grunta Fur
- Skeleton Horde
- Volupus Pink
Vallejo Game Color
Base 1
- 72.001 Dead White
Vallejo Metal Color
Base 2
- 77.710 Copper
- 77.725 Gold
Vallejo Model Air
Base 1
- 71.063 Silver RLM01 Metallic
Vallejo Model Color
Base 2
- 70.950 Black
- 70.951 White