Green Armor
- Prime Chaos Black
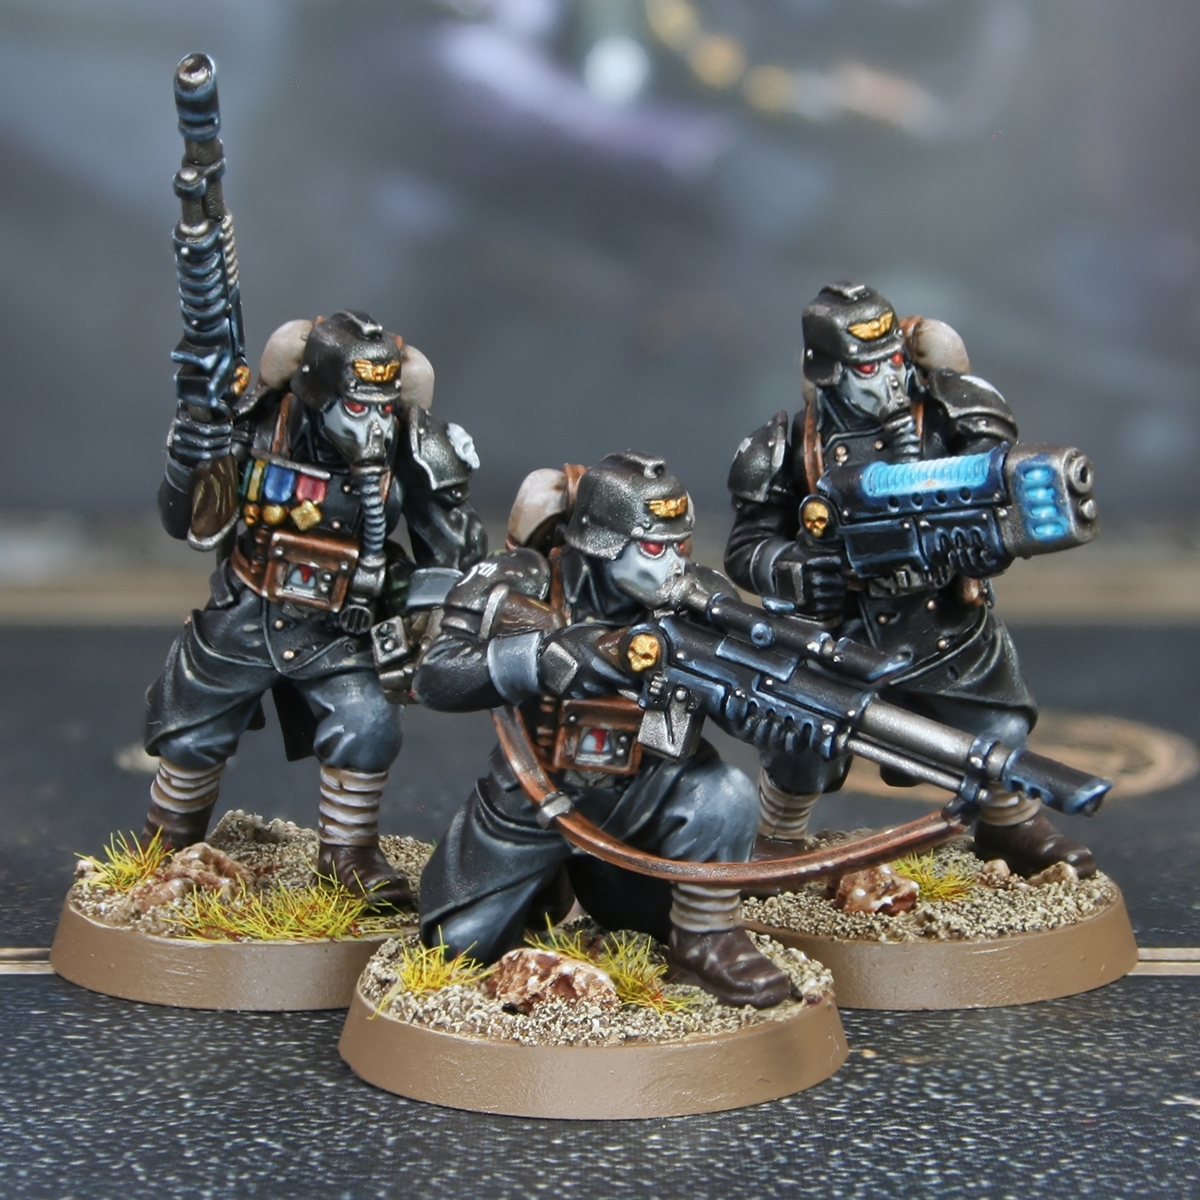
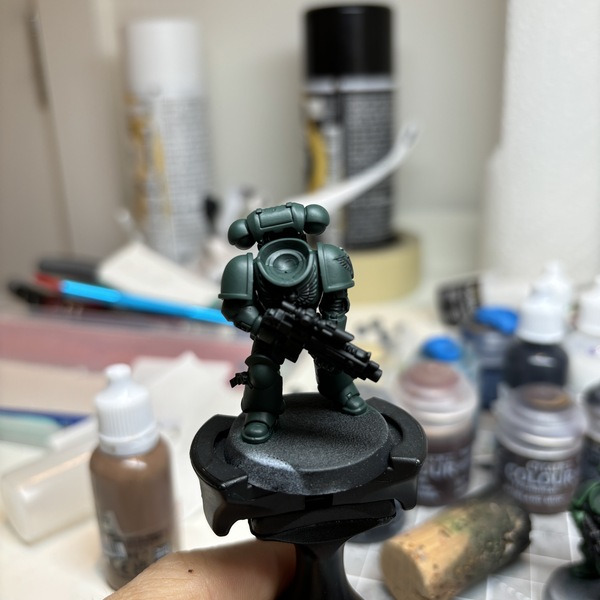 Base coat 3 thin + flow aid Caliban Green it takes about 3 minutes for each of the first coats and 1 minute for the last on touch ups. Use a size 3 brush.
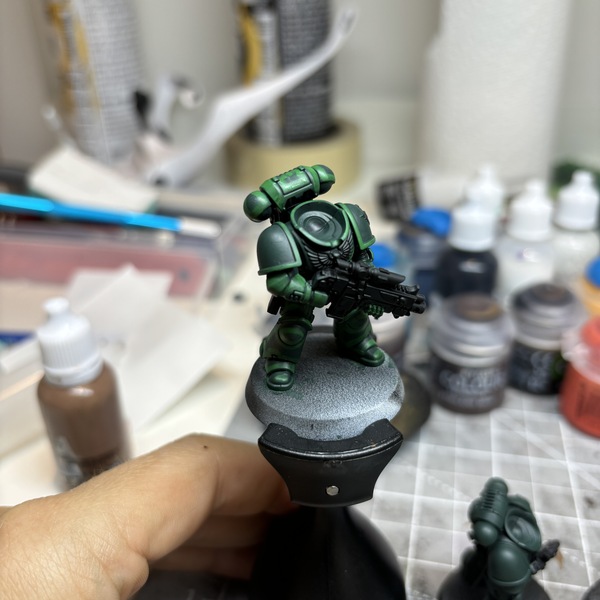 Chunky edge highlight, which at times means an entire panel 2 coats + flow aid Warpstone Glow . I use a very loaded brush and paint a thick first coat, I find this lets it dry smoother. It’s 14 minutes for the first coat, 5 minutes for the second. As you get better, you’ll find that you won’t need to put second coats on places that will get the final edge highlight. And in some particularly tricky spots like the top of the backpack I often don’t even cover the edges knowing the moot green has amazing coverage. (Total time now at 26 minutes per model). Use a size 2 brush.
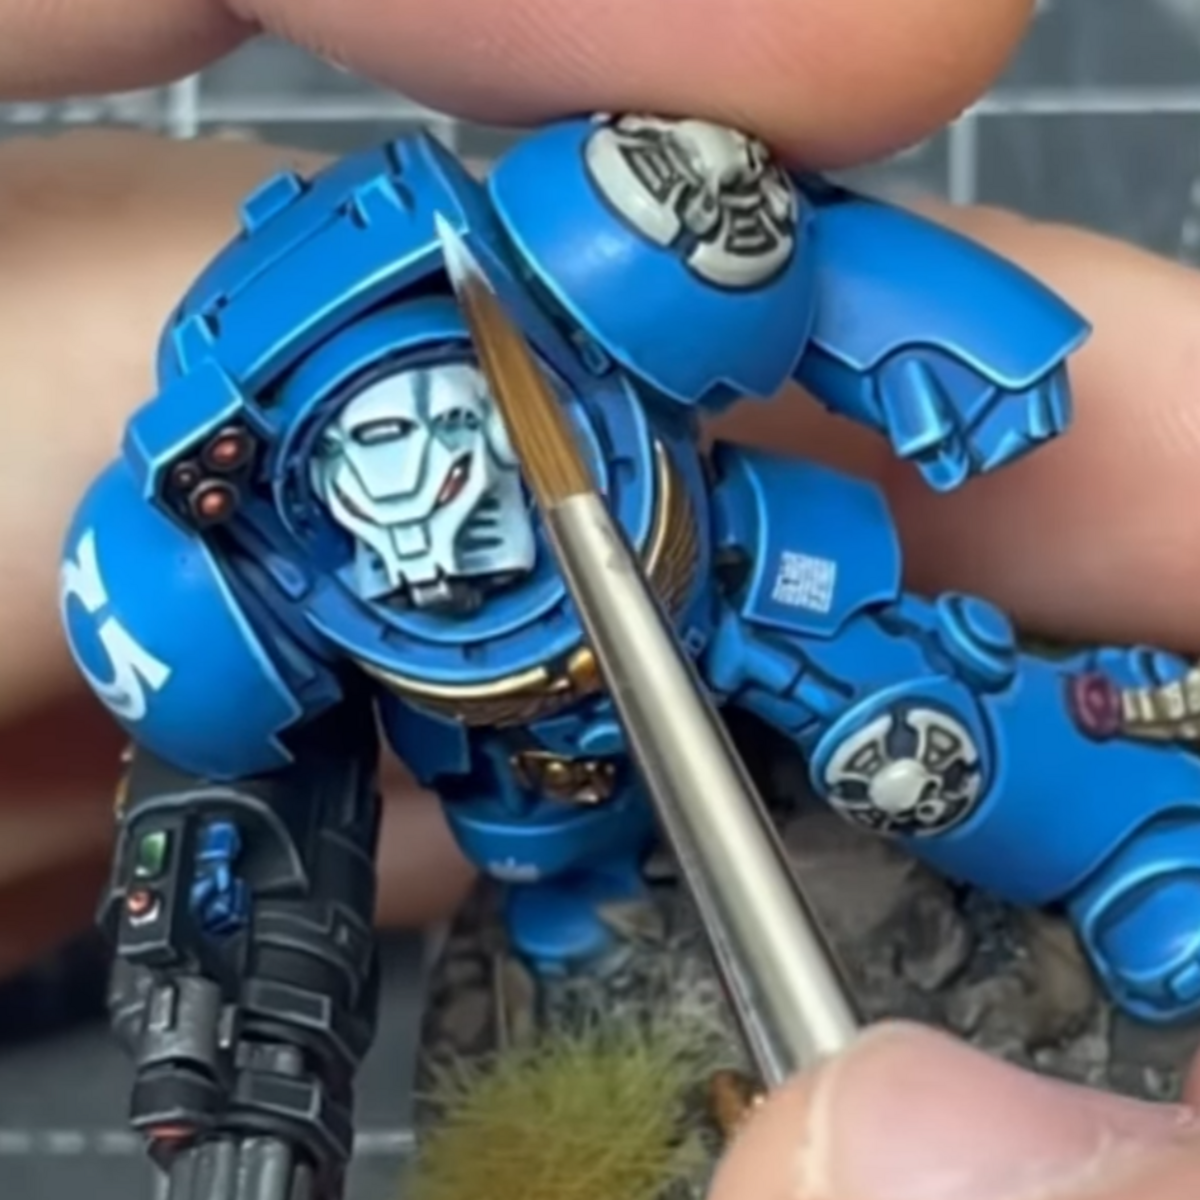
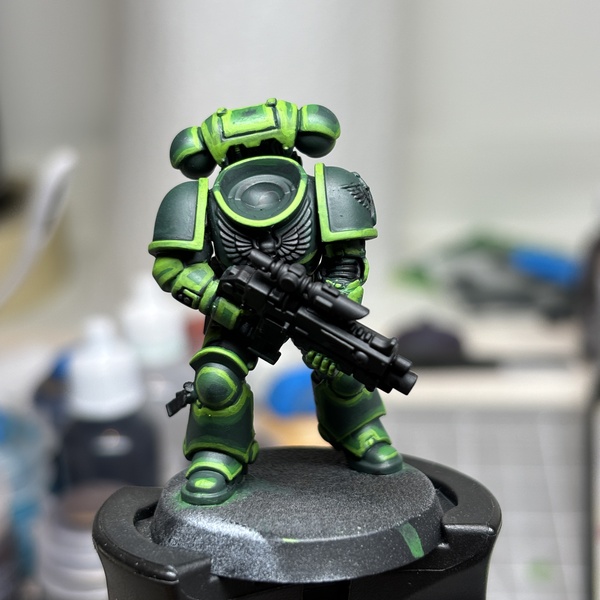 Edge highlight two thin coats of water + flow aid + Moot Green wthis is the longest step. You need to be precise with each stroke. Make sure you have a smaller brush than the last paint job. Budget 50 minutes (76 minutes now). Use a size 1 brush.
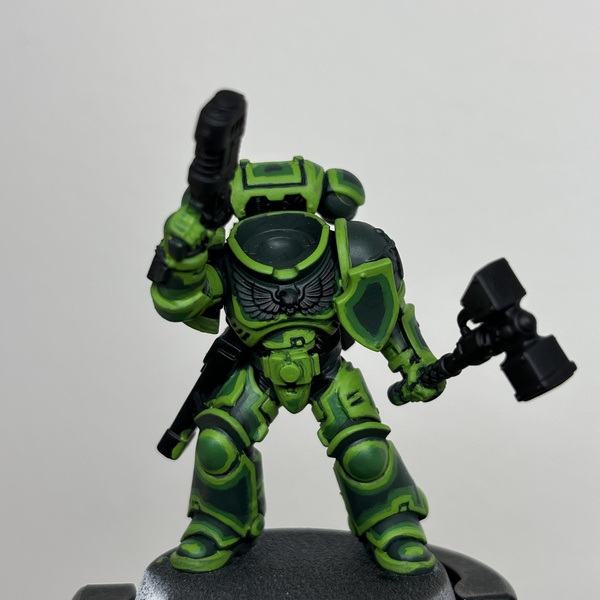 Clean up mistakes. Get all 3 paints on the palette, your goggles and a bright light. Switch between colors tidying whatever issues you spot. You can take a picture and zoom to get ideas for more things to fix. This step takes 10 minutes about. (86 minutes total). Use a size 0 brush.
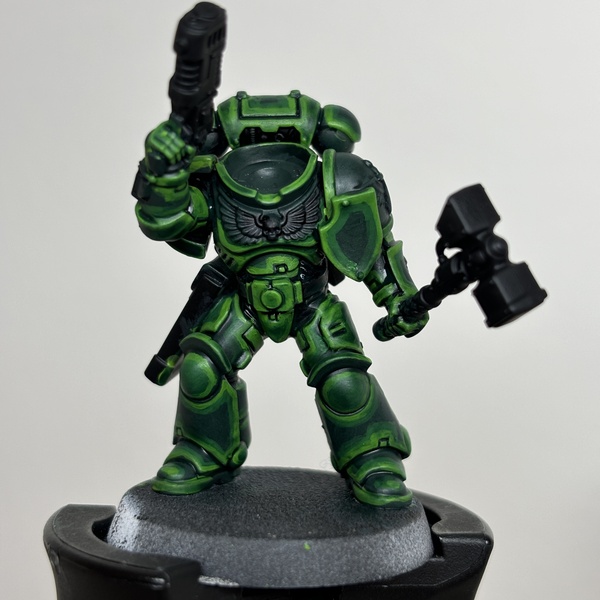 Wash 4:1 Contrast Medium and Dark Angels Green it’s very important to use the correct technique here. You need to move fucking fast while painting a panel, but not fast while painting the whole model. Focus all your attend on one panel at a time. You need to put a thick amount of contrast paint or else it will dry and streak almost immediately. Once you have a thick layer applied, you wipe the excess in as few gestures as possible to the recesses. You can’t be perfect here and trying to be will make it worse. This takes 4 minutes. Total 90 minutes for green armor done. Size 3 brush works here. Also, 1 drop from dropper of Dark Angels Contrast and 4 drops medium covers exactly 1 marine.
Weapon Red
- 2 thin coats Mephiston Red
- Wash cracks and rivets with Agrax Earthshade
- Paint extremely thick highlights (basically covering entire panels) with Evil Sunz Scarlet
- Edge highlight with Wild Rider Red
Silver
- Paint guns, pouch tabs, armor rivets with Silver
- Wash Nuln Oil
Leather Brown
- Base Coat Rhinox Hide
- Chunky highlight Doombull Brown
- Thin highlight Tuskgor Fur
- Wash with Agrax Earthshade
Blacks
- If metallic, Base with Silver , if leather Base with Eshin Grey
- Wash with Black Templar
White
- Base coat two thin Corax White
- Wash with Nuln Oil
Bone
- Base with two thin coats of Zandri Dust
- Wash with Seraphim Sepia
- Highlight with Ushabti Bone
Gold
- 3 coats of Gold
- Wash with Reikland Fleshshade
Base
- Rim based with Steel Legion Drab
- Top based with Stirland Mud
- Base cork chunks in Abaddon Black , highlight Dawnstone then glue with Superglue
- White Glue Army Painter Gravel, Grass, flowers
Base
6
-
Caliban Green
-
Corax White
-
Mephiston Red
-
Rhinox Hide
-
Steel Legion Drab
-
Zandri Dust
Shade
4
-
Agrax Earthshade
-
Nuln Oil
-
Reikland Fleshshade
-
Seraphim Sepia
Layer
8
-
Dawnstone
-
Doombull Brown
-
Eshin Grey
-
Moot Green
-
Tuskgor Fur
-
Ushabti Bone
-
Warpstone Glow
-
Wild Rider Red
Air
2
-
Abaddon Black
-
Evil Sunz Scarlet
Contrast
2
-
Black Templar
-
Dark Angels Green
Metallic
2
-
70.996
Gold
-
70.997
Silver
Sign up to compare these recipe requirements to your own paint collection
 Base coat 3 thin + flow aid Caliban Green it takes about 3 minutes for each of the first coats and 1 minute for the last on touch ups. Use a size 3 brush.
 Chunky edge highlight, which at times means an entire panel 2 coats + flow aid Warpstone Glow . I use a very loaded brush and paint a thick first coat, I find this lets it dry smoother. It’s 14 minutes for the first coat, 5 minutes for the second. As you get better, you’ll find that you won’t need to put second coats on places that will get the final edge highlight. And in some particularly tricky spots like the top of the backpack I often don’t even cover the edges knowing the moot green has amazing coverage. (Total time now at 26 minutes per model). Use a size 2 brush.
 Edge highlight two thin coats of water + flow aid + Moot Green wthis is the longest step. You need to be precise with each stroke. Make sure you have a smaller brush than the last paint job. Budget 50 minutes (76 minutes now). Use a size 1 brush.
 Clean up mistakes. Get all 3 paints on the palette, your goggles and a bright light. Switch between colors tidying whatever issues you spot. You can take a picture and zoom to get ideas for more things to fix. This step takes 10 minutes about. (86 minutes total). Use a size 0 brush.
 Wash 4:1 Contrast Medium and Dark Angels Green it’s very important to use the correct technique here. You need to move fucking fast while painting a panel, but not fast while painting the whole model. Focus all your attend on one panel at a time. You need to put a thick amount of contrast paint or else it will dry and streak almost immediately. Once you have a thick layer applied, you wipe the excess in as few gestures as possible to the recesses. You can’t be perfect here and trying to be will make it worse. This takes 4 minutes. Total 90 minutes for green armor done. Size 3 brush works here. Also, 1 drop from dropper of Dark Angels Contrast and 4 drops medium covers exactly 1 marine.