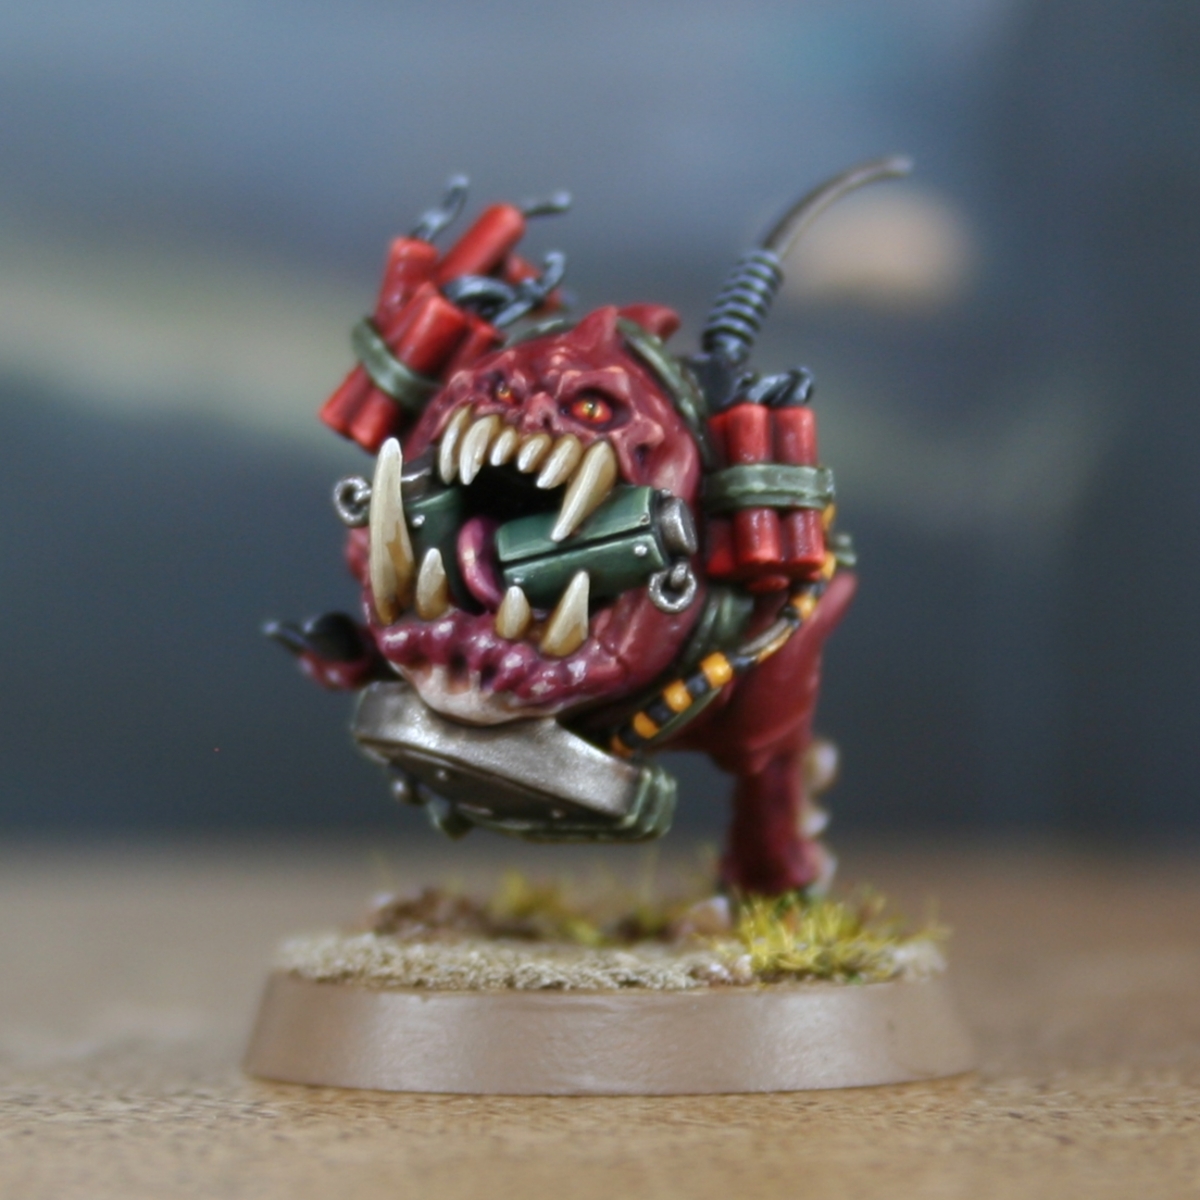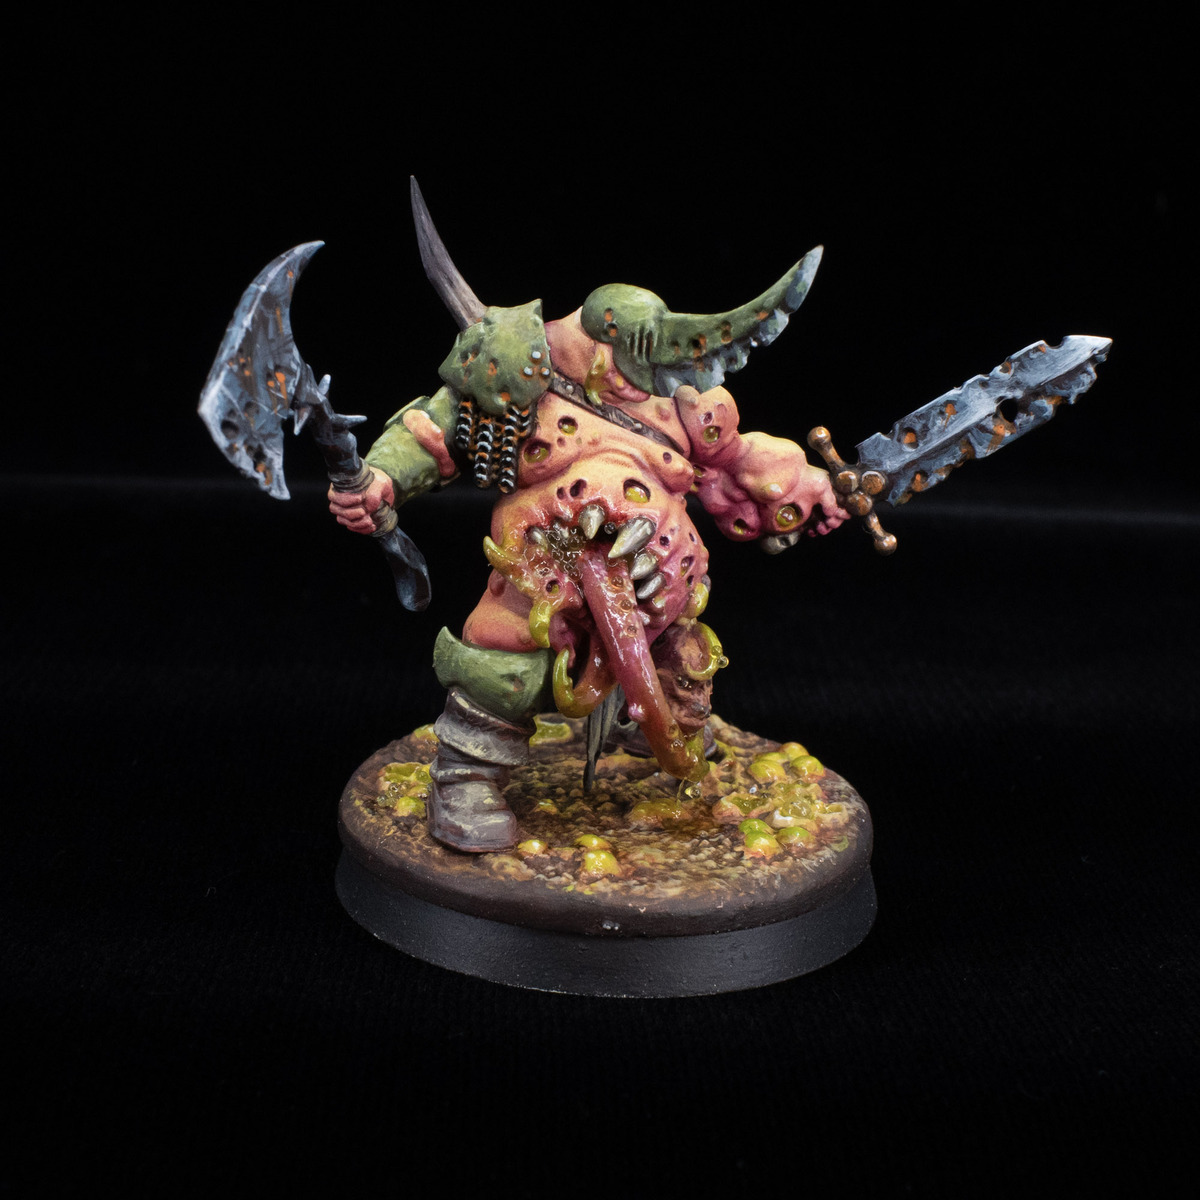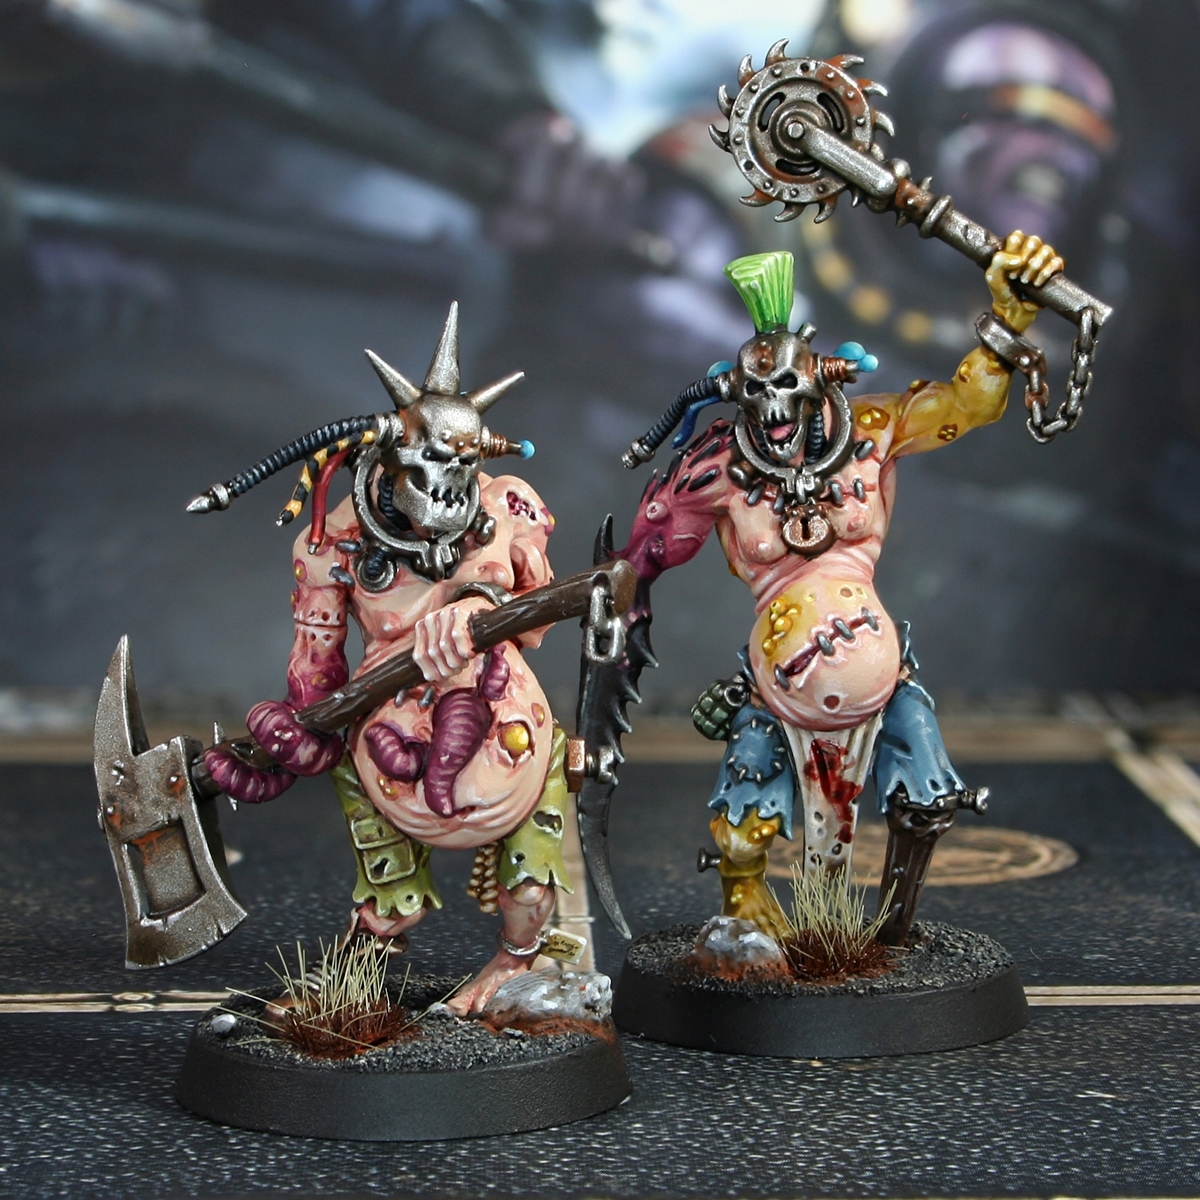
Gellerpox Infected: Gellerpox Mutants

 Skin
Skin
- Basecoat the skin with a mix of 3 parts Cadian Fleshtone , 2 parts White and 1 part Administratum Grey . This is quite a complex mix, but you only need to do it the once. I would advise mixing a decent amount, then just taking a small blob whenever you need it in future steps.
- Mix you base mix 2:1 with Doombull Brown , then thin it with a substantial amount of Lahmian Medium , until it is at a glaze consistency. Now use this to glaze in some general shading. Avoid shading limbs and boils that will end up being green later, both in this step and those that follow.
- Increase the amount of Doombull Brown in the above mix, so it is now, 1:2, making it look a lot more pink. Use this more sparingly to enhance the shading above, defining folds and the underside of bulges. I also like to use this paint as a general wash, helping to make the transition into tentacles and chaos mutations smoother.
- Add extra definition to recesses with some thin Doombull Brown , all by itself. I use this colour purely for very deep folds, like armpits of to separate materials.
- Increase the amount of white in your basecoat colour, so it is roughly equal parts Cadian Fleshtone and :white, with just a touch of Administratum Grey . use this lighter paint to add general highlights to the skin.
- Mix the above paint 1:1 with White and selectively highlight, making sure you are still working on what will be the green, diseased skin.
- Finish with a very small/specular highlights of pure White .
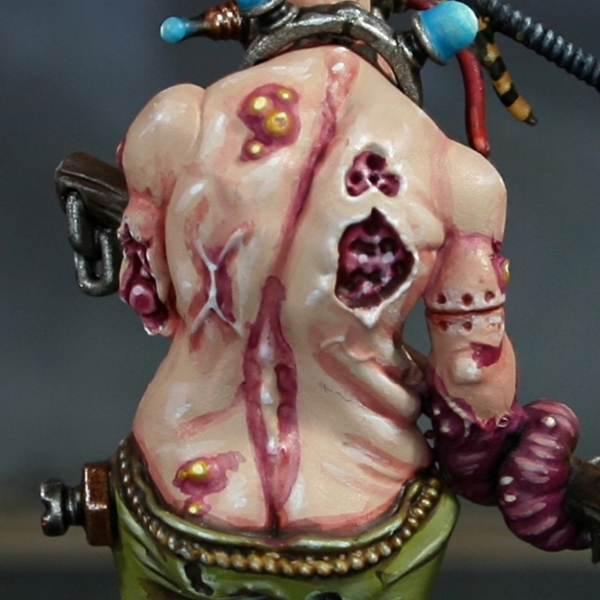
 Diseased Skin
At this point, you should have fully basecoated and highlighted skin, if you have followed the steps above. If not, take a look a few steps up.
- Cover the skin with Plaguebearer Flesh , leaving a little uncovered near the bicep. Now take some Contrast Medium and blend the contrast paint out, towards the shoulder. This should leave you with a nice easy gradient.
- I was feeling sassy, so I glazed a little Iyanden Yellow around the bicep area, to mimic the box art. This is very much optional though.
- To shade, I like to use a little Nazdreg Yellow . This is used sparingly around boils, in deep recesses and where the skin meets different materials.
- Selectively highlight with Deepkin Flesh .
- Finish with specular highlights of White on knuckles etc.
 For boils within these diseased patches, I just picked out the highest points with Flash Gitz Yellow , then finished with a smaller, specular highlight of Ice Yellow .
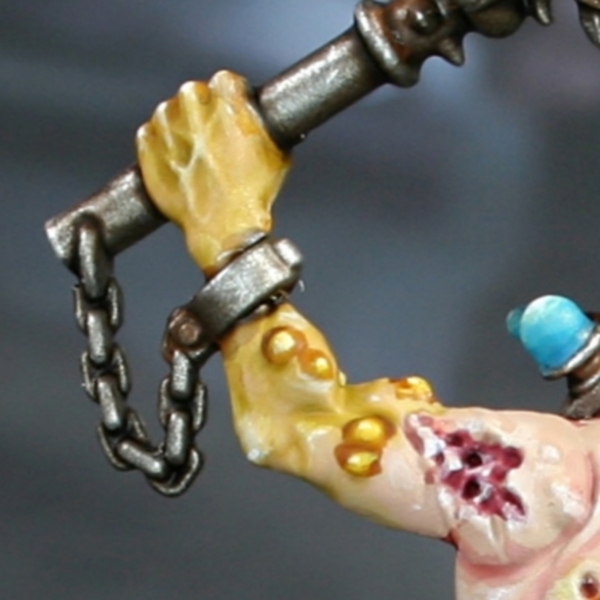
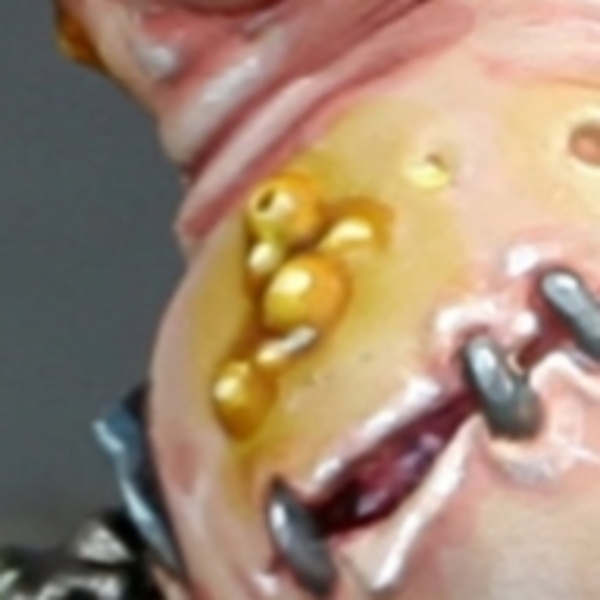
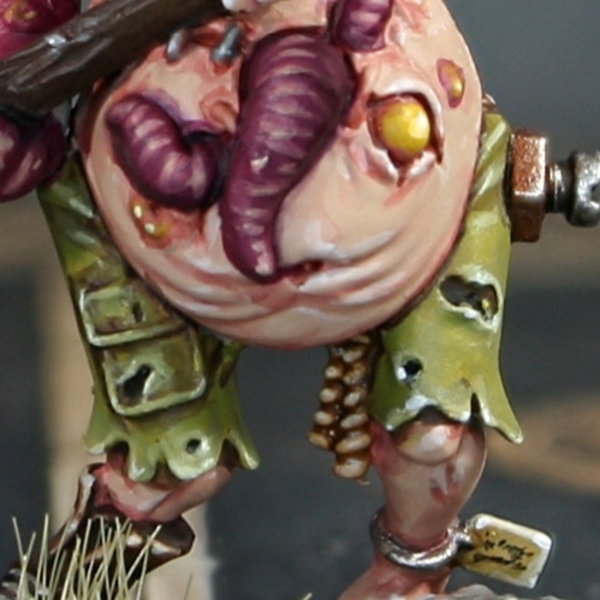
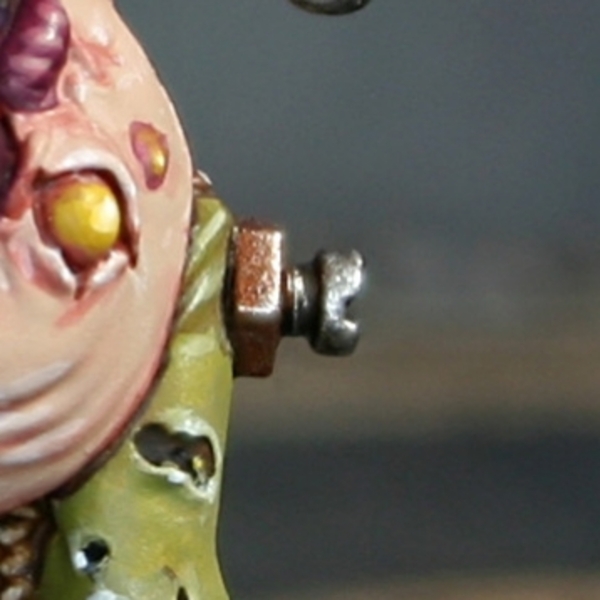
 Boils
Boils
If you have followed the above steps, the "normal" skin should now have a few patches of prominent and very pink looking spots. Now is a good time to pick them out and break up the skin.
- First, pick out the more spherical parts with Balor Brown , leaving some pink shading around them.
- Now highlight with a smaller amount of Yriel Yellow .
- Finish with very small/specular highlights of Ice Yellow .
On the very large one in the belly, I was a bit more generous with my highlights, and finished with an additional specular highlight of White .
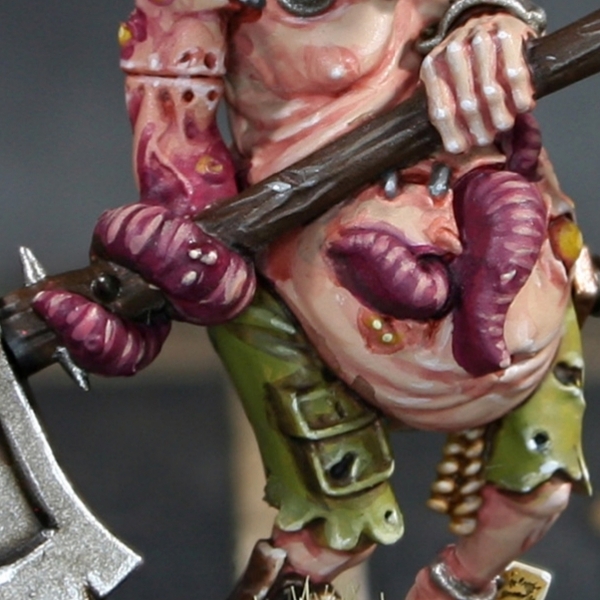 Fleshy Tentacles
- Basecoat with Screamer Pink .
- Wash the tentacle with Druchii Violet . Don't let it pool too much.
- With a 1:1 mix of Screamer Pink and Pink Horror cover most of the flesh with a thick glaze. Pulling paint towards the centre always. Paint everything just outside of recesses where the dried shade has dried.
- Paint a smaller area with pure Pink Horror . Use the same technique as above to ensure a smooth transition. This time go over around two thirds of the area, painting higher to simulate where light would hit and adding the illusion of depth below.
- With a 1:1 mix of Pink Horror and Kislev Flesh flesh paint an even smaller area, pulling even closer to the centre and higher.
- With pure Kislev Flesh paint a very small area. For some tentacles I add this highlight as multiple small lines to add texture.
- Optionally, add dot highlights of Flayed One Flesh to the points of tentacles and the centre of the previous steps highlights.
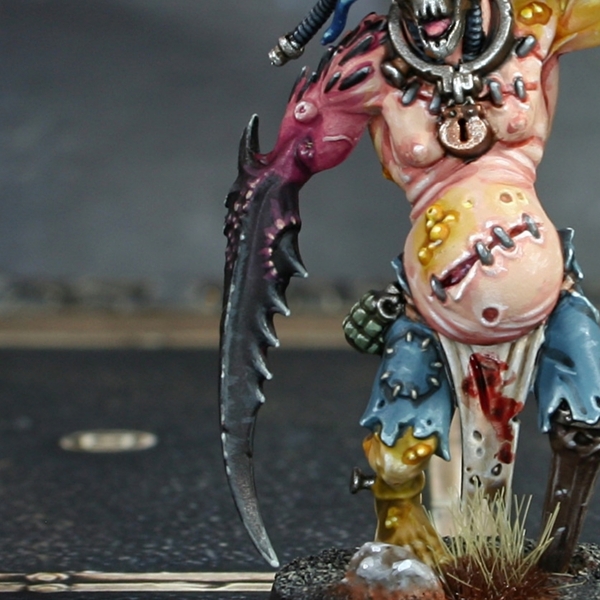 Chaos Mutation
In the skin step, I mentioned a wash of the skin colour with an increased amount of Doombull Brown mix in. This section assumes that you followed these steps.
- Make the transition between the top of the arm and mutation smoother with a pretty chunky glaze of :screamer pink. pull your brush down, to smooth the transition.
- Repeat with a 1:1 mix of Screamer Pink and Abaddon Black , sticking to the mutation below the elbow only.. I made a couple of passes with this paint, making the second one slighly further down.
- Hopefully the transition is pretty smooth now, but feel free to help it along with a glaze/wash of Druchii Violet to unify it.
- Glaze the hard looking parts of the mutation with Abaddon Black .
- Highlight edges of the black spiked section, using Skavenblight Dinge .
- Mix the Skavenblight Dinge 2:1 with Ushabti Bone and add fine highlights.
- Increase the amount of Ushabti Bone in the above mix, so ther is now roughly twice as much as the Skavenblight Dinge . Use this for selective highlights on points.
- Now add some White to the above mix and add specular highlights to points.
 Wood
Wood
- Basecoat with Thondia Brown .
- Shade with Rhinox Hide .
- Highlight and add woodgrain with a mix of 2:1 Thondia Brown and Steel Legion Drab .
- Take the above paint and mix it 1:1 with Administratum Grey . Now use this for fine highlights.
- Increase the amount of Administratum Grey again, then add selective highlights.
- Finish with a few specular highlights of pure Administratum Grey .
 Dark Brown Leather
- Basecoat the leather area with Rhinox Hide .
- Glaze most of the leather with thinned Mournfang Brown . Use quite a small brush and drag towards edges in rough lines. This should create some extra texture.
- Add a chunky edge highlight of Skrag Brown to all edges.
- Highlight everything again, this time with a fine line of Skrag Brown and Ushabti Bone mixed 1:1. This is a good mix to throw in occasional fine lines as scratches too.
- With pure Ushabti Bone , selectively highlight corners and exposed edges of the leather. Put a dot of this colour where the additional scratched above meet edges too.
- Add a little pure white (like Dead White ) to your Ushabti Bone and add dot highlights to corners.
 Green Cloth
- Basecoat with Loren Forest .
- Mix the Loren Forest 1:1 with Rhinox Hide and use this colour to shade the cloth.
- Now add a little Abaddon Black to the above mix and shade the deepest folds with a small amount of paint.
- Add some general highlights with Death Guard Green .
- Add fine highlights with Ogryn Camo .
- Selectively highlight corners and curves with 1:1 Ogryn Camo and Wraithbone .
- Finish with specular highlights of Wraithbone .
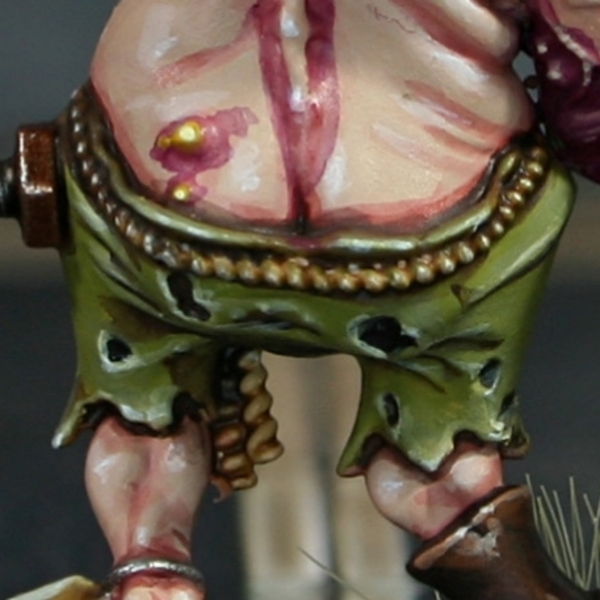 Rope
Rope
- Basecoat with Ushabti Bone .
- Wash with Skeleton Horde .
- Highlight with Screaming Skull .
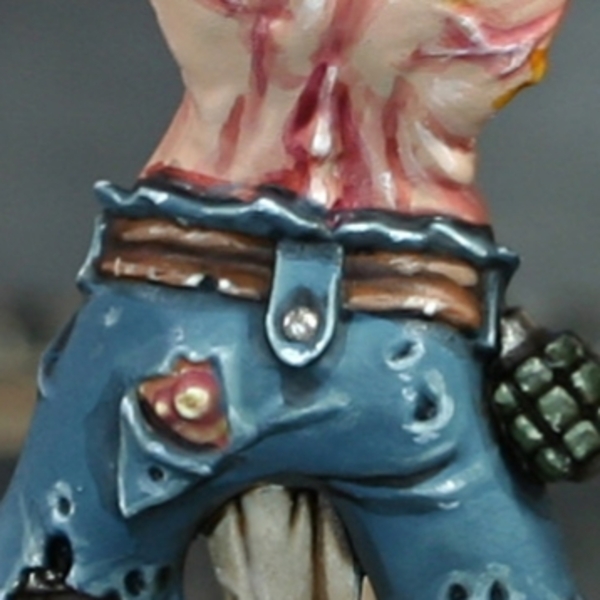
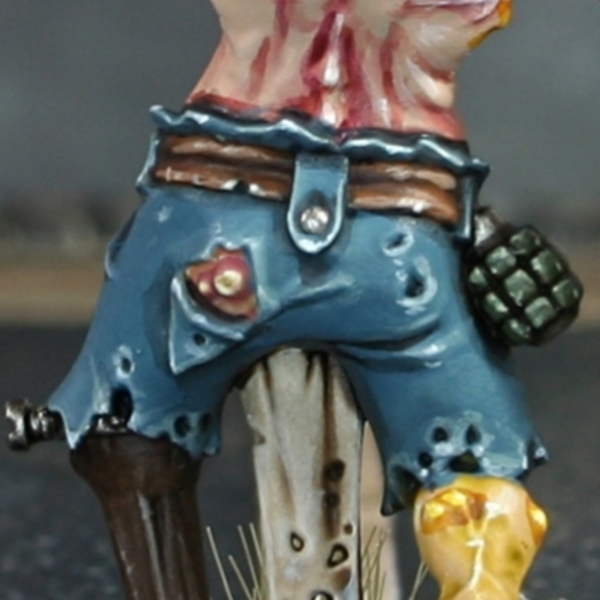 Blue Cloth
- Basecoat with Thunderhawk Blue .
- Shade using a thin mix of 1:1 Abaddon Black and Dark Reaper .
- Add chunky highlights using 2:1 Thunderhawk Blue and Ushabti Bone .
- Now with a 1:2 mix of Thunderhawk Blue and Ushabti Bone ., add fine edge highlights.
- Take a blob of the above paint and mix it 1:1 with some White . This is a good colour for selectively highlighting corners and curves.
- Mix in a little more White and finish with specular highlights on points.
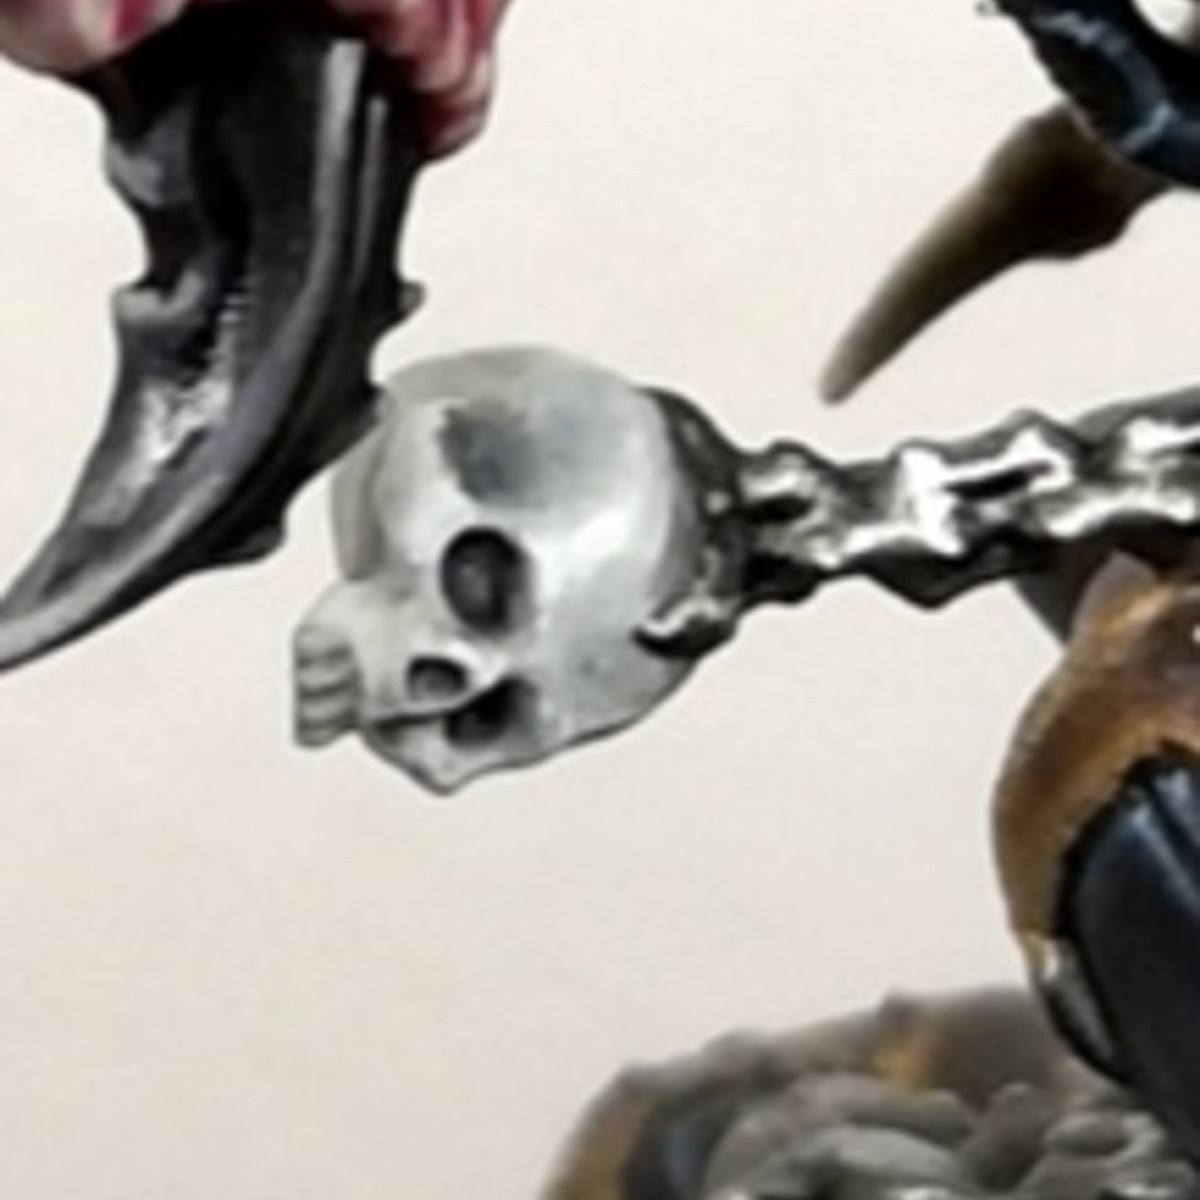
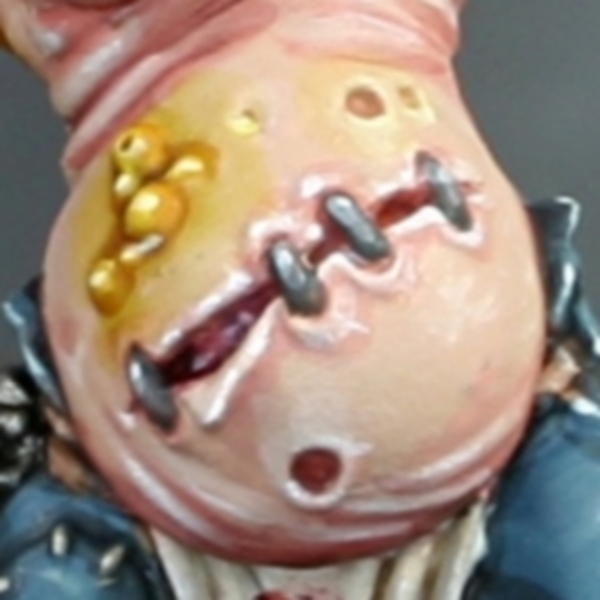 Stitches
- Basecoat with Skavenblight Dinge .
- Add some Wraithbone to the base colour and edge highlight.
- Now mix in a little White to the above colour and finish with 1 or two specular highlights.
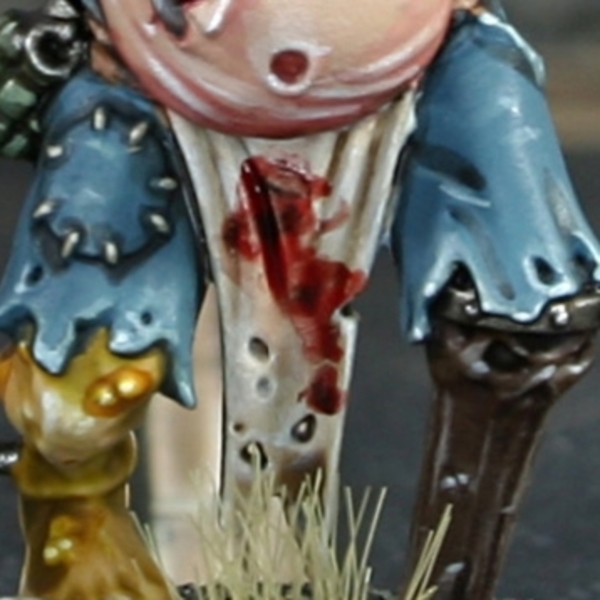 Dirty Cloth
- Basecoat with 1:1 Karak Stone and White .
- Wash with Agrax Earthshade , making sure it doesn't pool anywhere unsightly.
- Add fine edge highlights with the 1:1 Karak Stone and White base colour.
- Finish with selective highlights of pure White .
For the blood effect, I stippled on patches of Blood For The Blood God , thin stippled in a little Black while it was still wet. It is also a good idea to blend out the edges while it is still wet, to stop it looking like distinct glossy blobs.
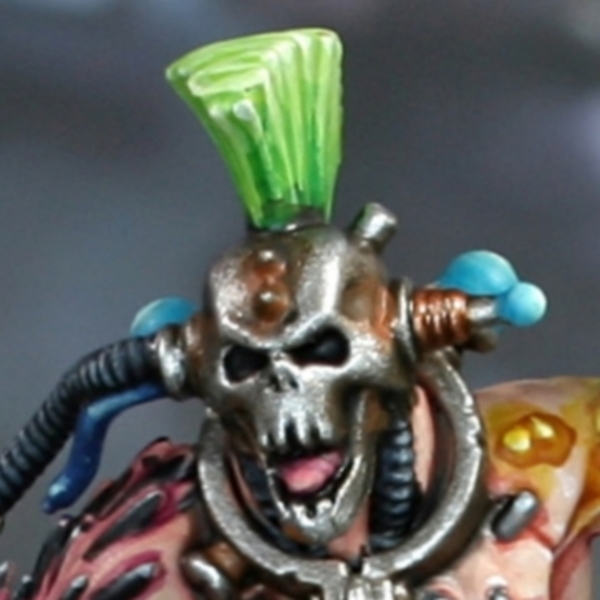 Green Hair
- Basecoat with Moot Green .
- Shade the lowest two thirds of the hair, using thinned Warpstone Glow . I focused mostly around shading the shallow sculpted recesses.
- Shade the lowest third with Caliban Green , like you did above. Ensure there is a line of very dark green around the base of the mohawk.
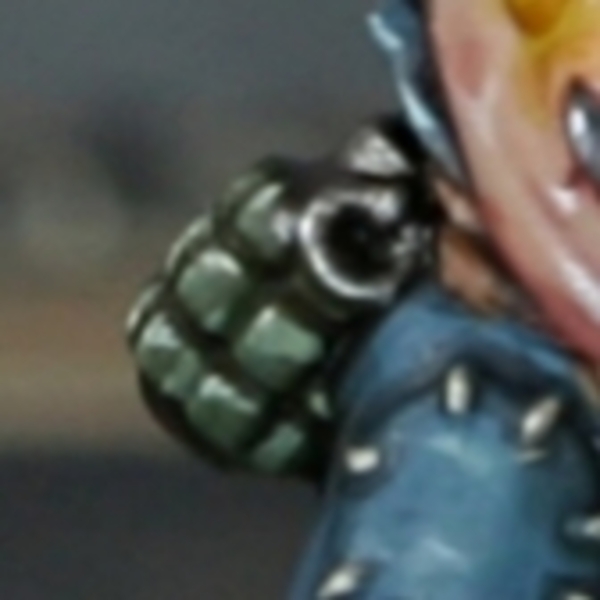 Granade Casing
- Basecoat with Castellan Green .
- Shade recesses with Agrax Earthshade and a thin brush.
- Highlight edges with Loren Forest .
- Selectively highlight with Ogryn Camo .
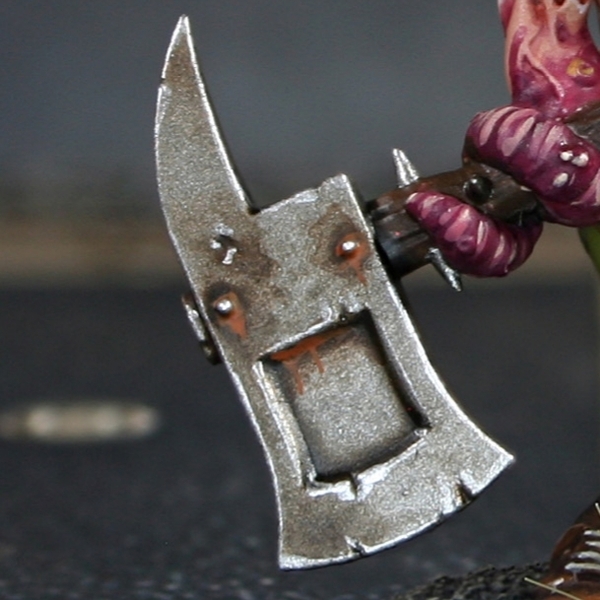 Steel
Steel
- Basecoat with Leadbelcher .
- Now wash the metal. I used Nuln Oil for clean metals and a 1:1 mix of Nuln Oil and Agrax Earthshade for metals I wanted to be dirtier, like the weapons.
- Enhance the shading where you want it to look dirtier using glazes of Wyldwood .
- Add rust around details as well as rust streaks. For this, I used some thinned Skrag Brown .
- Highlight with Ironbreaker .
- Finish with selective highlights of Silver RLM01 Metallic .
 Brass
Brass
- Basecoat with Balthasar Gold .
- Wash with Agrax Earthshade . If you need to enhance the shading once dry, feel free to use a dark brown and a thin brush.
- Highlight with Sycorax Bronze .
- Finish with very small/specular highlights using Silver RLM01 Metallic .
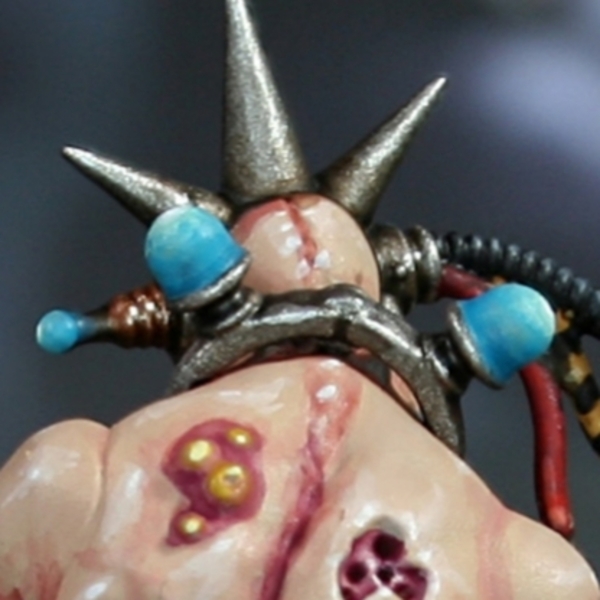 Glowing Orbs
- Basecoat with 1:1 Gauss Blaster Green and Thousand Sons Blue .
- Add general shading with 1:2 Gauss Blaster Green and Thousand Sons Blue .
- Enhance this shadin with a small amount of Sotek Green .
- Highlight with Gauss Blaster Green .
- Finish with small White highlights.

Rookie Brushes
RookieBrushes
Aspiring miniature painter and biscuit enthusiast. Here to share my hobby and help where I can.
Citadel Painting System 49
Base 13
- Abaddon Black
- Balthasar Gold
- Caliban Green
- Castellan Green
- Death Guard Green
- Leadbelcher
- Mournfang Brown
- Rhinox Hide
- Screamer Pink
- Steel Legion Drab
- Thondia Brown
- Thousand Sons Blue
- Wraithbone
Shade 3
- Agrax Earthshade
- Druchii Violet
- Nuln Oil
Layer 25
- Administratum Grey
- Balor Brown
- Cadian Fleshtone
- Dark Reaper
- Deepkin Flesh
- Doombull Brown
- Flash Gitz Yellow
- Flayed One Flesh
- Gauss Blaster Green
- Ironbreaker
- Karak Stone
- Kislev Flesh
- Loren Forest
- Moot Green
- Ogryn Camo
- Pink Horror
- Screaming Skull
- Skavenblight Dinge
- Skrag Brown
- Sotek Green
- Sycorax Bronze
- Thunderhawk Blue
- Ushabti Bone
- Warpstone Glow
- Yriel Yellow
Technical 3
- Blood For The Blood God
- Contrast Medium
- Lahmian Medium
Contrast 5
- Iyanden Yellow
- Nazdreg Yellow
- Plaguebearer Flesh
- Skeleton Horde
- Wyldwood
Vallejo Game Color
Base 1
- 72.001 Dead White
Vallejo Model Air
Base 1
- 71.063 Silver RLM01 Metallic
Vallejo Model Color
Base 3
- 70.858 Ice Yellow
- 70.950 Black
- 70.951 White