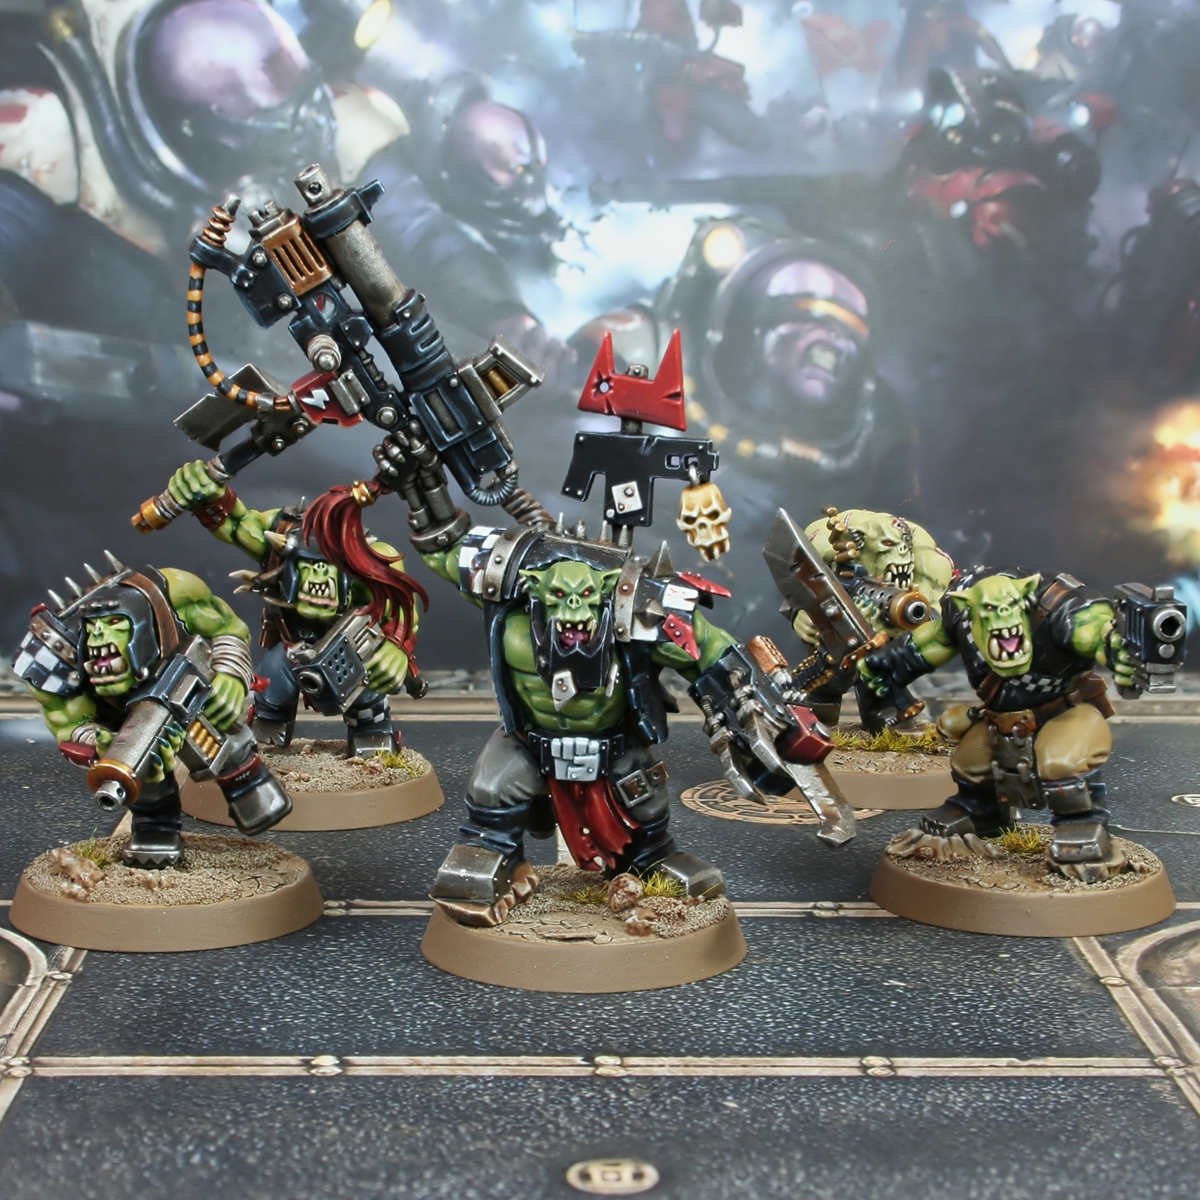

In this guide I will being focusing on the main colours I have been using for my Ork Goffs Kill Team. I like to vary the skin tones of my Orks, so if you are interested in this in particular you may want to check out my "Ork Skin Tone Collection" also available on this site.
If not, here is the recipe listed on Eavy-Archive.com as the taditional "40K Orks" recipe...
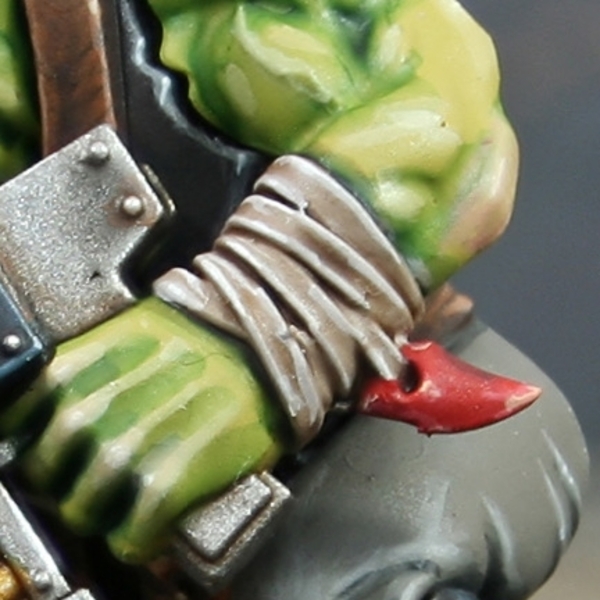
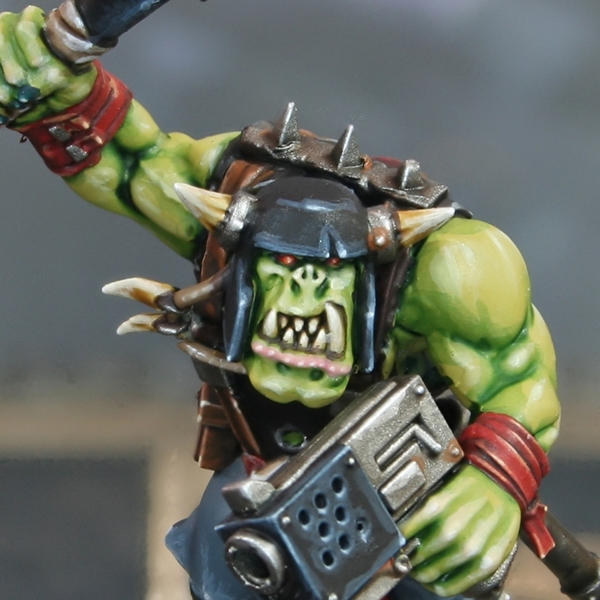 Green Ork Skin
- Basecoat with a mix of Averland Sunset and Skarsnik Green . I make the ratio about 1:1, but add a little more Skarsnik Green , so it reads as green and not yellow.
- Shade recesses with Biel-Tan Green . Use a combination of glazing and traditional recess shading.
- Run small amounts of Coelia Greenshade into deep recesses with a fine brush. Mix in a little Contrast Medium if you want to make it easier to handle.
- Add general highlights to the skin with Ogryn Camo .
- How apply fine highlights with Krieg Khaki .
- Glaze Kislev Flesh over ear tips, lips, the nose, knuckles and elbows.
- Add final selective and specular highlights of 1:1 Screaming Skull and White .
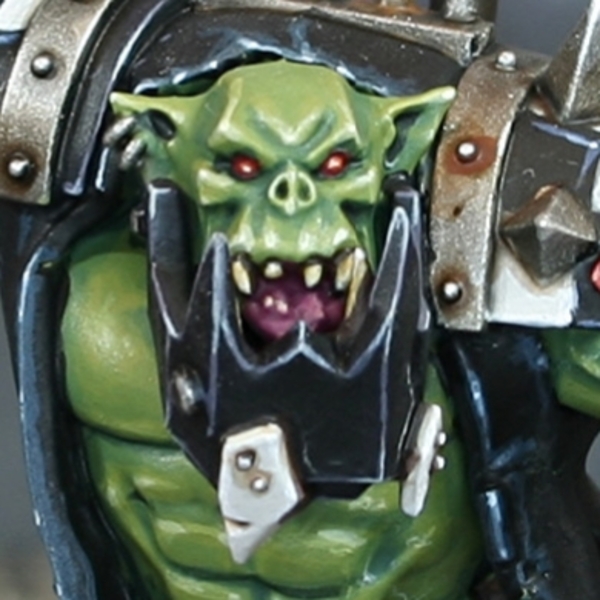 Red Eyes
- Basecoat with Khorne Red .
- Paint the inner part of the eye with Evil Sunz Scarlet .
- Paint a small highlight of Troll Slayer Orange in the middle of the eye, to represent the iris.
- Finish with an even smaller, specular highlight of Dorn Yellow in the centre, to represent the pupil.
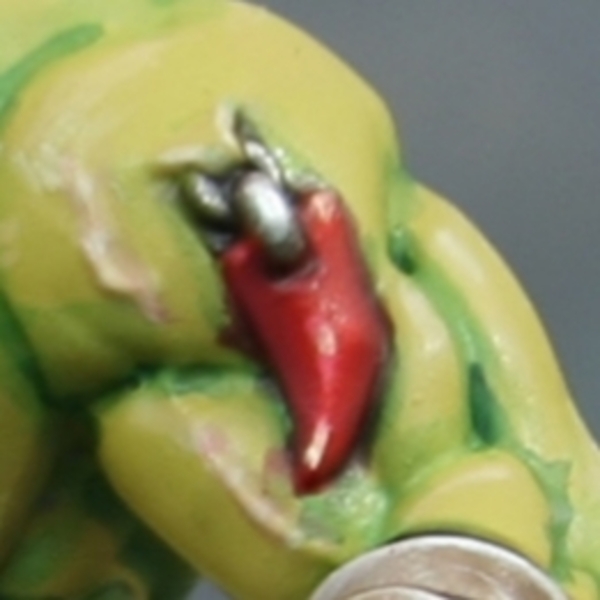
 Tongue
- Basecoat with Screamer Pink .
- Wssh the tongue with Druchii Violet .
- Pick out exposed areas with a 1:1 mix of Screamer Pink and Pink Horror .
- Highlight with Pink Horror .
- Selectively highlight with 1:1 Pink Horror and Kislev Flesh .
- Finish with a small highlight of Kislev Flesh .
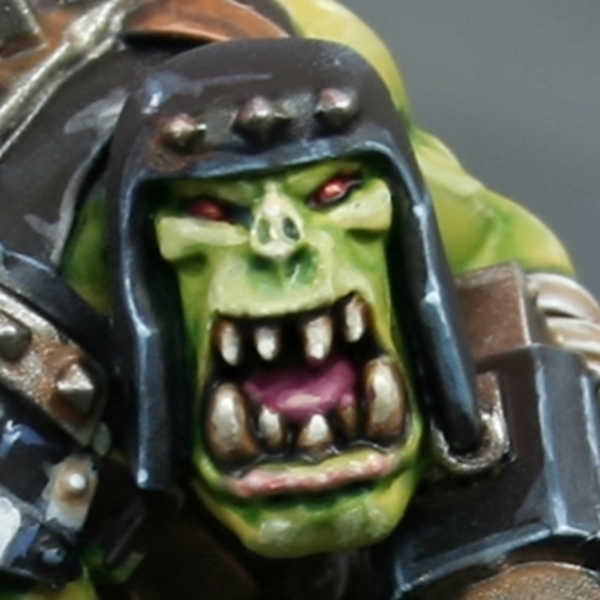
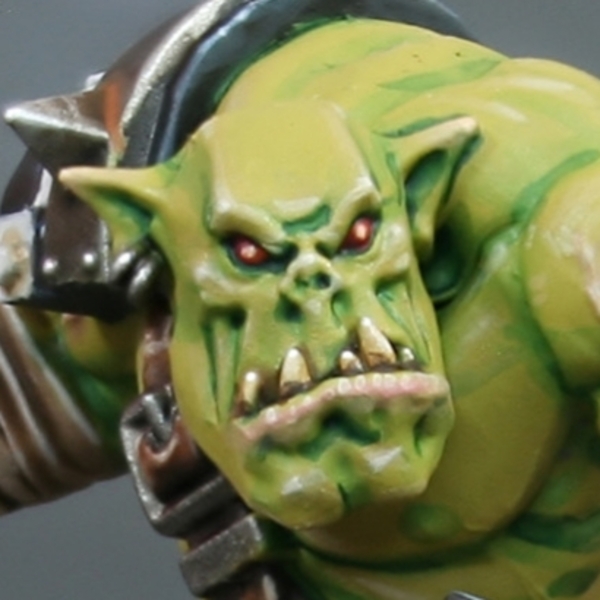 Teeth
Teeth
- Basecoat with Ushabti Bone .
- Wash with Skeleton Horde .
- Reestablish a line of Ushabti Bone in the centre.
- Mix some White into the Ushabti Bone and add selective highlights towards the point of the teeth.
- Finish with a dot of pure White .
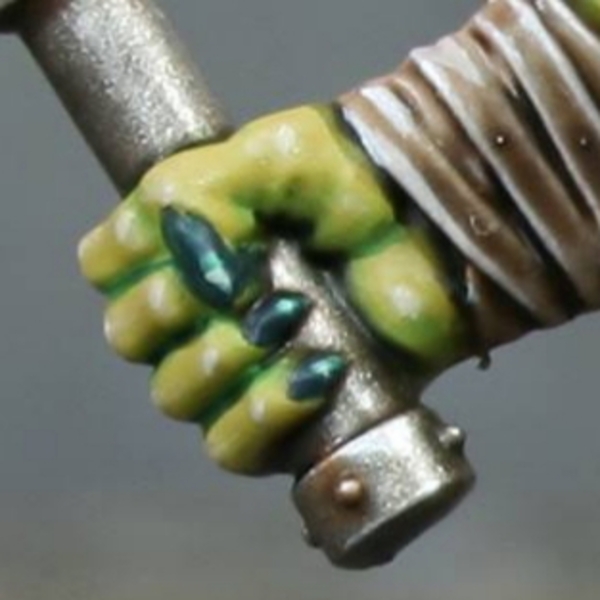 Claws
Claws
- Basecoat with Incubi Darkness .
- Highlight with Kabalite Green .
- Add selective highlight of Sybarite Green .
- Put specular highlight of Deepkin Flesh on the points only.
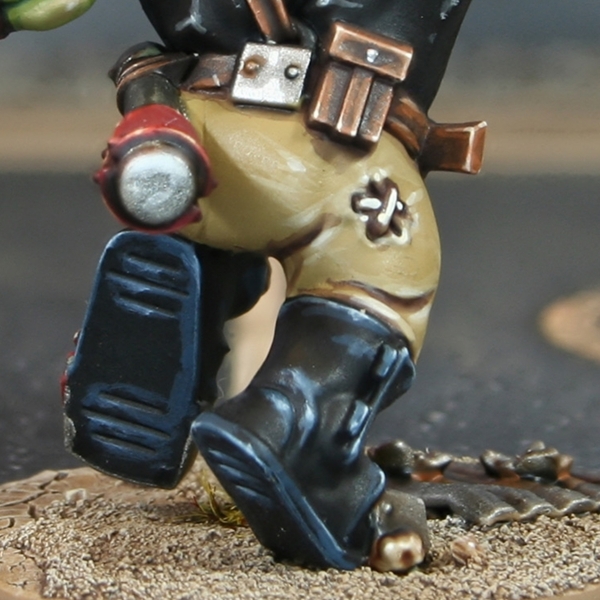 Khaki Cloth
- Basecoat with Tallarn Sand .
- Shade with a 1:1 mix of Tallarn Sand and Rhinox Hide .
- Deep shade with fine lines of Rhinox Hide .
- Add chunky highlights of 2:1 Tallarn Sand and Screaming Skull .
- Highlight a smaller area with fine highlights of 1:2 Tallarn Sand and Screaming Skull .
- Where relevant, apply specular highlights of Screaming Skull .
 Black Cloth
- Basecoat with Abaddon Black .
- Apply chunky highlights with 1:1 Abaddon Black & Rhinox Hide .
- Fine highlight edges with Stormvermin Fur .
- Selectively highlight with 2:1 Stormvermin Fur and White .
- Apply specular highlights of 1:2 Stormvermin Fur and White on points, folds and rough looking areas.
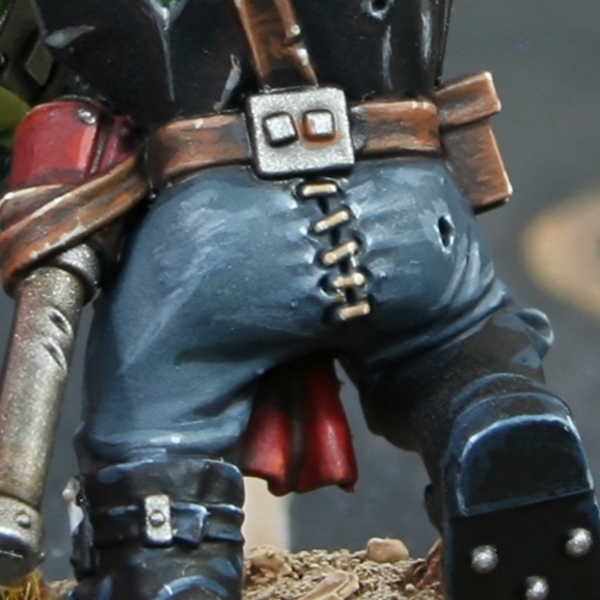 Dark Blue Cloth
- Basecoat with Dark Reaper .
- Shade recesses with Corvus Black .
- Apply chunky highlights with 1:1 Dark Reaper & Administratum Grey .
- Now highlight edges with fine lines of Administratum Grey .
- Mix a little White into the Administratum Grey and selectively highlight folds and corners.
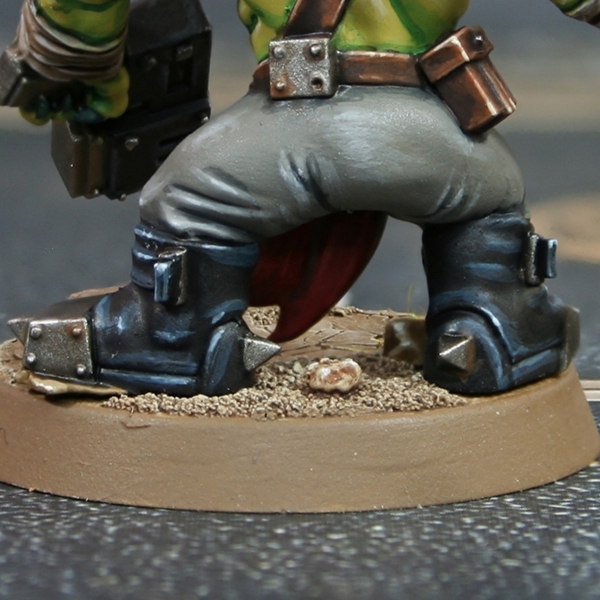
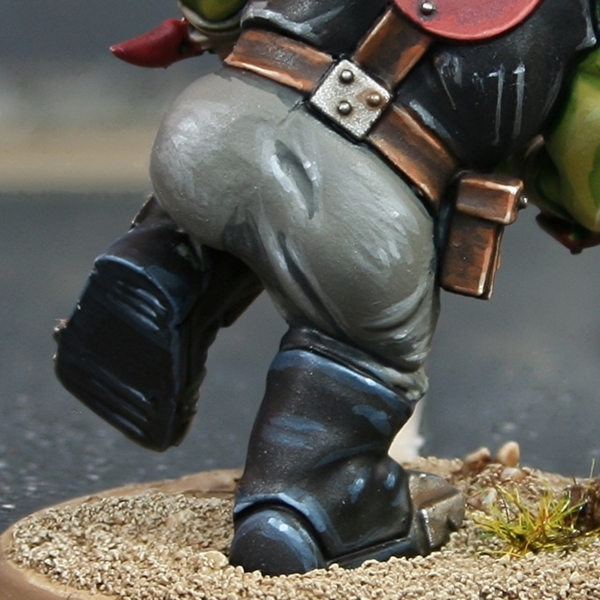 Grey Cloth
- Basecoat with Stormvermin Fur .
- Recess shade with Stormvermin Fur , Abaddon Black and Incubi Darkness mixed 2:2:1.
- Highlight with 2:1 Stormvermin Fur and Administratum Grey .
- Increase the amount of the light grey, so it is roughly 1:2 Stormvermin Fur and Administratum Grey and add finer highlights.
- Selectively highlight with Administratum Grey .
- Finish off with very small highlights with a mix or Administratum Grey and White . I would recommend keeping these highlights to points that are very exposed to light.
 Dirty Cloth
- Basecoat with Rakarth Flesh .
- Wash with Agrax Earthshade .
- Highlight with 1:1 Rakarth Flesh and Pallid Wych Flesh .
- Selectively highlight with Pallid Wych Flesh .
- Add small/specular highlights with 1:1 Pallid Wych Flesh and White . Be very selective with this step.
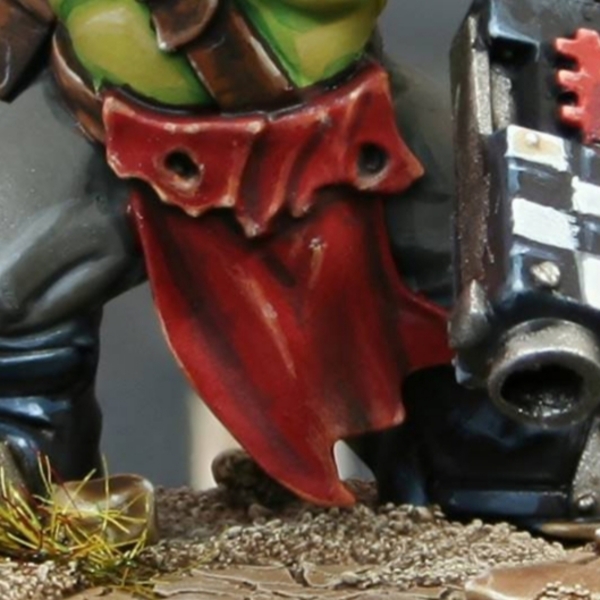
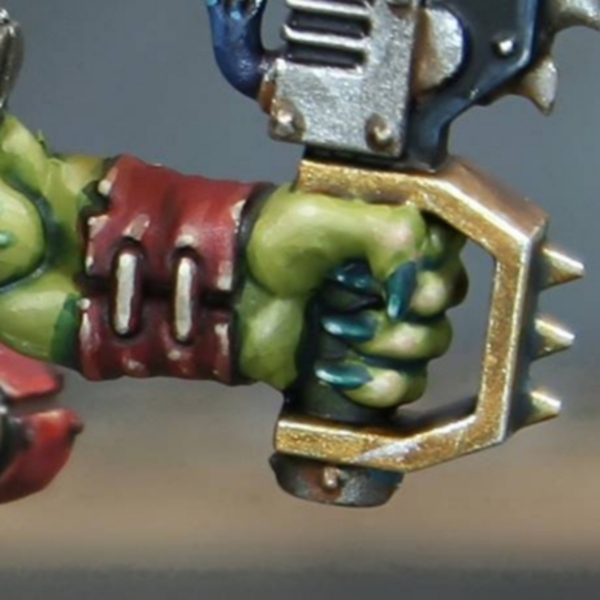 Red Cloth/Leather
- Basecoat with 1:1 Khorne Red & Doombull Brown .
- Mix Khorne Red & Abaddon Black 1:1, thin it down and shade the recesses.
- Highlight with a 1:1 mix of your base colour and Jokaero Orange .
- With pure Jokaero Orange add fine highlights.
- Selectively highlight with 1:1 Jokaero Orange and Ushabti Bone .
- Finish of with specular highlights of Screaming Skull , where needed.
For the stitching, I ensured I had shaded them during the above stage and simply picked them out with Karak Stone . Then mixed in a little Ice Yellow for selective highlights. Finishing them by adding some White to the mix, then adding specular highlights.
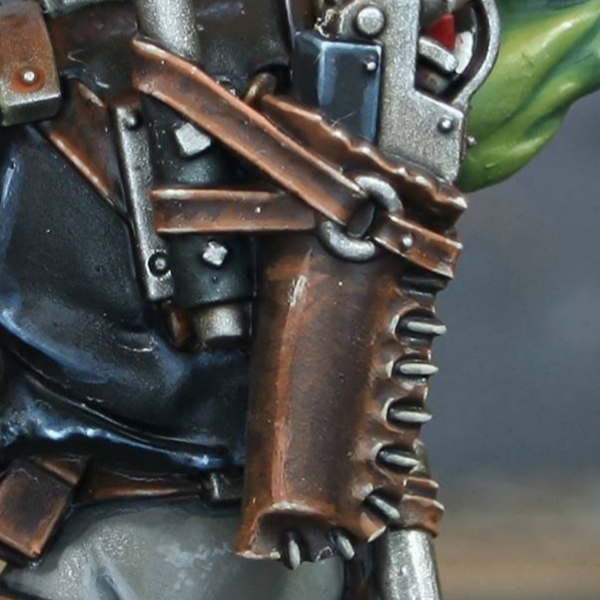 Dark Brown Leather
- Basecoat the leather area with Rhinox Hide .
- Glaze most of the leather with thinned Mournfang Brown . Use quite a small brush and drag towards edges in rough lines. This should create some extra texture.
- Add a chunky edge highlight of Skrag Brown to all edges.
- Highlight everything again, this time with a fine line of Skrag Brown and Ushabti Bone mixed 1:1. This is a good mix to throw in occasional fine lines as scratches too.
- With pure Ushabti Bone , selectively highlight corners and exposed edges of the leather. Put a dot of this colour where the additional scratched above meet edges too.
- Add a little pure white (like Dead White ) to your Ushabti Bone and add dot highlights to corners.
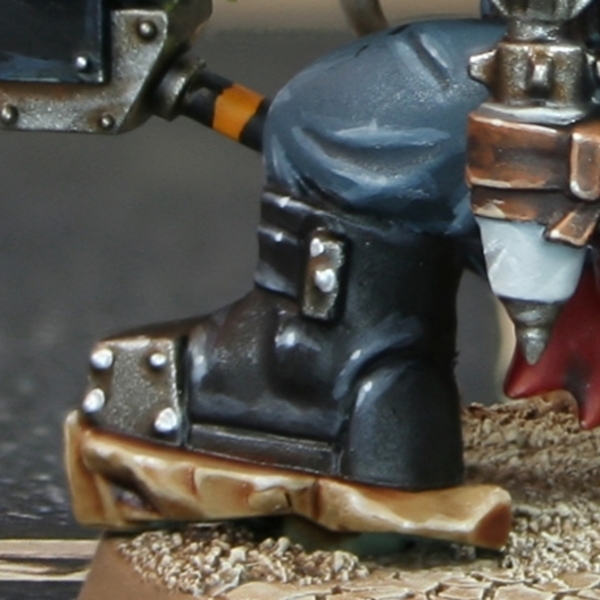
 Black Leather (Cool)
- Basecoat with Abaddon Black .
- Glaze chunky highlights of Stegadon Scale Green .
- Add fine highlights of Thunderhawk Blue .
- Selectively highlight with Fenrisian Grey .
- Specular highlights of Fenrisian Grey , with a little White mixed in.
 Black Leather (Neutral)
- Basecoat with Abaddon Black .
- Glaze chunky highlights of Eshin Grey .
- Add fine highlights of Dawnstone .
- Selectively highlight with Administratum Grey .
- Specular highlights of Administratum Grey , with a little White mixed in.
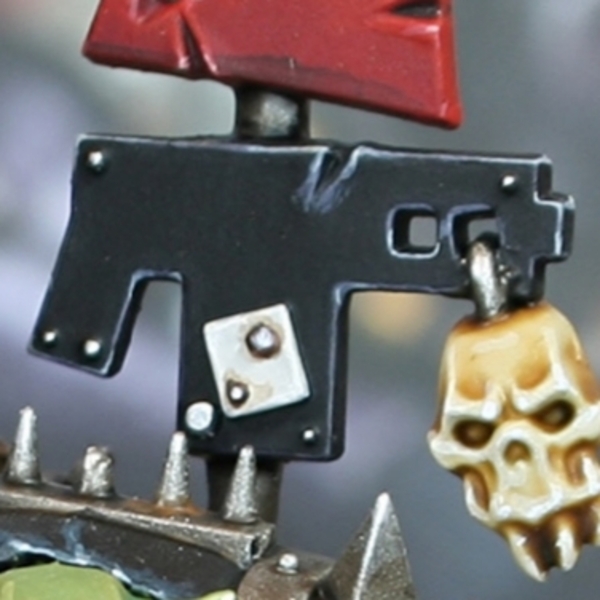
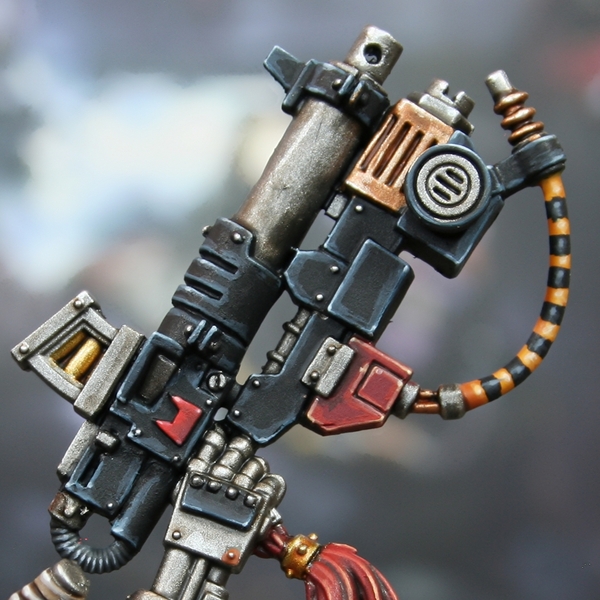 Black Weapon Casing
- Basecoat with Abaddon Black .
- Edge highlight everything with a thick line of Dark Reaper .
- Highlight everything again, this time with a thin line of Thunderhawk Blue . This colour is a good place to put in some scratches too.
- With Fenrisian Grey , selectively highlight upward facing edges, corners and prominent edges. Stick primarily to edges where the light would hit and always drag your brush towards the brightest point. If you added scratches previously, reinforce them with a smaller, thinner line underneath.
- Finally, edge add small highlights to the centre of the previous highlights and corners with Blue Horror . Try to make them very small, dots if at all possible.
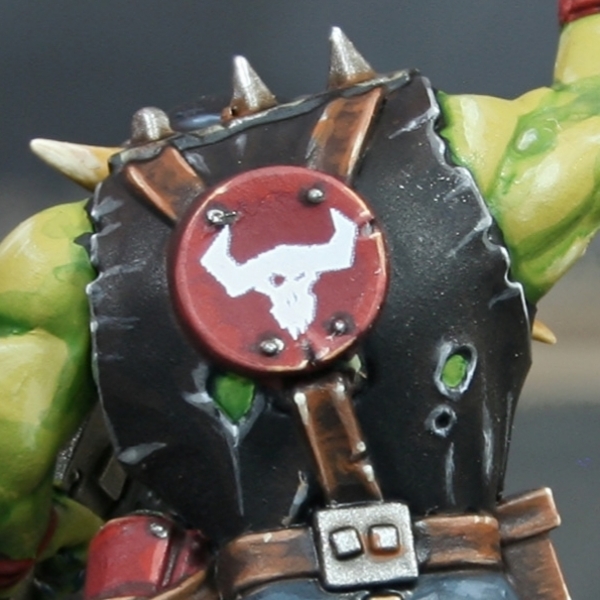
 Black Armour
- Basecoat with Abaddon Black .
- Chunky highlights with 1:1 Naggaroth Night and Abaddon Black .
- Fine highlights with an equal parts mix of Naggaroth Night , Abaddon Black and Celestra Grey .
- Selective highlights of Celestra Grey .
- Occasional specular highlights of White on corners that would catch light.
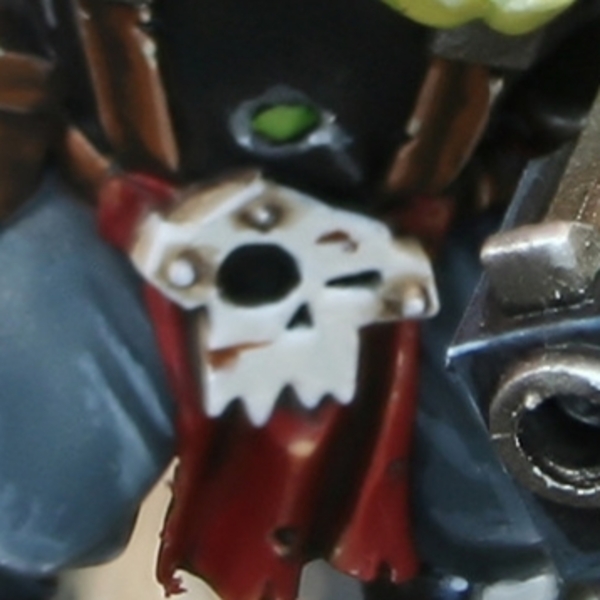 Dirty White
- Basecoat with Pallid Wych Flesh .
- Recess shade with thin Baneblade Brown .
- Deep shade recesses with thin Dryad Bark .
- Edge highlight with Pallid Wych Flesh and White .
- Selective highlights of White .
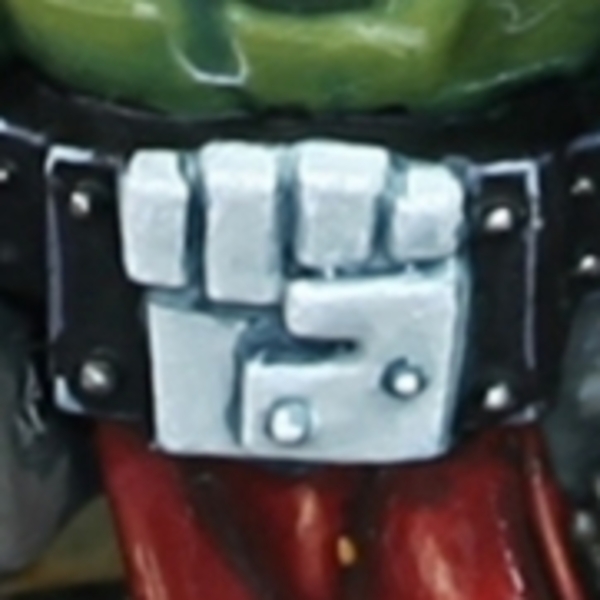 Clean White
- Basecoat with Corax White .
- Shade with Administratum Grey .
- Deep shade with Eshin Grey .
- Edge highlight with 1:1 Corax White and White .
- Selectively highlight with White .
 Neutral White
- Basecoat with Corax White .
- Wash with Apothecary White or shade with Administratum Grey , then Dawnstone .
- Re-establish highlights of Corax White if needed.
- Selectively highlight with 1:1 Corax White and White .
- Finish with very small highlights of White .
If you want to add chipping to any of the these three white recipes, just add patches of dots with the darkest shade colour ( Dryad Bark , Eshin Grey or Dawnstone ) then underline with White . This is a great way of stopping their gear from looking too factory fresh.
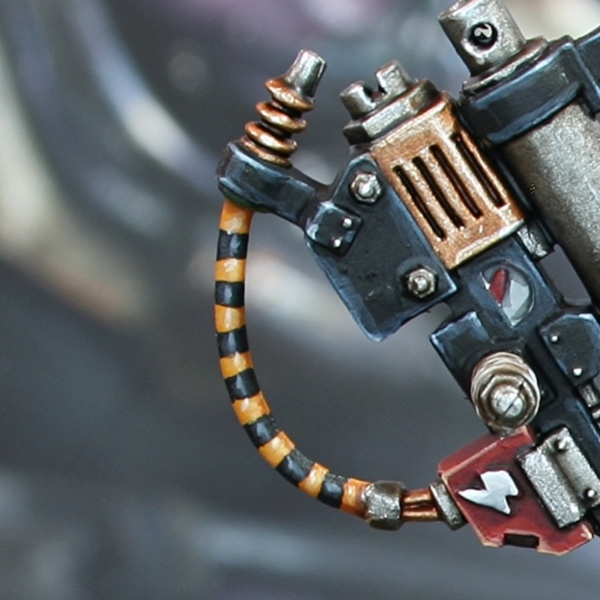 Hazard Stripes
- Basecoat with Averland Sunset .
- Wash with Iyanden Yellow .
- Carefully paint in the black stripes with Abaddon Black .
- Highlight the top edges of the stripe with a line of Averland Sunset , again.
- Where the previous highlight isn't noticeable, go over the area with a fine line of Averland Sunset and Screaming Skull mixed 1:1.
- Finally add a small highlight of Screaming Skull within the last stage.
- Highlight the black stripes in the same way. I used Eshin Grey , Dawnstone and Administratum Grey for this.
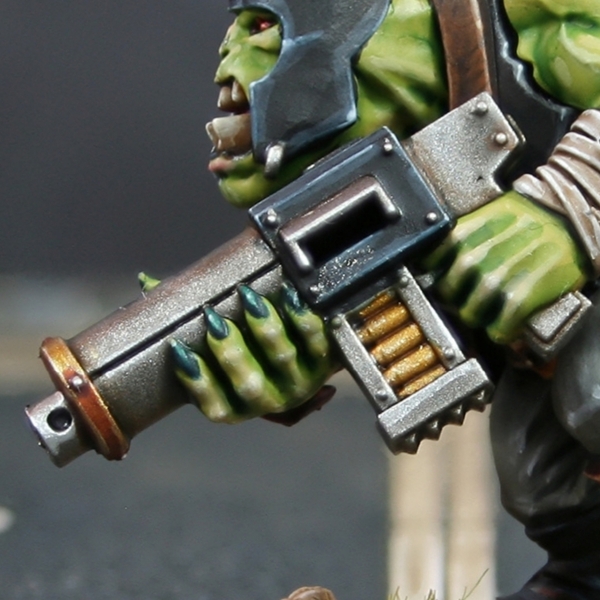 Steel
Steel
- Basecoat with Leadbelcher .
- Wash with Nuln Oil .
- Glaze Agrax Earthshade in areas where dirt could collect.
- Add highlights with Ironbreaker .
- Now selectively highlight with Vallejo Model Air Silver RLM01 Metallic .
If you wanted to add some additional weathering, consider glazes of Rhinox Hide , Mournfang Brown and small patches of Skrag Brown .
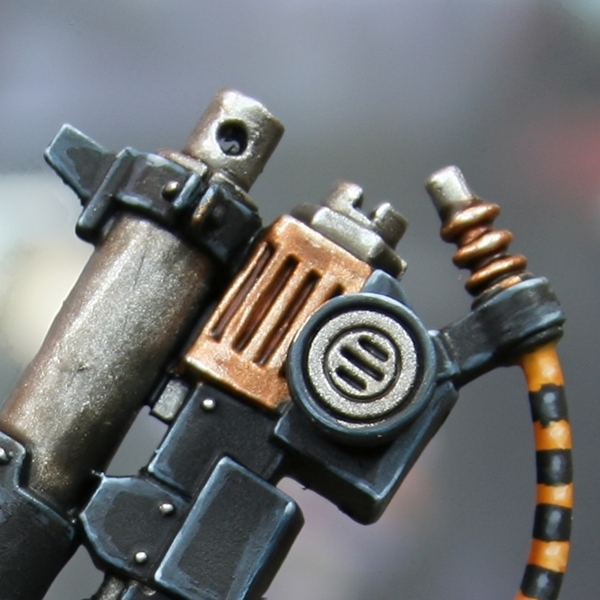 Brass
Brass
- Basecoat with Brass Scorpion .
- Shade with Agrax Earthshade .
- Mix increasing amounts of Silver RLM01 Metallic into the Brass Scorpion , then highlight smaller and smaller. You should be looking to end with dots of pure Silver RLM01 Metallic .
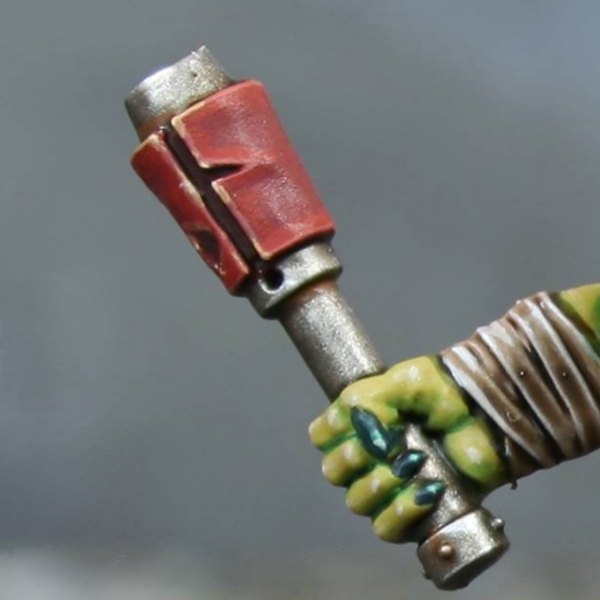
 Red Teef Armour
- Basecoat with 1:1 Mephiston Red and Evil Sunz Scarlet .
- Shade with thinned Khorne Red .
- Deep shade with thin Rhinox Hide .
- Edge highlight with Evil Sunz Scarlet .
- Mix a little Ice Yellow into your :Citadel/EvilSunzScarlet and selectively highlight corners.
- With pure Ice Yellow , add a couple of Ice Yellow specular highlights.
 Dull Red Armour
- Basecoat with 1:1 Khorne Red and Doombull Brown .
- Shade recesses with 1:1 Khorne Red and Abaddon Black .
- Highlight with a 1:1 Evil Sunz Scarlet , Word Bearers Red .
- Apply fine highlights with an equal parts mix of Evil Sunz Scarlet , Word Bearers Red and Ungor Flesh .
- Apply selective highlights with Ungor Flesh .
- Apply very small/specular highlights of Ungor Flesh and White .
 Red Cloth
- Basecoat with Mephiston Red .
- Shade recesses with thinned 1:1 Mephiston Red and Incubi Darkness .
- In very deep recesses, add some Abaddon Black to the mix above and shade with fine lines.
- Highlight with 1:1 Mephiston Red and Wild Rider Red .
- Apply fine highlights of Wild Rider Red .
- Selectively highlight with Fire Dragon Bright .
- Apply small/specular highlights of 1:1 Fire Dragon Bright and Ice Yellow . Alternatively, feel free to use Lugganath Orange .
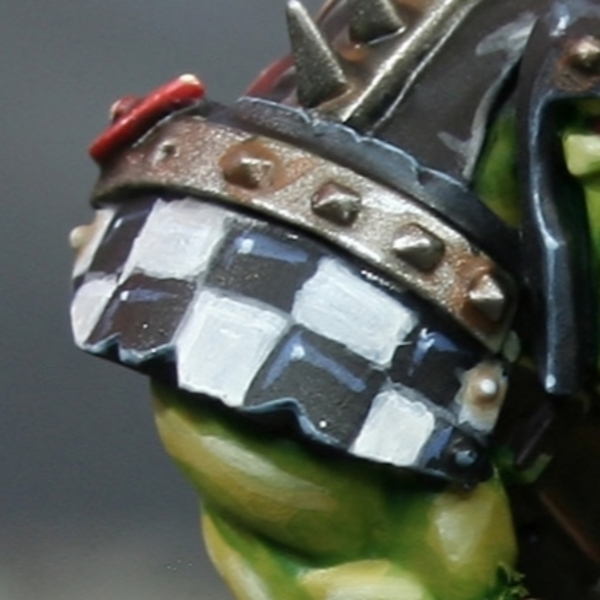 Chequered Pattern
- Basecoat with Black .
- Sketch out the pattern with Dawnstone and a fine brush. Fill in the white squares with thes colour when you are happy.
- Brighten the white squares with Pallid Wych Flesh .
- Highlight with small amounts of White .
- Tidy up black squares with Black .
- Edge highlight with The Fang .
- Apply selective highlights of Blue Horror if/where needed.

Rookie Brushes
RookieBrushes
Aspiring miniature painter and biscuit enthusiast. Here to share my hobby and help where I can.
Citadel Painting System 61
Base 18
- Abaddon Black
- Averland Sunset
- Celestra Grey
- Corax White
- Corvus Black
- Dryad Bark
- Incubi Darkness
- Jokaero Orange
- Khorne Red
- Leadbelcher
- Mephiston Red
- Mournfang Brown
- Naggaroth Night
- Rakarth Flesh
- Rhinox Hide
- Screamer Pink
- Stegadon Scale Green
- The Fang
Shade 5
- Agrax Earthshade
- Biel-Tan Green
- Coelia Greenshade
- Druchii Violet
- Nuln Oil
Layer 34
- Administratum Grey
- Baneblade Brown
- Blue Horror
- Brass Scorpion
- Dark Reaper
- Dawnstone
- Deepkin Flesh
- Doombull Brown
- Dorn Yellow
- Eshin Grey
- Evil Sunz Scarlet
- Fenrisian Grey
- Fire Dragon Bright
- Ironbreaker
- Kabalite Green
- Karak Stone
- Kislev Flesh
- Krieg Khaki
- Lugganath Orange
- Ogryn Camo
- Pallid Wych Flesh
- Pink Horror
- Screaming Skull
- Skarsnik Green
- Skrag Brown
- Stormvermin Fur
- Sybarite Green
- Tallarn Sand
- Thunderhawk Blue
- Troll Slayer Orange
- Ungor Flesh
- Ushabti Bone
- Wild Rider Red
- Word Bearers Red
Technical 1
- Contrast Medium
Contrast 3
- Apothecary White
- Iyanden Yellow
- Skeleton Horde
Vallejo Game Color
Base 1
- 72.001 Dead White
Vallejo Model Air
Base 1
- 71.063 Silver RLM01 Metallic
Vallejo Model Color
Base 3
- 70.858 Ice Yellow
- 70.950 Black
- 70.951 White