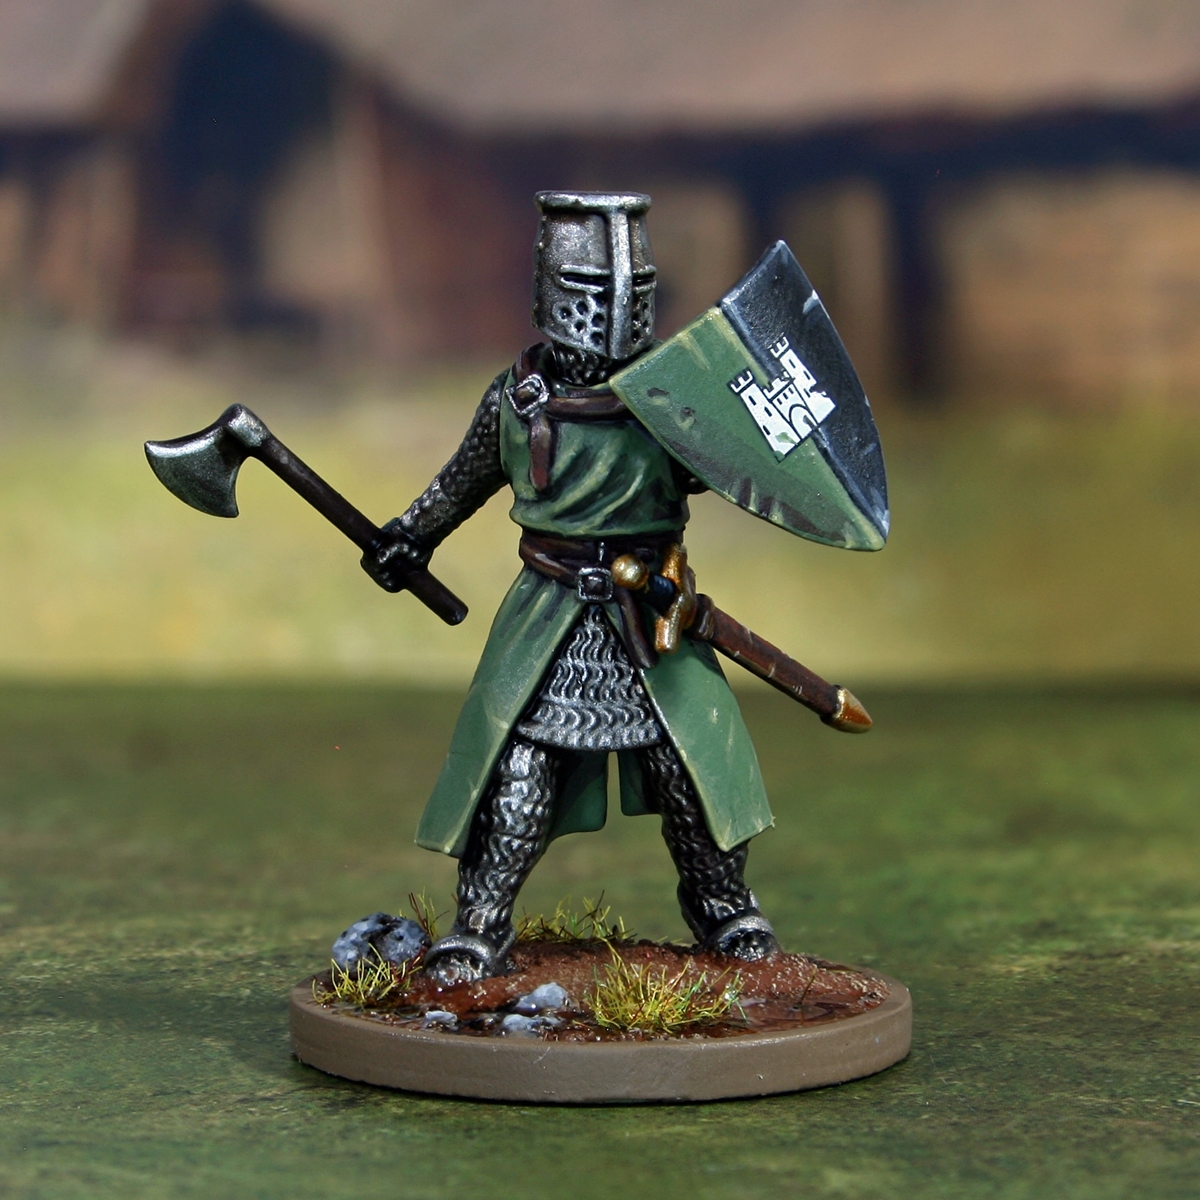

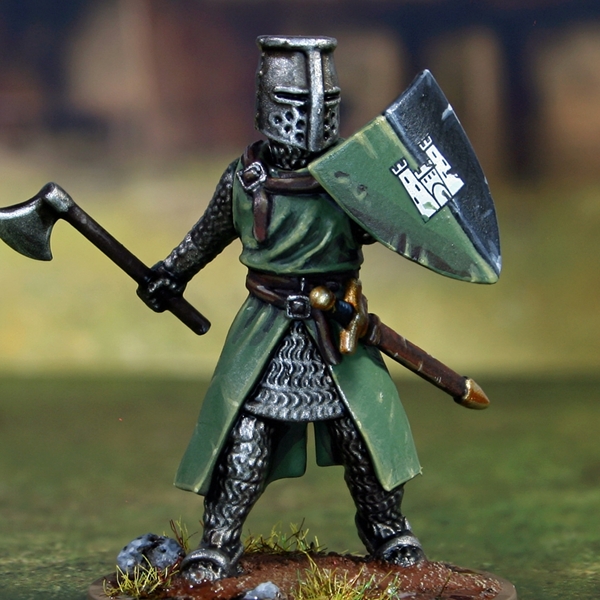
This scheme is based strongly on the official artwork from Sean Sutter, for this new game. How to paint a team of Green Knights to a decent standard. These knights will also be doing double duty in my retinues for "The Barons' War".
I started by priming with Death Rattle Green . This is not a compulsory step, but it makes the next steps easier.
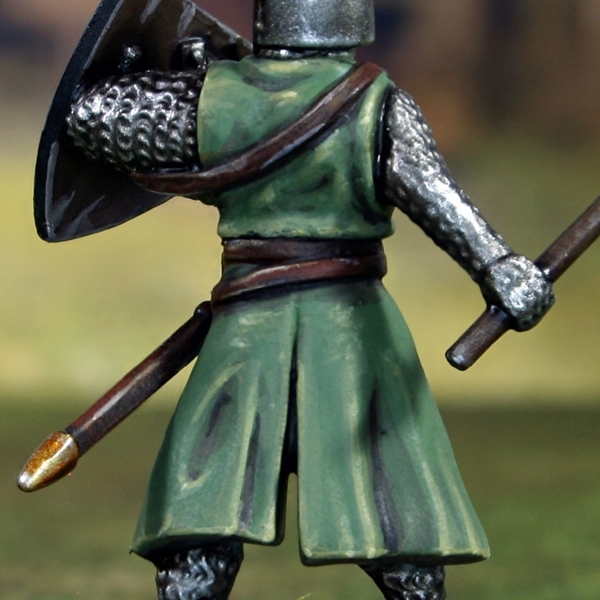 Green Cloth
- Basecoat with Loren Forest .
- Mix the Loren Forest 1:1 with Rhinox Hide and ui=se this colour to shade the cloth.
- Now add a little Abaddon Black to the above mix and shade the deepest folds with a small amount of paint.
- Now mix Loren Forest and Death Guard Green 1:1 and add chunky highlights to the cloth.
- Add fine highlights with Death Guard Green .
- Selectively highlight with 1:1 Death Guard Green and Ogryn Camo .
- Finish with specular highlights of Ogryn Camo .
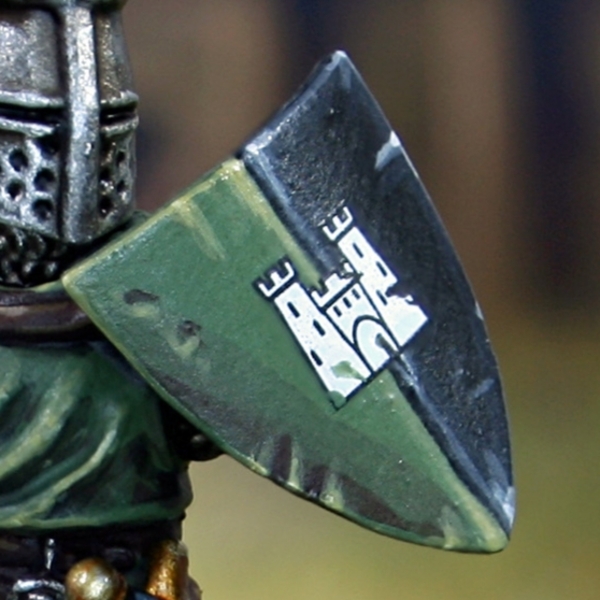 Black Shield Portion
- Basecoat with Black .
- Apply chunky highlights of Corvus Black .
- Add in fine highlights of Mechanicus Standard Grey .
- Selectively highlight with Administratum Grey .
- Mix your Administratum Grey 1:1 with White , then finish with specular highlights.
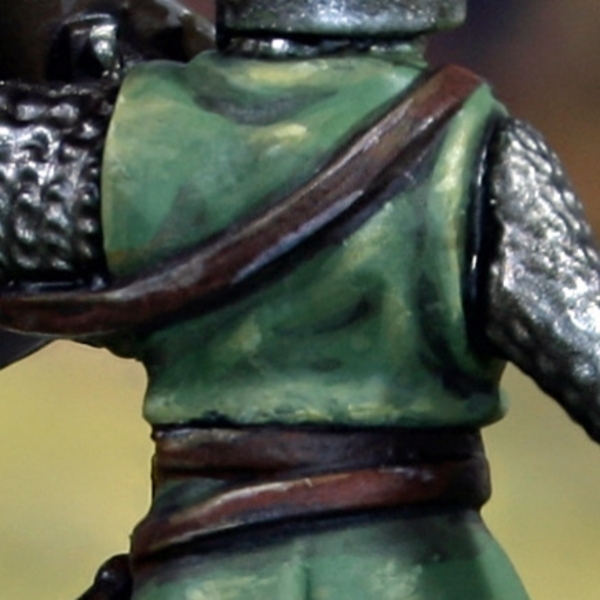 Dark Brown Leather
- Basecoat with Rhinox Hide .
- Add edge highlights to everything and volumetric highlights with Doombull Brown .
- Selectively highlight with XV-88 , using the big highlights from the previous stage as a guide.
- Finish with very small Screaming Skull highlights.
 Wood
Wood
- Basecoat with Thondia Brown .
- Shade with Rhinox Hide .
- Highlight and add woodgrain with a mix of 2:1 Thondia Brown and Steel Legion Drab .
- Take the above paint and mix it 1:1 with Administratum Grey . Now use this for fine highlights.
- Increase the amount of Administratum Grey again, then add selective highlights.
- Finish with a few specular highlights of pure Administratum Grey .
 Chainmail and Steel
- Basecoat with Leadbelcher .
- Wash with Nuln Oil .
- I also like to enhance the shading in recesses and where areas of steel need separating. For this I typically use glazes of Agrax Earthshade .
- Overbrush and highlight using Ironbreaker .
- Finish with selective highlights of Silver RLM01 Metallic .
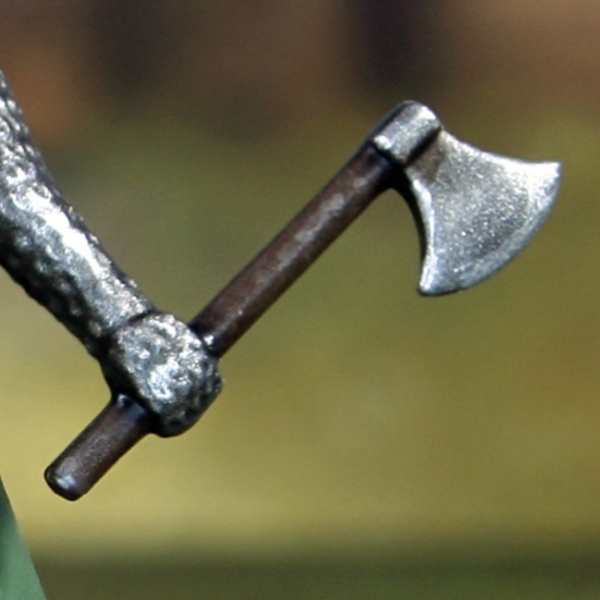
 Blades
- Basecoat with Vallejo Metal Color Silver .
- Glaze shading over half of the blade with Gryph-charger Grey . I would recommend keeping this thin and doing a couple of passes.
- Repeat on the half furthest from the pure silver, creating a rudimental gradient. This time I use Nuln Oil straight from the pot.
- Ensure tall edges are highlighted, where the previous two sets of glazes may have over spilled. For this I like to use Ironbreaker , simply because I find it catches edges easier than Vallejo Metal Color paints.
- Finish with selective highlights of Silver RLM01 Metallic on edges that still have the solid Silver basecoat. Focus more highlights towards the tip.
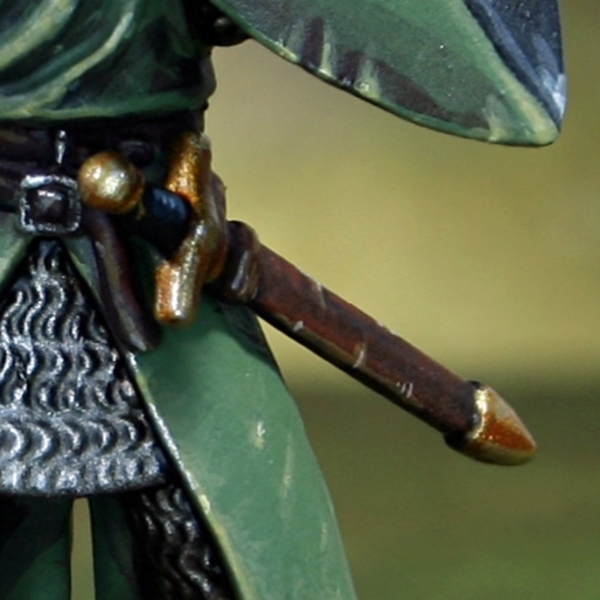 Gold Details
- Basecoat using Retributor Armour .
- Shade selectively with Reikland Fleshshade where there are details or recesses that need more definition.
- Add some Silver RLM01 Metallic to the Retributor Armour , and highlight selectively.
- Finish with a few dots of pure Silver RLM01 Metallic .
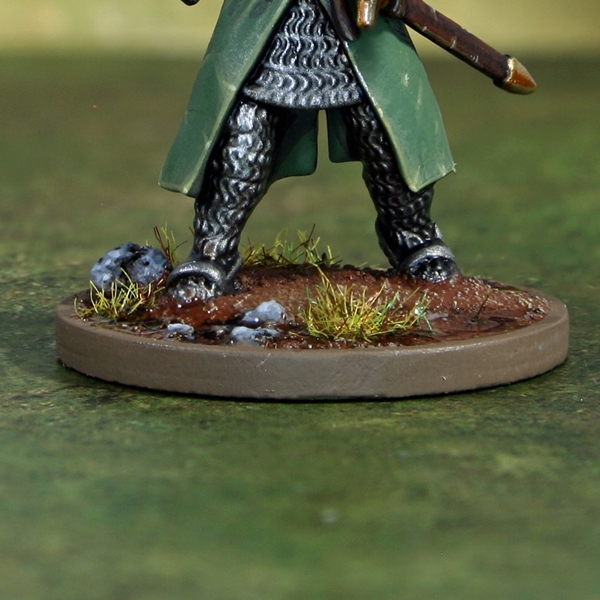 Bases
Bases
- Basecoat with Mournfang Brown . It is best to thin a little with water to ensure it flows into all of the recesses. Give it a couple of coats, until the colour is solid.
- Drybrush with Zamesi Desert , picking out all of the raised detail.
- Give the base a second dryrbush with Ushabti Bone . Make this drybrush a little lighter, so it only picks out the most raised points.
- Basecoat the rocks with Dawnstone .
- Wash the rocks with a little Agrax Earthshade .
- Highlight the rocks with Administratum Grey .
- Mix some White . into your Administratum Grey and more selectively highlight the rocks.
- Finally, finish off by painting the rim with Steel Legion Drab .
- Now all that remains is to apply any turfs or flock that you wish. I like to use PVA glue and some flock from my local model shop.

Rookie Brushes
RookieBrushes
Aspiring miniature painter and biscuit enthusiast. Here to share my hobby and help where I can.
Citadel Painting System 24
Base 11
- Abaddon Black
- Corvus Black
- Death Guard Green
- Leadbelcher
- Mechanicus Standard Grey
- Mournfang Brown
- Retributor Armour
- Rhinox Hide
- Steel Legion Drab
- Thondia Brown
- XV-88
Shade 3
- Agrax Earthshade
- Nuln Oil
- Reikland Fleshshade
Layer 9
- Administratum Grey
- Dawnstone
- Doombull Brown
- Ironbreaker
- Loren Forest
- Ogryn Camo
- Screaming Skull
- Ushabti Bone
- Zamesi Desert
Contrast 1
- Gryph-charger Grey
Colour Forge
Base 1
- Death Rattle Green
Vallejo Metal Color
Base 1
- 77.724 Silver
Vallejo Model Air
Base 1
- 71.063 Silver RLM01 Metallic
Vallejo Model Color
Base 2
- 70.950 Black
- 70.951 White