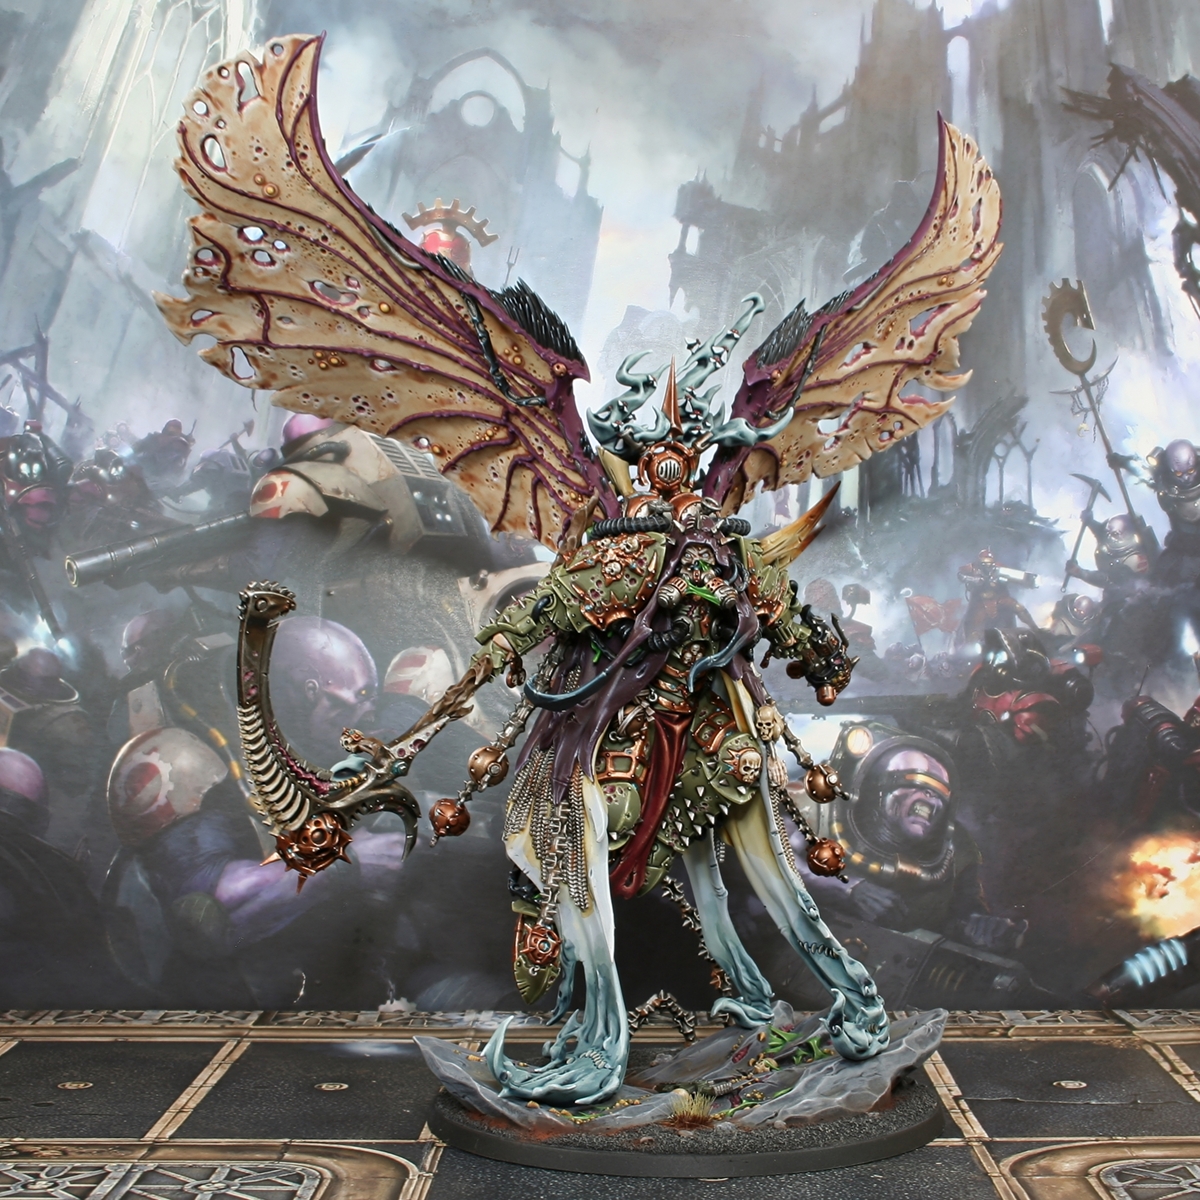
Mortarion, Daemon Primarch of Nurgle

I wanted my Death Guard Primarch to be pretty close to the Games Workshop boxart, so I relied heavily on recipes from 'eavy-archive.com' for this project. Please do check them out if you need as much help with paint selection as I do.
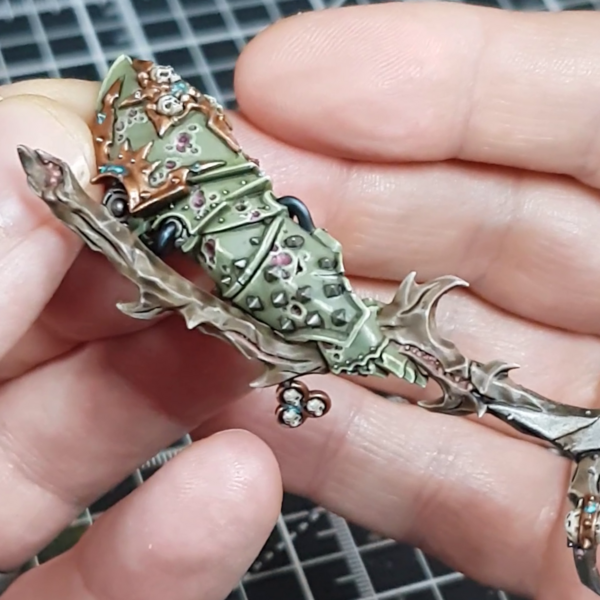
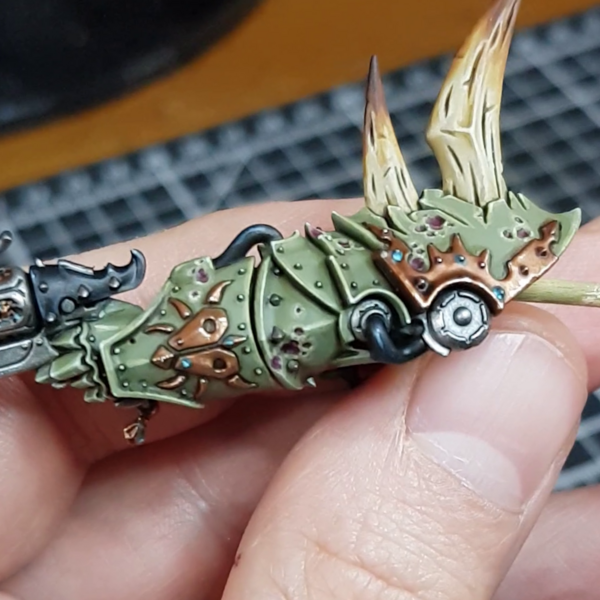 Green Armour
- I started by priming with Vallejo Surface Primer Russian Green 4bo . You could use any colour and work your way up, but this is easier.
- Now basecoat the armour with Death Guard Green .
- Thin some Athonian Camoshade with an equal amount of water (or medium) and add some general shading to the recesses.
- Mix Rhinox Hide and Caliban Green 1:1 and shade deeper recesses with fine lines. I keep this mix pretty thin to control it easier.
- Add chunky highlights with Ogryn Camo , with a little Death Guard Green mixed in. Probably around 4:1.
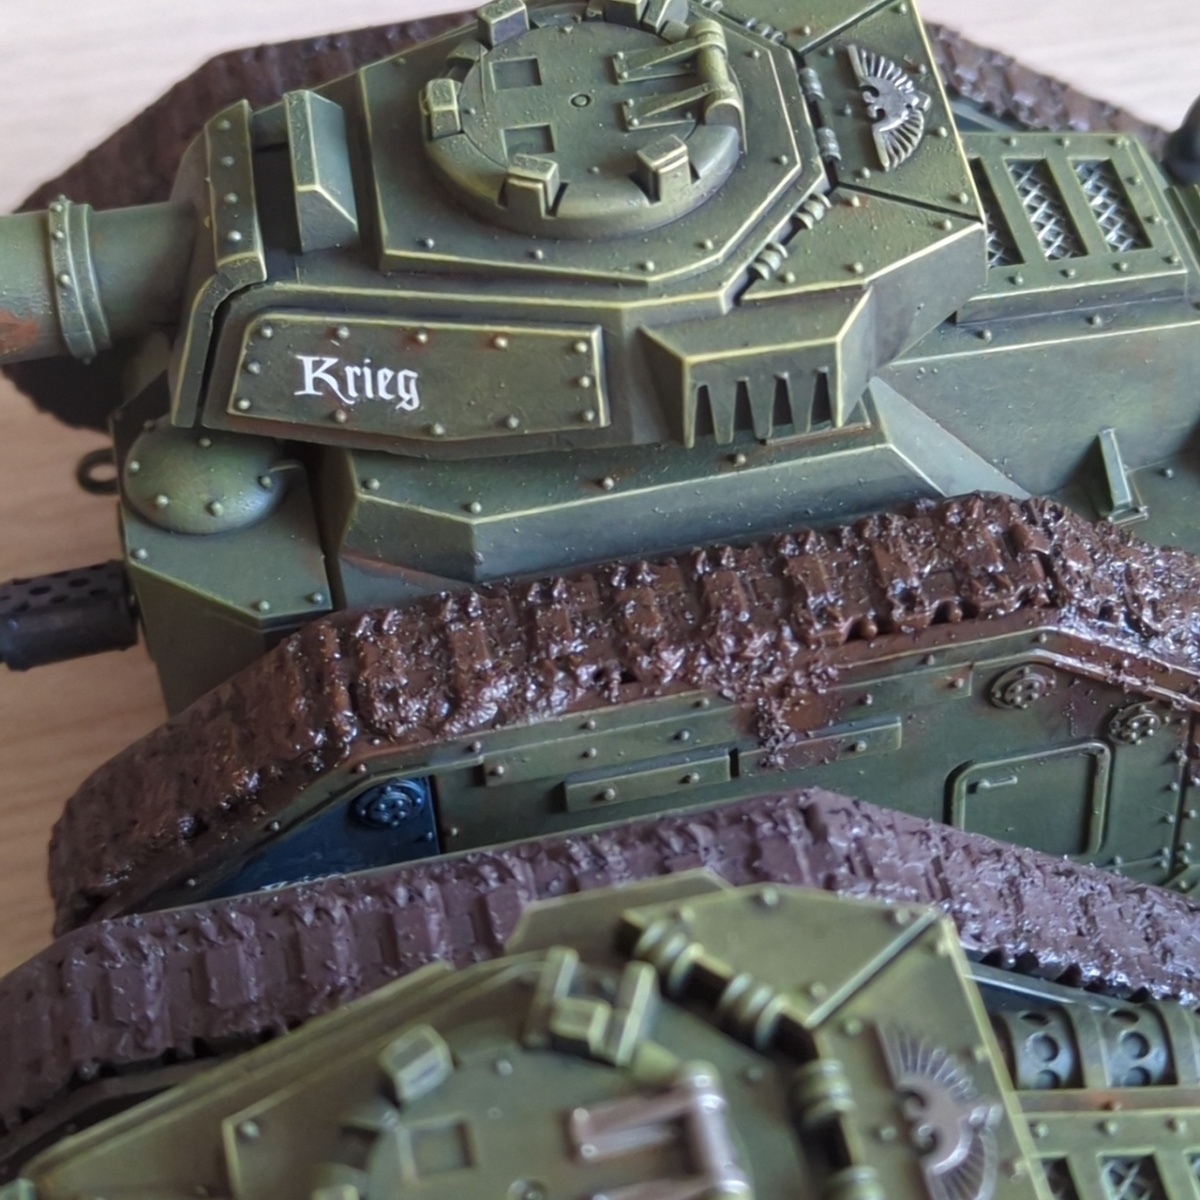
- Add smaller, fine highlights with Krieg Khaki .
- Mix some White Scar (or another pure white) into the Krieg Khaki and selectively highlight corners.
- Finsih the armour with specular highlights of White Scar where needed.
 Fleshy Bits and Pockmarks
- I started by basecoating these areas with a 1:2 mix of Screamer Pink and Cadian Fleshtone .
- Then wash them with an equal part mix of Druchii Violet , Reikland Fleshshade and Contrast Medium .
- Pick out raised edges with selective highlights of Pink Horror mixed 1:1 with Kislev Flesh .
- Finsih of with dots of Kislev Flesh on points.
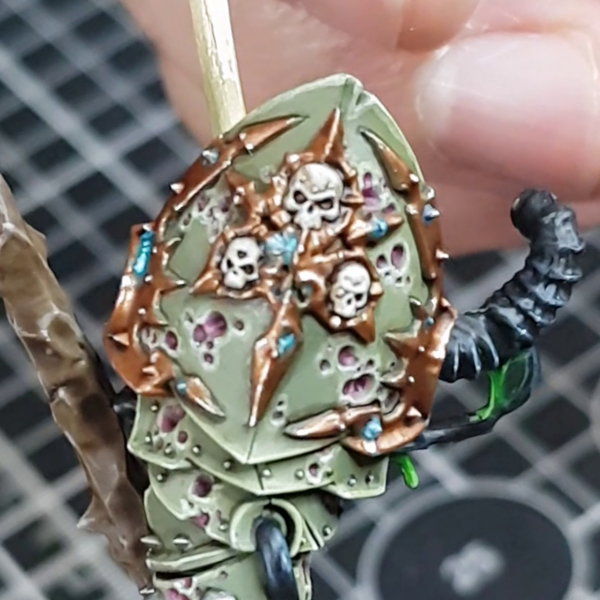 Bronze Armour Trim
- Basecoat with Hashut Copper mixed with just a touch of Doombull Brown , about 9:1 if you wanted a ratio.
- Shade recesses and around recesses with Agrax Earthshade .
- In the very deepest parts, add line shading with a thin 1:1 mix of Khorne Red and Abaddon Black .
- Mix some light gold and silver into the base mix, so the paints are roughly in equal parts. If you wanted to use Citadel paints, I would recommend Liberator Gold and Stormhost Silver . Use this mix to add highlights to edges.
- Increase the amount of Stormhost Silver and add fine highlights.
- With pure Stormhost Silver add selective specular highlights. I prefer Vallejo Model Air Silver RLM01 Metallic .
To add verdigris to the bronze, mix Sotek Green and Kabalite Green 1:1 and run it into recesses. To enhance the effect, mix in increasing amounts of White Scar and cover a small area.
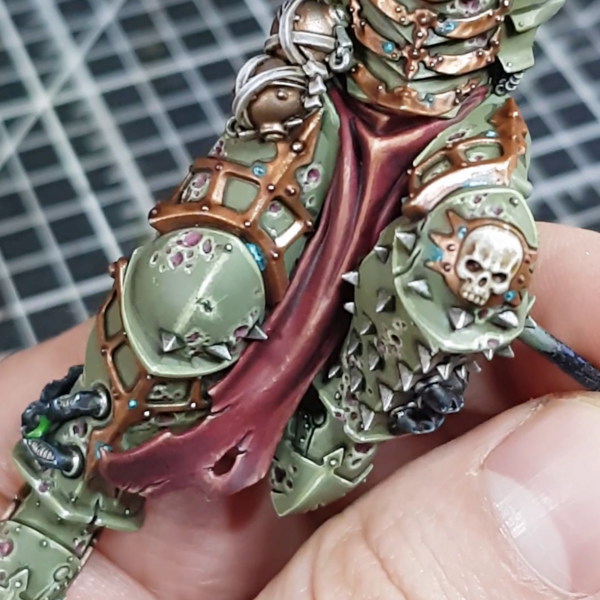 Red Cloth
- Basecoat with a 1:1 mix of Khorne Red and Doombull Brown .
- Shade with Khorne Red and Abaddon Black mixed. I mixed an equal amount and then increased the black for very deep folds.
- Add Jokaero Orange into the base mix and apply chunky highlights.
- Highlighting within the last stage, go over the area again with small amounts of pure Jokaero Orange .
- Add some Vallejo Model Colour Ivory (or Screaming Skull ) into the Jokaero Orange and selectively hihglihgt, inclreasing the amount and making the highlights smaller as you go.
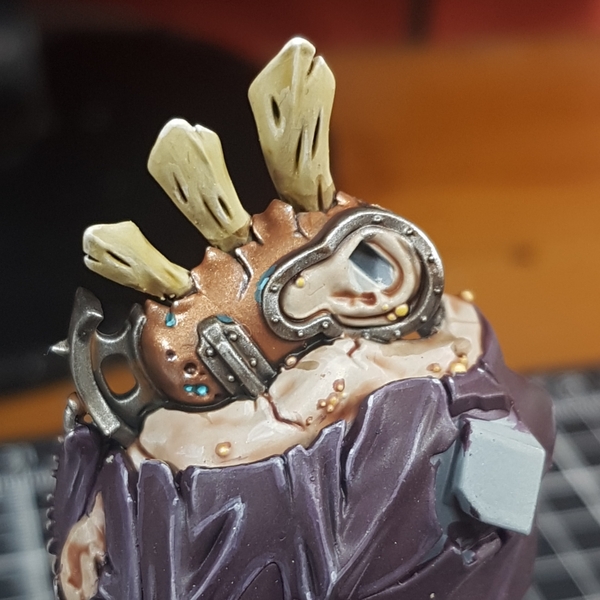
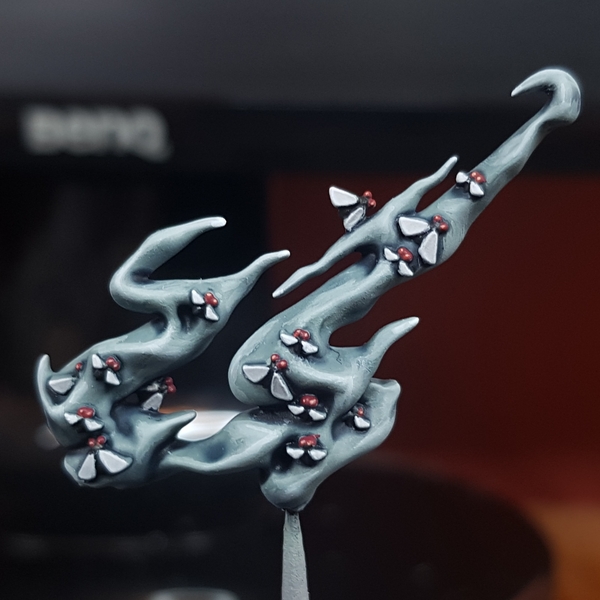
 Bone Spikes
- Basecoat with Ushabti Bone .
- Wash with Skeleton Horde thinned 1:3 with Contrast Medium . This is to both add a little colour into detail and begin shading around the base of the horns.
- Run a thin line of Agrax Earthshade around the base of the horn and carefully pop some into cracks too.
- Glaze XV-88 upwards, covering roughly two thirds of the bone.
- Repeat the process covering less area with a glaze of Mournfang Brown . This colour is so rich, I kept it thin and did two passes in the end.
- Mix the Mournfang Brown with Rhinox Hide and glaze again. At this point you should be covering less than one thirds of it (roughly).
- Finally, glaze the tip with Rhinox Hide .
 Wooden Scythe Staff
- Basecoat with Steel Legion Drab .
- Wash with Agrax Earthshade .
- Add edge highlights with Baneblade Brown , both to edges and areas whe you want to add the effect of woodgrain.
- Use Karak Stone to add smaller highlights, towards points.
- Mix some White Scar into the Karak Stone and add specular highlights where needed.
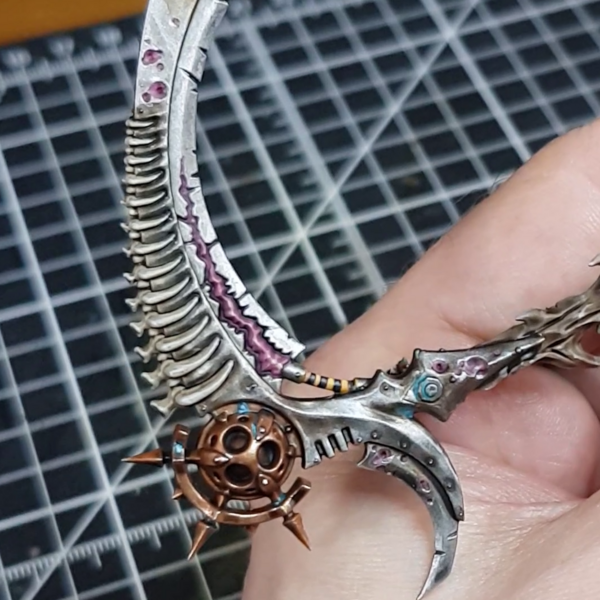
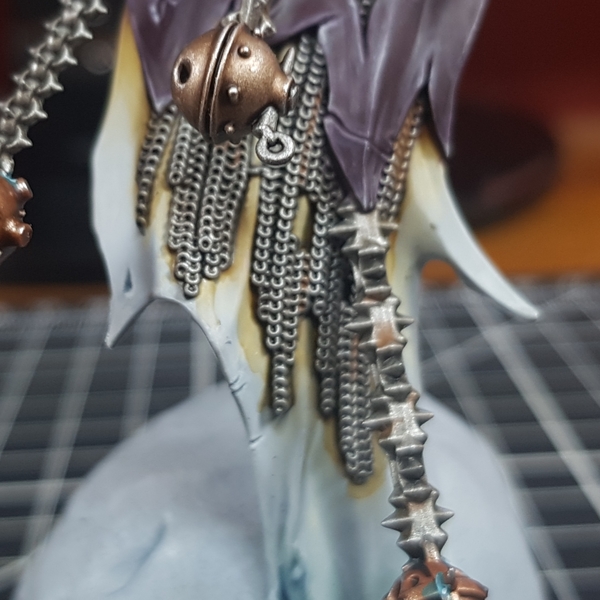
 Steel
Steel
- Basecoat with Leadbelcher .
- Wash with Nuln Oil .
- Edge highlight with Ironbreaker .
- Add fine highlights with small amounts of Vallejo Model Air Silver RLM01 Metallic .
To dirty up the metal work I did a mix of things, mostly glazes to tint areas. For this I used Wyldwood for general shading, Aggaros Dunes to add richness, then Cygor Brown and finally Ratling Grime to darken areas. Where I wanted specific patches of gathered rust, I ran in watered down Skrag Brown .
 Black Rubber Tubing
- Basecoat with Abaddon Black .
- Paint chunky highlights of Incubi Darkness onto raised details.
- Mix the Incubi Darkness 1:1 with Deepkin Flesh and add fine highlights onto edges.
- Add selective highlights of Deepkin Flesh on corners and points that would catch the light.
- Mix a little Ivory or Pallid Wych Flesh into your Deepkin Flesh and add specular highlights where needed.
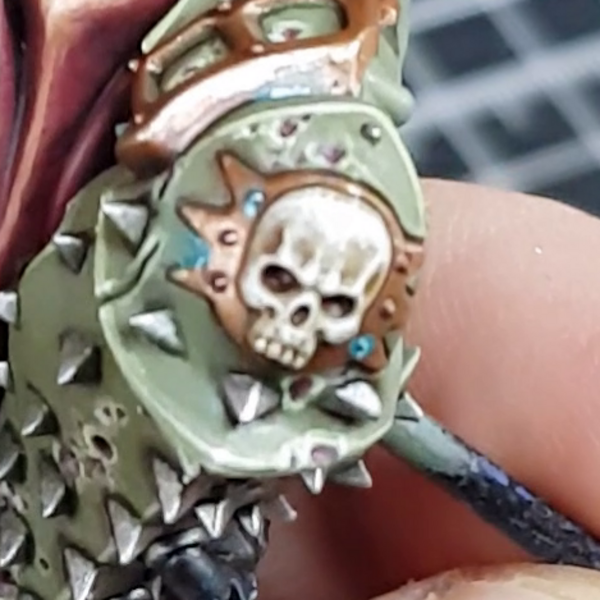 Decorative Skulls
- Basecoat with a 1:1 mix of Karak Stone and Ushabti Bone .
- Shade recesses with a mix of Reikland Fleshshade and Agrax Earthshade .
- In very deep recesses, add extra darknes with a thin mix of Steel Legion Drab and Rhinox Hide .
- Drag some fairly thin Screaming Skull towards edges, to begin highlighting them.
- Enhance these with edge highlgihts of Screaming Skull mixed 1:1 with White Scar .
- Finish off the skulls with specular highlights of White Scar (or another pure white).
 Undead Flesh
- Basecoat with an equal part mix of Rakarth Flesh , Ushabti Bone and White Scar .
- I now washed the flesh with Reikland Fleshshade , ensureing I pulled the pigment away from open areas.
- Use gentle glazes of Berserker Bloodshade , Druchii Violet and Drakenhof Nightshade to add interest/make areas look sore.
- Add a little White Scar to the base mix and add fine hihglights where appropriate.
- Finally, finish off with specular hightlights of White Scar .
 Green Slime
- Basecoat with a 1:1 mix of Waaagh! Flesh and Moot Green .
- Wash with Biel-Tan Green .
- Add highlights of Moot Green to all edges and raised detail.
- Mix some Vallejo Model Color Ice Yellow into the Moot Green and apply in smaller highlights. Dorn Yellow is a decent GW equivalent.
- Finally, apply specular highlights of pure Ice Yellow where relevant.
 Dirty White Cloth
- Basecoat with Corax White .
- Glaze a few layers of Screaming Skull , pulling the paint towards recesses.
- Repeat the above step, using Ushabti Bone . This time cover less area.
- Same again, but use Seraphim Sepia . These passes are great for bringing out detail and sould be heavier in deep recesses.
- Add highlights with Wraithbone .
- Finish off the white, with selective White Scar highlights.
 Plague Smoke
- Basecoat with Thunderhawk Blue and Ushabti Bone , mixed 1:1.
- Wash the smoke with Drakenhof Nightshade mixed 1:1 with Contrast Medium . Try and pull the pigment towards recesses and areas where the smoke is thickest.
- Mix a pure white, like White Scar , into the base mix gradually and build up highlights. Apply them towards the tip of the smoke, furthest from the source.
I used this same recipe for the smoke towards the bottom of his white cloth. To smooth the transition, I used the Thunderhawk Blue and Ushabti Bone mix, with some Corax White in. Don't be afraid to do this over several passes and pull the brush away from the dirthy parts of the cloth.
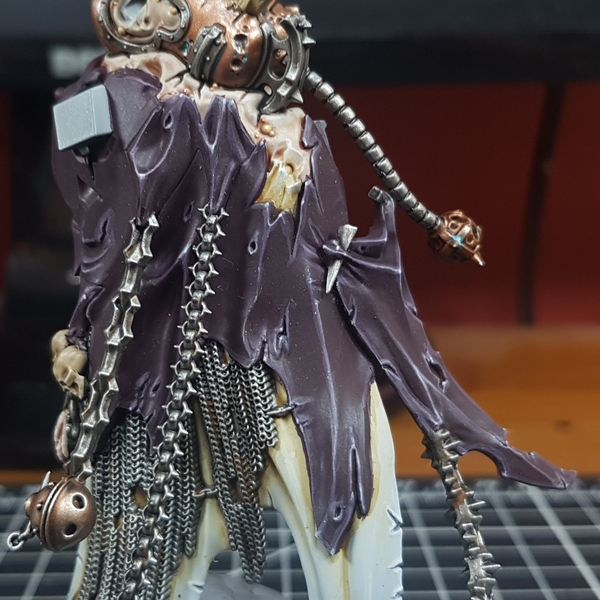 Dark Purple Cloth
- Basecoat with a mix of Khorne Red and Incubi Darkness mixed 1:1. Maybe lean slightly more towards the Incubi Darkness to ensure it reads as purple.
- Add Administratum Grey to the base mix 1:1 and add chunky highlights.
- Increase the amount of Administratum Grey again, so it is now 1:2. Now add fine highlights to everything.
- Selectively highlight curves and corners with pure Administratum Grey .
- Add White Scar into the Administratum Grey 1:1 and add very small/specular highlights to upward facing points.
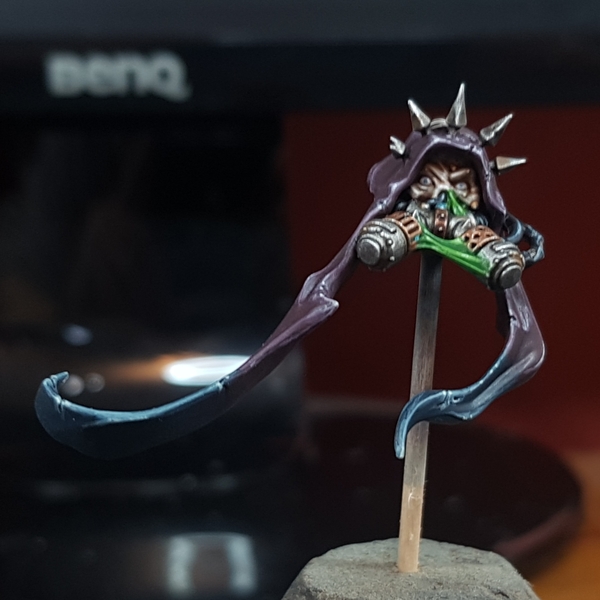 Teal Cloth Tips
- Glaze Incubi Darkness towards the tips. Do repeated passes until you reach full opacity.
- Mix a little Abaddon Black into your Incubi Darkness and shade recesses. water it down a fair amount to wash fine details.
- With Incubi Darkness and Screaming Skull mixed 1:1 add edge highlights.
- Increase the amount of Screaming Skull in the mix, until it it 1:2 and add selective edge highlights.
- With pure Screaming Skull , add a few selective edge highlgihts.
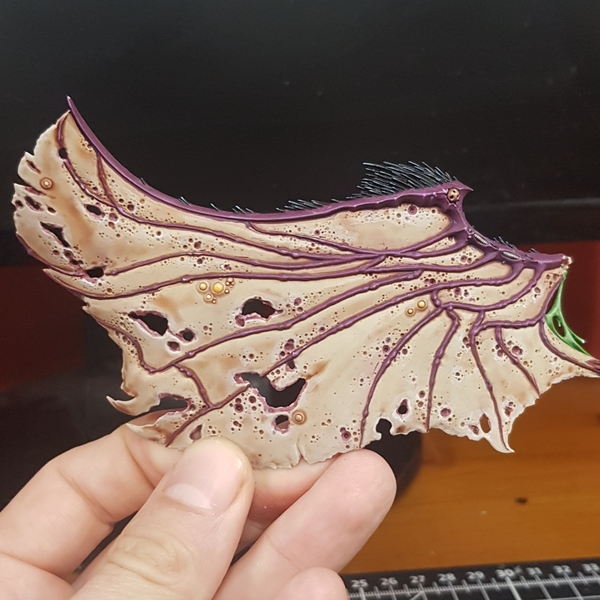 Wing Membranes
- Basecoat with a 1:1 mix of Karak Stone and White Scar .
- Wash the wings with Reikland Fleshshade pulling pigment towards the areas with the most veins and fleshy parts.
- Now is a good time to paint up the boils and the diseased fleshy parts, like we did in previous stages.
- Where the skin was left free on the edge of the wing, I reestablished a lighter shade with the Karak Stone and White Scar base mix.
- Mix some Pallid Wych Flesh into the base mix and add highlights around edges.
- Finish with dots of pure Pallid Wych Flesh on points and corners.
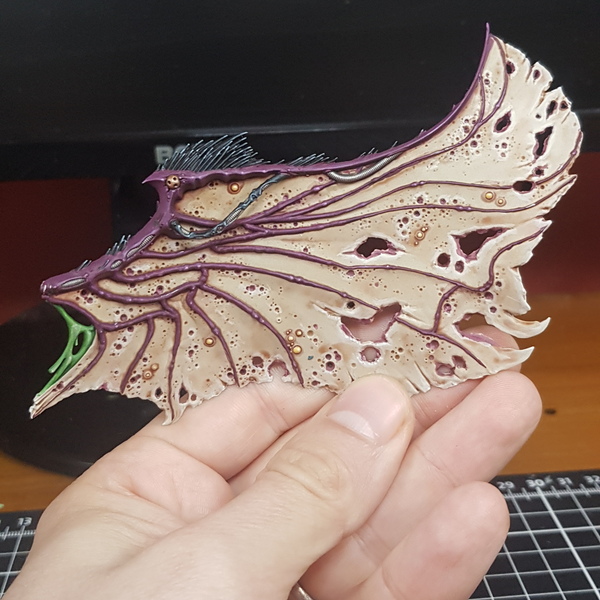 Purple Wing Skin
- Basecoat with Xereus Purple and Khorne Red , mixed 1:1.
- Take some of the base mix and add an equal amount of Abaddon Black . Use this to shade any recesses.
- Now grtadually add Blue Horror to the base mix and add smaller and smaller highlights to the flesh. I did this in around for stages, ending with dots of a very light purple.
When I was done with the above two steps I enhanced shading in the recesses with Berserker Bloodshade , thinned with Contrast Medium to ease the transition.

Rookie Brushes
RookieBrushes
Aspiring miniature painter and biscuit enthusiast. Here to share my hobby and help where I can.
Citadel Painting System 57
Base 16
- Abaddon Black
- Caliban Green
- Corax White
- Death Guard Green
- Incubi Darkness
- Jokaero Orange
- Khorne Red
- Leadbelcher
- Mournfang Brown
- Rakarth Flesh
- Rhinox Hide
- Screamer Pink
- Steel Legion Drab
- Waaagh! Flesh
- Wraithbone
- XV-88
Shade 9
- Agrax Earthshade
- Athonian Camoshade
- Berserker Bloodshade
- Biel-Tan Green
- Drakenhof Nightshade
- Druchii Violet
- Nuln Oil
- Reikland Fleshshade
- Seraphim Sepia
Layer 26
- Administratum Grey
- Baneblade Brown
- Blue Horror
- Cadian Fleshtone
- Deepkin Flesh
- Doombull Brown
- Dorn Yellow
- Hashut Copper
- Ironbreaker
- Kabalite Green
- Karak Stone
- Kislev Flesh
- Krieg Khaki
- Liberator Gold
- Moot Green
- Ogryn Camo
- Pallid Wych Flesh
- Pink Horror
- Screaming Skull
- Skrag Brown
- Sotek Green
- Stormhost Silver
- Thunderhawk Blue
- Ushabti Bone
- White Scar
- Xereus Purple
Technical 1
- Contrast Medium
Contrast 5
- Aggaros Dunes
- Cygor Brown
- Ratling Grime
- Skeleton Horde
- Wyldwood
Vallejo Model Air
Base 1
- 71.063 Silver RLM01 Metallic
Vallejo Model Color
Base 2
- 70.858 Ice Yellow
- 70.918 Ivory
Vallejo Surface Primer
Base 1
- 70.609 Russian Green 4bo