
Here is how I painted this scenery kit quickly and efficiently as I was able. I took much less care than I normally do when painting and used the weathering methods to cover any imperfections. Individual elements could also be used easily on other kits or miniatures.
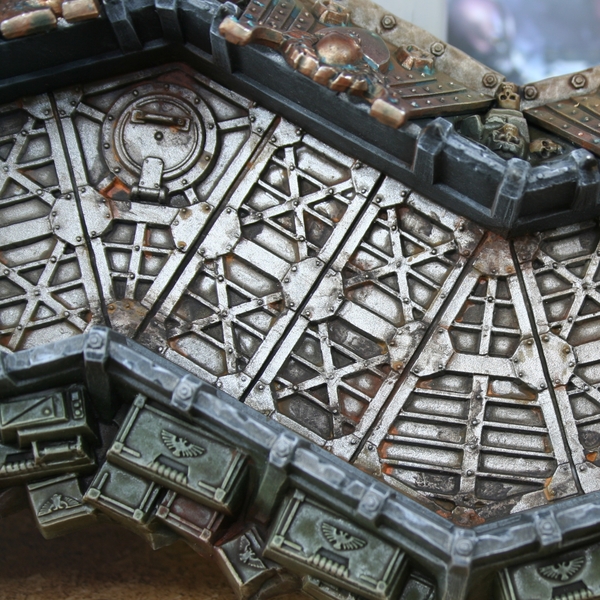 Rusted Metal Flooring
- Basecoat with Leadbelcher .
- Wash with a 1:1:1 mix of Agrax Earthshade , Nuln Oil and water (or Lahmian Medium if you're not cheap).
- At this point, I covered up imperfections, points where the wash dried weird and points that looked too plain with some Typhus Corrosion . Just grab an old brush and mash it into corners and recesses, wiping excess off with your finger.
- I mixed 4:1 Agrax Earthshade and Rust and use it to build-up higher rust areas. I brush this into recesses, areas where the wash has pooled and within the Typhus Corrosion patches.
- To add some quick and easy rust effects, I just water down Skrag Brown . I pop this into deep recesses and around rivets. Try to stick to areas that look bland and don't be too uniform. Most of the water will just evaporate and the paint will dry much darker than when it is wet, so feel free to go pretty heavy.
- In particularly rusty looking areas I pop a small amount of Rust . If you don't have this paint, I would recommend Ryza Rust mixed with a little water or just a heavily thinned bright orange.
 Grey Stone Barricade Wall
- Basecoat with 50-50 Mechanicus Standard Grey and Abaddon Black .
- Heavily drybrush with Dawnstone the entire surface.
- Now take Administratum Grey and drybrush the wall again. Go a little lighter this time and feel free to skip over the harder to get to parts.
- Add a little white to your Administratum Grey . Now edge highlight particularly exposed edges and point. You can also pop a few addition scratches and dings here and there. Use a fine brush and try to keep lines and dots as thin as possible.
- I finished this section by selectively highlighting the tips of the spikes with Duraluminum and then a dot of Chrome .
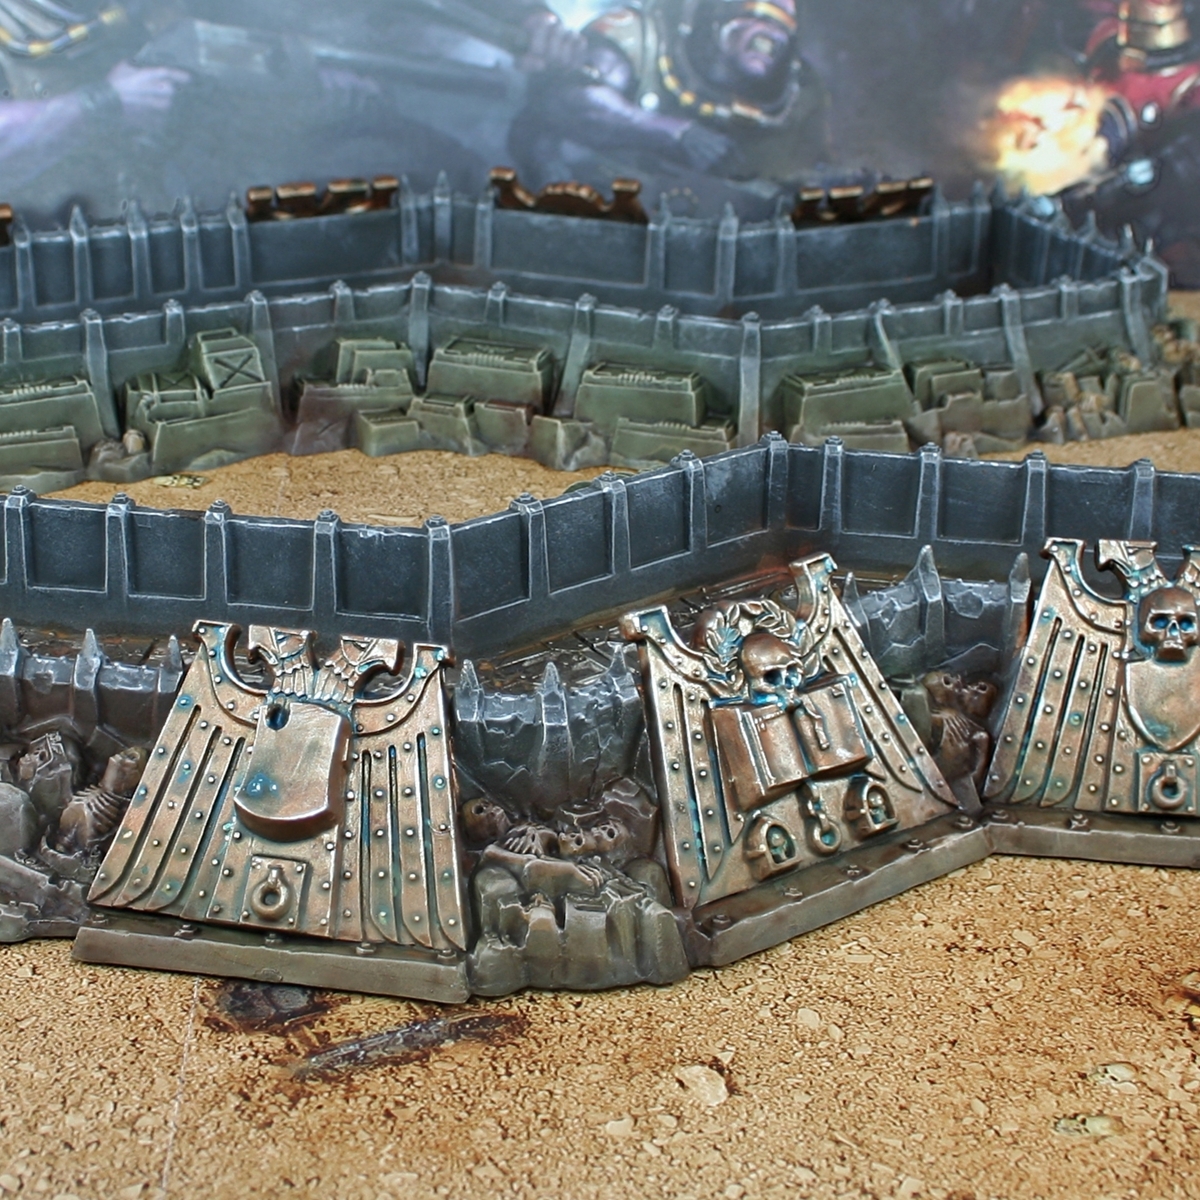
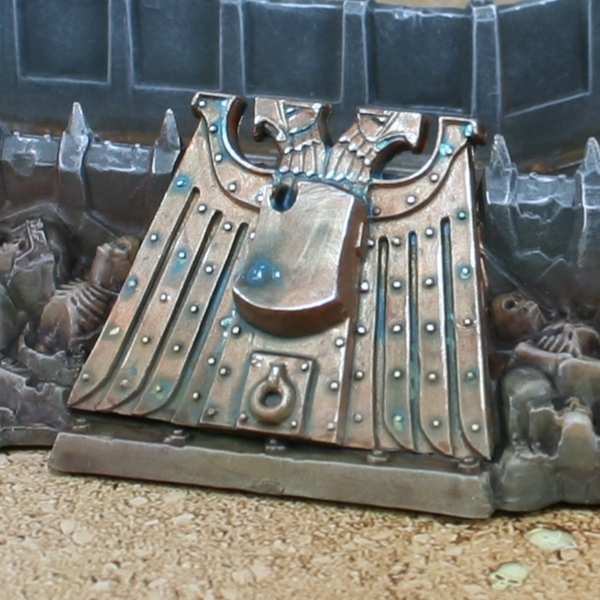 Oxidized Bronze Imperial Eagles
- Basecoat the metal with Copper and add some brown ink to make it look more bronze like. I popped a drop of Liquitex Burnt Umber in for every two drops of Copper.
- Wash the metal with equal parts Agrax Earthshade and Aethermatic Blue .
- Carefully drybrush the metal with Sycorax Bronze .
- Add small highlights of Chrome to rivets and corners.
- In areas where the previous wash has dried and collected, pop some thinned Sotek Green .
- Put very small amounts of Nihilakh Oxide within the previous colour. This represents the most oxidized parts.
- If you wanted to add a little additional "pop", consider adding dots of pure white in areas where oxidisation would have REALLY built up.
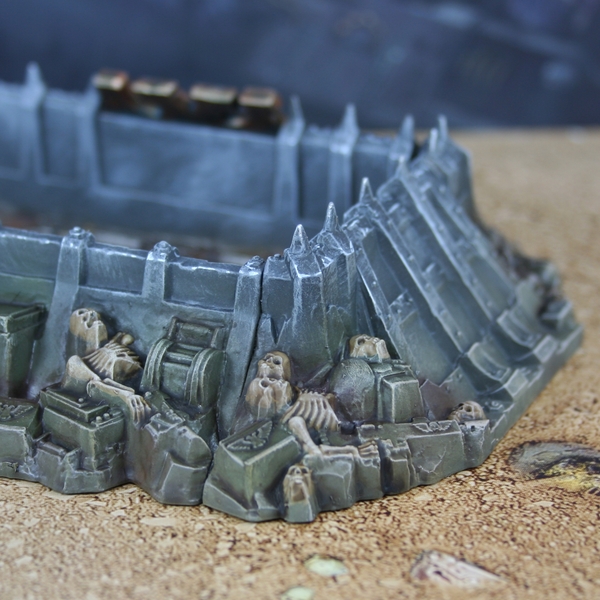
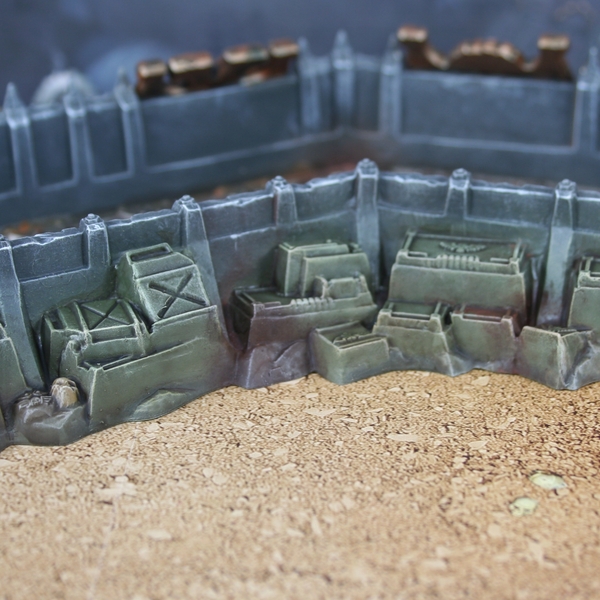 Dusty/Dirty Debris
- Basecoat all of the eqipment with Castellan Green .
- Basecoat all of the skeletons with Zandri Dust .
- I then washed both of the above with a coctail of washes. This mix was 1 part Black Wash , 2 parts Sepia Wash and three parts water. You could of course use their Citadel equivalents, if you wanted, I just had lots of these spare.
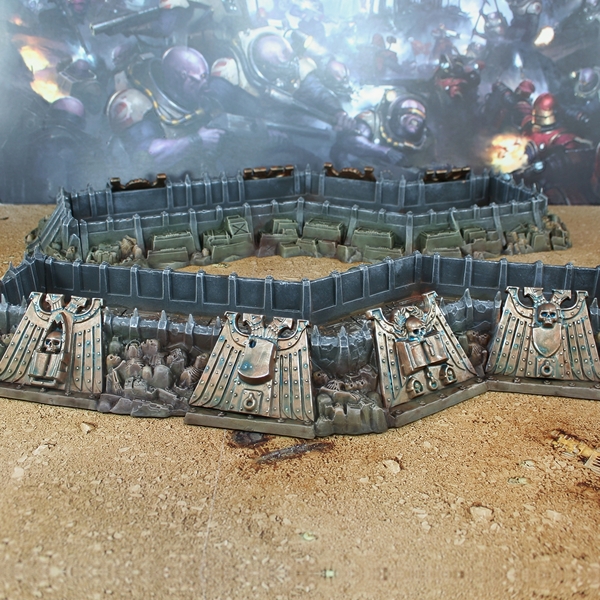 Final Weathering
To finish off the trenches, I dirtied up the lower portion in a variety of ways, including...
- Thinning some Tallarn Sand and spraying around the bottom with my airbrush, varying how much I coverred.
- Jabbing pigments into parts of the debris that looked to uniform. I used Vallejo Pigments Burnt Sienna and Humbrol :Dark Earth Weathering powder.
- I then sealed everything in with a final spray through the airbrush with more Vallejo Sepia Wash .
On this section I went back and forth for a bit trying to get the colour right, finally settling on the trenches as pictured. Apologies for not having precise steps.

Rookie Brushes
RookieBrushes
Aspiring miniature painter and biscuit enthusiast. Here to share my hobby and help where I can.
Citadel Painting System 18
Base 5
- Abaddon Black
- Castellan Green
- Leadbelcher
- Mechanicus Standard Grey
- Zandri Dust
Shade 2
- Agrax Earthshade
- Nuln Oil
Layer 6
- Administratum Grey
- Dawnstone
- Skrag Brown
- Sotek Green
- Sycorax Bronze
- Tallarn Sand
Dry 1
- Ryza Rust
Technical 3
- Lahmian Medium
- Nihilakh Oxide
- Typhus Corrosion
Contrast 1
- Aethermatic Blue
Vallejo Metal Color
Base 3
- 77.702 Duraluminum
- 77.707 Chrome
- 77.710 Copper