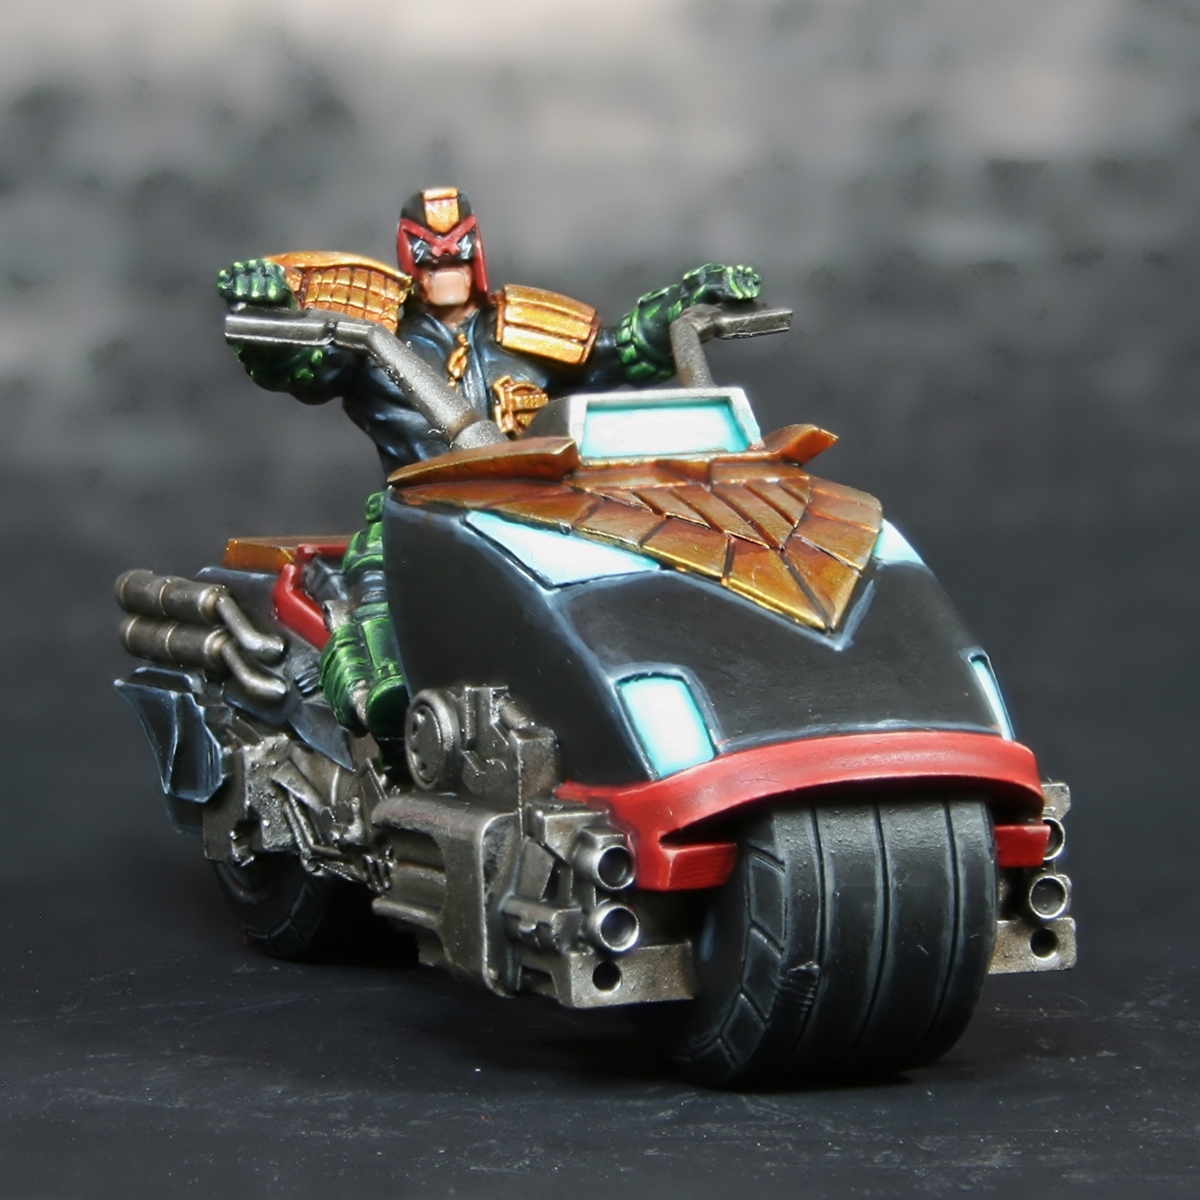

Here is how I painted Judge Dredd's Lawmaster miniature, from the expansion to the Judge Dredd game from Warlord Games.
Black Bike Chassis
- Basecoat with a pure Black . Whilst I used a Vallejo paint, there is no reason you couldn't use Abaddon Black .
- Add a chunky edge highlights with a mix of Dark Reaper , Kantor Blue & Black , mixed in equal amounts.
- Highlight with Dark Reaper , make these highlights finer than the previous stage, but allow yourself space to make the next stage finer.
- Mix Dark Reaper and Deepkin Flesh , then use this for fine highlights.
- Selectively highlight with Celestra Grey .
- Finally add specular highlights of a pure White .
Metal
- Basecoat with Leadbelcher .
- Wash with Nuln Oil .
- Take some :contrast medium and add in some Nuln Oil and Wyldwood . Now use this mix to shade the recesses and glaze for a little extra dirty look on the metal. Do a couple of passes to enrich it and ansure you have a variety of tones.
- Add chunky highlights with Ironbreaker .
- Add fine highlights with Vallejo Model Air Silver (or Stormhost Silver ).
Headlights
- Basecoat in Corax White .
- Paint a smaller section within this of White Scar (or another pure white). This is mean to represent a direct glow from the bulb.
- Paint the whole thing with :a 1:1 mix of Aethermatic Blue and Contrast Medium . Drag the brush towards the edges, away from the "light source". Glaze with this mix a few times if needed.
- Now glaze toward the bulb with your White Scar , bringing back the brightness. You could even paint a very small path in the centre, if you wanted.
Red Trim
- Basecoat with Mephiston Red .
- Soft shade the recesses with thin Khorne Red .
- Mix a little Abaddon Black into your Khorne Red and do a more targeted recess shade.
- Chunky highlights with Evil Sunz Scarlet .
- Fine highlights with Squig Orange .
- Now mix some Ice Yellow (or Dorn Yellow ) into your Squig Orange and highlight smaller and smaller. I did two passes, making the second one a specular highlight of almost pure Ice Yellow .
Gold Details
- Basecoat with Retributor Armour .
- Wash with Gore-grunta Fur , thinned with an equal amount of water. Try to pull this towards the deepest recesses and feel free to do a couple of passes/glazes to build up colour where needed.
- Darken the shading and recesses with some Cygor Brown , covering less area than in the last step.
- Tidy up the gold with Retributor Armour again, bringing back the colour where needed.
- Mix some Silver RLM01 Metallic into your Retributor Armour (around 1:1 and some highlights.
- Add much smaller highlights with Silver RLM01 Metallic .
Tyres
- Basecoat with Abaddon Black .
- Drybrush heavily with Abaddon Black and Skavenblight Dinge , mixed 1:1.
- Drybrush again with just Skavenblight Dinge , apply the paint more lightly.
- Aelectively highlight edges with Stormvermin Fur .

Rookie Brushes
RookieBrushes
Aspiring miniature painter and biscuit enthusiast. Here to share my hobby and help where I can.
Citadel Painting System 24
Base 8
- Abaddon Black
- Celestra Grey
- Corax White
- Kantor Blue
- Khorne Red
- Leadbelcher
- Mephiston Red
- Retributor Armour
Shade 1
- Nuln Oil
Layer 10
- Dark Reaper
- Deepkin Flesh
- Dorn Yellow
- Evil Sunz Scarlet
- Ironbreaker
- Skavenblight Dinge
- Squig Orange
- Stormhost Silver
- Stormvermin Fur
- White Scar
Technical 1
- Contrast Medium
Contrast 4
- Aethermatic Blue
- Cygor Brown
- Gore-grunta Fur
- Wyldwood
Vallejo Model Air
Base 1
- 71.063 Silver RLM01 Metallic