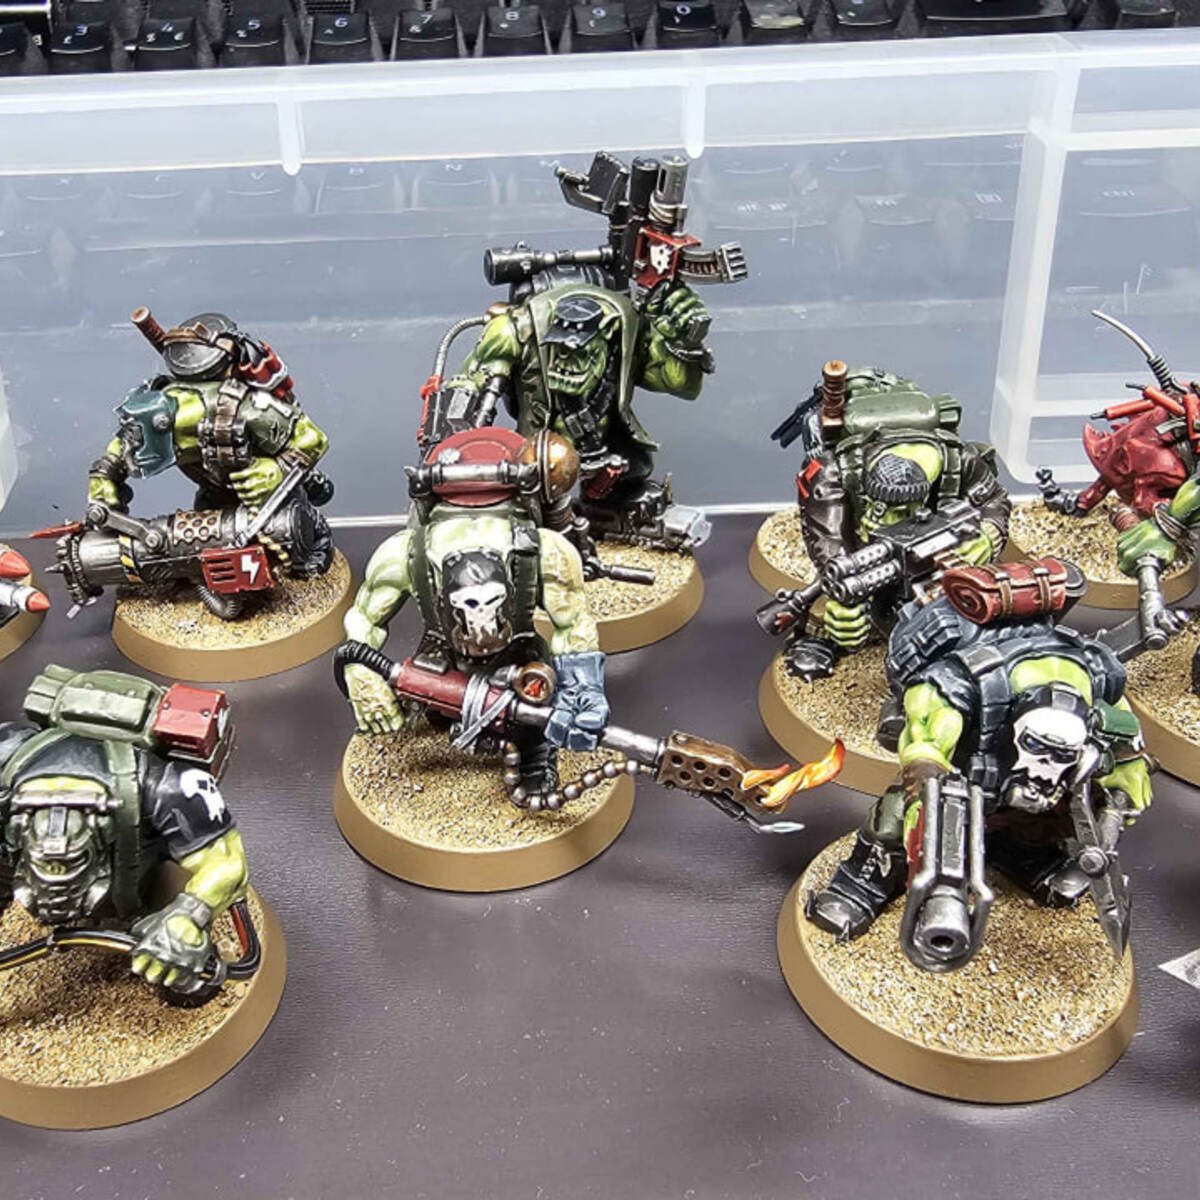
Ork Kommandos are the elite infiltrators of the Ork warbands, blending brutal strength with surprising stealth. Their gear is battered, their armor chipped, and their skin scarred from countless battles. The challenge of painting Ork Kommandos lies in capturing their raw, rugged look, from the weathered leather to the chipped armor and worn cloth. This guide provides detailed step-by-step instructions on how to achieve a gritty, battle-hardened appearance for your Ork Kommandos, giving them the character and depth they deserve on the tabletop.
1. Ork Skin
The Ork Kommandos’ skin reflects the harsh environments they endure and the brutal lives they lead. Whether you prefer warmer tones, darker shading, or a variety of green hues, the following recipes provide a wide range of options for your Ork Kommandos. Each approach helps bring out the rugged, battle-worn look of your models while allowing flexibility in how you want them to appear on the battlefield. With the skin being such a defining feature of Orks, these methods will help give them a striking and unique presence.
Warm Green Skin (40K Orks)
This recipe produces a classic, vibrant green with warm undertones, typical of Orks in the Warhammer 40,000 universe. It's bold and eye-catching while retaining a battle-hardened feel.
- Basecoat: Apply a mix of Averland Sunset and Skarsnik Green (1:1) with a little more Skarsnik Green for a green hue that leans slightly warm.
- Shade: Use Biel-Tan Green to glaze and recess shade the skin, focusing on deeper areas like under the muscles and facial creases.
- Deep Shade: Apply Coelia Greenshade in deep recesses with a fine brush for further depth.
- Highlight: Add general highlights with Ogryn Camo , focusing on areas like the muscles, knuckles, and cheekbones.
- Fine Highlight: Use Krieg Khaki for finer highlights on the skin, applied to the most raised portions.
- Glaze: Use Kislev Flesh to glaze over ear tips, lips, knuckles, and elbows to add warmth and definition.
- Final Highlight: Mix Screaming Skull and White Scar (1:1) and apply selective and specular highlights to key areas, like the brow and shoulders.
Sickly Green Skin (Beast Snaggas)
This variant produces a paler, more sickly green tone, often associated with Beast Snaggas. It retains a green look but with more desaturated undertones and touches of warm flesh tones.
- Basecoat: Mix Skarsnik Green with Averland Sunset (1:1) to create a muted, pale green.
- Shade: Add a little Warp Lightning to the base mix and use this to recess shade the skin. For deep shading, apply Caliban Green in the darkest areas.
- Highlight: Mix Skarsnik Green , Averland Sunset , and Zandri Dust (1:1:1) and apply as highlights to raised areas like the muscles and face.
- Selective Highlight: Add Screaming Skull to the above mix and use it for sharper highlights on high points like the knuckles, nose, and brow.
- Glaze: Apply Kislev Flesh over knuckles, ears, elbows, and lips to introduce warmth, followed by a glaze of Carroburg Crimson in areas like the lips for a bruised, flushed effect.
- Final Highlight: Apply Screaming Skull to sharp points for fine, specular highlights.
Subdued Green Skin (Ghazghkull)
This recipe is designed for more subdued, battle-worn Orks like Ghazghkull Thraka. The green tone is darker and less vibrant, with subtle, cool undertones.
- Basecoat: Use a mix of Elysian Green and Waaagh! Flesh (2:1) for a darker, muted green tone.
- Shade: Apply thinned Waaagh! Flesh to the recesses, especially in areas like the face and muscles, to reinforce the darker tone.
- Deep Shade: Use a mix of Caliban Green and Rhinox Hide (2:1) in the deepest recesses, such as around the eyes and beneath the jawline.
- Highlight: Use Elysian Green for chunky highlights, focusing on the raised portions of the muscles and facial features.
- Fine Highlight: Mix Skarsnik Green and Averland Sunset (4:1) and apply finer highlights to edges like the cheekbones, knuckles, and fingers.
- Final Highlight: Use Krieg Khaki for specular highlights on sharp edges and points of interest, like the brow and elbows.
- Optional Glaze: For added life, apply a glaze of Kislev Flesh over the lips, knuckles, and elbows, finishing with a small highlight of Screaming Skull on the lip for a subtle warmth.
Cold Green Skin (Ironjawz)
This variant produces a cooler green tone, reminiscent of Ironjawz and their more menacing, brutish appearance. It incorporates deeper, cooler shades that make the skin appear tough and resilient.
- Basecoat: Use Elysian Green for a solid, mid-green base.
- Shade: Glaze with a mix of Athonian Camoshade , Drakenhof Nightshade , and Biel-Tan Green (3:1:1), pulling the pigment toward the recesses.
- Deep Shade: Add Incubi Darkness to the glaze mix for deep recesses, especially under the muscles and around the neck.
- Highlight: Mix Elysian Green with Ogryn Camo (1:1) for chunky highlights on the larger raised areas.
- Fine Highlight: Use pure Ogryn Camo for smaller highlights on the edges of muscles, knuckles, and facial features.
- Final Highlight: Mix Ogryn Camo with Screaming Skull (1:3) and apply fine, selective highlights to sharp points and edges.
- Final Touch: Glaze Kislev Flesh over knuckles, ears, and lips to add warmth if needed.
Pale Green Skin Variations (Kruleboyz)
Kruleboyz are known for their pallid, weathered skin tones. These recipes create pale, muted greens, emphasizing the harsh environments they survive in.
Kruleboyz 1: Pale Green
- Basecoat: Mix Ogryn Camo and Elysian Green (1:1) for a pale green base.
- Shade: Apply Deathworld Forest to the recesses for shading.
- Deep Shade: Use Vulkan Green for the deepest recesses.
- Highlight: Mix Ogryn Camo and Krieg Khaki (1:1) for edge highlights.
- Fine Highlight: Mix Ogryn Camo , Krieg Khaki , and Ushabti Bone (1:1:1) and apply as finer highlights to edges and high points.
- Final Highlight: Use Ushabti Bone for small, sharp highlights, and add Screaming Skull to the most exposed points.
- Glaze: Use Kislev Flesh on knuckles, ears, and lips for a bit of warmth.
Kruleboyz 2: Olive Green
- Basecoat: Use Ogryn Camo .
- Shade: Mix Deathworld Forest and Loren Forest (1:1) for a general shade in the recesses.
- Deep Shade: Apply a 1:1 mix of Caliban Green and Mournfang Brown for deep shadows.
- Highlight: Use Krieg Khaki for raised areas and edges.
- Final Highlight: Mix Krieg Khaki with Pallid Wych Flesh (1:1) for fine highlights on the sharpest edges.
Kruleboyz 3: Desaturated Green
- Basecoat: Mix Ogryn Camo and Krieg Khaki (2:1) for a desaturated base.
- Shade: Use a 1:1 mix of Death Korps Drab and Nurgling Green for a cool shade in recesses.
- Deep Shade: Apply thin Death Korps Drab in the deepest recesses.
- Highlight: Use a 1:2 mix of Ogryn Camo and Krieg Khaki for highlights.
- Fine Highlight: Mix Ogryn Camo , Krieg Khaki , and Ionrach Skin (1:1:1) for fine edge highlights.
- Final Highlight: Apply pure Ionrach Skin for sharp highlights on raised areas.
Kruleboyz 4: Sickly Green
- Basecoat: Use Nurgling Green for a sickly, pale green base.
- Shade: Apply a mix of Ogryn Camo and Sons of Horus Green (1:1) for shading in the recesses.
- Deep Shade: Mix Dark Reaper and Loren Forest (1:1) for deep recesses.
- Highlight: Mix Wraithbone and Grey Seer with Nurgling Green (1:1:1) and apply to the raised areas.
- Final Highlight: Add more Wraithbone and Grey Seer for sharper highlights.
Dark Red Squig
Squigs are an iconic part of Ork Kommandos, bringing wild, ferocious energy to the battlefield. This dark red Squig will stand out as a brutal, yet loyal, companion to your Ork warband. The following method combines rich, deep reds with smooth belly transitions to give your Squig a natural, yet intimidating appearance.
- Basecoat: Start with a solid coat of Khorne Red over the Squig’s entire body. Ensure even coverage, as this will set the foundation for the dark red tone.
- Shade: Wash the Squig’s skin with Druchii Violet , thinned with an equal amount of Lahmian Medium to smooth the transition into the recesses. This will add a deep, rich purple hue to the shadows.
- Glaze: Bring the color back up on the raised or exposed areas by glazing with a 1:1 mix of Khorne Red and Wazdakka Red . Focus on larger areas like the shoulders, haunches, and face to establish depth in the skin.
- Chunky Highlights: Apply chunky highlights to the skin with Wazdakka Red , focusing on areas where light would naturally hit, such as the top of the head, limbs, and body curves.
- Fine Highlights: Mix Wazdakka Red with Squig Orange (1:1) and add fine edge highlights along the sharpest areas, such as around the mouth, the tips of the limbs, and any sharp edges of the skin.
- Final Highlights: For the most prominent edges and points, use pure Squig Orange to create selective highlights.
- Specular Highlights: Mix Lugganath Orange with Squig Orange and place small specular highlights on the sharpest parts of the Squig’s body, like the knuckles and tips of spikes.
Lower Body Transition: For the lower areas close to the lighter belly:
- Mix Khorne Red with Rakarth Flesh to create large highlights.
- For smaller highlights, gradually mix Pallid Wych Flesh into the previous mix. There are no fixed ratios for this step, so adjust by eye until the transition looks smooth.
Belly and Transition
The belly of the Squig provides a bright contrast to the dark red body, creating a natural transition from the darker skin to a lighter underbelly.
- Basecoat: Paint the entire belly area with Rakarth Flesh to set the base for the lighter tone.
- Belly Transition: Create a dividing line between the belly and the darker red body by carefully blending Rakarth Flesh with Khorne Red along the boundary. To smooth the transition, alternate between glazing with Khorne Red and Rakarth Flesh until the blend looks natural. Don't stress about making this perfectly smooth; the details of the model will draw attention away from minor imperfections.
- Shade: Wash the belly with a mix of Reikland Fleshshade thinned with Lahmian Medium . Focus on the recesses to create depth.
- First Highlight: Lighten the raised parts of the belly by mixing Rakarth Flesh with Pallid Wych Flesh (1:1) and applying highlights along the raised folds and muscles.
- Chunky Highlights: Apply chunky highlights of pure Pallid Wych Flesh to areas where light would naturally hit, such as the center of the belly or along the raised parts of the muscles.
- Final Highlights: Mix Pallid Wych Flesh with White Scar and add small, bright highlights to the sharpest edges and raised points of the belly to create a sharp contrast and give the skin a vibrant finish.
Conclusion: Whether you prefer warmer tones, darker shading, or a variety of green tones, these methods provide a wide range of options for your Ork Kommandos and Squigs. Each approach helps bring out the rugged, battle-worn look of your models while allowing flexibility in how you want them to appear on the battlefield.
2. Claws, Eyes, Teeth, Tongue, and Masks
The claws, eyes, teeth, tongue, and masks of the Ork Kommandos bring out their savage and brutal nature. Proper detailing of these features will enhance their menacing appearance, giving each model a characterful and intimidating look. This section offers straightforward methods to highlight these key features and bring out the fierceness of the Orks.
Claws
The claws of the Orks and Squig need to look sharp and menacing, with a smooth transition from dark base tones to sharp, specular highlights. Here's how to achieve a deadly claw effect:
- Basecoat: Apply Incubi Darkness over the entire claw. This will give a dark, almost black-green starting point.
- Wash: Shade the claws with Nuln Oil , making sure it settles into the recesses to deepen the shadows and reinforce the dark look.
- First Highlight: Use Dark Reaper to gently highlight the edges and ridges of the claw. Focus on keeping the dark appearance intact while subtly defining the raised areas.
- Selective Highlight: Carefully apply Thunderhawk Blue to the sharpest edges and raised portions of the claws. Use this sparingly to keep the overall tone dark while still adding definition.
- Specular Highlight: For the brightest, sharpest points, apply Deepkin Flesh to the tips of the claws and other prominent edges. This will create the appearance of light reflecting off the sharp surfaces.
Eyes (Red and Intense)
Ork Kommando eyes typically glow with a bright, menacing red. Here’s how to paint them to reflect that intense, feral look.
- Glaze: Begin by glazing the area around the eye with a mix of Khorne Red and Incubi Darkness to deepen the shadows.
- Basecoat: Paint the eyeball with Evil Sunz Scarlet , leaving the edges dark from the previous glaze.
- Highlight: Add a small dot of Troll Slayer Orange to the center of the eyeball to bring out the raised portion of the eye.
- Final Highlight: Apply a tiny dot of Flash Gitz Yellow in the center for the sharpest specular highlight, giving the eye a glint of intensity.
Teeth (Gnarly and Sharp)
The gnarly, sharp teeth of Orks add to their terrifying look, whether they're gnashing their way through enemies or grinning maniacally.
- Basecoat: Start with Zandri Dust to give the teeth a dirty bone color.
- First Highlight: Apply Ushabti Bone to the majority of the teeth, leaving some of the darker Zandri Dust in the recesses.
- Final Highlight: Mix Ushabti Bone with White Scar (1:1) and apply to the tips of the teeth for added sharpness.
- Spot Highlight: For a finishing touch, add small dots of pure White Scar to the tips of the sharpest teeth, making them look freshly sharpened.
Tongue (Contrasting Pink)
The tongue provides a bright, contrasting color to the otherwise grimy appearance of the Ork Kommando faces. A well-painted tongue can add a bit of extra character to their snarl.
- Basecoat: Apply Screamer Pink to the tongue for a rich base.
- Shade: Use Druchii Violet to add depth to the tongue, especially in the recesses.
- First Highlight: Mix Screamer Pink with Pink Horror (1:1) and highlight the raised areas of the tongue.
- Final Highlight: Apply Kislev Flesh selectively to the edges and raised sections for the final highlight, ensuring a fleshy, realistic look.
Skull Masks (Dirty White)
Many of the Ork Kommandos wear grim skull-like masks, adding to their ferocity. These masks are usually weathered and worn, reflecting years of battle and neglect.
- Basecoat: Start with Pallid Wych Flesh for the base layer of the skull mask.
- Shade: Apply Baneblade Brown thinned with Lahmian Medium to the recesses for a subtle weathered look.
- Deep Shade: Use thin Dryad Bark in the deepest recesses and around cracks or eye holes to add further depth and grime.
- First Highlight: Re-establish highlights with Pallid Wych Flesh on the raised areas.
- Final Highlight: Use White Scar for the sharpest edges and details, such as around the eye sockets or any cracks in the mask.
Conclusion: Detailing the eyes, teeth, tongue, and masks of your Ork Kommandos will help bring their savage nature to life on the tabletop. These elements, when carefully highlighted and shaded, provide character and depth, enhancing the model’s expression and overall menace.
3. Cloth (Shirts, Pants, Gloves, etc.)
The Ork Kommandos’ clothing is as rugged and varied as their weapons, often reflecting the environments they operate in. From worn, drab tones to patched camo patterns, their attire is practical and utilitarian, built to endure the rigors of war. This section covers the various types of cloth, ensuring that their outfits match their battle-hardened nature.
Grey Cloth
The grey cloth found on some Kommandos' clothing is typically worn and dirty, giving them a stealthy, well-used appearance.
- Basecoat: Apply Dawnstone for the base.
- Shade: Use Nuln Oil thinned with Lahmian Medium (2:1) to wash the recesses and create depth.
- First Highlight: Mix Dawnstone with Administratum Grey (1:1) and highlight the raised edges.
- Final Highlight: Apply Ulthuan Grey as a fine edge highlight, focusing on sharp edges and corners.
Dark Grey Cloth
- Basecoat: Start by applying Eshin Grey to the entire pouch. This will give a much darker, more neutral grey base.
- Shade: Apply a wash of Nuln Oil , letting it settle into the creases to deepen the shadows and add definition.
- Re-establish Base: Reapply Eshin Grey to the raised areas, avoiding the shaded recesses.
- First Highlight: Use Dawnstone to highlight the edges and most prominent folds. This will create contrast while keeping the overall tone dark.
- Final Highlight: Sparingly apply Administratum Grey on the sharpest edges and corners to give the pouch a slightly worn, weathered look, focusing on the points that would catch the most light.
Drab Brown Cloth
This drab brown cloth represents heavier-duty fabric, often seen on pouches, pants, or sleeves.
- Basecoat: Use Steel Legion Drab as the base color.
- Shade: Apply Agrax Earthshade thinned with Lahmian Medium (2:1) into the recesses, making sure not to let it pool.
- First Highlight: Mix Steel Legion Drab with Tallarn Sand (1:1) and apply as edge highlights to raised areas.
- Final Highlight: Use Tallarn Sand mixed with Pallid Wych Flesh (1:1) to create fine, selective highlights on sharp edges.
Khaki Cloth
Khaki cloth, often used for tactical gear and lighter clothing, adds a muted tone to the Orks' outfits, blending them into dusty environments.
- Basecoat: Apply Tallarn Sand as the base.
- Shade: Use a mix of Tallarn Sand and Rhinox Hide (1:1) to shade the recesses.
- First Highlight: Use Screaming Skull for broad highlights along raised folds and edges.
- Final Highlight: Apply Krieg Khaki to the sharpest edges and folds for a subtle, weathered look.
Camo Clothing (Jackets, Trousers, etc.)
The camo clothing uses a darker base and subtle camouflage patterns. These patterns help the Kommandos blend into various environments while retaining a gritty, battle-worn feel.
- Basecoat: Apply Castellan Green for a darker, muted green base.
- Brown Spots: Apply patches of Steel Legion Drab in random, jagged shapes across the camo sections.
- Black Spots: Add smaller, scattered patches of Abaddon Black to create contrast.
- Shade: Use Agrax Earthshade sparingly in the recesses to blend the camo pattern and create depth in the folds.
- Highlight: Re-highlight the raised edges with Castellan Green .
- Final Highlight: Use Krieg Khaki for subtle edge highlights along the folds and edges of the camo cloth, adding depth without overpowering the pattern.
Black Cloth
The black cloth seen on various parts of the Ork Kommandos' gear, from shirts to straps and pouches, should have a rugged, worn appearance while keeping its dark tone. This recipe will help create subtle definition through highlights while maintaining the cloth's deep black base.
- Basecoat: Apply Abaddon Black to the entire black cloth area. This will form a strong, solid black foundation for the fabric.
- First Highlight: Use Corvus Black to highlight the raised folds, edges, and creases in the fabric. This will provide a subtle contrast while still keeping the overall tone dark. Focus on areas like the tops of folds or where the fabric would naturally catch more light.
- Second Highlight: Apply Eshin Grey sparingly along sharper edges and more prominent folds. Keep this highlight minimal, as the black cloth should remain predominantly dark.
- Final Highlight: For the final touch, use Dawnstone to add very fine highlights on the sharpest edges and corners. Concentrate on the topmost parts of the fabric, like the peaks of folds or the edges of straps, to create small points of visual interest without over-brightening the surface.
- Optional Glaze: If the highlights look too pronounced or harsh, apply a thin glaze of Nuln Oil to tone down the brightness and smooth out the transitions.
Leader’s Dark Green Trousers
The trousers on the leader have a darker, more muted green tone compared to other parts of the model, which complements the overall dark and rugged aesthetic of the Ork Kommandos. This guide will walk you through painting these trousers to achieve a weathered, natural fabric appearance, with rich shadows and subtle highlights that don’t overpower the dark base. The goal is to maintain a deep green tone while still bringing out the details through careful shading and highlighting.
- Basecoat: Apply Vulkan Green over the entire trousers for a rich, dark green base.
- Shade: Wash the trousers with Nuln Oil to deepen the shadows and create contrast in the recesses. Let the wash settle in folds and creases.
- Re-establish Base: Reapply Vulkan Green to the raised areas and flatter surfaces, leaving the shaded recesses darker.
- First Highlight: Use Waaagh! Flesh to highlight the raised areas and edges, focusing on fabric folds and the tops of the trousers.
- Second Highlight: Apply a more selective highlight using Loren Forest , focusing on the sharpest edges and ridges of the trousers. Keep this layer thin and sparing to maintain the dark, subdued look.
- Final Sparing Highlight: For the final sharp highlights, use Ogryn Camo very sparingly on the most prominent edges and corners, especially where light would naturally hit. This will provide a slight pop without overwhelming the darker tones.
Blue-Grey Gloves
The blue-grey gloves found on some Ork Kommandos give them a unique, cool-toned contrast against their otherwise muted and earthy color scheme.
- Basecoat: Apply Dark Reaper to the gloves.
- Shade: Thin Corvus Black and apply it to the recesses to add depth.
- First Highlight: Mix Dark Reaper with Administratum Grey (1:1) and highlight the raised areas.
- Final Highlight: Use Krieg Khaki for the final highlight on sharp edges, adding a subtle worn look to the gloves.
Wraps on Wires and Tubes
The wraps seen on wires and tubes are often practical and ragged, protecting the gear and giving the Orks' equipment a more "cobbled together" feel. These wraps are often a light, weathered grey or white.
- Basecoat: Apply Administratum Grey to the wrapped sections of wires and tubes.
- Shade: Use Nuln Oil to shade the recesses and folds of the wraps, giving them depth and definition.
- First Highlight: Apply Ulthuan Grey to the raised areas and edges of the wraps, focusing on where the wraps overlap.
- Final Highlight: Use White Scar for small, sharp highlights on the outermost folds, adding brightness and wear to the wraps.
Conclusion: The variety of cloth textures and colors on Ork Kommandos’ gear adds depth and realism to their appearance, reflecting the utilitarian nature of their uniforms. Each cloth type is weathered and dirty, perfect for the gritty, battle-hardened look of the Orks.
4. Leather (and Boots)
Leather elements are a key part of the Ork Kommando gear, appearing as belts, boots, straps, and other functional details. The wear and tear of these leather components show the rough life Orks live. This section covers a range of leather types, from dark brown to black, each designed to complement the overall look of your models.
Dark Brown Leather
Dark brown leather gives a heavy, weathered look to belts, straps, and pouches, making the Ork Kommando gear look sturdy and worn-in.
- Basecoat: Start with Rhinox Hide as the base color for the leather.
- Glaze: Use thinned Mournfang Brown to glaze the raised sections and edges of the leather, creating a textured appearance.
- First Highlight: Use Skrag Brown and apply chunky edge highlights to the leather.
- Final Highlight: Use pure Ushabti Bone for fine edge highlights on the sharpest parts of the leather, like the corners or worn edges of straps.
Tan Leather
This lighter-toned leather is often seen on ammo pouches or backpacks, adding some contrast to the darker tones of the model.
- Basecoat: Apply XV-88 to the leather areas.
- Shade: Use Agrax Earthshade in the recesses to create depth and darken the leather.
- First Highlight: Mix XV-88 with Ushabti Bone (1:1) for chunky highlights along the edges of the leather straps or pouches.
- Final Highlight: Use Pallid Wych Flesh to add sharp, fine highlights to the most raised areas, giving the leather a worn, aged look.
Red Leather
Red leather details add some character to Ork Kommandos, seen on straps or holsters. This rich, worn red contrasts with the greens and browns of their gear.
- Basecoat: Use a 1:1 mix of Khorne Red and Doombull Brown for a deep, muted red leather base.
- Shade: Apply Agrax Earthshade in the recesses to deepen the red and add contrast.
- First Highlight: Mix Khorne Red with Jokaero Orange (1:1) and apply edge highlights along the straps or leather pieces.
- Final Highlight: Use a mix of Jokaero Orange and Ushabti Bone (1:1) to add sharp, final highlights on the most raised areas.
Black Leather (Including Boots and Gas Masks)
Black leather is seen in boots, belts, and gas masks, giving the Ork Kommando gear a tough, worn look. These darker tones help balance the overall color palette of the models, adding depth and a well-worn feel.
- Basecoat: Apply Abaddon Black as the base for the black leather areas, including boots, belts, and gas masks.
- First Highlight: Use Eshin Grey for broad edge highlights along the straps, folds, and raised areas of the black leather.
- Fine Highlight: Apply Dawnstone to sharper edges, like the corners of belts or boots, adding finer highlights for a worn look.
- Final Highlight: Use Administratum Grey mixed with White Scar (1:1) for the sharpest, small highlights on the edges and points of interest, such as the tips of boots or the edges of gas masks.
- Optional: Use Nuln Oil to shade down and blend the highlights in and for a darker look.
Rope Reels
The ropes carried by Orks are weathered and utilitarian, reflecting their rough-and-ready approach to warfare. These reels of rope should look old, frayed, and well-used.
- Basecoat: Start with Zandri Dust for a natural rope color.
- Shade: Use Agrax Earthshade in the recesses and coils to add depth and give the rope a worn look.
- First Highlight: Mix Zandri Dust with Karak Stone (1:1) and apply as chunky highlights to the raised areas of the coils.
- Final Highlight: Use Ushabti Bone for fine highlights along the sharpest edges of the rope, making the strands stand out.
Conclusion: The leather elements on the Ork Kommandos give their gear a rugged, well-worn appearance. Each leather type, from dark brown to black, adds to the battle-hardened, practical look of the models, enhancing their overall character and toughness.
5. Armor and Gear
The armor and gear of the Ork Kommandos are tough and battered, showing the wear of countless battles. Each armor type and gear component reflects their brutal, utilitarian approach to war, with chipped paint, weathered edges, and well-used equipment. This section focuses on their black and red armor, green armor, and other gear details.
Goff Black Armor
The black armor worn by Ork Kommandos provides stealth and resilience. This approach adds subtle highlights to the black surfaces, giving the armor a worn, battle-scarred appearance.
- Basecoat: Apply Abaddon Black as the base for the black armor.
- First Highlight: Mix Naggaroth Night and Abaddon Black (1:1) and apply chunky highlights along the edges of the armor plates.
- Fine Highlight: Use a 1:1 mix of Naggaroth Night , Abaddon Black , and Celestra Grey for fine highlights along the sharp edges of the armor.
- Final Highlight: Apply Celestra Grey to the sharpest points, such as the corners of the armor plates, for a final highlight. Use White Scar for tiny specular highlights on points where light would hit the most exposed areas.
Red Armor (Teef)
The red armor found on the Orks, particularly around the teef shapes, adds a striking contrast to the darker tones of the models.
- Basecoat: Use a 1:1 mix of Mephiston Red and Evil Sunz Scarlet for a bright red base.
- Shade: Thin Khorne Red with water and apply to the recesses of the red armor to deepen the shadows.
- First Highlight: Apply Evil Sunz Scarlet as an edge highlight on the raised areas, focusing on the teef shapes and sharp corners.
- Final Highlight: Mix Screaming Skull with Evil Sunz Scarlet (1:1) and apply fine highlights to the sharpest edges, such as the tips of the teef and armor plates.
Dull Red Armor
This approach provides a more muted, rugged red look for the Ork Kommando armor. It works well for battle-worn Orks that have seen years of combat.
- Basecoat: Mix Khorne Red and Doombull Brown (1:1) for a dull, deep red armor base.
- Shade: Use a thin mix of Khorne Red and Abaddon Black (1:1) and recess shade the armor plates to add depth and grime.
- First Highlight: Mix Evil Sunz Scarlet with Word Bearers Red (1:1) and apply edge highlights to the raised areas.
- Fine Highlight: Use Ungor Flesh for tiny, sharp highlights on the most prominent points of the armor, like corners and raised areas.
Dark Green Armor
The dark green armor on some Ork Kommando models gives them a striking and unique look, leaning towards a cool, battle-worn shade. This method will match well with any dark green equipment and gear.
- Basecoat: Apply a mix of Caliban Green and Dark Reaper (1:1) for a deep, desaturated green base with a slightly cool tone.
- Shade: Apply Nuln Oil in the recesses and around any raised areas to enhance depth and darken the overall tone. Let this shade settle in the grooves and around the edges to create contrast.
- Re-establish Base: After shading, lightly go over the raised areas with the original base mix of Caliban Green and Dark Reaper to clean up and enhance the mid-tone areas, leaving the shaded recesses dark.
- First Highlight: Mix Caliban Green with Fenrisian Grey (2:1) and apply this along the edges. This mix will give a slightly cooler green.
- Second Highlight: Use Fenrisian Grey alone for a more focused highlight along sharp edges, corners, and any areas where light would naturally hit. Apply this sparingly to avoid overpowering the green tone.
- Final Highlight: Add very fine edge highlights with White Scar or Ulthuan Grey on the most prominent corners and points of the armor.
- Chipping (Optional): For a weathered look, add small chips along the edges using Abaddon Black to represent worn areas where the paint has been scraped away. For added realism, underline some of these chips with Fenrisian Grey to simulate depth.
Dark Green Backpacks
The dark green backpacks follow the same base as the dark green camo, but without the camo pattern, ensuring consistency across the model.
- Basecoat: Apply Castellan Green for a darker, muted green base.
- Shade: Use Agrax Earthshade sparingly in the recesses to create depth in the folds.
- Highlight: Re-highlight the raised edges with Castellan Green .
- Final Highlight: Use Krieg Khaki for subtle edge highlights along the folds and edges of the cloth, adding depth.
Hazard Stripes
Hazard stripes add character and warning signs to the weapons and armor of Ork Kommandos, giving a sense of chaos and danger.
- Basecoat: Apply Averland Sunset over the area where hazard stripes will be placed.
- Shade: Use Iyanden Yellow to deepen the yellow tone in the recesses.
- Black Stripes: Carefully paint Abaddon Black in straight lines to create the hazard stripes. Keep the lines sharp for contrast.
- Highlight Yellow: Use a mix of Averland Sunset and Screaming Skull (1:1) to highlight the edges of the yellow stripes.
- Highlight Black: Use Eshin Grey to highlight the edges of the black stripes for a worn, scratched look.
- Final Highlight: For a more chipped and worn appearance, add small dots and scratches of Screaming Skull along the yellow stripes and Administratum Grey on the black stripes to simulate paint chipping.
Conclusion: The armor and gear of the Ork Kommandos are essential for conveying their brutal, battle-worn nature. With the black, red, and green armor options, along with hazard stripes and brass details, these elements give your models depth, toughness, and a sense of relentless warfare.
6. Weapons and Metallic Details
The weapons and metallic gear of the Ork Kommandos are as brutal and worn as their armor. From chipped and scratched black casings to grimy, rusted metallics, these details help convey the relentless, war-torn existence of the Orks. This section will cover the black weapon casings, metallic components, grenade casings, and brass details, ensuring the weapons and gear look weathered and well-used.
Darker Metallics (Leader’s Power Klaw)
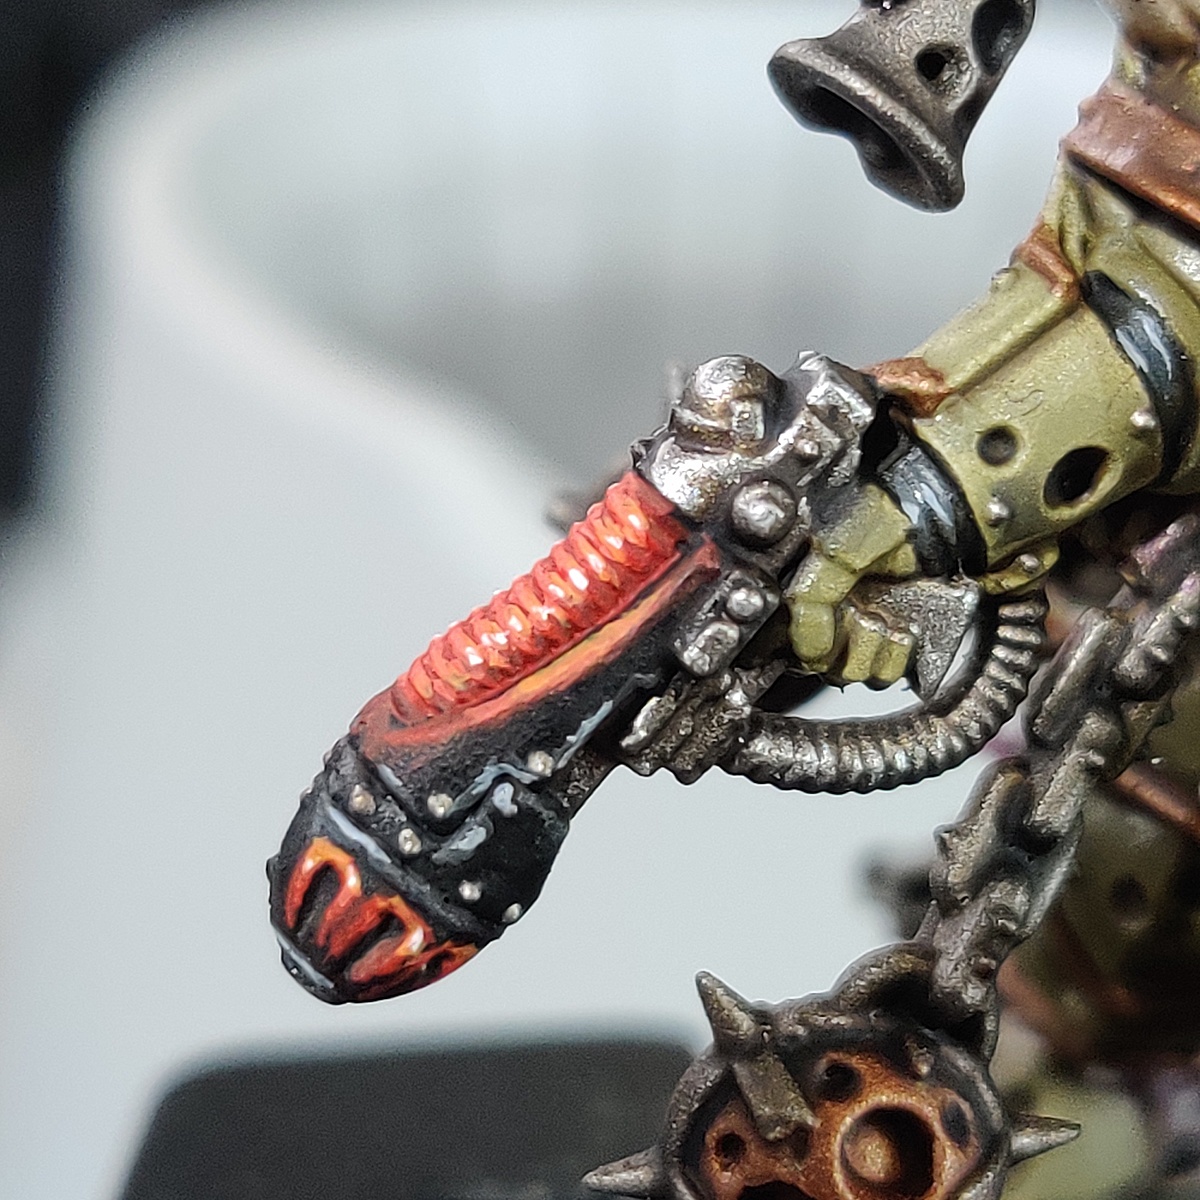
For darker, weathered metallics like the leader's power klaw, this method creates a grim, battle-worn appearance with deep shadows and a rugged, rusted finish. It combines subtle highlights with layered weathering for an authentic, brutal look.
- Basecoat: Start by applying a mix of Iron Warriors and Abaddon Black (1:1) to create a dark, gritty metallic base.
- Shade: Wash the entire metallic area with Nuln Oil , allowing it to settle into the recesses to deepen shadows and enhance the dark appearance.
- Highlight: Apply Stormhost Silver to the raised edges and most exposed areas. Use it sparingly to keep the overall metallic look dark, while ensuring key points stand out.
- Second Shade: Apply another layer of Nuln Oil to tone down the highlights and further darken the metallic surface, helping to blend the highlights into the base.
- Weathering Glaze (Rust/Grime): First Glaze: Apply a thin glaze of Rhinox Hide in areas where dirt and grime would naturally accumulate, such as the recesses, joints, or around the sharp edges. Use a fine brush and build up the weathering effect gradually.
- Second Glaze: Follow up with a thin glaze of Mournfang Brown to simulate rust and add extra depth to the weathered areas. Focus this glaze in similar areas to where you applied the Rhinox Hide glaze.
Black Weapon Casings
Ork Kommando weapons are typically crude and practical, with black casings that contrast against their vibrant skin and ragged gear.
- Basecoat: Apply Abaddon Black as the base for the black weapon casings.
- First Highlight: Use Dark Reaper to apply broad edge highlights to the weapon casing, focusing on raised areas and sharp edges.
- Fine Highlight: Use Thunderhawk Blue for a thinner edge highlight along the sharpest edges and ridges of the weapon casing.
- Final Highlight: Apply Fenrisian Grey to the sharpest points and corners for a subtle, sharp highlight that adds a sense of wear and tear.
- Optional Scratch Effects: Use Fenrisian Grey to paint thin scratches along the casings, reinforcing them with Thunderhawk Blue along the bottom edge to give the illusion of depth.
Metallic Components (Gun Barrels, Exposed Machinery, etc.)
The metallic parts of Ork Kommando weapons—like gun barrels, exhaust pipes, Ammo belts and rounds and exposed machinery—are typically weathered and worn, reflecting their brutal, no-nonsense construction.
- Basecoat: Use Leadbelcher on all exposed metal parts, such as gun barrels, chains, or mechanical components.
- Shade: Apply Nuln Oil to the recesses and around the metallic details to bring out depth and contrast.
- First Highlight: Use Ironbreaker to apply edge highlights and light drybrushing on the raised areas of the metallic surfaces.
- Final Highlight: Apply Stormhost Silver to the sharpest edges for a bright, reflective highlight on metallic details.
Weathering (Optional):
- Rust: Drybrush or stipple Typhus Corrosion onto areas that would be prone to rust, such as gun barrels or exposed metal joints.
- Rust Highlight: Lightly drybrush Ryza Rust onto the previously weathered areas to give the impression of flaking rust.
- Grime: Use Agrax Earthshade Gloss or Typhus Corrosion to add patches of dirt or grime to the metallic components.
Grenade Casings
Grenades carried by Ork Kommandos come in various colors, here's how to paint them
Green Grenade Casings
- Basecoat: Apply Waaagh! Flesh for the base layer of the dark green casings.
- Shade: Apply Nuln Oil to the recesses to darken the shadows and define the edges.
- First Highlight: Mix Waaagh! Flesh with Skarsnik Green (1:1) and apply chunky edge highlights, focusing on the most raised areas.
- Final Highlight: Mix Skarsnik Green with a small amount of Deepkin Flesh (2:1) and apply fine edge highlights to the sharpest points, like the corners and edges. Use this mix to also add some light weathering to the edges where the paint would naturally wear away.
Red Grenade Casings:
- Basecoat: Use Mephiston Red for the grenade casing.
- Shade: Apply Agrax Earthshade to the recesses for contrast and depth.
- First Highlight: Use Evil Sunz Scarlet to highlight the edges of the grenade casing.
- Final Highlight: Mix Evil Sunz Scarlet with Screaming Skull (1:1) for fine edge highlights along the raised portions and sharp edges.
Metallic Grenade Casings:
- Basecoat: Use Leadbelcher for the metallic grenade casing.
- Shade: Apply Nuln Oil to deepen the recesses.
- First Highlight: Use Ironbreaker to highlight the raised edges of the casing.
- Final Highlight: Apply Stormhost Silver to the sharpest points for bright, reflective highlights.
Brass and Copper Details
Brass and copper elements—such as buckles, knobs, or decorative parts—are a common feature on Ork Kommando weapons and gear. These details can be painted to look aged and tarnished for a well-worn effect.
- Basecoat: Apply Brass Scorpion to all brass and copper details on the weapons and gear.
- Shade: Use Agrax Earthshade to deepen the shadows and bring out detail in the brass.
- First Highlight: Use Runelord Brass to apply edge highlights on the raised areas.
- Final Highlight: Mix Runelord Brass with Stormhost Silver (1:1) for a final highlight on the sharpest edges and corners, giving the brass a more reflective appearance.
Explosives/Dynamite (Squig)
The dynamite on the Squig adds a distinct and fun element to the model, giving it a sense of destructive power. This guide helps make it stand out with vivid colors and defined details.
- Basecoat: Start by applying a basecoat of Mephiston Red on the dynamite sticks for a strong, vibrant red.
- Shade: Apply Agrax Earthshade in the recesses to add depth and reinforce the cylindrical shape.
- Highlight: Use Evil Sunz Scarlet to highlight the raised parts of the dynamite sticks, ensuring the rounded edges stand out.
- Fine Highlight: Mix Evil Sunz Scarlet with Squig Orange (1:1) and apply fine edge highlights along the top and sides of the dynamite, focusing on sharp edges.
- Wires/Cables: For the wires connecting the dynamite, use Abaddon Black as the basecoat. Highlight the cables with Eshin Grey and add a final sharp highlight with Dawnstone .
Conclusion: The weapons and metallic gear of the Ork Kommandos are crucial to their grim, battle-worn appearance. By adding weathering, scratches, and chipping, you can bring out the brutal, well-used nature of their gear, making each weapon and metallic detail look like it has been through countless battles.
7. Final Details and Finishing Touches
The final details on Ork Kommandos are what bring the models to life. From rope reels to wraps on wires, every small piece adds to the sense that these Orks are ready for anything. In this section, we’ll cover the unique details like ropes, wraps, and extra accessories that give each Ork its own character.
Icons and Markings
The markings and symbols painted onto the Orks' armor or gear give each Kommando its own identity. These simple glyphs and symbols can be done in bold white or red to contrast against the darker tones of the armor.
- Basecoat: Use Corax White to paint the markings, such as glyphs or symbols, on the armor or gear.
- Shade: (Optional) If needed, use a very thin wash of Nuln Oil in the recesses around the markings for extra depth.
- Highlight: Re-highlight the main areas of the markings with Corax White to smooth the finish.
- Final Highlight: Use White Scar for very fine highlights on the sharpest edges of the markings to give them a clean, bold look.
- For red markings, follow the same steps but use Mephiston Red and Evil Sunz Scarlet for the highlights, with Screaming Skull mixed in for the final edge highlight.
Trophies and Trinkets
Many Ork Kommandos carry trophies or trinkets, from bones to scrap metal, adding extra layers of detail to their gear.
Bone Trophies:
- Basecoat: Use Zandri Dust for the bones.
- Shade: Apply Agrax Earthshade to the recesses and cracks in the bone.
- First Highlight: Use Ushabti Bone to highlight the raised portions of the bones.
- Final Highlight: Apply White Scar as a fine highlight to the tips and sharp edges of the bones for a dry, aged appearance.
Metal Trophies:
- Basecoat: Use Leadbelcher for any metallic trophies, like skull plates or scrap metal.
- Shade: Apply Nuln Oil in the recesses to bring out the detail.
- First Highlight: Use Ironbreaker to add highlights to the raised areas.
- Final Highlight: Apply Stormhost Silver to the sharpest edges for a bright metallic finish.
Conclusion: The final details and finishing touches help bring your Ork Kommandos to life, adding character and narrative to the models. From frayed ropes to carefully painted glyphs, each small element adds depth to the model’s overall look, making your Kommandos stand out on the battlefield.
8. Basing
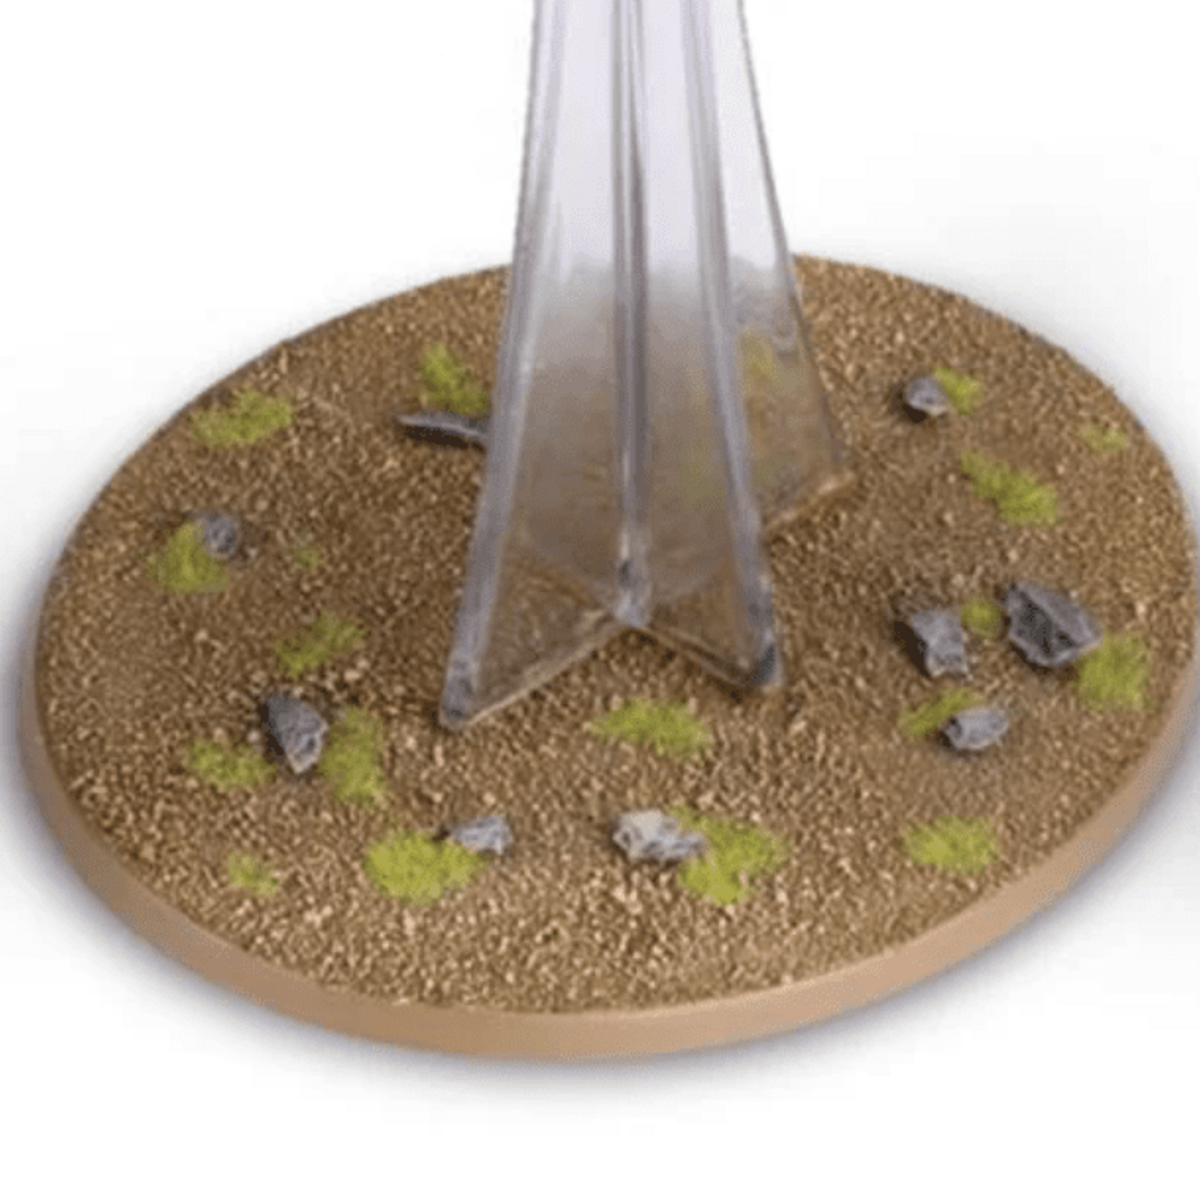
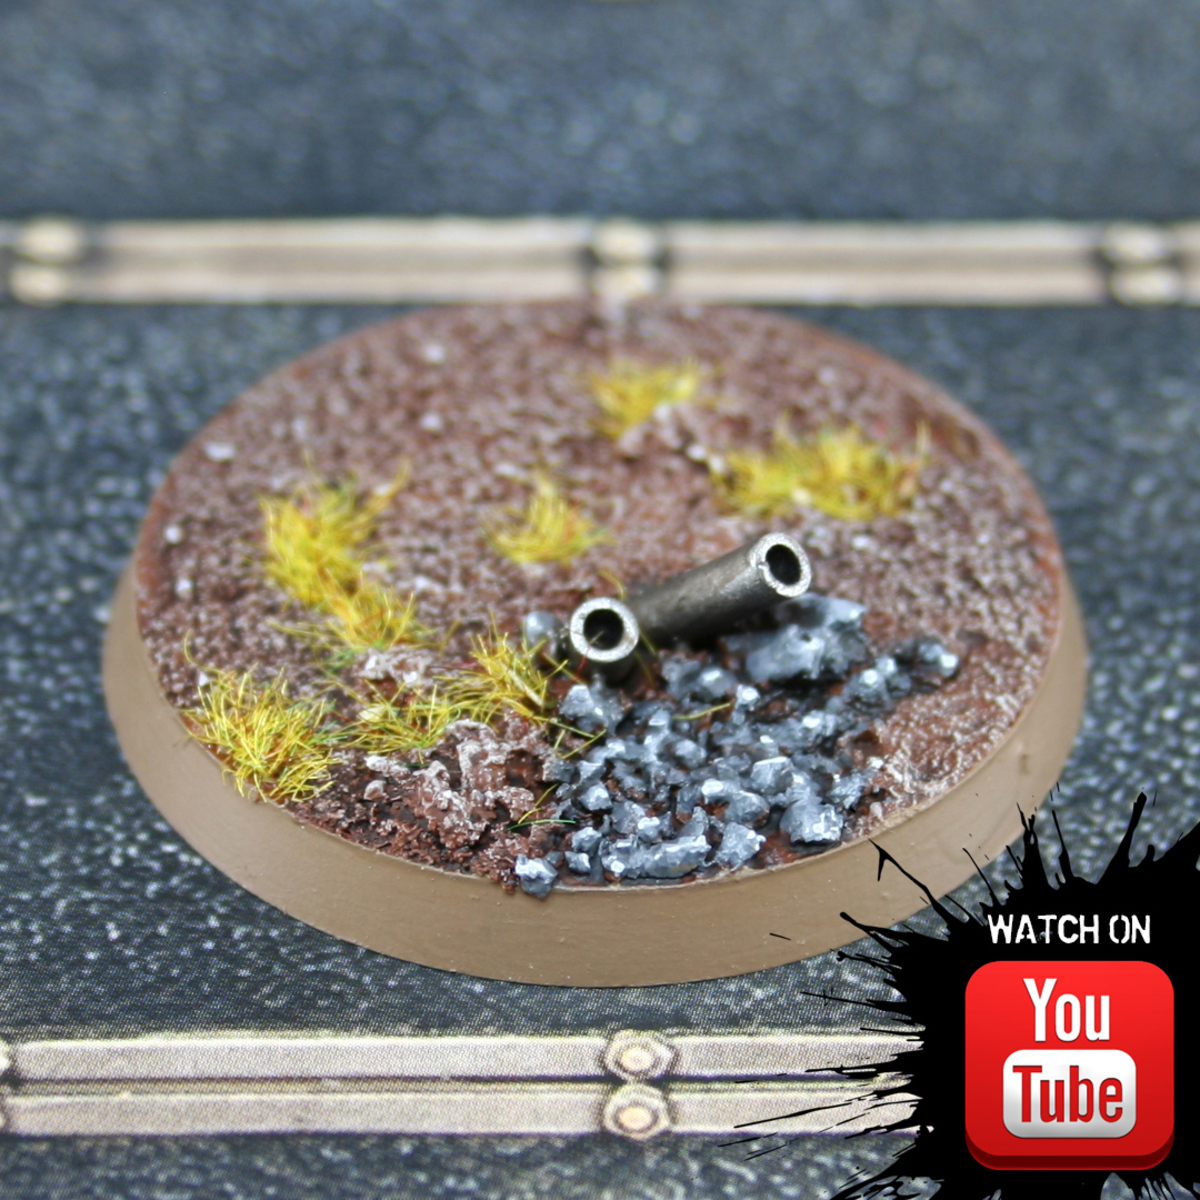
The base of your Ork Kommando models adds the final touch to their war-torn aesthetic. This particular basing method creates a rugged, earthy environment that complements the gritty look of the Orks, making them feel like they're traversing through a battlefield or wilderness. The following steps provide a detailed guide to creating a realistic and visually striking base.
- Prepare the Base: Before painting, apply a layer of PVA glue or your preferred basing glue to the base. Sprinkle sand, small rocks, and any debris you want to add for texture. Focus on creating natural-looking clusters and leaving some areas clear to avoid overcrowding. Let the glue fully dry before proceeding.
- Basecoat: Once the sand and debris are securely in place, apply Mournfang Brown as the base color. Thin the paint slightly to ensure it gets between all the textures of the sand and debris. This may require two coats for complete and consistent coverage.
- Shade: Wash the entire base with Agrax Earthshade , allowing the wash to settle in the recesses to add depth and enhance the texture.
- First Drybrush: Heavily drybrush the base with Sylvaneth Bark . This will bring out the texture and give the base a worn, earthy appearance. For a more desaturated look, consider using Karak Stone instead of Sylvaneth Bark .
- Second Drybrush: Lightly drybrush the base with Screaming Skull to highlight the highest points, adding contrast and further emphasizing the textures.
- Final Highlight: Pick out the most raised details, such as large grains of sand or debris, with Pallid Wych Flesh . This adds sharp highlights and makes the base appear more natural and weathered.
- Details: Paint any specific elements like rocks, pipes, or additional debris. Use metallics or natural tones to match the overall theme of the base.
- Flock and Tufts: Apply flock or tufts to areas of the base where you want to simulate grass, vegetation, or add visual interest. These can be used to create dynamic environments and add variety.
- Base Rim: Paint the rim of the base with Steel Legion Drab for a clean, professional finish that complements the earthy tones of the base.
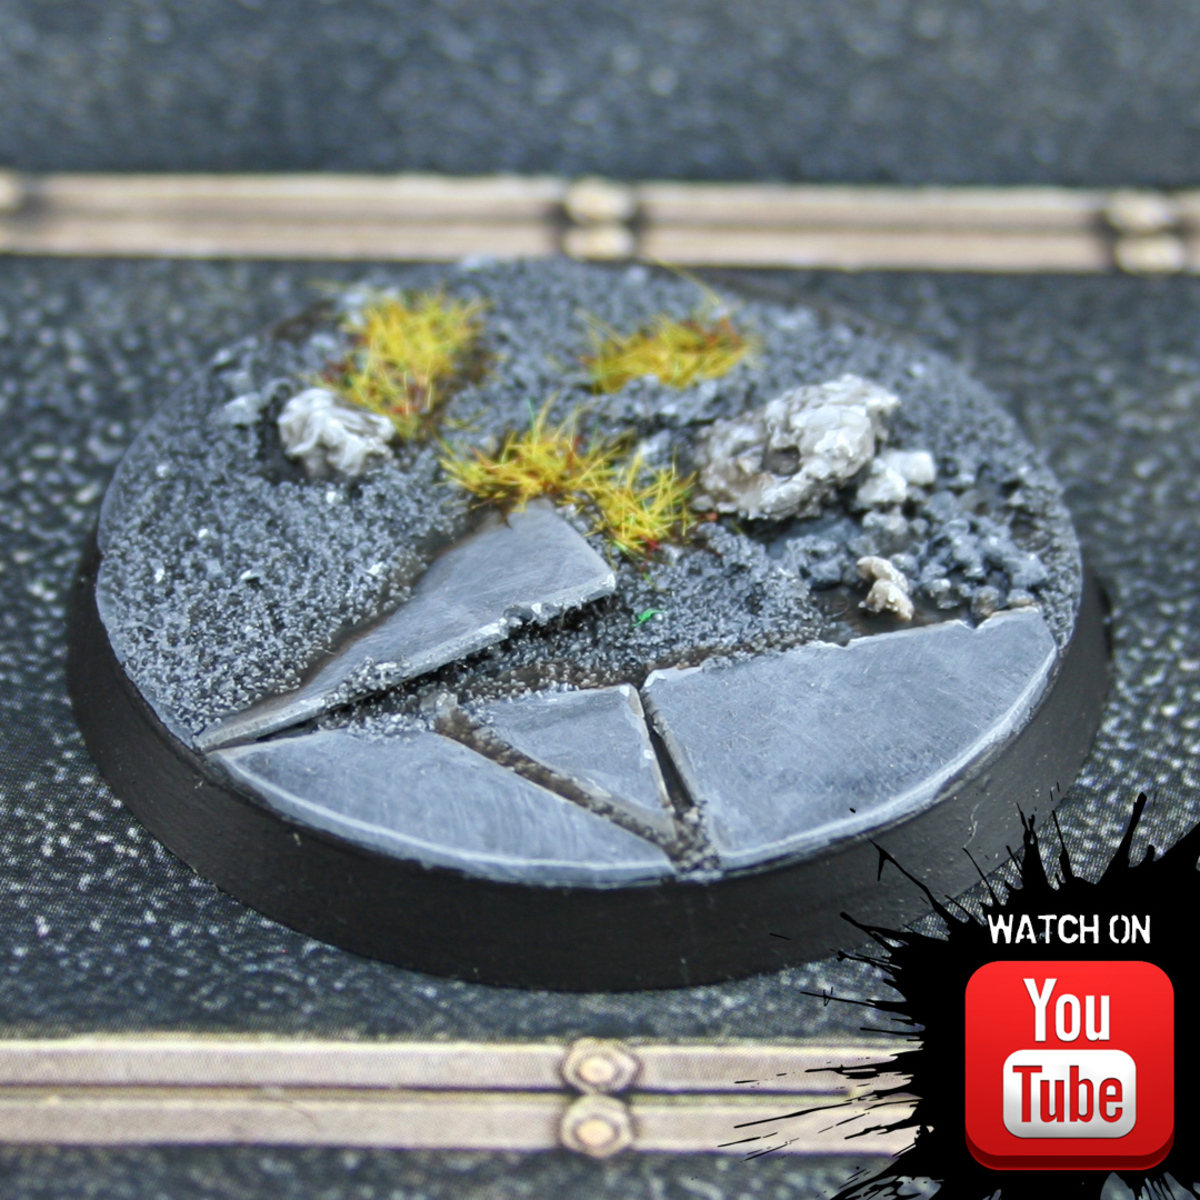
Alternative Basing
- Basecoat: Start by applying Zandri Dust to the sand area. Thin the paint slightly to ensure it gets between the grains of sand and debris. You may need a couple of coats to achieve full coverage.
- Shade: Wash the entire base with Seraphim Sepia to add warmth and depth to the sand. In areas where you want a bit more shadow definition, add some Agrax Earthshade while the Seraphim Sepia is still wet, allowing the shades to blend naturally.
- First Drybrush: Drybrush the base heavily with Ushabti Bone . This will create contrast and bring out the texture of the sand and any debris.
- Second Drybrush: Apply a lighter drybrush of Screaming Skull to further enhance the raised areas and add more depth to the overall appearance.
- Final Highlights: Pick out the most raised points and the occasional grain of sand with Pallid Wych Flesh for sharp, bright highlights.
- Details: Paint additional details like rocks, skulls, or debris with appropriate colors from the guide (such as Leadbelcher for metallic parts or Rakarth Flesh for bone). Wash them with Agrax Earthshade or Nuln Oil as needed for added depth, then highlight accordingly.
- Flock and Tufts: Apply flock, tufts, or other basing materials to add visual interest and variation across the base. Place them in areas that would naturally accumulate growth or debris.
- Base Rim: Paint the rim of the base with Steel Legion Drab for a clean, neutral finish.
Conclusion: By adding texture first, such as sand or debris, and carefully painting and highlighting these elements, this basing method gives your Ork Kommandos a rugged, realistic environment to stand on. The careful use of washes, drybrushing, and vegetation adds depth and character to the base, ensuring it enhances the overall aesthetic of the model.
Final Conclusion
With this comprehensive guide, your Ork Kommandos will come to life on the battlefield, reflecting the brutal and gritty aesthetic that defines their role in the Warhammer 40,000 universe. From the detailed techniques used to create rich, varied skin tones, to the battle-worn armor and gear, every step in this guide ensures your models look both unique and unified in their relentless, war-torn appearance.
The key to achieving this look is balancing realism with character—whether through the subtle weathering of armor, the bright gleam of their fierce red eyes, or the chipped, dirty weapon casings that reflect years of combat. By paying attention to every detail, from cloth and leather to their distinctive skull masks and trophies, each Ork will stand out while maintaining the cohesive look of a Kommando unit.
The final basing steps provide the perfect backdrop for your Orks, grounding them in the harsh, rugged environments they thrive in. With these techniques, your models won’t just look painted—they’ll tell a story of countless battles fought and enemies crushed underfoot.
As you apply these methods, feel free to experiment with color choices, highlights, and additional weathering effects to truly make your Ork Kommandos your own. The flexibility of this guide allows for personalization while maintaining the core aesthetic of a battle-hardened Ork warband.
Now that you’ve completed the painting process, your Ork Kommandos are ready to charge into battle, fearlessly sneaking through the shadows before unleashing their savage strength on the enemy. Enjoy the satisfaction of seeing these models stand proudly on the battlefield, a testament to your dedication and skill as a painter.
Charlie Biddle
CharlieBiddle
Citadel Painting System 84
Base 28
- Abaddon Black
- Averland Sunset
- Caliban Green
- Castellan Green
- Celestra Grey
- Corax White
- Corvus Black
- Death Korps Drab
- Deathworld Forest
- Dryad Bark
- Grey Seer
- Incubi Darkness
- Ionrach Skin
- Iron Warriors
- Jokaero Orange
- Khorne Red
- Leadbelcher
- Mephiston Red
- Mournfang Brown
- Naggaroth Night
- Rakarth Flesh
- Rhinox Hide
- Screamer Pink
- Steel Legion Drab
- Waaagh! Flesh
- Wraithbone
- XV-88
- Zandri Dust
Shade 11
- Agrax Earthshade
- Agrax Earthshade Gloss
- Athonian Camoshade
- Biel-Tan Green
- Carroburg Crimson
- Coelia Greenshade
- Drakenhof Nightshade
- Druchii Violet
- Nuln Oil
- Reikland Fleshshade
- Seraphim Sepia
Layer 39
- Administratum Grey
- Baneblade Brown
- Brass Scorpion
- Dark Reaper
- Dawnstone
- Deepkin Flesh
- Doombull Brown
- Elysian Green
- Eshin Grey
- Evil Sunz Scarlet
- Fenrisian Grey
- Flash Gitz Yellow
- Ironbreaker
- Karak Stone
- Kislev Flesh
- Krieg Khaki
- Loren Forest
- Lugganath Orange
- Nurgling Green
- Ogryn Camo
- Pallid Wych Flesh
- Pink Horror
- Runelord Brass
- Screaming Skull
- Skarsnik Green
- Skrag Brown
- Sons of Horus Green
- Squig Orange
- Stormhost Silver
- Tallarn Sand
- Thunderhawk Blue
- Troll Slayer Orange
- Ulthuan Grey
- Ungor Flesh
- Ushabti Bone
- Vulkan Green
- Wazdakka Red
- White Scar
- Word Bearers Red
Dry 2
- Ryza Rust
- Sylvaneth Bark
Technical 2
- Lahmian Medium
- Typhus Corrosion
Contrast 2
- Iyanden Yellow
- Warp Lightning
